I ALSO HAVE THE LUTHERES BEST FRIEND HAD IT FOR ABOUT6 5 YEARS COST AT THE TIM $220.00 AND YOU HAVE 2 TOOLS THE DRILL PRESS AND THICKNESS SANDER, I HAVE HAD NOTHING BUT GREAT RESULTS, UNFORTUNATLY MY PHYSICAL CONDITION AGE 84 1/2 WHEEL CHAIR BOUND I HAVE TO MANY PROBLEMS CHANGING DRUMS ALSO WITH THE SPECIAL DRUMS I HAVE ONLY CHANGED PAPER ONCE, SO I HAVE TO SPRING FOR THE BYRNES. GOD BLESS STAY SAFE ALL DON
-

Win a Free Custom Engraved Brass Coin!!!
As a way to introduce our brass coins to the community, we will raffle off a free coin during the month of August. Follow link ABOVE for instructions for entering.
-

PRE-ORDER SHIPS IN SCALE TODAY!
The beloved Ships in Scale Magazine is back and charting a new course for 2026!
Discover new skills, new techniques, and new inspirations in every issue.
NOTE THAT OUR FIRST ISSUE WILL BE JAN/FEB 2026
You are using an out of date browser. It may not display this or other websites correctly.
You should upgrade or use an alternative browser.
You should upgrade or use an alternative browser.
Le Rochefort build log by OlivierF
- Thread starter OlivierF
- Start date
- Watchers 39
-
- Tags
- ancre group build le rochefort
Yes I did. I was hoping for Swiss Pear but Dave is having trouble sourcing it so i opted for the poor man’s pear. it’ll be great since the wood is passive it will not be at fault when I mess up!Did you get cherry wood ? Looks like it.
Yes good choice. I choose the Beech as I had quite a bit here already.Yes I did. I was hoping for Swiss Pear but Dave is having trouble sourcing it so i opted for the poor man’s pear. it’ll be great since the wood is passive it will not be at fault when I mess up!
That's right just something thinner with a screw for adjustment.
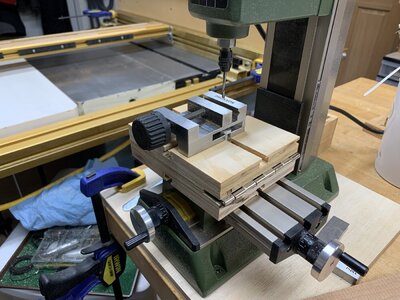
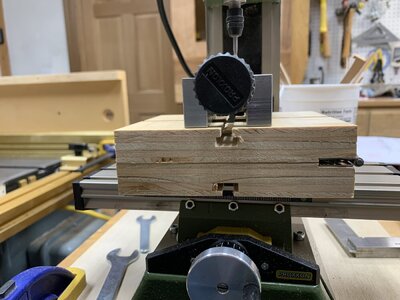
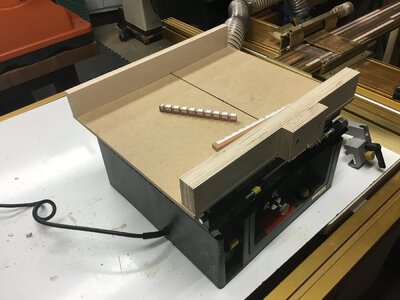
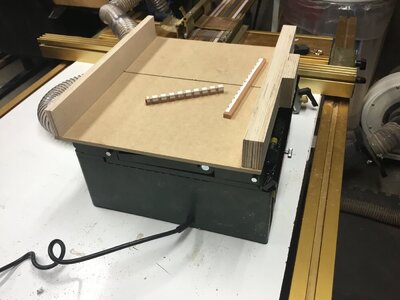
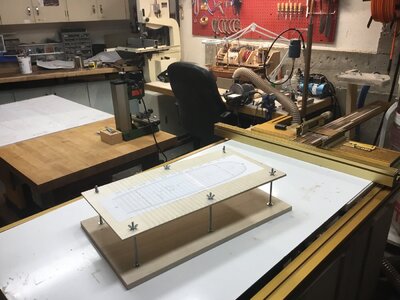
I‘ve been struggling to puzzle out a couple of things. 1. Make an angle plate for the MF70. 1st attempt was a failure (see above) And I’m pondering next moves. 2. Make a thicknesser for the drill press. Better success with that when it dawned on me as I was sanding keel pieces that I could use the spindle sander. It was one of those “ Well, DUH!” moments. So I scribbled out an idea and voila...
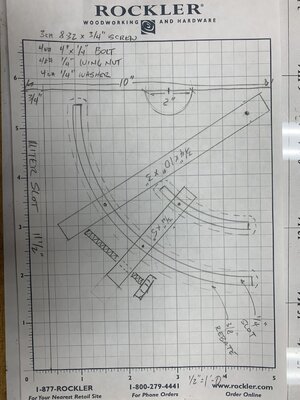
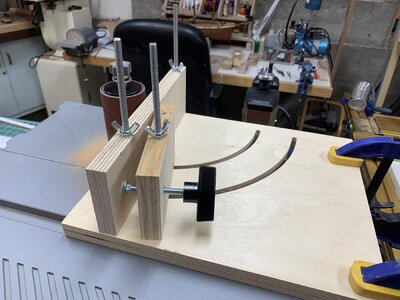
A thickness sander mimicking the Luthier’s Best Friend made from scrap. I still need to get appropriate sized bolts but it works a treat!
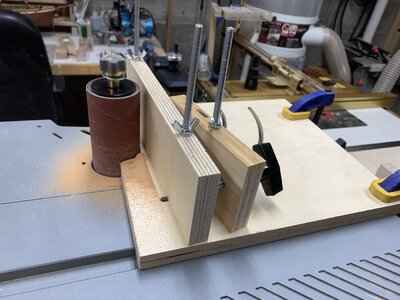
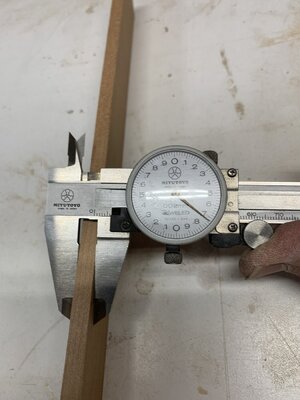
I sanded a piece of cherry to see how well it works and it’s pretty spot on. I was able to get the wood down to 6.75mm and it measures true throughout the piece! I’m very excited! Now back to work on the keel components…

A thickness sander mimicking the Luthier’s Best Friend made from scrap. I still need to get appropriate sized bolts but it works a treat!


I sanded a piece of cherry to see how well it works and it’s pretty spot on. I was able to get the wood down to 6.75mm and it measures true throughout the piece! I’m very excited! Now back to work on the keel components…

Looks good. The only thing I found was if doing many long pieces and we get sloppy in holding the piece we tend to pull it towards the drum which can cause divots. A second fence just clamped on holding the lumber away from the drum fixes that. Then again the spindle sander if ideal as you don't have the drill press above the work. You can look down it it and I'm sure its easier to feed
Tony, Thanks for the tip. I‘ll keep it in mind as I work out the kinks.Looks good. The only thing I found was if doing many long pieces and we get sloppy in holding the piece we tend to pull it towards the drum which can cause divots. A second fence just clamped on holding the lumber away from the drum fixes that. Then again the spindle sander if ideal as you don't have the drill press above the work. You can look down it it and I'm sure its easier to feed
Today was a frustrating day… besides trying to sand my finger I did not have good luck in completing the rising wood. My 1st attempt I cut those pieces to size before routing the mortises and rabbets so there was not enough bulk to work with. 2nd attempt I left enough wood under the pieces for working in the details which worked fine until trying to cut them to the correct thickness on my band saw. Worked well enough but they needed to be sanded to the layout line. Then sanded them too thin as I got confused as to which line to sand to. So on to attempt #3 tomorrow. Any suggestions from those with more experience than me? Which is everyone! Thanks for letting ramble and vent…
...there will be better days, for sure!
I hope you have no serious injuries, I sawed these parts with my Proxxon Fet, I took over the thickness size from the drawing and sawed it to this size.Today was a frustrating day… besides trying to sand my finger I did not have good luck in completing the rising wood. My 1st attempt I cut those pieces to size before routing the mortises and rabbets so there was not enough bulk to work with. 2nd attempt I left enough wood under the pieces for working in the details which worked fine until trying to cut them to the correct thickness on my band saw. Worked well enough but they needed to be sanded to the layout line. Then sanded them too thin as I got confused as to which line to sand to. So on to attempt #3 tomorrow. Any suggestions from those with more experience than me? Which is everyone! Thanks for letting ramble and vent…
Thanks Splinter. No serious injury except to my pride… just sanded a bit off my finger and fingernail…I hope you have no serious injuries, I sawed these parts with my Proxxon Fet, I took over the thickness size from the drawing and sawed it to this size.
I actually just placed an order for a Proxxon FET saw since working with a full size bandsaw is just not working for me. I also think I’ll scribe a line to the final dimension as the paper template has multiple reference lines and I get confused.
I Finally got the stem and stern pieces glued up. I tried Tobias’ trick of using glue mixed with a couple drops of India ink to mimic the caulking. The results are good to my eye. Certainly not to the level of others in this build but I’m happy. Next is shaping the stern piece. I’m not sure if I will attempt shaping on the mill or go at it by hand. I’m afraid I’ll mess up either way. Oh well, I’m learning a boatload new tricks!
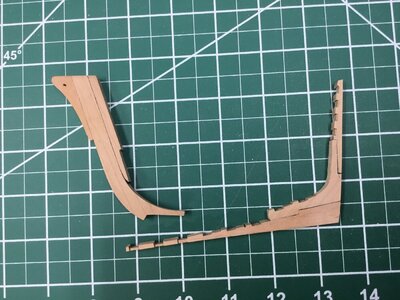

Hello Oliver your result looks very good. Level or not it doesn't matter, the result is the most important and this is absolutely clean. I for one have also just experimented and am not so happy with it. Paul @dockattner has done super with his construction of the kingfisher, I think, he uses black tissue paper and the result is excellent.I Finally got the stem and stern pieces glued up. I tried Tobias’ trick of using glue mixed with a couple drops of India ink to mimic the caulking. The results are good to my eye. Certainly not to the level of others in this build but I’m happy. Next is shaping the stern piece. I’m not sure if I will attempt shaping on the mill or go at it by hand. I’m afraid I’ll mess up either way. Oh well, I’m learning a boatload new tricks!
View attachment 353583
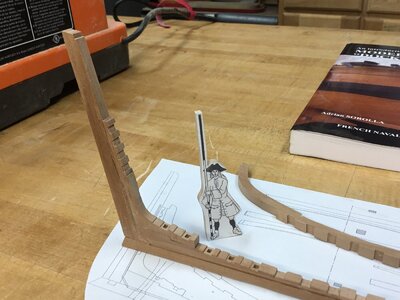
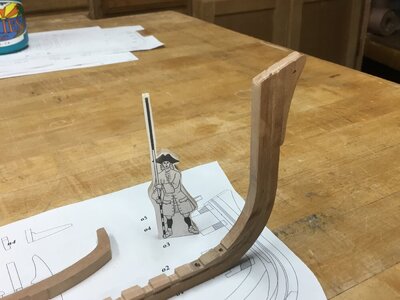
I believe after a bit more final sanding the keel is ready to be laid in dry dock… took longer than I thought and the results are not perfect but I think it’s serviceable to continue. I ended up completing the rabbits with a scalpel and sanding sticks so they’re a little rough but again i think the planking will hide my defects. Next step (after final sanding) will be to cut out the top of the dry dock.
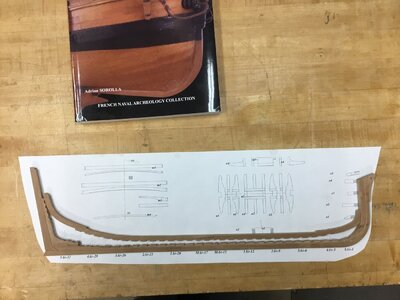
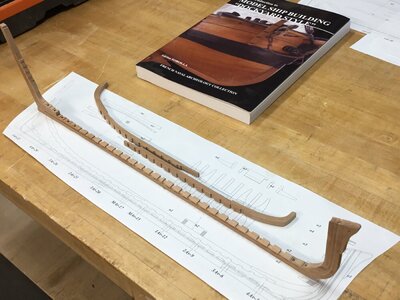
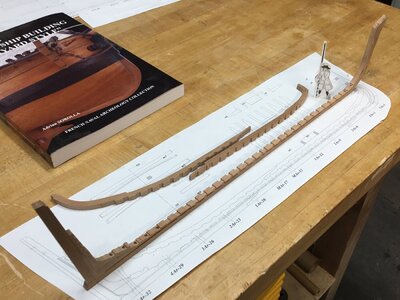


Very nice result Oliver. I also had to rework something by hand, rather a little less with the machine than too much. What is gone is gone and can no longer be added.
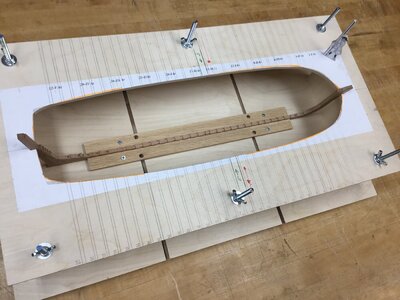
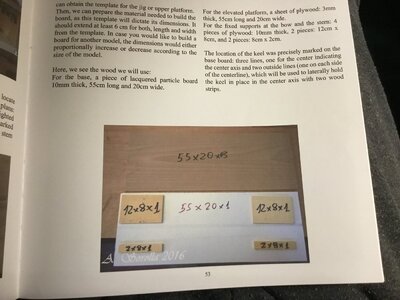
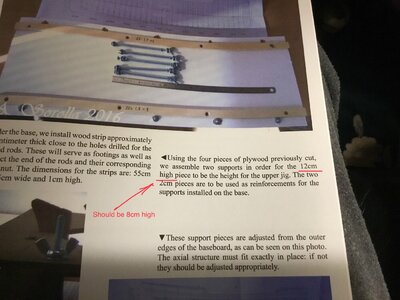
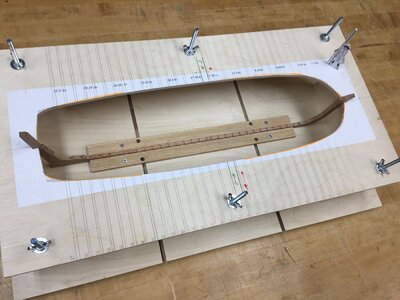
i managed to complete the framing jig and get the keel assembly laid in the jig. It took an awhile to figure out the right height for the top piece. Following Adrian’s book is confusing and I believe there is an error in the labeling of the braces that go on each end of the jig assembly. It says to place them at 12cm high (which is taller than the keel assembly. I believe it should read “8cm high”. This height matches the keel and other photos in the book.


Last edited:


