-

Win a Free Custom Engraved Brass Coin!!!
As a way to introduce our brass coins to the community, we will raffle off a free coin during the month of August. Follow link ABOVE for instructions for entering.
-

PRE-ORDER SHIPS IN SCALE TODAY!
The beloved Ships in Scale Magazine is back and charting a new course for 2026!
Discover new skills, new techniques, and new inspirations in every issue.
NOTE THAT OUR FIRST ISSUE WILL BE JAN/FEB 2026
You are using an out of date browser. It may not display this or other websites correctly.
You should upgrade or use an alternative browser.
You should upgrade or use an alternative browser.
LE ROCHEFORT
- Thread starter donfarr
- Start date
- Watchers 37
-
- Tags
- ancre le rochefort
THANK YOU ALL, MEANS A LOT. GOD BLESS STAY SAFE YOU AND YOURS. DON
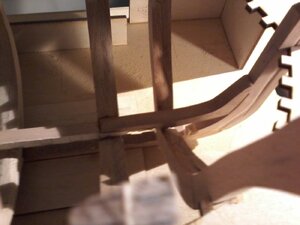
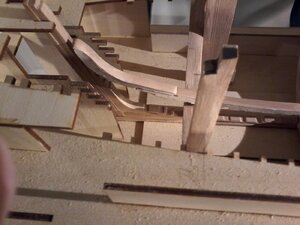
OK UPDATE DRY FITTING THE KEELSON, IF PICTURES DO NOT SHOW I WILL SEND MORE BUT HAVE TO WAIT FOR DAUGHTER AS I CAN NOT STAND UNSUPORTED, BACK ON TOPIC I THINK THE STERN OF THE KEELSON IS SITTING TO HIGH ACCORDING TO THE PLANS PLANSET 2 NEED HELP AND ADVICE IF IT IS WRONG ON HOW TO FIX IT,,,ALSO THE FRAMES NEED A LOT OF FAIRING ESPECIALL ON THE INTERIOR SHOULD I TRIM TO SAND THEM A LITTLE MORE INDIVIDULLY OR WAIT UNTIL AFTER THE FRAMES ARE INSTALLED, SO GUYS HEL P PLEASE GILLES, MAARTEN. GOD BLESS STAY SAFE YOU AND YOURS DON
Hi Don,
I'm gone for about 2 years and lookie here what your building. That's great and it's looking fantastic Don. You have come along way when we first spoke years back. Have fun my friend and I will be enjoying your progress.
Stay safe,
Mario
I'm gone for about 2 years and lookie here what your building. That's great and it's looking fantastic Don. You have come along way when we first spoke years back. Have fun my friend and I will be enjoying your progress.
Stay safe,
Mario
THANK YOU VERY MUCH DEAR FRIEND. GOD BLESS YOU AND YOURS DON
Its always good to see the latest post on your build log Don.
Last edited:
THANK YOU SO MUCH BRIAN, MEANS A LOT, LOTS MORE WORK TO DO. GOD BLESS STAY SAFE YOU AND YOURS DON
- Joined
- Feb 18, 2019
- Messages
- 717
- Points
- 353

Hi Don,
I would not spend so much time fiddling with the keelson: you have too much difference from one frame to the other and your notches are likely to be offset one way or another from where they should be. Concentrate on getting the all frames installed on the keel, ensuring they are mounted square to it and the jig. Then, once all your frames are in place you can check your keelson notches alignment as a whole and adjust the ones needing adjustment , then check the fit of the keelson . One step at a time... Are you temporarily securing the frames to the keel: so that if you are dry fitting them you will be able to re-install them exactly as they are during dry fitting stage?
As far as sanding the inside is concerned, personally I would not do it until your frames are in place and secured (permanently installed in the jig. If you do it one at a time at this point, you are going to introduce another opportunity for errors. All it means, is more time spend sanding when your frames are in place, but at least you can work on the entire frame assembly at the same time.
G
GOT IT GILLES, WILL DO, ARE YOU TALKING ABOUT DOWELING THE FRAMES TO THE KEEL, FOR DRYFITTING, ALSO FITTING IN SPACERS TO LINE THE FRAMES UP, ONLY DRY FITTING THEM THAT SHOULD HELP, THANK YOU AS ALWAYS. GOD BLESS STAY SAFE YOU AND YOURS DON
GILLES, ANOTHER THOUGHT, AFTER DRY FITTING SPACERS TO DRILL A TREENAIL FROM THE TOP INTO THE KEEL NOTCH, JUST A THOUGHT. GOD BLESS STAY SAFE YOU AND YOURS DON
Hi Don,
Thats what I should do, if the frame is in the right position on the keel in respect to height and width you can drill a hole to fit a temporary pin. When finally fitting you can replace it for a treenail and glue it.
Thats what I should do, if the frame is in the right position on the keel in respect to height and width you can drill a hole to fit a temporary pin. When finally fitting you can replace it for a treenail and glue it.
- Joined
- Feb 18, 2019
- Messages
- 717
- Points
- 353

Don,
As I understand, You have the book by A Sorolla explaining the construction of your model. It is written following the building sequence. Use it as your main reference: how many such books are written and especially with your ship as a example of planked on frame construction? Chapter IV and starting on page 58, it explains the installation of the frames, the spacers located between the frames at the keel and further up, etc....
Once your frames and different spacers at the bottom of your hull are in place, then you can sand the inside and then you can fit you keelson. At that point your assembled framing will be solid enough for sanding the inside, and if you want to make it easy on yourself, you may even by-pass the keelson notches altogether: that is an option if your notches are too offset on once side or the other as I suspect they will be once the frames sit square to the keel.
G.
THANKS GUYS, ALWAYS, YES GILLES I HAVE THE BOOK IT IS A WONDER USE IT CONSTANTLY, BTW GREAT JOB ON THE TRANSLATION. GOD BLESS STAY SAFE YOU AND YOURS DON
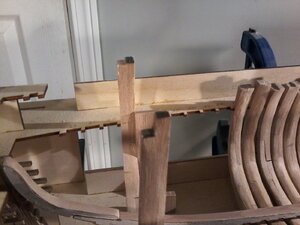
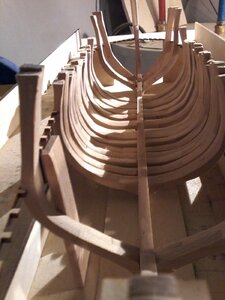
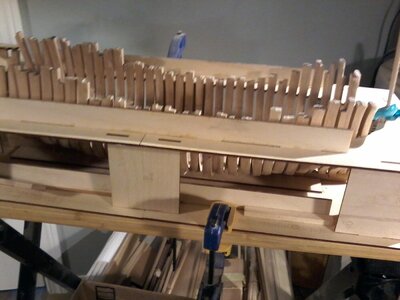
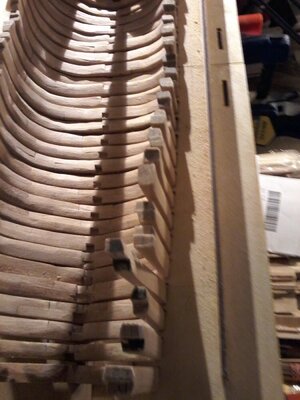
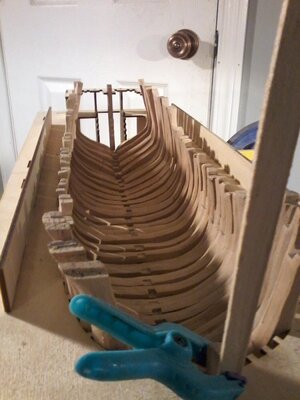
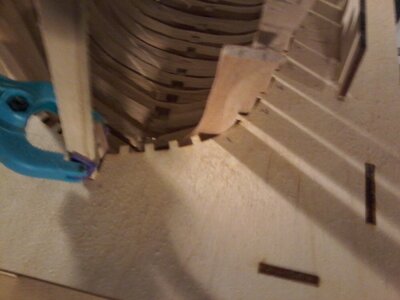
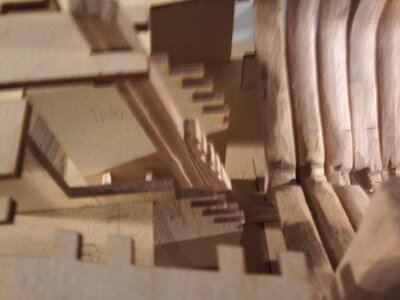
HI ALL IN CASE YOU THOUGHT I GAVE THIS ONE UP, NOT GOING TO HAPPEN, JUST PUT IT ASIDE FOR A WHILE WHILE DOING OTHER MODELS, SO FAR MY NUMBER ONE GOAL AS I STATED TO START IS MAKING FRAMES THANKS TO GILLES, MARRTEN AND OTHERS I THINK I GOT THAT DOWN, SO SUCESS WITH THAT NOW ANYTHING ELSE IS A PLUS, SO HERE IS SOME PROGRESS PICTURES ALL FRAMES ARE DRY FITTED LOOKS LIKE 2 NEED TO BE DONE OVER, THE JIG THAT KRIS DID IS FANTASTIC COULD NOT HAVE GOTTE THIS FAR WITH ANYTHING ELSE NOTICE THE CLOSE UP AT THE BOW OF FRAME NO.1 I THINK THE HAWSE TIMBERS WILL FIT USING THE NOTCHES NOT SURE SEE PICTURE OF THE STERN NOW FOR DECISION DO I DO THE STERN NOW OR FINISH THE FRAME INSTALLATION, THEN THE STERN SUGESTIONS PLEASE MARRATEN, GILES OR ANYONE


Last edited by a moderator:
hi Don,
thats looking great buddy.
.
thats looking great buddy.
.
BRIAN, JOSEPH, THANK YOU FOR YOUR KIND COMMENTS GREATLY APPRECIATED. GOD BLESS STAY SAFE YOU AND YOURS DON
Keep up the hard work Don!


