• Win a Free Custom Engraved Brass Coin!!!
    As a way to introduce our brass coins to the community, we will raffle off a free coin during the month of August. Follow link ABOVE for instructions for entering.

Lowell Grand Banks Dory, First Ever Build

Joined
Jun 5, 2025
Messages
12
Points
48

Location
Staten Island, NY
A few years into my retirement I have decided to attempt wooden ship model building. My first foray is the Model Expo Lowell Grand Banks Dory.

I know my skill set would make the three-piece bottom fairly simple. However, as it is my first build I took the easy way out and chose the one-piece bottom.
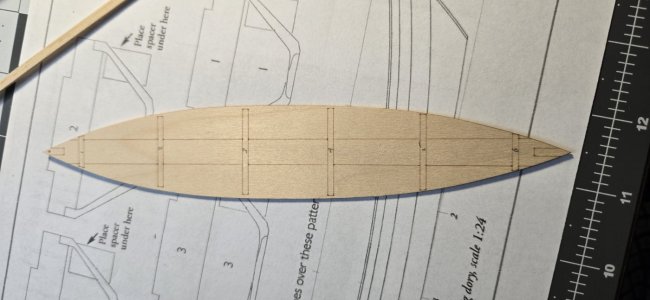
20250630_155728 Rotated.jpg

I measured and marked out the cleats, and chamfered the edges before cutting them, requiring only chamfering the ends when placing them.
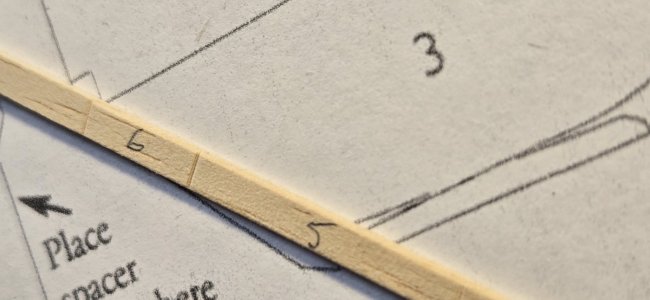
20250630_155927 Rotated.jpg

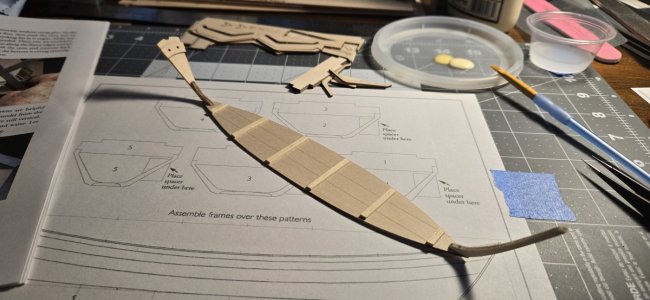
Following the guide I prepared and installed the stem and transom. Then set the bottom curve.
20250630_174329.jpg
20250630_182242.jpg

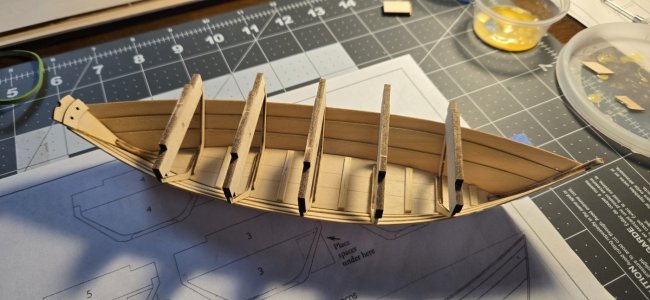
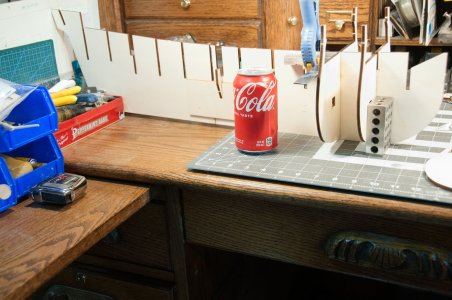
I encountered an issue (my own) with the frames. They assembled all right. Getting them into the jig, and having them set at 90 degrees was the first issue. After sanding the inside of the slots, where needed, I placed each from and support. I found I needed to file opposite top and bottom long edges to get the frames to align at 90 degrees.
20250630_205939.jpg

Now, my next issue with the frames. In a number of builds there were comments about the fragility of some wood pieces due to the angle of the grain to the piece. I found that out the hard way. Attempting to be as careful and gentle as possible I had two frames break from the rubber band pressure. For one frame the broken piece landed in the middle of the workspace. The second broken piece disappeared into the ether. [Update: When cleaning up after this build, before starting the Norwegian Pram, I found the errant piece on a window sill. Oof.] Using the template I was able to manufacture the missing piece. Unfortunately, I miscalculated and the piece was a tad short. When the bottom was laid out over the frames there was a gap of a few millimeters. I filled the gap with a piece of scrap from a piece sheet that was the right thickness. Glued that in place, and sanded to shape. What I learned from this particular occurrence is in the future, put the template on a piece of carboard or dense foam and use pins to wedge the pieces in place while mapping out the 'missing' section.
20250630_210006.jpg

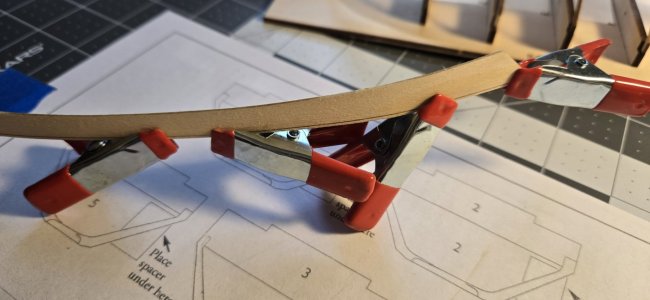
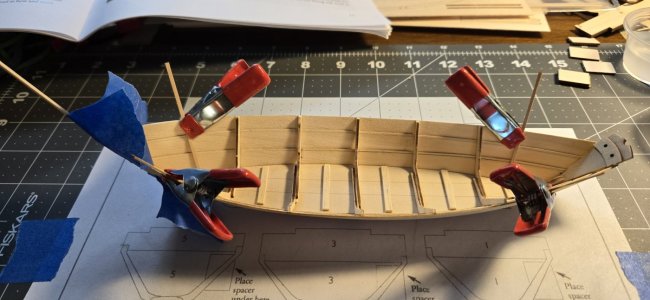
Forming and attaching the garboard planks presented a minor problem. While soaking the port plank I used a metal weight to hold under the water. Oops. The metal left a stain, Hoping paint will correct that error. While working the starboard plank, sanding down to the laser printed sanding mark, the edge split and separated along much of the the mark. Apparently I put too much lateral pressure on the edge while cleaning them up. using diluted PVA glue I filled the gap and clamped the piece in place.
20250705_151246.jpg20250705_151516.jpg

So, to this point I have the port garboard plank glued in place, and the starboard garboard plank bent. While bending the starboard plank the plank split at the guide line, again. Re-glued and clamped. Will attempt to glue into place later today.
20250705_151135.jpg

Has been quite enjoyable, a real test of patience (waiting for the next step).

Cheers
 
Last edited:
Finished the Broad Planks and the Sheer Planks
20250709_104934.jpg

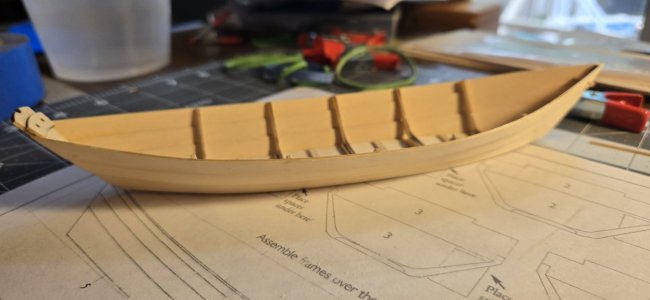
Once removed from the building board, I found all of the issues derived from my inexperience. I found I did not quite bevel the edges of the Garboard Planks and the Broad Planks as much as needed. Further, my rolling bevels did not go far enough down the planks to get the desired seating at the stem and transom.

I also needed to fill in a number of spaces with PVA glue to connect loose contact points.

20250709_123944.jpg

I also found that I got a bit confused working upside down and put the rolling bevel on one of the Sheer Planks outboard instead of inboard.

Now, onto the interior details.
 
Continued on with the build, occupied with other things slowed down posting.

I added in the side cleats and the false stem.
20250709_145001.jpg
20250709_155700.jpg
After installing the false stem, and seeing how poorly it looked, I realized I used the wrong piece of wood. I will be building this kit again, so won't make that mistake again. Just new ones.

Next up, I trimmed the cleats and false stem, and added the seat risers. I was a bit too zealous and trimmed the stem and false stem right down to the strakes.
20250709_163847.jpg

Next up were adding the bands, and sanding down the tops of the bands and the sheer strakes.

I trimmed down the frames to make way for the gunwales.
20250709_181545.jpg
I need a new ruler or new eyes. I trimmed down an 1/8" but it still seemed too much.

[I don't have a pic of the gunwales and breast hook being installed.]

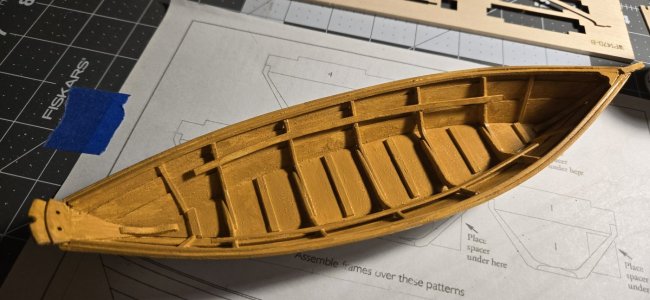
Next up was a light sanding and priming for painting.
20250714_192509.jpg
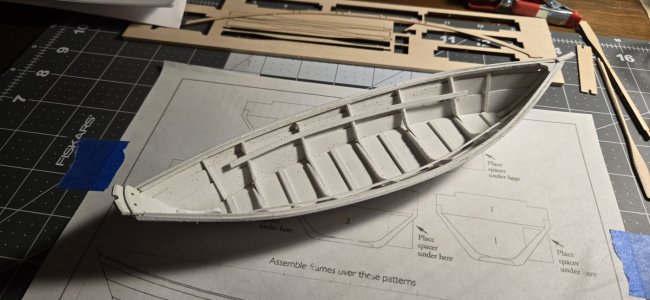
Boy, did all of my sins get revealed. After sanding it looked good and felt good. After priming it was like a well established 5 o'clock shadow.
20250714_192516 Primed Pre Sand.jpg

More sanding. Even after using 220 on the hull the paint job still looked bad.

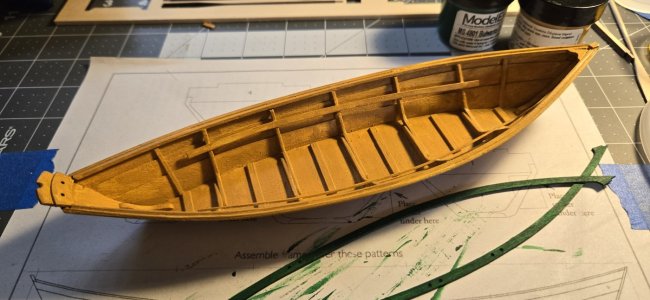
I ended up applying three coats, sanding lightly between coats.

First Coat
20250714_200907.jpg

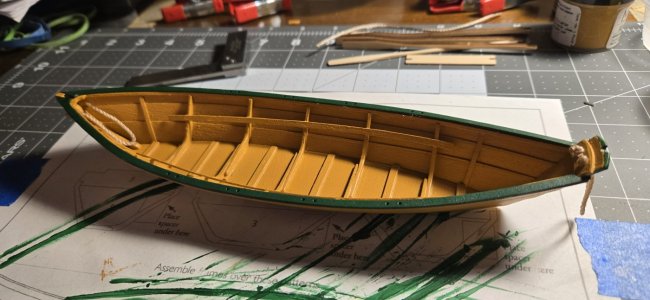
Third Coat. Cap rails show their first coat.
20250715_105408.jpg

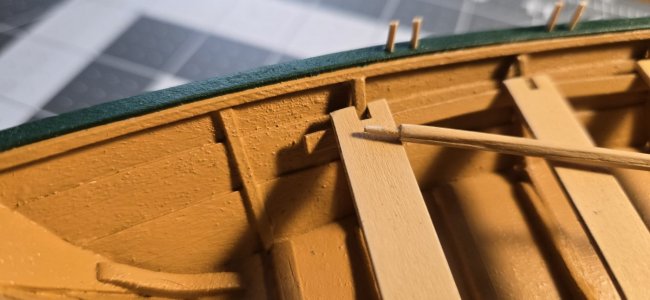
After three coats of paint, and fitting and trimming, the cap rails are installed. Beckets soon followed.
20250717_230211.jpg

I whittled and shaped a single oar. One seemed enough to be representative.

It was at this point I worked on the tholes. Instead of sanding, I drew the wood through a draw plate. I could only go so far before the wood was too thin and brittle to pass through the last hole that would have made them fully round. At this size one needs to get really close up to see that they are not 'fully' round.

I sanded the thwarts, and decided to use the ModelExpo Wood Conditioner before painting the oar and thwarts with the ModelExpo Natural Stain. Much to my dismay it was NOT stain, but paint to look like natural wood. After conditioning I lightly sanded. I applied a coat of Natural Stain, and lightly sanded again, followed by another coat of paint and sanding.
20250721_133843.jpg

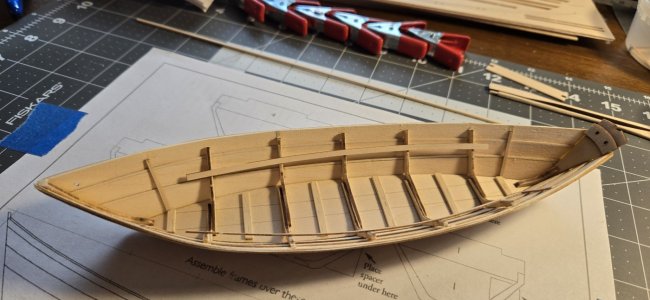
All of my thwarts are a bit short. I probably had my frames too wide.
20250721_133955.jpg

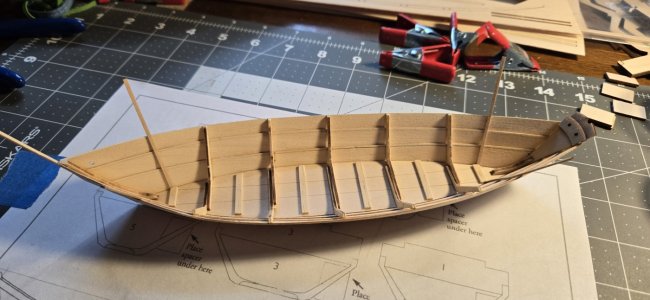
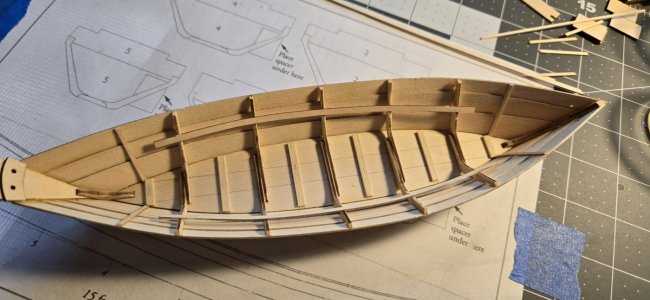
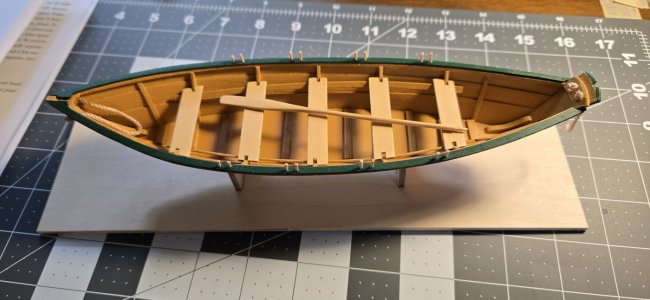
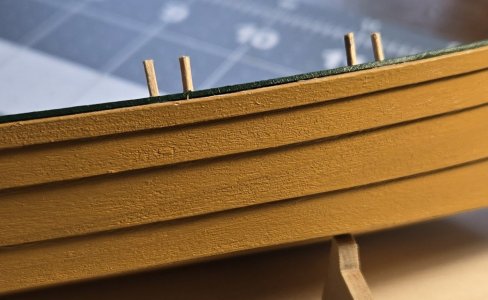
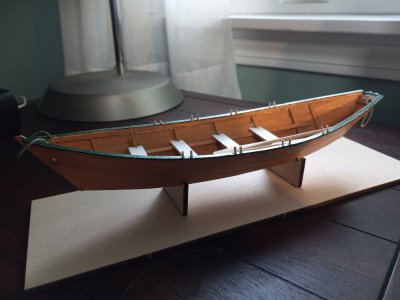
The final finish of the boat is not too hideous. One one hand the hull looks like it has years paint added. On the other, it shows my insufficient sanding.
20250721_133929 Cropped.jpg

Even though I am my own worst critic, I am happy with the outcome, as it is my first ever wood model.

I have purchased a second copy of the Dory, to make, and earn store credit for future purchases. Seeing where I made mistakes, and where I can improve, I expect the second version to be greatly improved over this one.

I will certainly go with the three piece bottom, beveling the longitudinal edges a bit, both sides, to make sure you can see the three planks, once painted. Right now the bottom looks like it was made with plywood.

I am planning on attaching the frame templates to a piece of foam board. I will then use pins to align the frame pieces with the templates, to ensure proper alignment, instead of eyeballing like I did this time.

The final big piece I need to improve on is sanding. Any tips out there would be greatly appreciated.

Cheers
 
VERY WELL DONE Ed. She is a beauty! This is one of the best beginner kits that teaches many things that will carry over to more complex builds.
Allan
 
Great work for your first kit, and your learning the in's and out's of wood working and thin wood construction issues.

Keep up the work and it will be a great experience as you progress to the next kit.

I think Model Expo still has offer to give a discount on second kit if you post photos of first build on their website.
 
A few years into my retirement I have decided to attempt wooden ship model building. My first foray is the Model Expo Lowell Grand Banks Dory.

I know my skill set would make the three-piece bottom fairly simple. However, as it is my first build I took the easy way out and chose the one-piece bottom.
View attachment 530240

I measured and marked out the cleats, and chamfered the edges before cutting them, requiring only chamfering the ends when placing them.
View attachment 530241

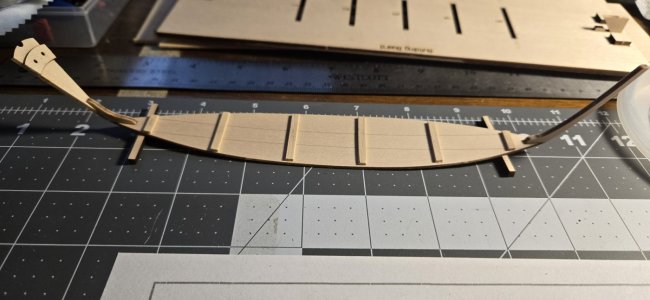
Following the guide I prepared and installed the stem and transom. Then set the bottom curve.
View attachment 530242
View attachment 530243

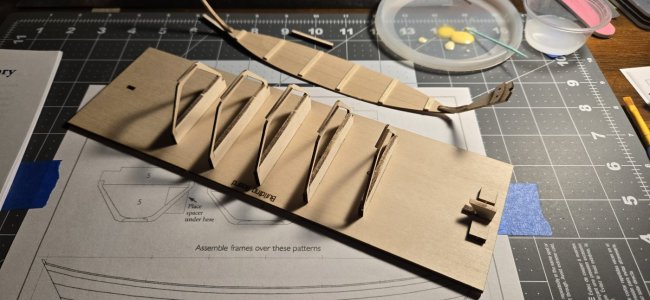
I encountered an issue (my own) with the frames. They assembled all right. Getting them into the jig, and having them set at 90 degrees was the first issue. After sanding the inside of the slots, where needed, I placed each from and support. I found I needed to file opposite top and bottom long edges to get the frames to align at 90 degrees.
View attachment 530244

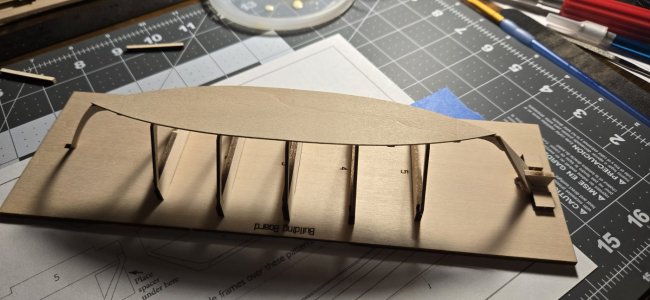
Now, my next issue with the frames. In a number of builds there were comments about the fragility of some wood pieces due to the angle of the grain to the piece. I found that out the hard way. Attempting to be as careful and gentle as possible I had two frames break from the rubber band pressure. For one frame the broken piece landed in the middle of the workspace. The second broken pieced disappeared into the ether. Using the template I was able to manufacture the missing piece. Unfortunately, I miscalculated and the piece was a tad short. When the bottom was laid out over the frames there was a gap of a few millimeters. I filled the gap with a piece of scrap from a piece sheet that was the right thickness. Glued that in place, and sanded to shape. What I learned from this particular occurrence is in the future, put the template on a piece of carboard or dense foam and use pins to wedge the pieces in place while mapping out the 'missing' section.
View attachment 530247

Forming and attaching the garboard planks presented a minor problem. While soaking the port plank I used a metal weight to hold under the water. Oops. The metal left a stain, Hoping paint will correct that error. While working the starboard plank, sanding down to the laser printed sanding mark, the edge split and separated along much of the the mark. Apparently I put too much lateral pressure on the edge while cleaning them up. using diluted PVA glue I filled the gap and clamped the piece in place.
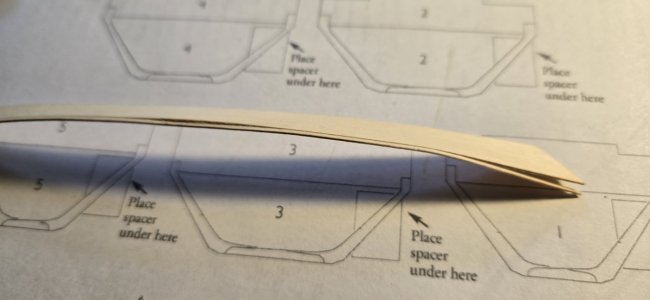
View attachment 530248View attachment 530249

So, to this point I have the port garboard plank glued in place, and the starboard garboard plank bent. While bending the starboard plank the plank split at the guide line, again. Re-glued and clamped. Will attempt to glue into place later today.
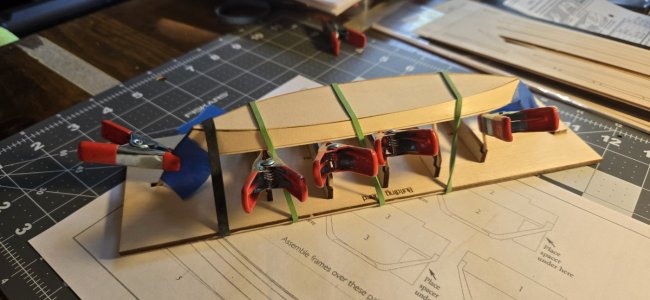
View attachment 530250

Has been quite enjoyable, a real test of patience (waiting for the next step).

Cheers
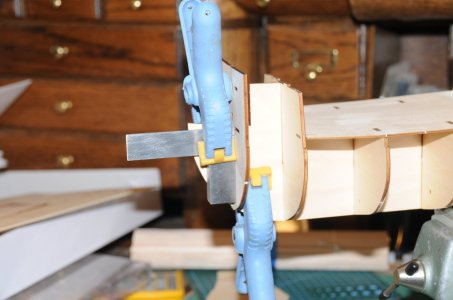
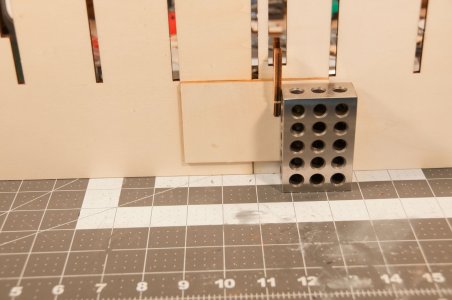
Looking good. One thing I found that helps maintain square is to use engineering squares or 1-2-3 blocks. But I have heard of some folks using Legos......square1.JPGsquare2.jpgsquare3.jpg
 
The final big piece I need to improve on is sanding. Any tips out there would be greatly appreciated.

Cheers

Great looking little boat you have there! Regarding sanding, on bare wood you can sand as fine as you'd like and you will still get a rough/fuzzy surface when using a water-based paint, and to a lesser degree other types of paint, because the paint will soak in and raise the grain. The solution to this is to use something that will allow you to raise and fix the grain, then sand to a smooth surface that won't re-raise. In furniture making we use stuff called sanding sealer, which is akin to very dilute PVA glue. You sand your surface smooth, paint it on, let it dry, then sand again until smooth. Another possibility, which I'm about to try on my current project, is to use shellac, which will also give you a hard, sandable surface, potentially after applying a couple of coats. With a boat like the one you have built, with the exposed interior structure being difficult to reach with sandpaper once assembled, I would suggest sealing and sanding out all of the pieces individually before assembly, so that all you need to do once it's built is paint.
 
all tha matters is thta yiur happy with yiur fist
Continued on with the build, occupied with other things slowed down posting.

I added in the side cleats and the false stem.
View attachment 533396
View attachment 533397
After installing the false stem, and seeing how poorly it looked, I realized I used the wrong piece of wood. I will be building this kit again, so won't make that mistake again. Just new ones.

Next up, I trimmed the cleats and false stem, and added the seat risers. I was a bit too zealous and trimmed the stem and false stem right down to the strakes.
View attachment 533398

Next up were adding the bands, and sanding down the tops of the bands and the sheer strakes.

I trimmed down the frames to make way for the gunwales.
View attachment 533399
I need a new ruler or new eyes. I trimmed down an 1/8" but it still seemed too much.

[I don't have a pic of the gunwales and breast hook being installed.]

Next up was a light sanding and priming for painting.
View attachment 533400
Boy, did all of my sins get revealed. After sanding it looked good and felt good. After priming it was like a well established 5 o'clock shadow.
View attachment 533401

More sanding. Even after using 220 on the hull the paint job still looked bad.

I ended up applying three coats, sanding lightly between coats.

First Coat
View attachment 533402

Third Coat. Cap rails show their first coat.
View attachment 533403

After three coats of paint, and fitting and trimming, the cap rails are installed. Beckets soon followed.
View attachment 533404

I whittled and shaped a single oar. One seemed enough to be representative.

It was at this point I worked on the tholes. Instead of sanding, I drew the wood through a draw plate. I could only go so far before the wood was too thin and brittle to pass through the last hole that would have made them fully round. At this size one needs to get really close up to see that they are not 'fully' round.

I sanded the thwarts, and decided to use the ModelExpo Wood Conditioner before painting the oar and thwarts with the ModelExpo Natural Stain. Much to my dismay it was NOT stain, but paint to look like natural wood. After conditioning I lightly sanded. I applied a coat of Natural Stain, and lightly sanded again, followed by another coat of paint and sanding.
View attachment 533405

All of my thwarts are a bit short. I probably had my frames too wide.
View attachment 533406

The final finish of the boat is not too hideous. One one hand the hull looks like it has years paint added. On the other, it shows my insufficient sanding.
View attachment 533407

Even though I am my own worst critic, I am happy with the outcome, as it is my first ever wood model.

I have purchased a second copy of the Dory, to make, and earn store credit for future purchases. Seeing where I made mistakes, and where I can improve, I expect the second version to be greatly improved over this one.

I will certainly go with the three piece bottom, beveling the longitudinal edges a bit, both sides, to make sure you can see the three planks, once painted. Right now the bottom looks like it was made with plywood.

I am planning on attaching the frame templates to a piece of foam board. I will then use pins to align the frame pieces with the templates, to ensure proper alignment, instead of eyeballing like I did this time.

The final big piece I need to improve on is sanding. Any tips out there would be greatly appreciated.

Cheers
For you first ever wooden boat project all that matters is that your happy with the end result, Keep it going, Darryl
 
To add to Alex’s excellent advice above. As he says, contact with water gives wood, particularly basswood used in the kit, to get that five o’clock shadow look. And most model paints sold today are acrylic which means that they use water as a thinner.

I agree with giving the hull a coat of shellac once you have throughly sanded it. Then you might want to consider switching to oil based paints.

Ship model building is an art form in the sense that what works for one may not work for someone else. These dory models appear somewhat experimental for you. Don’t hesitate to try different approaches.

Roger
 
Wonderful first build! Congratulations! The Dory was my first build also and a great way to start. I really enjoyed your build log. It brought back memories. As others have suggested, I believe using sanding sealer will greatly help to prevent raising the wood grain before painting, I generally put on 2 coats.

Welcome Aboard!

Rob
 
Not familiar with this kit, but if like most kits today, planking and frames are basswood. While basswood works fine for planking, it might be too weak for the frames, especially since scantlings (framing) are small in these open boats.

It looks like the drawings are like those for the old balsa, tissue model airplanes; you can build the frames by pinning them to the drawing. Therefore, why not use a stronger wood for the frames on your next dory model. Wooden Popsicle sticks would be a good choice, provided you have a way to saw them to the required profile. You have the kit supplied basswood frame parts to use as patterns.

If you don’t have the necessary tools to do this, it might be a good time to invest in some. The very simple hand tools required need not be expensive and will be used over and over again on future models.

Roger
 
Nice job.
With the exception of very hardwoods, all woods need repeated sealing and sanding in order to obtain a smooth finish. French polishers use a similar technique and can apply up to 30 coats of shellac to obtain a mirror finish, not that a mirror finish is necessarily desirable on a ship model, but you get the point.
 
Looking good. One thing I found that helps maintain square is to use engineering squares or 1-2-3 blocks. But I have heard of some folks using Legos......View attachment 533585View attachment 533586View attachment 533587dksfnlkn

Not familiar with this kit, but if like most kits today, planking and frames are basswood. While basswood works fine for planking, it might be too weak for the frames, especially since scantlings (framing) are small in these open boats.

It looks like the drawings are like those for the old balsa, tissue model airplanes; you can build the frames by pinning them to the drawing. Therefore, why not use a stronger wood for the frames on your next dory model. Wooden Popsicle sticks would be a good choice, provided you have a way to saw them to the required profile. You have the kit supplied basswood frame parts to use as patterns.

If you don’t have the necessary tools to do this, it might be a good time to invest in some. The very simple hand tools required need not be expensive and will be used over and over again on future models.

Roger
Hadn't considered different woods. My tool collection is more than adequate, including my 50 year old Dremel.
 
I just finished my Dory, and had to unglue the frames and the planks. Using A[ene's glue, so some alcohol released the glue, a little clean up of the glue, and a redo.
I used a wood conditioner then a sealer before painting. I also lost one seat, and two oars, another to do item...working the Norwegian Pram now. I prefer oil based paints.

20250802_191543.jpg
 
Last edited:
Hello ChefEd, you have produced a beautiful dory for your first boat, you have skills with this craft. Welcome aboard from one old man to another!
 
Back
Top