Heat build-up on the cutting edge of a drill bit will cause the bit to temporarily loose its cutting edge. Periodically dip the end of the bit into water or use a drop or two of oil will help dissipate the heat thus maintaining its cutting-edge profile.
-

Win a Free Custom Engraved Brass Coin!!!
As a way to introduce our brass coins to the community, we will raffle off a free coin during the month of August. Follow link ABOVE for instructions for entering.
-

PRE-ORDER SHIPS IN SCALE TODAY!
The beloved Ships in Scale Magazine is back and charting a new course for 2026!
Discover new skills, new techniques, and new inspirations in every issue.
NOTE THAT OUR FIRST ISSUE WILL BE JAN/FEB 2026
You are using an out of date browser. It may not display this or other websites correctly.
You should upgrade or use an alternative browser.
You should upgrade or use an alternative browser.
Thanks
The bit end was broken, going to try again. Would it be worth while to put a cover of shellac on all of the kit bass wood?
Last edited:
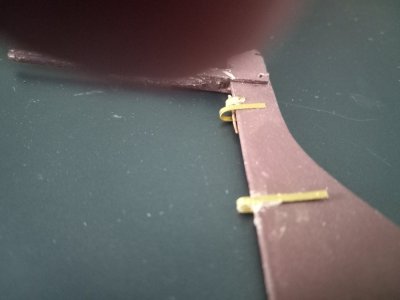
As for the "hinges." They are called "gudgeons" and "pintles." The gudgeon is the half that's attached to the boat and the pintle is the part attached to the rudder. The pintle has a "pin" on it that fits into the gudgeon, so that's an easy way to remember the difference. In my experience, the easiest way to make a credible representation of a gudgeon and pintle at the scale you're working with is as follows:This is how my new hinges will be. I found a pram in the harbor and this what the hinges were like, not the short ones the kit provided.
I have to remove the upper hinge. Hopefully these new hinges will work. I had broken the tiller three times in three different places too, might redo that too.
Perform the following steps for each pintle and gudgeon set you require. Some larger rudders will require more than two sets.
1. Cut two strips of brass or copper sheet stock of suitable widths and lengths to serve as the straps for the gudgeons and pintles.
2. Take a length of brass (or copper) tubing stock with a diameter as thick as the leading edge of the rudder is wide and cut two lengths, each as long as the width of the straps in 1. above. (Most hobby shops will carry such tubing.)
3. Take a length of wire of the same diameter as the inside of your tubing and cut a length as long as the lengths of the two lengths of the two sections of brass tubing in 2. above combined.
4. Insert the wire into one of the sections of brass tube for the full length of the tubing. Solder the wire and the tube together. (Or use thin cyanoacrylate adhesive to glue them together.) File the edge of the tubing that the wire doesn't protrude from flat so that the wire and tubing appear at that end to be one.
5. Obtain suitably sized (small) brass "lill" or "sequin" pins (e.g., https://micromark.com/products/mini-nails-3-8-inch-long-x-020-inch-dia-pkg-of-100?keyword=pins) length unimportant.
5. Drill holes the same diameter as the in the ends of the brass or copper straps where fastenings should be placed. Take care to drill holes exactly in the center of the strap and exactly the same distance from each end of each strap. (The gudgeon strap will be shorter than the pintle strap, of course.)
6. Fold the brass straps exactly in half, bending them 90 degrees around each length of tubing. Place the long strap for the pintle around the section of tubing with the wire in it. Place the short strap around the hollow length of tubing and bend the ends of the straps outward 90 degrees again to form the base for the gudgeon. Solder the straps and the lengths of tubing together. (Or glue with thin cyanoacrylate adhesive.) Clean excess solder (or glue) from the parts created using a fine file or wire brush. Thoroughly clean the parts by washing them in vinegar. "Blacken" or paint the pintle and gudgeon or leave bare to allow it to develop a natural patina over time.
7. To mount the gudgeon to the sternpost or transom, determine its placement on the centerline of the model and drill the mounting holes in the transom or sternpost where required to line up with the holes drilled in the mounting strap. Don't drill all the way through the transom unless the transom is only a board thick, as in a dinghy, in which case drill all the way through and make a matching inboard backing plate of brass or copper sheet to match the gudgeon base on the outboard side. Cut brass pins to suitable length and insert them though the holes in the strap and mount the gudgeon by inserting the pins into the drilled mounting holes. If the gudgeon is mounted on a thin transom, only cut the pins to a length of half the thickness of the transom and, after mounting the gudgeon outboard, mount the backing plate and its mounting pins in the inboard ends of the holes drilled for the gudgeon. This will create the appearance of a drift bolt peened at either end. In a similar fashion, drill through the rudder and mount the pintle with a pin through each hole from either side to simulate a bolt peened at either side of the rudder, securing the straps with thin cyanoacrylate adhesive. Note that adhesive should be applied to the pins themselves, as well as the straps, and the pins should preferably be a tight fit in order to provide some measure of mechanical holding power in addition to the adhesive. Metal to painted, or even bare wooden, surfaces, provides a compromised bond that is no stronger than the paint film. Tightly driven pins will also probably provide enough holding power to avoid the need to clamp the straps to the surface when gluing.
8. Mount the rudder on the hull by inserting the pintles on the rudder into the gudgeons on the transom. The rudder will turn in the same manner as on the real boat.
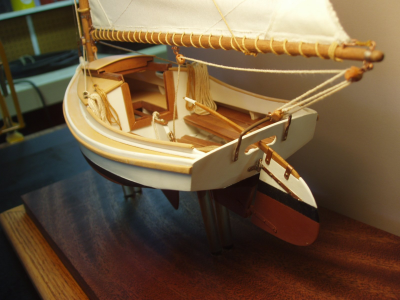
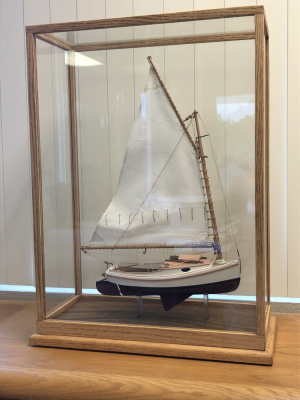
Below is a photo of my model of a 17' hard chined centerboard catboat I designed which I had handy in a pdf file. The photo isn't the best, but you can see the transom fittings modeled as described above if you look closely. The model is to the scale of 3/4ths of an inch to the foot.
As for the broken tiller... make a new one. It won't take but a few minutes and if you don't, it will bug you forever. A big part of ship modeling is doing things over again until you're satisfied with them. (Consequently, the measure of a ship modeler's skill is often determined, not by his skill or experience, but rather simply by what it is that he is willing to accept as "good enough.")
Last edited:
Wow! Thanks! Beautiful work!
I have decided to read the directions more than once...to catch what was missed the third time. Got the rudder done, working the mast now.
- Joined
- Jan 5, 2022
- Messages
- 9
- Points
- 23

I've bookmarked this log for tips. I've just ordered the SOS the ship kit and they say to start with the dory first. I'd been looking at the site and kept putting it off getting it. Then I saw it on sale again for all three plus basic tools for $119 so I went for it. https://modelexpo-online.com/Model-...-Series-with-Tools-Glue-and-Paint_p_5290.html
I think you got a good deal!
Rob
Rob
It's a good tutorial kit for first timers. Read the directions twice! Enjoy!
Kurt Konrath
Kurt Konrath
Looks good, great work.
I finally got the rudder finished and dropped it on the floor, not realizing I had dropped it, and retired for a night's sleep. Before she went to bed, the Queen of the house decided to clean my hobby area, and vacuumed up the newly repaired rudder.
I love my wife, we've been married 53 years, but I wish she would stay away from my hobby work area!
The amount of destruction a son, a wife and a cat can do is amazing!
I love my wife, we've been married 53 years, but I wish she would stay away from my hobby work area!
The amount of destruction a son, a wife and a cat can do is amazing!
I can easily commiserate with you. My work area is on the second floor and every time I am done I carefully clean up, check the floor and cover everything with large towels to keep my curious cats out. A cat can single handedly destroy months of work in just a few seconds, but they are a joy to live with. As I like to say, I have been happily married for 5 years. Been married for 45 but 5 were happy!I finally got the rudder finished and dropped it on the floor, not realizing I had dropped it, and retired for a night's sleep. Before she went to bed, the Queen of the house decided to clean my hobby area, and vacuumed up the newly repaired rudder.
I love my wife, we've been married 53 years, but I wish she would stay away from my hobby work area!
The amount of destruction a son, a wife and a cat can do is amazing!
Rob
- Joined
- Jun 29, 2024
- Messages
- 1,507
- Points
- 438

When my children were very young I would watch them on Saturday while my wife went shopping. I had just finished making all of the blocks for a New York Pilot boat model. They were carefully sorted out by size in an egg crate. I was distracted for a few moments and when I turned around there was my three year old daughter holding the empty egg crate! Fortunately she enjoyed the “game” of finding the spilled blocks on the basement floor.
Roger
Roger
- Joined
- Jan 5, 2022
- Messages
- 9
- Points
- 23

Hope it's ok to post here, did a forum search but couldn't find the info. Do you recommend a particular type of sanding sealer? I looked online and seems to be sold in quarts and gallons for home use, was wondering if something smaller available for hobby use?Wonderful first build! Congratulations! The Dory was my first build also and a great way to start. I really enjoyed your build log. It brought back memories. As others have suggested, I believe using sanding sealer will greatly help to prevent raising the wood grain before painting, I generally put on 2 coats.
Welcome Aboard!
Rob
I bought a quart of the Zinsser sanding sealer from a local Ace hardware. I can not find it in smaller quantities. Amazon also has it.Hope it's ok to post here, did a forum search but couldn't find the info. Do you recommend a particular type of sanding sealer? I looked online and seems to be sold in quarts and gallons for home use, was wondering if something smaller available for hobby use?
Rob
f
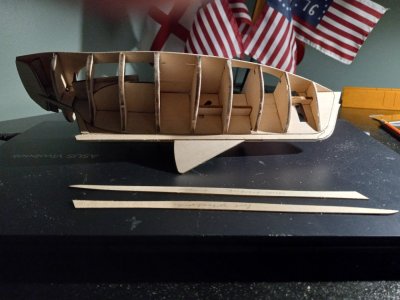
Fairing finished, trying to figure out how to clamp the Garboard planks, at the angls and curves, my clothespins and harbor freight clamps aren't working. Not sure about trying CA glues.
Fairing finished, trying to figure out how to clamp the Garboard planks, at the angls and curves, my clothespins and harbor freight clamps aren't working. Not sure about trying CA glues.
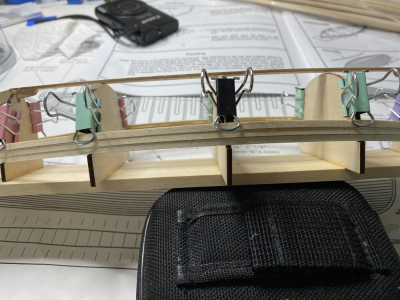
thanksYou can use rubber bands in a lot of areas to secure things. I also used modified binder clamps to help clamp things into position and hold them until they dried. you sake the "handles" off a binder clamp and carefully wedge it into the bottom of two other binder clamps. This works well.
View attachment 546458


