• Ships of Scale has incorportated an extra level of security when you log In. Please follow on-screen prompts to acknowledge that you are not a robot via a "Check Box" or a "Pictorial Check Box Puzzle". This is needed due to higher level of AI Activity Security.
  • SUBSCRIBE TO SHIPS IN SCALE TODAY!

    The beloved Ships in Scale Magazine is back and charting a new course for 2026!
    Discover new skills, new techniques, and new inspirations in every issue.

    NOTE THAT OUR NEXT ISSUE WILL BE July/August 2026
  • Win a Free Custom Engraved Brass Coin!!!
    As a way to introduce our brass coins to the community, we will raffle off a free coin during the month of August. Follow link ABOVE for instructions for entering.

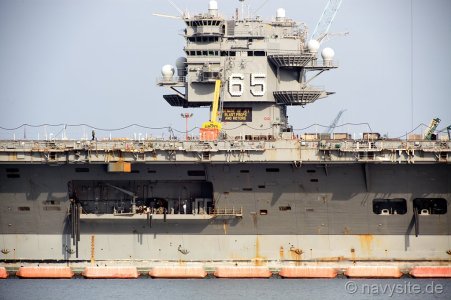
Mini Hobby 80502 1/350 Scale USS Enterprise CVN-65 Early

Part 19 Sponson 4, 3 and 5 Part 3 of 4 parts

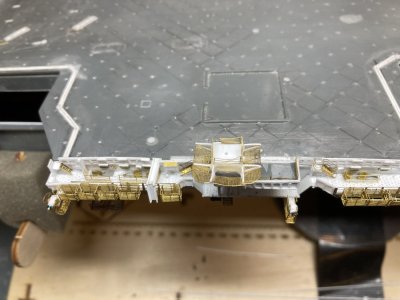
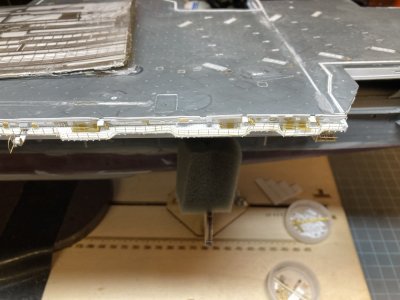
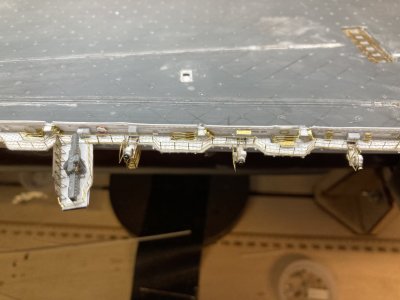
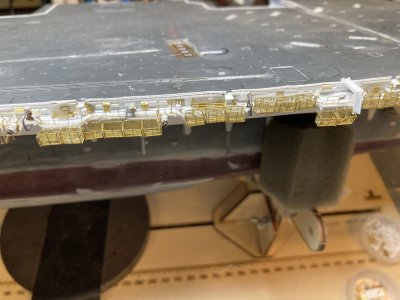
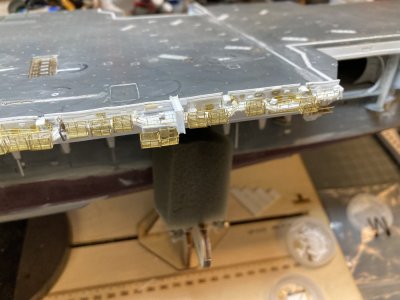
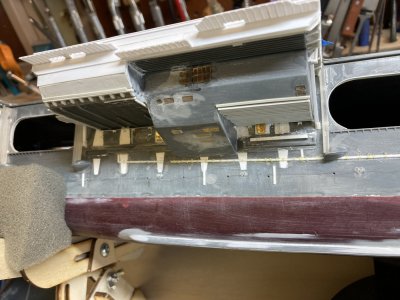
I followed the same basic steps for making the flight deck catwalk for this section using the wider flight deck coaming. I added strip for the scuppers but in this section of the flight deck the coaming was different. I did not put strip above the drain holes in the coaming. Photos show a splinter shield around the edge of the flight deck about thigh high on a 1/350 figure between elevators. There were handrails on top of the shield. I used a piece of .010” X .080” of strip to make the shield. I detailed this with some of the stanchion material for the catwalks. I marked and cut out access openings for ladders to the upper catwalks from the flight deck. The splinter shields were glued to the flight deck coamings leaving the drain holes barely visible. I glued photo etched railing behind the coaming so that the upper rails rise above splinter shield. When I made my drawings I totally missed this feature. I don’t remember it but I was normally standing on the inside looking out and my focus wasn’t on the ship when I was ashore.
Sponson 5 (14).JPG

I have just done the basics on the catwalk.


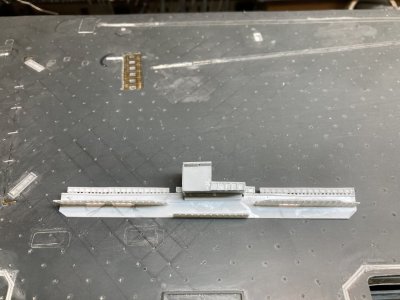
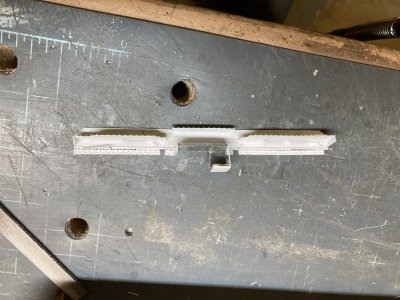
When the Starboard Mk-115 Director was added it was placed on a structure which cantilevered over the lower area of the catwalk. After the big refit when the director was removed, the starboard Phalanx CIWS mount was placed there. I had already filled the locator for the Phalanx mount on my flight deck but the platform the kit supplies was modified so I could use it and more importantly backdate it. The kit part is much larger than the one that was there for the Mk-115. I cut it down a great deal, modified the structure and glued the 2 pedestal structure pieces to the deck of the kit part. I had to skin over the holes on the forward and outboard sides of the pedestal. The same splinter shield railing combination goes around the forward edges of the platform albeit slightly wider to account for the thickness of the deck.
Sponson 5 (18).JPG

Before. The MK-115 platform is almost done or so I thought.
Sponson 5 (33).JPG

During. It looks pretty bad with everything chopped off.
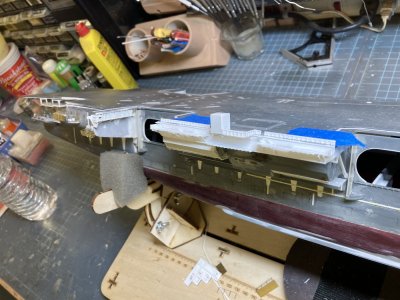
Sponson 5 (37).JPG

After. The pedestal structure is much smaller now. It extends over the lower catwalk just enough to protrude past the catwalk slightly. Now the supports will be in the right place.


The part was glued to the flight deck coaming and I drilled a hole for a single pin into the edge of the flight deck to help hold the assembly in place. After looking carefully at my original effort I felt the MK-115 pedestal was too wide forward and outboard. I cut away more of the structure and covered the sides again. I have included a before, during and after photo above. I felt the second try was much better. Underneath I added some girders (leftover parts from the elevator skirts). Then I added support webbing from the catwalk parts. I then used wide and narrow open angle braces to brace the upper catwalks like I used on previous sections. I placed end caps on the upper catwalks. I added ladder landings for the catwalk flight deck openings. There is one other gap in the coaming in this area for an ordnance disposal ramp. I made a ramp and cut an opening in the coaming.
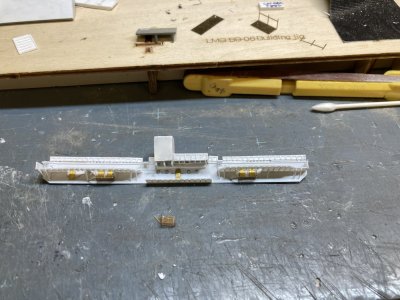
Sponson 5 (41).JPG

Just the start of the dozens of brass parts.
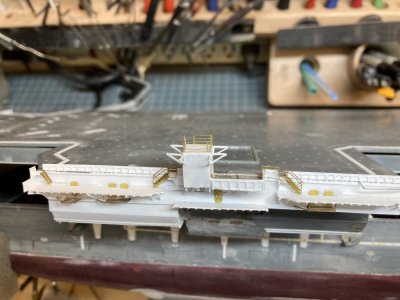
Sponson 5 (47).JPG

The ladders, pedestal railing and the supports for the pedestal nets are all on.


I wanted to see the degree of difficulty that adding the 03 level doors and landings and other photoetch parts. Would they make it too difficult to work with and store the assembly? I folded up the three parts designated by Eduard for these and then they were glued in place. Do be sure to fold these in the correct direction because you only get one bend before they break. The detail side of the deck should be down. I did the first one wrong and spent some time gluing the broken railings back on. If you do it wrong the platform won’t be oriented correctly. The doors on these platforms extend up through the ladder well on the catwalk. On the two platforms with two WTD’s I cut the ladder wells longer so both doors would fit and look somewhat believable. Outside of the ATO I placed a door and 4 portholes.
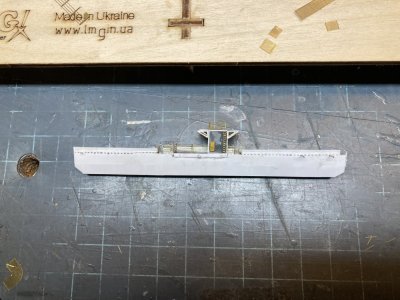
Sponson 5 (53).JPG

The details on the inboard side of the pedestal.
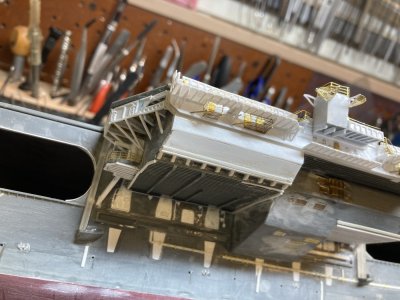
Sponson 5 (51).JPG

I have just formed, fitted and glued up the 2 corner nets.


I placed a door and ladder on the inside face of the Mk-115 mount. I glued angle braces for the safety nets and I folded and attached rails around the top. When the net braces had dried sufficiently I reinforced the joins with CA. For the nets I used the White Ensign photoetch for the flight deck nets at the bow. I cut and formed the two corner nets first. I used a ball bearing to get the rounded appearance in the photos and glued them to the corners. Fitting the sides and outboard nets was fairly easy after that.
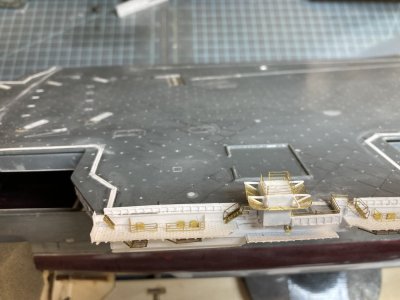
Sponson 5 (56).JPG

The nets and railings are done.

Sponson 5 (87).JPG

The short ladders from the catwalk to the flight deck have been added


I added the ladders from the catwalk to the flight deck on this section. Even with all of the photoetch installed I was still able to install and remove the catwalk. One other peculiarity of this section of catwalk was the railing and ladders coming off the flight deck just around the island. They had handrails around the ladder platform and the ladder handrails were installed. This must have been a concession for dignitaries coming up from ATO. No other ladder to the flight deck has these features. Aircraft are parked with their tails over the catwalks and a normal handrail on a ladder would just be an accident waiting to happen. With the island blocking aircraft parking this wouldn’t be an issue. Eduard didn’t provide any short ladders from the flight deck or the ladders to the ATO landing but they did supply the other landings and the ladders to them. I had difficulty folding the Eduard ladders 2 of the 3 skewed with the rungs all at a slant. I was using a photoetch folding tool and I am not sure what made them do that. When I tried to correct this both ladders broke. I made 5 ladders using Tom’s Modelworks photoetch but did not install them yet.
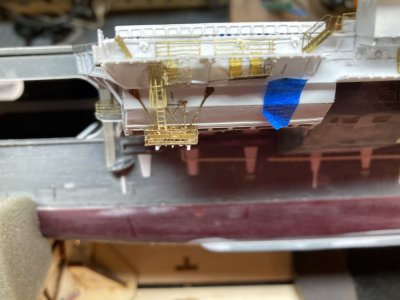
Sponson 5 (99).JPG

The ladder and cage in position. I had to do some fudging with the locations of some of the parts to fit it all. I used a plastic angle on the opposite end of the small platform because the brass one interfered with the ladder and cage.


I glued the ladder for the outer rigging platform to the coaming above it then checked to make sure that it was all lined up. Next I rolled the ladder cage and promptly lost it somewhere! I looked but couldn’t find it so I used some of the cage from one of the other sets. I ended up cutting away the brace on the single landing because it wouldn’t allow the cage to fit. Hopefully I will find the Eduard part before I return to the long port catwalk because I will need one over the platform there. (Never did find it even after finishing this section and cleaning the bench).
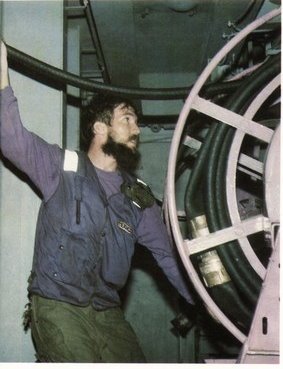
fuel 05.jpg

This photo is the only shot of one of these stations that I have.


This is something I just recently discovered. I almost always worked nights on the bow or the Six Pack where our planes were usually parked and did not spend a lot of time exploring the other areas. You could miss a lot of what was going on around you because it was so dark. I knew that there were fuel hose reels under the flight deck because of the photo showing one that has been in my collection for some time. I really didn’t know where they all were though. That is a detail that is wrong in both kits as they have you assemble and place several hose reels in the catwalks where they never were.
Sponson 5 (101).JPG

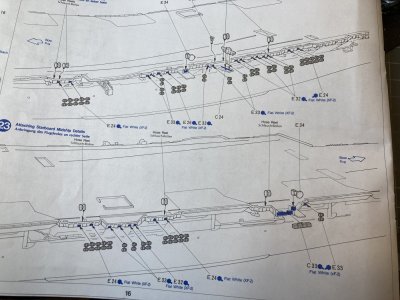
This step from the Tamiya instructions shows assembled hose reels going in the catwalks on the port and starboard midships catwalks. All of these locations are in error. There should not be any hose reels in any of these places. The equivalent page from the Mini Hobby kit is too difficult to read but it shows the same mistakes.
14a.jpg

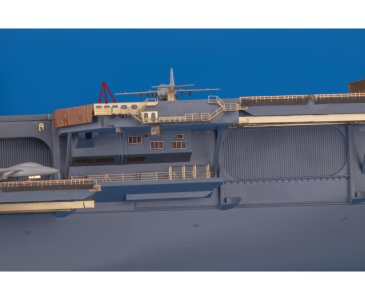
This is the Eduard photoetch for the catwalk between Elevator 1 and 2. The arrows point out the fuel station windows. Unfortunately this is the only piece in their set that represents this feature. They don’t supply the rollers either.


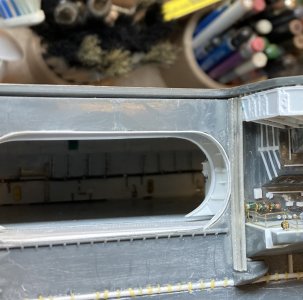
All the midships fuel hoses are below the flight deck in the 03 level If you don’t know what you are looking for you will miss them entirely. They can be spotted by the rollers on the coaming and directly below the roller there will be a horizontal oval opening. In the photos it appears black. The Eduard Part 5 set provides a photoetched part that represents some of these but only in the catwalk between Elevator 1 and 2. Another giveaway in these locations is a landing with two doors. One door is access to the fuel station and the other leads to the interior of the ship.
65 CVAN 09 24 1968 YARDS a.jpg

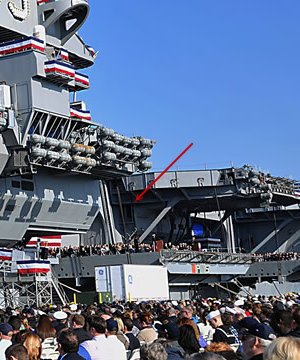
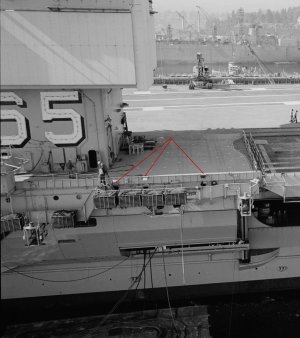
These are the fuel stations forward of the island. The red arrows point to the fuel stations. Note the double rollers on these stations because of the high coaming. Where the fuel reels are right in the catwalk there is only one.
65 CVAN  ISLAND 09 24 1968a.jpg

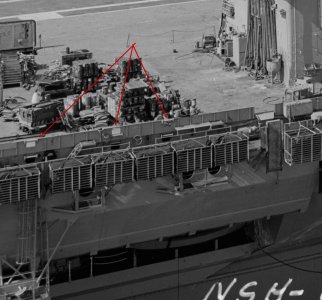
These are the stations aft of the island. There are holes in the coaming but I did not try to duplicate this.


Making the rollers was fairly easy. I cut equal sized pieces of rod and glued them in place. I needed to represent 6 oval windows in the catwalks between Elevator 2 and 3. To model the oval I decided to make oval rings from plastic tube and just paint the ovals in. The plastic tube just crumpled when I tried to flatten it. I tried something more durable and used some 3/32” K&L brass tube. I first drilled out a section about 1 ½ inches long to thin out the inner diameter. I cult fine slices off it by chucking it in a drill and cutting slices off with a sharp Xacto knife as the drill spun the tube. They were too thick so I sanded them between 2 pieces of 220 grit sandpaper glued to wood shims until they were wafer thin. I slipped each ring over a tapered piece of .030” X .060” strip. By forcing them down the strip they take on the flat oval shape which I finished by squeezing them with pliers. These were then located in the catwalks and glued down.
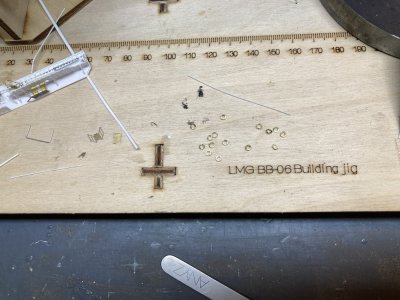
Sponson 5 (103).JPG

I have cut many more rings than I need because I will need them in other portions of the catwalks. It still seems odd that I did not lose any.
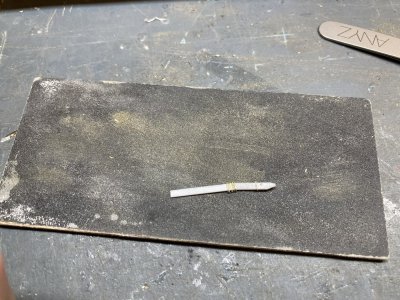
Sponson 5 (104).JPG

These are the rings on the tapered jig you can see how much thinner they are now.


This is the end of part 3.
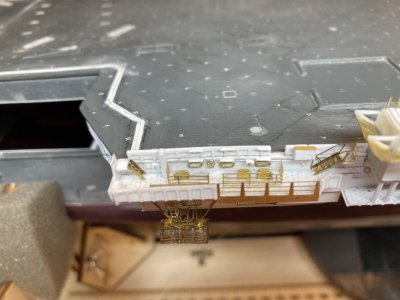
 
Part 19 Sponson 4, 3 and 5 Part 4 of 4 parts

I added wiring, lamps, boxes and other greeblies to the inner catwalk bulkheads to detail them up. There is an aircraft power cable in the forward and aft catwalks. In the 1968 photo they show a cord on a hanger like the cords in the hanger bay. Some locations around the deck still had these but by 1978 I believe these many were replaced by the box type similar to the in flight deck stations but much smaller maybe a foot square. There was a hollow shaft that led to the 03 level. These had a weathertight door on top you reached in and pulled the cable out. There was a roller fairlead that made it easy to haul out, return and to keep the cable from falling through.

Sponson 5 (112).JPG

I’m pretty sure the hand wheel visible in this photo was used to raise and lower the barricade. There was another on the port side.


To make the power stations I cut sections of .040” square strip to come even with the top of the coaming. A thin piece of strip represents the door on top. In the 1968 photo of the aft section of catwalk you can see a large hand wheel between the 2 ladder wells. I don’t know this for a fact but I believe that this was the manual control to raise and lower the barricade stanchion on the starboard flight deck. I found a photo of the port catwalk that shows another hand wheel on that side.

Sponson 5 (105).JPG

I have added the rings and rollers for the fuel stations. The 2 A/C 400hz power stations are also added at the ends of the catwalks.


There is a saltwater fire station in the aft section of this catwalk. In 1978 All the fire hoses on the flight deck were flaked into boxes mounted to the deck or onto the coaming whether they were saltwater or AFFF. (There is a standard saltwater firehose station on the crane platform). This catwalk station was mounted on the coaming. You just need some appropriate strip with a photoetch hatch cover for a lid to make these. Under the box I placed a hose connection. The flight deck and hanger deck AFFF hose reels would come after the refit. I don’t know if they ever changed the saltwater hose stations. There were some AFFF hose reels on the island in 1978 but those are the only reels that I know of.

Sponson 5 (114).JPG

The hose box is glued to the coaming and the fire plug is below it.


With all the detail work in the catwalks done I added the outer splinter shields/hand rails. The shields should have foot and handhold to service the rafts but I did not try to make these. I first went to the Eduard parts for this set of catwalks. They furnish full rails/shields but I cut away all the solid shield parts opting to just use the handrails. I wanted all splinter shields to look consistent. I couldn’t glue the shield on the lower catwalk yet or I wouldn’t be able to do the detail painting later. I did assemble a shield which included the shields on the ladders from the upper catwalks. The bottom of this ladder well also had a splinter shield on it. I made these from strip stock and I added a small piece of shield at the top and bottom of each ladder to fence them in.

Sponson 5 (135).JPG

Here I have added splinter shield that will go under each ladder to the ATO. This photo helped me notice the missing outboard net on the MK-115 platform. I found the net on the work stand almost right below it and glued it back on.


Later I can add the ladders and then glue the outer splinter shield in position. I taped the catwalk assembly back in its final location. With it secured I drilled an additional locating hole at each end just under the catwalk. I put a small section of .030 rod through each hole and glued them to the underside of the catwalk. This ensured that I didn’t glue the catwalk to the hull yet. I can remove the staples now and place the catwalk back in it location when I need to.

Sponson 5 (111).JPG

The basic long mounts are on the left along with the angled mount for the point. The two level mounts to span the fuel stations are on the right.

Sponson 5 (113).JPG

The starboard bow catwalk is here upside down. The tubs for the fuel station are installed. The step inboard from the outer edge had to be compensated for which required a two level platform. I built this part up to this point to get the stepped mounts correct.


I needed to revisit the whip antenna mounts. On this section the catwalk is wider at the aft end. A caged whip mount is located there. All told I will need 8 wider whip mounts. I decided to just do them all now. There are 3 mounts that are the same as the ones I previously made but they need to be longer. There is one mount that comes out under the catwalk running along the point on the starboard side. It has the inner end cut at an angle and the two gussets are different lengths. There are 4 mounts on the bow that fit under the fuel stations these required a 2 level platform with corresponding braces. Other than these differences the mounts were built up using the same basic steps as the short ones.

Once all the mounts were made I stowed everything but the 3 I needed now safely away. I needed each of these to have the caged catwalk underneath. I built them up the same as the one I made on the port side. When they were all assembled I glued each to its position under the catwalk. I placed a hatch on the mount above the vertical ladders. I found some railing that would serve nicely on these to serve as safety rails. I cut one section for each side of the 3 mounts and glued them all in place. I used some of the fuel cable reels from the Eduard sheet for the rotating handles which should mean that I will have enough of the regular handles to do the rest of the mounts.

Sponson 5 (115).JPG

Progressing toward the end, now all the sockets and the inner insulators have been installed.

Sponson 5 (116).JPG

I am working on the caged platforms now.

Sponson 5 (117).JPG

All the remaining mounts in the storage box.

Sponson 5 (118).JPG

The catwalk section with the whip mounts installed.


I assembled all the life raft baskets for this area and I installed all of them but the 3 destined for the lower catwalk. Eyes were added to the catwalk deck for each life raft position. I’m not sure how I will rig all these baskets but the eyes will be in position. I placed the whip mount for lower catwalk near the forward ladder which is where I drew it. This obviously was moved because in the 1978 photo it is where I put it.

Sponson 5 (139).JPG

I am assembling life raft baskets.

Sponson 5 (138).JPG

The bomb skids.


There is a bomb ramp or skid on the upper aft catwalk. This was a removable ramp that spanned the catwalk. These were only set in place if we were flying live ordnance otherwise they were stowed in the catwalk. On the outer catwalk rail there was a second ramp which kept a piece of ordnance from getting hung up in the catwalk railing. Eduard furnishes 4 ramps in their set Part 4 but they are designed for the elevators and are too short for the catwalks. I needed 6 skids for this time frame. I made mine from Plastruct channel. The piece across the catwalk has an opening that is funnel shaped to guide a weapon into the chute. This was made from a few pieces of strip. I made 7 just in case and glued one to the catwalk.

Sponson 5 (140).JPG

The life raft baskets and rigging eyes are all in place now.

Sponson 5 (145).JPG

Everything has been safely stowed away.

Sponson 5 (38).JPG

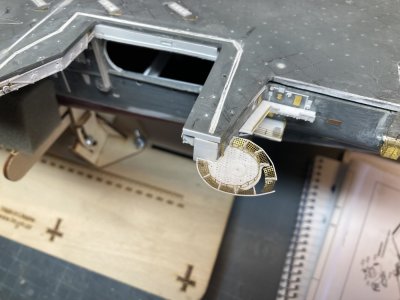
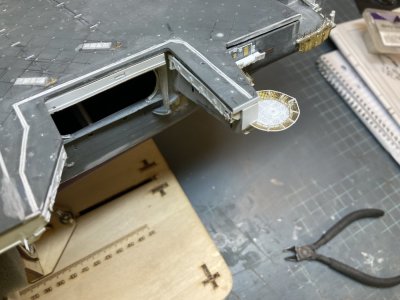
After some real sweat I have the railing around this platform and the folding crane has been fabricated and installed.


I returned to the little Calibration Lab Platform above Elevator 3. I fabricated the folding crane from some 1/16” I beam and glued it above the double doors. The last thing I needed to do was the railing. This needs multiple bends and would be difficult to get right in that tight position under the overhang. I took a small square of paper and held it under the platform while tracing the outline with a pencil from above. I used this to fold some generic railing with closely spaced posts. It worked very well but it gets really hot in my shop this time of year so I had my window A/C, a ceiling fan and a large swamp cooler going. This can generally keep the temperature in the high 70’s to low 80’s but when you turn them off the heat instantly soars.

I dropped the first and second railings that I folded attempting to position them and they were blown somewhere into infinity and beyond because of all the moving air. Sweeping the floor and a flashlight search proved fruitless. I made a third railing and shut off the A/C and the cooler. With sweat running down my face and into my eyes I was finally able to get the railing installed. At noon when this happened it was already over 101 degrees outside. Today’s high was 108° Fahrenheit (42.2° Celsius). Happily temps have been fairly mild this year till now. I generally try to start work as early as possible and quit by 1:00 PM to avoid the worst heat. Getting the railing in place was a major victory and the end of further modeling today (August 3, 2026). I closed down the garage and went in for a cool drink and some good A/C.

Sponson 5 (60).JPG

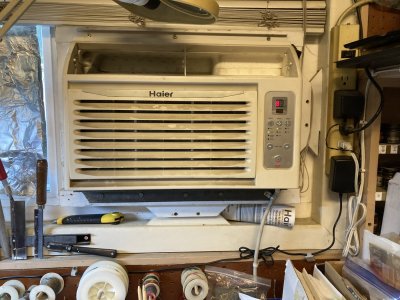
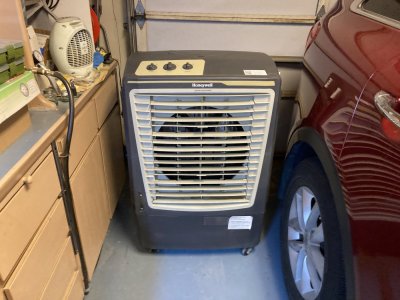
This is the air conditioner. I got it years ago when the house system broke down in the summer. We could sleep in comfort with this. After the home unit was replaced I really didn’t need the window unit for anything so I migrated it to the garage.

Sponson 5 (61).JPG

This is the swamp cooler. We all have to work around something to build models. My cross to bear is the summer heat.


Here is a brief explanation for those of you who have no idea what a swamp cooler is (the actual name is evaporative cooler). I had never heard of or saw such a thing till I was stationed here in central California back in 1975. I was born and raised in Ohio which spends most of the summer fairly temperate but when the temperature goes up there you get higher humidity. A swamp cooler wouldn’t do much there.

Essentially you put a big fan in a box, draw outside air in from 3 sides and blow out on the other. The bottom of the box is filled with water, the cooler the better, and it is pumped to the top of the openings allowing it to run down through filters which will get wet and stay that way as long as you have water in the bottom. The air will be cooled by the water in the filters coming in and blowing out.

These are very common where the climate is warm to hot and dry. It needs that dry air coming in to evaporate the water in the filters. It won’t work where the humidity is high. When the mercury tops 110° it is much less effective. I tried closing the garage and running it when I first got it but it makes the inside humid and muggy in no time at all because you keep
recycling the moist air. The hot setup is to start with the ceiling fan. As the temp climbs I crack open the garage door by a couple of inches let the cooler draw air from there. Finally when the cooler doesn’t keep pace I turn on the A/C. I survived my first summer here in an off base mobile trailer cooled only by one of these coolers (it was my first place of my own and I became very familiar with these things keeping the one on my roof running).

During all the moving around working on the model I had a small problem with MK-115 mount on the port side. Apparently I had hit it on something and didn’t notice it. It looked pretty bad to begin with but I am getting better at fixing these sorts of things. It’s just a fact of modeling that eventually you will break something while you build. Machine guns and pitot tubes on aircraft are one of my nemeses.

Sponson 5 (29).JPG

I don’t even know when this happened.

Sponson 5 (32).JPG

Unless you know that it was broke you can’t tell thank goodness.


That finishes this part. In the next I will work on the Port Boathouse (Sponson 2) and the other two deck houses (Cleat Decks by the assembly manuals. I don’t believe that was the actual name. I never heard them called that). It may be some time before I post again as I have some family things that need doing. I will work when I can and see you again in my next post. Happy modeling.
 
Mini Hobby 80502 1/350 Scale USS Enterprise CVN-65 Early

Part 20 Sponson 2 and the Port Deckhouses Part 1 of 3 parts


Ship's Boats 02.jpg

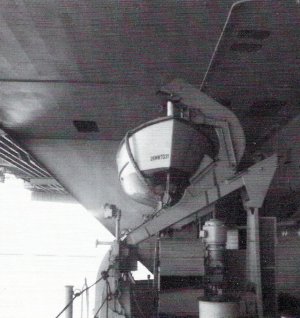
This is the view I’d see as I peeked out on the sponson. Note the overhead and the fact that there aren’t any platforms. This is the configuration of this sponson from launch until the 2 RHIB’s replaced the motor whaleboat.


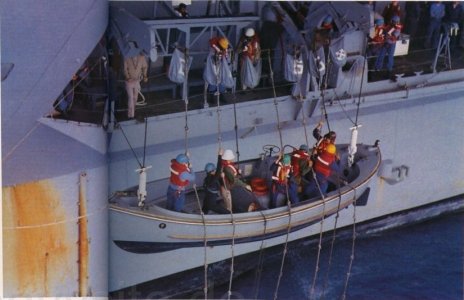
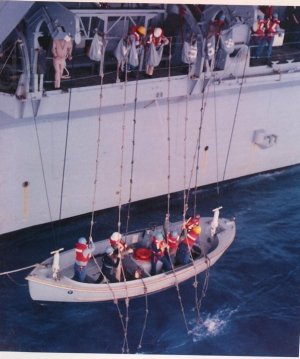
Sponson 2 or the Port Boat House isn’t somewhere that I was allowed to just go and hang out. The Bosuns Mates who were tasked with taking care of this area were pretty territorial. However they often left the doors to the hanger/ladder well and to the sponson open so I got a peek out there every once in a while. This was the home of the only duty lifeboat. It was evident from what I could see that the boat was maintained with pride. Like the Captains Gig or the Admirals Barge it was cleaned and polished to a T. The man ropes (monkey lines) were coiled into bags that had the hull number and a bosuns rating device sewed on them. If there was a man overboard or a plane went in the water the duty lifeboat was immediately manned and prepared for launch.

Ship's Boats 05.jpg

Launching Enterprise’s duty lifeboat, note how the outside feet of the rails are attached on extensions. Each man of the crew holds a Monkey Line in case the boat falls. The monkey Lines (or Man Ropes) are coiled in the 7 bags. Each bag is labeled individually (”C, V, N, an unlabeled bag for a dash, 6, 5 and the Bosuns Mate rating device.”)

Sponson 033.jpg

Here the boat has almost reached the water.

Sponson 050.jpg

The bosuns assigned to the ships boats lavished a lot of care on their boats. On the bulkhead in the background there is the lowest row of the filters or the distribution system. I will paint the life rings and fire extinguishers separately and then install them. Note the ladder and the small platform.


This sponson was pretty large and tall for that matter. It went up from the main deck two more levels to accommodate the davits that launched the boat. They were a single bank, double arm, trackway, gravity davit (I believe that is the correct nomenclature). They could launch the boat via gravity and the arms were returned with a vertical electric motor (the vertical motor probably could also drive the boat to the launch position). I found some CAD pictures of similar davits on the USS Oklahoma City CL-91/CLG-5 /CG-5. They don’t have the drive motor they use a winch and sheaves so they aren’t the same as the unit on the Enterprise but they give a clearer picture of the way they look.

Here is a link (https://www.okieboat.com/CAD miscellaneous.html). All the davits and the motor whaleboat went away eventually and were replaced by 2 Rigid Hull Inflatable Boats (RHIB’s) and a crane. When that change occurred it appears that a small deck office or storage space was added to the aft corner of the sponson. This didn’t happen until after the turn of the century though. In 1978 there appears to be a horizontal tank there which might be a fuel tank for the boat.

cvn65nn6.jpg

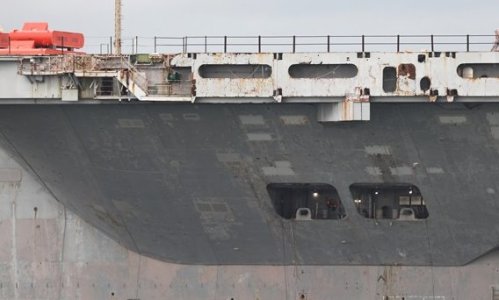
These photos from the scrapping of the ship are some of the best for detail in specific areas. The RHIB’s are gone but the crane is still there and there appears to be a shack or storage area on the aft end. Note the wiring, vents and plumbing.

Hull 124a.jpg

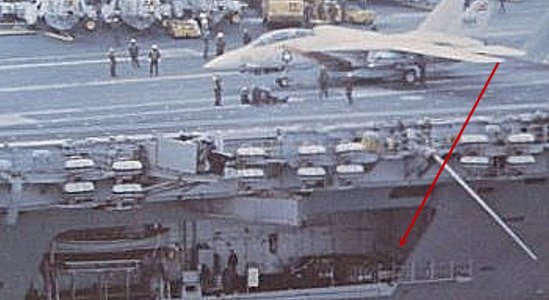
Most of my photos for the spaces I am modeling are kind of fuzzy like this. I believe that there is a tank on the aft end of the sponson, red arrow.


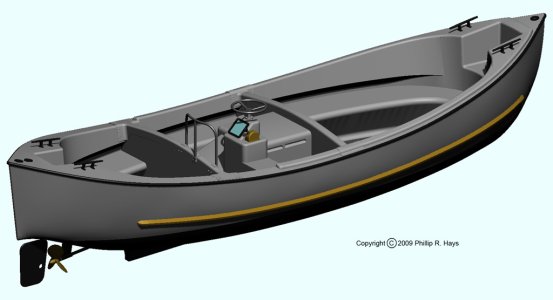
The Mk-10 26 foot Motor Whaleboat was very similar to the wooden Mk-2 26 foot Motor Whaleboat of WWII and it was the work boat of the fleet for many years. The newer ones had fiberglass hulls with a wheel and shift lever on a control podium on the starboard midships instead of a tiller at the aft end. The rudder was much smaller and did not extend up the stern. The Enterprise’s boat was grey like most everything on the ship, the water line was painted black and there was some varnished wood work in the way of rub rails. There was some bright work and fancy work (fancy work is thin rope or cord line wrapped around railings and such in a decorative way. It does provide a better grip and it is often painted white).

Mk-10 26 Ft MWB.jpg

This drawing is about as clear as it gets for the motor whaleboat. By the way there are dozens listed for sale on the internet if you want to buy one. Note how the hull extends over the rudder. I did not fix this on the Black Cat MWB.


There isn’t much photographic documentation on this side of the ship at all so I went through all of my files and printed off what I could. Unfortunately the quality isn’t that good for most of them. The boat and its davits were located on the forward end of the sponson. There was a double WTD just aft of the boat. There are a number of vents and pipes on the inside bulkhead while the forward bulkhead has some sort of filtration or distribution network and the aft has that tank with the bulkhead having some wiring and panels. For the most part the details of the sponson are based on the clearer photos of the early 80’s Enterprise, the ship being stripped from 2025 or so and my drawings.

Hull 118.jpg

Sponson 2 in the early 80’s.

cvn65nn39a.jpg

This image of Deckhouse 1 is pretty clear and shows the dividing bulkhead with the large rectangular opening.

Hull 112.jpg

This is one of the few photos that shows anything about Deckhouse 1

Hull 120.jpg

And this is Deckhouse 2. The Fairleads of the 2 deckhouses are not in the same locations.


As little as I know about Sponson 2 there is even less to go on for the forward and aft deckhouses. I believe the forward provided access to the accommodation ladder (when I was on the Kitty Hawk CV-63 they had a similar arrangement and there was access to an accommodation ladder). The Admirals Barge, the Captains Gig and The senior officer’s liberty boats loaded and unloaded their passengers there. These two locations were sometimes used to tie off camels and barges when we were at anchor or moored. I have a photo of a ferry barge tied to the port side in Hong Kong. I was finally able to answer one question about what the dividing bulkhead of the two deckhouses actually looked like after finding a decent photo of the area from 2025. Originally I thought it was a solid wall inside to outside with a single oval doorway like in my drawings but the photo shows a larger rectangular opening.

65 CVAN PORT SIDE BELOW ANGLE 1975.jpg

The ferry barge tied to the port side of the ship. Note the accommodation ladder.

Sponson 2 and Port Deckhouses (1).JPG

These 6 parts make up the bulk of Sponson 2 and the 2 deckhouses.

Sponson 2 and Port Deckhouses (3).JPG

These are the Sponson 2 parts up close.


One of the first things I did was look at the kit parts for the two deckhouses and the sponson. There isn’t much to them. I haven’t found any evidence of a platform on this sponson but there is a kit part and an Eduard part to replace it. Both are just a figment of somebodies imagination. I had already cut away all the molded overheads and inboard bulkheads for these spaces and now I would be rebuilding them. The part for the sponson had to be skinned like the decks on the other sponsons so first all the detail was removed and the deck was covered with .010” plastic. I checked the fit and how far the sponson protruded out of the opening. I kept adjusting till the sponson deck was level with the hanger deck and butted up to it.

I needed the deck to stick out enough for the extension to be added (the kit part has a molded extension but it is the same thickness as the rest of the deck so I cut it off (Eduard’s instructions have you cut it off too). I had to shim the inboard edge of the deck with some strip to get it to match up with the hanger deck. Looking at photos it became apparent that the kit part was missing an important feature. The Sponson 2 deck should be cut at an angle after it passes beyond the opening at both ends. I drew a line on the forward corner and copied that for the aft. I cut off both corners and sanded everything smooth. I skinned the forward edge but the aft would be covered by the extension.

Sponson 2 and Port Deckhouses (9).JPG

The old extension is gone and I have marked the cuts that I will make for the angled ends.


Once I got the fit right I got a small piece of my perforated deck and cut it to the proper length for the aft extension on the sponson. I laid this under the kit part and cut the angle for the aft end. I marked the aft end of the kit part where the deck meets the angle of the hull to determine the inboard edge of the extension and its width. I added some webbing below and some heavier strip around the edge of the extension for strength. I placed the extension and the sponson face down on my mat, put them together and glued them with Tamiya Extra Thin Cement. I skinned the sloped underside and the entire outboard edge of the sponson.

Sponson 2 and Port Deckhouses (17).JPG

The angled cuts have been made and the extension has been added.


The Eduard Part 5 piece for the sponson extension is attached to the railing for the sponson but the railing wasn’t made to allow for davits protruding through it or for the angle at the forward end. I was going to use just the deck but then the extension would have been too short after cutting the angle. Those parts went into my scrap box. I let it firm up and did a final test. I drilled a couple of holes through the deck and into the hull. Using some plastic rod I made two locating pins. This allows removal of the deck until I am ready to glue things together.

Sponson 2 and Port Deckhouses (20).JPG

The second batch of parts to make the davits.


The gravity roller track davits on Sponson 2 required two attempts to get good parts. I used the Silhouette to make them but when you are dealing with small pieces like these it can be difficult to get them right. In this case my bitmap drawing resolution got changed somehow which changed the size and made all the parts too small. (No idea what key I fat fingered to do that). I looked for 3D printed or photoetch parts for these davits first but I couldn’t find any until I stumbled on this Swordfish Website after I made mine. You will still have to make the trellis beam and some other modifications to use them for Enterprise. Here is their link https://www.swordfishmodels.com/product-page/set-of-gravity-davits

Sponson 2 and Port Deckhouses (22).JPG

The basic assembly on the davits is done. The glued up subassembly is still on the double sided mounting tape.


It would have been nice if the Eduard Enterprise set included these davits instead of a spurious platform. I cut the pieces out of.010” sheet then built the parts up from multiple layers. There is a trellis beam supported on two pylons that face outboard instead mounting them to the inner bulkhead. When this was assembled it was placed vertically on some double sided foam mounting tape. Each track required 2 outer panels, 2 inner tracks, 2 outer reinforcement ribs and several spacers. The parts were built up and glued one side at a time to the support trellis ensuring they stayed perpendicular to it. I checked the part against a Black Cat WWII 26 foot motor whaleboat periodically as assembly went along.

This is the end of the first part of this post
 
Part 20 Sponson 2 and the Port Deckhouses Part 2 of 3 parts

Sponson 2 and Port Deckhouses (26).JPG

The angles that the outer feet of the davit sit on have been added along with the gussets. The inboard bulkhead is in position and the upper portion of the hull stiffener plates is installed. I have also installed the boat boom.


The kit doesn’t have one of these whaleboats. The instructions have you hang a Captains Gig type launch from the overhead of the sponson. The Black Cat whaleboat will have to be modified to modernize it. The stern of the Black Cat WWII Mk-2 model is different than the Mk-10. The stern of the hull should extend over the rudder but I chose not to mess with fixing this and just cut the rudder down. I made a control podium, glued it in position and topped it with a tiny wheel. The arms took two layers glued together and then glued in the upper position on each track. I added some gusset detail to the rails and the keel block and steadying arm to each davit. This type davit has a long keel rest bar which folds down and away when the boat starts to move down the rails. I copied the supports that I saw in a photo and got the look if nothing else.

Sponson 2 and Port Deckhouses (62a).JPG

The davits are just about complete in this photo.


There is an access platform with a vertical ladder at the forward support pylon which I made from generic photoetch parts. A drive motor and a boat winch for the falls were added from parts I had already made up and spare winch parts. I added some details to the davits and the forward set of rails. I made up a pair of sheaves for the boat falls and drilled some holes in the bow and stern of the boat. Some .010” rod was glued into each hole. I cut 2 small pieces of Albion Alloy brass tube and slid them over the plastic rod. I added some small pieces of rod above the brass in a T shape to make the attachment devices that hooked the boat to the falls. When these were cut short enough to reach the sheaves they held the boat in position on the davits. I did not plan it that way just a happy accident.

Sponson 2 and Port Deckhouses (27).JPG

Sponson 2’s basic assembly is clearer in this photo without the davits.


The next step was to add an inboard bulkhead at the same position as the hull. I cut and fitted some .040 inch sheet, got an acceptable fit and glued it to the inboard edge of the deck. Then I added some hull reinforcement stiffener plates cut to match up with those visible below the sponson. There were 3 on the inboard wall. I put a couple pieces of angle for the davit to rest on at the outer edge of the deck. Later I added 2 gussets under each angle after reviewing some photos. I placed two pins on the base of the rail legs on the outboard end and drilled locater holes for them. Once the davit was located I made a double WTD and glued it in place (I wasn’t satisfied with this so later I re did it with some brass parts. Aft of the davit I glued the boat boom to the edge of the sponson. There were a couple of lockers from Black Cat, a kit fairlead, an Eduard bitt, the tank and the winch for the falls to add detail to the deck.

Sponson 2 and Port Deckhouses (36).JPG

The overhead is set in pace on top of the bulkheads.

Sponson 2 and Port Deckhouses (46).JPG

The overhead from below.

Sponson 2 and Port Deckhouses (59).JPG

Almost all the detail is now on sponson 2. Behind it is the detailed overhead. I didn’t care for the original set of doors that I made and they were replaced in this photo.


I went through the usual steps for vent ducts, electrical and plumbing on the inboard bulkhead based on what I could identify in my two reference photos. Jacques at Ship Models Forum did really nice work on this area with the 2 RHIB’s here is a link to his model. www.shipmodels.info/mws_forum/viewtopic.php?f=59&t=210966

I made some plumbing for the distribution thingy on the forward bulkhead and then some wiring and grills and panels on the aft bulkhead. The overhead of Sponson 2 is made up of plates like the hull. There are no visible support beams. There is some plumbing and some vent grills. Once the inboard wall was dry I cut a piece of .020” sheet to size so it just rests on the bulkheads and the outer hull. I cut and glued pieces of angle to hold the part in place. I used various grills from my photoetch stash. The plumbing is plastic rod. It’s an approximation and not 100% accurate but the look is there. With this done all that was left was to finish detailing the inner bulkheads. To light this area I will use LED’s as there will be no way to hide light holes.
Sponson 2 and Port Deckhouses (60).JPG


This is the plumbing system on the forward bulkhead.

Sponson 2 and Port Deckhouses (70).JPG

The completed Sponson.

Sponson 2 and Port Deckhouses (78).JPG

The completed boat.

Sponson 2 and Port Deckhouses (82).JPG

The final addition to Sponson 2 was a vent grill on the aft bulkhead. I had to be careful what I added and where I put it here because more would not have allowed me to insert the assembly in the opening.


The decks for the 2 deckhouses (4 parts total) were too narrow and I had removed the rib separating the two ports at each deckhouse because they were so thick with the end result being that the kit parts weren’t usable. The kit deck should end at the hull (despite what I said in an earlier post). I cut my own deck from some scrap plastic so it would be one piece. I went through the same process to fit these as I did for the sponson. I even added a locating pin in each one.

Sponson 2 and Port Deckhouses (31).JPG

The forward deckhouse seen from outside. I have glued the separators to the hull at this point but later I attached them to the deck assembly. I haven’t placed the additional strip to the front edge to fair it to the hull.

Sponson 2 and Port Deckhouses (30).JPG

The aft deckhouse under construction.


I added the inboard bulkheads by cutting and fitting them behind the fore and aft sides at the same position as the hull. There is a substantial gap between this bulkhead and the molded bulkheads of the kit. I filled the gap with .080” strip (the plastic of the deckhouse walls was really that thick. I detailed the inner bulkhead with the hull reinforcing strips like I did on the Sponson. I spent a good bit of time getting the separating bulkhead fitted. I used .020” plastic to make it which gives it a more scale appearance. The large rectangular opening was first scribed with a Trimaster template and then cut out. After the part for the forward deckhouse was made I checked it in the aft deckhouse and finding the fit good, I copied it. I glued a piece of .010” X .040” strip in the opening of each separating bulkhead to form a coaming.

The strip separating the 2 ports was simply a piece of .060” strip beveled at both ends so it fits flush in the opening. I had to cut a notch in the decks so they fit around the separator. Later I found that it worked better for me to remove the separator from the openings and glue it to the deck assembly in the notch. It makes for a more solid assembly. To blend the decks a final piece of strip was added to the outboard edges so that it extended past the hull. I sanded a bevel on these to match the slope on the hull. The fit is tight and positive.

Sponson 2 and Port Deckhouses (39).JPG

The forward Deckhouse with the separator installed on the deck. I have cut out the rectangular opening and fitted the bulkhead to the deck and the separator strip.
Note the thickness of the white spacer.

Sponson 051.jpg

The overhead of Deckhouse 1 has open support beams so I assumed that Deckhouse 2 did also.

Sponson 2 and Port Deckhouses (43).JPG

The overhead for Deckhouse 1.

Sponson 2 and Port Deckhouses (45).JPG

The overhead in position, the backlighting highlights the support beams. I have the opening faired into the hull.


Constructing the overheads for the 2 deckhouses wasn’t much different than the overhead on the sponson. I found a single photo that shows part of the overhead of Deckhouse 1 and there are support girders for it. I assumed it would be the same in Deckhouse 2. I marked the locations of the 3 bulkheads on the overhead and then added the girders like I did under the flight deck. I went a step further and imagined some plumbing. To light this area I cut holes in the overhead for the hanger LED’s to filter down. I added a photoetched accommodation ladder to the well just aft of the deckhouse.

Sponson 2 and Port Deckhouses (52).JPG

There wasn’t enough space to add the kit ladder and glue the photoetch part to it like I did at sponson 5.


This is the end of the second part.
 
Part 20 Sponson 2 and the Port Deckhouses Part 3 of 3 parts

Sponson 2 and Port Deckhouses (71).JPG

The 2 Deckhouse assemblies under construction.

Sponson 2 and Port Deckhouses (72).JPG

Deckhouse 1 getting mated up to the hull. I added the door to the accommodation ladder.

Sponson 2 and Port Deckhouses (79).JPG

Looking forward at Deckhouse 1.

Sponson 2 and Port Deckhouses (80).JPG

Looking aft at Deckhouse 1.

Sponson 2 and Port Deckhouses (81).JPG

Deckhouse 1 in place.


About the only item that I could discern from the photos of the deckhouses on the bulkheads were 3 electrical panels on the aft end of Deckhouse 1. The rest of the bulkhead detail was pure guesswork and imagination. I added wiring, 1MC loudspeakers, lights, some plumbing, lamps, lockers and fire stations. The fit of the assemblies was pretty tight but I was able to add an access door to the accommodation ladder and some vent grills to the fore and aft bulkheads. On the deck there was a fairlead in each opening, (pay attention to the photos though because they are not in the same positions at both deckhouses). I placed bitts inboard of the fairleads then added railing to finish the deckhouses off. Then I grit my teeth and carefully popped the 3 assemblies in position. Yay no damage.

Sponson 2 and Port Deckhouses (83).JPG

Deckhouse 2 out of the hull.

Sponson 2 and Port Deckhouses (84).JPG

Looking aft at Deckhouse 2.

Sponson 2 and Port Deckhouses (87).JPG

More fragile parts in boxes.


I packed all the delicate parts away in a storage box for safe keeping. Because this essentially finishes this section off I am going ahead and posting it. I have done some more work on the port midships catwalks but none of that will be posted until my family vacation is finished. When I post again I will deal with those catwalks then move back to starboard and complete the area around Sponson 1. Till then enjoy your modeling.
 
Mini Hobby 80502 1/350 Scale USS Enterprise CVN-65 Early


Part 21 Port Midships Catwalks Part 1 of 2 parts

CVAN 65 1978 PORT CLOSEUP SFC.jpg

This photo shows the 1978 Enterprise with the entire port midships catwalks. Note that there isn’t any coaming on the forward section of catwalks (red arrows). The coaming ends around the aft gallery entrance (yellow arrow). The aft catwalk runs from the yellow arrow to the white arrow.


The catwalk from the aft gallery entrance to elevator 4 already had the basic assembly completed when I started this part. In this section I will finish the detail of this catwalk. I will do the basic assembly of the catwalk forward of the gallery and then complete the detailing on it. In the aft section of the catwalk starting just forward of elevator number 4 there was an emergency plate lock operating station for Elevator 4, next was an underdeck fuel station, the manual control for the port barricade, the JBD controls for catapults 4 and 3, another underdeck fuel station, The catapult stations, the FLOLS and a final underdeck fuel station.

cvn65nn7b.jpg

This photo shows the two forward under deck fuel stations red arrows and the AESCT white arrow.

Catwalk 022.jpg

Green shirt manning the manual barricade control.

cvn65nn4a.jpg

The 2 aft underdeck fuel stations red arrows.


There was also the aircraft power, SINS, lighting, fire extinguishers, AFFF and Salt Water fire stations. There was a large rectangular box that was present in the catwalk and extended below it called an AESCT (Aircraft Emergency Service Control Terminal). There were 6 of these terminals in various locations around the catwalks. I know about these because they are marked on the set of plans that I got from Floating Drydock and I googled them to find out what they were for. According to Wikipedia they are “small, fixed‑position consoles or panels located at key points along the flight deck designed to provide quick access to emergency aircraft handling and safety systems.” Visually all you see is a big rectangular slab under the catwalk and a corresponding smaller one above. I do not remember ever being briefed on these during our training work-ups but they were still present on the ship while it was being scrapped. They were probably strictly for ABH’s (Aviation Bosuns Mate Handling) use.

CVAN 65 MAY OF1966.jpeg

This is about the best view that I have of the forward port midships catwalk.


The forward section of catwalk was very small compared to the long aft section. I did not make this when I was working on the aft piece. There were 2 whip antennas with the suspended catwalks below, 2 ladders to the 03 level and 1 to the flight deck. Because this section of catwalk could possibly be in the takeoff area during a bolter, (aircraft misses all 4 wires) or a touch and go, there was no coaming sticking up above the flight deck. Generally the only aircraft spotted (parked) here was the duty or Alert Helo, oriented with the nose pointed forward for takeoff so the lack of the coaming wasn't an issue. This was Helo Spot 3. The entire length of the catwalk from the angle to elevator 4 had no splinter shield except the endcaps. Instead of splinter shields there were guard rails along the entire length of both sections.
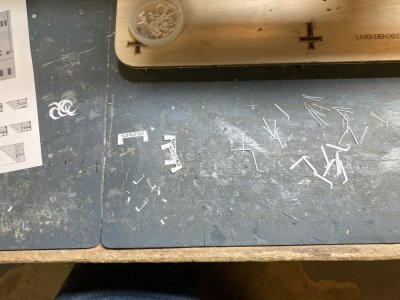
The forward section of the port midships catwalk was the primary route for the Avionics/Armament Division of my squadron to get up on deck and then return below. During launch and recovery operations it would have been suicidal to try to cross the deck here but when take-offs and landings were over we used it almost exclusively. One feature of the port side middle catwalks was that all the aircraft power cords were the type that had to be coiled on a hanger. There was one just as you came up out of the gallery that was used almost exclusively by HS-2. During the 1978 deployment they became very lazy about hanging the cord up properly and just threw it into the catwalk. We complained bitterly about this since it was an extreme trip hazard right at the top of the ladder. When our Maintenance Chief complained to theirs or to CAG it would stop for about a week or two but then they would go right back again.

During the deployment we practiced darken ship every night. None of the red floods or the catwalk lighting was turned on. You only had a red or blue lensed flashlight to light your way and if you were carrying something heavy you wouldn’t be able to use it because one hand was full and you needed the other for holding on to the rail as you climbed up out of the gallery. One night I was carrying a replacement Heads-Up Display, Pilots Display Unit (HUD PDU) for one of our aircraft. When you build a model A-7E or look at photos of the real aircraft you don’t get any idea of the size of this piece of equipment because all you see is the combiner glass and the projector lens.

A-7E Pilots Display Unit.jpg

This is a HUD PDU out of the aircraft.


It is actually about 3 feet long, the body of it was around 8 inches wide and 6 inches on each side. The combiner glass stuck up additional 6 or 7 inches too. The preferred method of carrying it was on your shoulder with the combiner facing down at your back so the glass was somewhat protected. Like a rifle at Shoulder Arms. I was working with another guy on this job. He was trying to light the steps at my feet from behind but his flashlight kept going off by itself. Navy flashlights during this era were very undependable.

As I came up the ladder from the gallery my feet hit that cord and got tangled up in it. I fell forward and as I fell I tried to protect the PDU but it flipped off my shoulder, landed on the glass and nearly went over the side since there wasn’t any splinter shield. I tweaked my back and ankle trying to keep the unit from going over but the combiner glass was broken and its mount was a twisted mess. The formerly Ready For Issue (RFI) PDU had to be turned in for a very unnecessary and costly repair. Our plane didn’t get fixed right away because there wasn’t another PDU available from the supply pool. We had to cannibalize it from a plane in the hanger. There was a great deal of fall out over all this. It was one thing to have some people bitching about something but damaging an aircraft part costing thousands of dollars was another thing entirely. Nobody was overly concerned that I hurt myself. My partner and I were absolved of wrong doing, the fact that we had been complaining about this issue for a couple of months had some bearing I’m sure. I never saw that cord on the deck again.

Port Midships Catwalks (2).JPG

I have made the basic assembly for the forward catwalk.


To make the forward section I obtained a piece of the wide coaming material with the drain holes, measured and cut it to fit from the forward gallery entrance to the final turn of the angle. I installed the scupper but did not put the extra strip at the top. I glued the pre cut deck to the coaming, added the 2 whip mounts minus their catwalks and glued the support web to the underside. On the hull I had to add some strip at the bottom edge of the overhang to blend the assembly in like I did on the aft section.

Port Midships Catwalks (1).JPG

The forward catwalk in place on the hull. The part blends in with a seam forward and underneath.


I positioned both the forward and aft sections of catwalk with staples and tape then drilled holes for locating pins which were glued to the support web but not the hull. Once this had dried the staples were no longer necessary. The catwalks were removed and excess rod was trimmed. I cut the upper part of the coaming even with the scupper on the forward section. I could install and remove the catwalk assemblies as needed now. It is much easier to add all these details to these parts off the ship.

Port Midships Catwalks (3).JPG

Detailing progressing on the forward catwalk.


I began detailing with the landing under the ladder well. Since the removed kit section of catwalk did not have an opening for a second ladder to the 03 level Eduard did not provide parts for it, the door, landing or any of the railing. They didn’t provide these parts for the aft catwalk either. There were openings for ladders to the 03 level on the kit parts but nothing from Eduard. This was kind of odd because they made a point of removing the splinter shields for the catwalks on the starboard side and replacing them with railing where needed. I placed a door and I fabricated my own landing with generic photoetch parts. Next I did the electrical wiring and fixtures. Then I built the 2 fire stations. I modified a photoetch ladder to model the ladder to the flight deck. I removed the railings and cut the ladder to 4 steps. Next I tackled bending and installing the deck edge railing then the rotating handles, hatches and safety rails on the whip antenna mounts. I finished with the 2 life raft baskets between the whips. I intend to run a cord from the A/C power station to the helo on spot 3 so I didn’t add a cord to the mount.

Port Midships Catwalks (6).JPG

The electrical, fire stations and ladder well are all completed here.

Port Midships Catwalks (7).JPG

The landing has been fabricated and added.


One thing I had missed when I did the fully detailed starboard catwalk between Elevators 2 and 3 were the loudspeakers for the 1MC General Announcing System and the 5 MC Flight Deck Announcing System. The loudspeakers for these 2 systems were obviously different with the 1MC looking like a standard bell shaped loudspeaker and the 5MC looking like a flat wedge shaped box. They were mounted on brackets and platforms on the outside edge of the splinter shields and railings. On USN ships there are something like over 50 different systems. I won’t list them all but in addition to the two I mentioned there is the 2MC 2 way Engineering System, 3 MC Hanger Deck/Troop Deck Announcing System and 4MC 2 Way Damage Control Announcing System. Here is a link to a table containing various shipboard communication circuits. https://www.nj2bb.org/reference/Ship's_Comms_Circuits.pdf

I cut a whole strip of 3/64” Plastruct angle into approximately 1/8” sections. I glued these to the railings and splinter shields for the loudspeaker mounts. I have several packages of L’Arsenal and Black Cat bell shaped loudspeakers for the 1MC. But for the 5MC I cut about half of a .030” X .040” strip into the same size pieces as the angle. I trimmed off the corners on one side of the strip to make the speakers. I more or less went by my drawings to position the speakers on the starboard and port forward catwalks.

Port Midships Catwalks (8).JPG

Almost finished I need to add the life raft baskets and the loudspeakers.

Port Midships Catwalks (28).JPG

Here it is completed and ready to go to the storage bin.


The aft section proceeded in pretty much the same manner as the forward. I began by adding all the doors on the landings. I used the White Ensign landings since there weren’t any Eduard parts. These looked a little small and they were a bit fiddley to bend but in the end they worked all right. I used 5 of these to make the single door landings. The advantage to these is not only are the rails attached but the ladders are also so once it is folded it is complete. There is even a tab to help glue them in place. They don’t have the angle brace at the aft end of the landing so I cut plastic strip and made my own. The 2 double door landings were made with bits of generic photoetch like the forward section of catwalk.

Port Midships Catwalks (14).JPG

All the doors have been added.

Port Midships Catwalks (15).JPG

The combination landing, ladder and railing before folding.

Port Midships Catwalks (16).JPG

A mere 11 folds later voila a complete landing.


I made the AESCT in the forward end of the aft catwalk with some .030” X .060” strip and a piece of .010” strip for a lid. I cut a piece for below the catwalk and a shorter piece for the section in the catwalk. The lid is conjecture. I did the under deck fuel stations next. From the photos I have there appears to be two reels at the forward and aft ends and a single reel in the middle. After the ovals were in place I cut and glued the rollers to the coaming. I fabricated the two catapult and JBD stations with some L’Arsenal Photoetch and plastic shapes for phone boxes. There are 6 fire stations in this catwalk and I made them with plastic strip and photoetch hatches. I placed valves with hand wheels at each station. Then I added sections of rod under the catwalk for plumbing.

Port Midships Catwalks (18).JPG

The landings for the 2 double door platforms have to be fabricated piecemeal.


This ends part 1 of this post.
 
Part 21 Port Midships Catwalks Part 1 of 2 parts

Port Midships Catwalks (35).JPG

The aft landing completed.


I have a pretty good idea of what aircraft will be placed in this area and how they would be portrayed so I made up 2 cords to place on two of the power stations from fine copper wire. A tiny piece of strip forms the plug end. Most of the permanent wiring would have been above deck level but some of the whip antennas and the FLOLS platform were wired up with some lead wire and clamps as needed. I did not attempt to add wiring to the caged whips.

Port Midships Catwalks (37).JPG

The details coming together on the forward aft catwalk.

Port Midships Catwalks (36).JPG

The aft end.


For the railing along the port side I used some from the White Ensign Enterprise sheet which has several rows of railing with posts close together. I did not try to bend one length of railing for the entire catwalk. I broke it up into small sections. To join sections together I overlapped posts and glued them together. I left an opening at the FLOLS platform. I was able to do the whole side with around 8 sections.

Port Midships Catwalks (42).JPG

I have started on the railings

Port Midships Catwalks (48).JPG

The railings have been finished.


For the FLOLS platform the kit provide two parts but Eduard offers about 18 pieces of tiny photoetch parts to embellish the optical system. The one irritating thing about the parts was the back shield which was broken into 3 parts. This easily could have been a single part. They put grooves for the stanchions and it would have been easy to bend it as needed. I glued 5 of the 7 stanchions in place. Then I glued the 3 plates into position. I had to go back and add the remaining stanchions after the plates were in place. These are very small and happily they give you an extra. There are 6 parts to detail the kit lens assembly and I added some lead wire to the backside for wiring.

Port Midships Catwalks (49).JPG

The Eduard railing is already broken and it looks might frail on the fret, white circle.


I glued the modified kit part on the platform leaving space for the railing. Eduard provides a railing for this location but it already was broken and looked like it would fall apart at the first attempt to bend it. It was also too short to go around to the plates. The White Ensign sheet provided multiple rows of railing with just a single rail for around the elevators. I used a section of this to go around the FLOLS platform. Once the section of railing was bent to follow the edge I glued it in position.

Port Midships Catwalks (52).JPG

The Finished FLOLS platform.

Port Midships Catwalks (54).JPG

Looking forward at the FLOLS platform.


While finishing this I managed to break the cage off the whip antenna and two of the four rotating handles so these problems were corrected. There were a large number of life raft baskets along this section of catwalk. In one location between the caged whip and the most aft whip they are suspended below the catwalk instead of on the railing. This was to avoid blocking the line of sight to the FLOLS. I started at the aft end and began working my way forward.

Port Midships Catwalks (63).JPG

One section of the hanging life raft basket support structure. Note the ordnance disposal skid.


On the section of baskets hanging below the catwalk there is a visible support structure that the baskets are mounted on. I used some of the catwalk underside support webbing to make this. I glued it to the underside of the catwalk and then added some of the catwalk angle struts to brace it. I don’t have any photos of this without the baskets so I just sort of imagineered the whole thing. It looks enough like the photo to be believable. With all the baskets in place I moved on to the loudspeakers. There were some final details to be added. A TV camera covering the launch area and 2 AFFF cannons covering the launch area of each catapult in case of a catastrophic engine failure at military power during a launch. There is even a kit part for the camera which surprised me. It is a tolerable looking part.

Port Midships Catwalks (76).JPG

The overall completed port aft catwalk all the baskets are in place. The white arrow points to the TV camera. The green arrows indicate the two AFFF cannons.

Port Midships Catwalks (71).JPG

A more detailed view of the forward end.

Port Midships Catwalks (73).JPG

Detail of the section up to the last whip antenna.

Port Midships Catwalks (74).JPG

A detailed view to the bomb skid.

Port Midships Catwalks (75).JPG

The detailed view to the elevator.


With all of this taken care of I called the two sections of catwalk done, moved them and any unattached parts to the storage boxes bring this section to an end. I will close this out here. In the next part I will build sponson 1 and the catwalk above it which will finish the sponsons. From there I will go back to the aft catwalks and detail them and the move on to the bow catwalks. Till then take care and happy modeling.
 
Mini Hobby 80502 1/350 Scale USS Enterprise CVN-65 Early


Part 22 Starboard Forward Midships Catwalk and Sponson 1 Part 1 of 2 parts

Hull 078.jpg1

This photo shows Sponson 1 looking aft . The ship is moored in Alameda and the time frame is after the major refit in the 80's. Aft of the Officer’s brow are the shore power lines and forward are I believe fresh water lines. Note the vent ducts and the refueling rig in the overhang. The large box at the forward edge was not there in 1978.

Hull 077.jpg 2

In this photo from the same time frame looking forward note the position of the vent at the outboard edge of the overhang and the 8 chaff and flare lockers.


Sponson 1 is the last sponson that I have to make. The others have all been completed. This was UNREP Station 3, the forward refueling station. There was an accommodation ladder at this location for use when the ship was anchored. This sponson was the in port Quarterdeck. When moored, shore power was connected here and it served as the officer’s brow, their primary access to go ashore. There were 3 fuel connections on the deck and a winch serving the refueling station. There was a second platform mounted deck winch that served UNREP Station 1 at the Elevator 1 door well. This sponson was Officer’s Country so I only saw it from the Hanger Bay or the Pier. Perhaps if they had known about the model that I would build 50 years later they would have let me poke around.

Hull 014.jpg

In this photo from 1978 the ship is moored at NAS Cubi Pt. RP. The box on the forward edge is gone and there are only 4 chaff and flare lockers. Note the whip antennas and the landing under the aft upper section of catwalk.


The kit provides 4 parts for the sponson. There is a platform on the forward end and it is the full width of the sponson. There are 2 parts for the sponson itself which were already assembled, the detail removed and the deck skinned. I had also already cut the notch for the elevators out of the forward and aft ends. There is a plastic accommodation ladder which I glued in place and then covered with a photoetch ladder from one of the sets. I started out construction by making the 3 struts for supporting the flight deck overhang. I made them as before with endplates and gussets. Each was fitted to its position on the overhang. I detailed all 3 with ladder rungs and I marked them so I wouldn’t mix them up later. There were 2 on the sponson itself and another under the point (forward of Elevator 1).

Sponson 1 (1).JPG

These are the kit parts for Sponson 1. The platform should be straight on both the forward and aft edges. The sponson has been assembled, all the detail removed from the deck, the deck is “skinned” and the notches for the elevators to pass through are done.


In photos you can see that the refueling rigging would have been different on this sponson compared to Sponsons 4 and 5. There is a recessed area for the tracks on the overhang on Sponson 1. The tracks run fore and aft vice athwartships. I marked the area that I wanted for the rig based on photos. I cut a line for the forward and aft sides through the molded girders, then using a chisel and Xacto chisel blades I removed the girders in that area. I scraped the area with a blade until it was smooth. I framed the opening with .010” strip then cut 3 “T” profile strips to fit lengthwise forming the overhead pulley systems rails. To finish I added gussets to each strip like the photos.

Sponson 1 (2).JPG

Here I have begun removing the girders for the refueling rig.

Sponson 1 (12a).JPG

This the overhang above Sponson 1 finished


There are some vent ducts and plumbing under the overhang. The kit furnished the double tube on the aft end of the sponson and I had already folded up and assembled the Eduard part for the vent on the outboard edge. The kit part had a couple of visible sink marks which had to be filled. The Eduard part had to have a 90 degree bend fashioned from thick plastic strip. The bend is visible in photos but Eduard did not make their part with it they squared off the inside end. This was fine on the duct over the Sponson 3/5 area because it ends against the hull. This duct seems to have been moved at some point. I have a 1976-78 period photo showing it under the aft end of the lower level of catwalk but in 1968 it was under the landing. There is another small duct at the forward end of the sponson. It wasn’t provided by either the kit or Eduard so I made one and glued it in position. There are several pipe runs on the overhang and I used plastic rod and lead wire to fashion those. I initially glued the Eduard part too far inboard and had to correct that moving it outboard so it will end under the lower level catwalk.

65 CVAN THE E  09 24 1968  MIDSHIPS.jpg

In this 1968 photo note the position of the vent duct on the outboard overhang.

Sponson 1 (32a).JPG

This photo shows the strip I added at the end of the vent box to make it look similar to the Eduard photoetch at the forward end.

SHIP_CVN-65_Inactivation_Ceremony_2012-12-01_USN_lg a.jpg

Not a great photo but you can make out some detail on the actual ship at the aft end of the vent box (red arrow).


At the aft end of the big vent box I added some strip to look similar to the Eduard photoetched piece that I had glued to the forward edge. Photos only show a hint of what was actually there but I felt that it would be similar. I added 3 small cable reels to the aft hull at the end of the sponson just above the strut. Two more are cemented above the platform area. Then I began adding the electrical wiring to the hull side for the sponson. There is some wiring at the forward end and a run along the vent box edge for floodlights. The Lights came from a Black Cat resin set. At the aft end of the sponson there is a small vent opening made from plastic strip with the upper edge beveled. Based on photos I had made some errors with the positions of vent screens on the big vent box and I corrected them now carefully prying them up, then soaking them in acetone to remove the existing glue, sanding the area and gluing them in position by the Eduard instructions instead of covering the kit features. I had to fill in those features and sand them smooth which is why I did them wrong in the first place.

Sponson 1 (14).JPG10 Sponson 1 (14)

This photo shows the corrected vent screens the two forward screens are at the bottom of the panel and the third aft screen is at the top. This photo was taken before I corrected the bracing on the end of the vent box..


The sponson was previously fitted to the hull so I sat it in position with a friction fit. The kit platform has an angled notch on the aft side. I don’t know what it for kit wise but it is not visible in photos as they show a straight aft edge. I placed the strut in position and discovered that the kit platform is too high and will not fit under the big vent box or between the big vent box and the strut even with that aft edge. The Eduard part is like the one on Sponson 5. It is too narrow and too long. The supporting legs are even finer than the ones on Sponson 5 and there would be an inner row of pillars so I made my own part. I cut some .020” plastic sheet to fit in the desired position. I laid the part on the sponson and traced the edge on the bottom of the platform part. I cut off all the plastic outboard of that line so I have the deck of the platform in the correct width and length.

Sponson 1 (19).JPG

Sponson 1 is dry fitted to the hull, the platform is in place and the cable reels are installed.


The deck of the platform should sit at the bottom of the vent box. I glued a piece of strip to the hull to support the inside edge at that level. I determined the position for a vertical ladder and cut a hole in the platform. In my drawings I drew an inclined ladder but none of the photos show that so I am assuming the vertical ladder. I detailed the underside and edges with strip. I glued support pillars to each outboard corner, reinforced them with plastic angles then measured and cut them to the correct height. I can set the platform in position and it will stay there. With the basic construction of the platform out of the way I cut and folded some photoetch vertical ladder and glued it in place for the platform access.

I went back to the electrical panels and wiring below the vent box. I added the 4 panels for the shore power connections and then let imagination take over for the rest of the detail. I cut some thin slices of channel for brackets that held sections of fuel hose under the vent box. I made a run of lights under the vent box, then under and above the platform. I finished the platform by adding a deck winch, a locker and the railing. I had to cut some posts and rails from the aft edge hand rails to make an angle that fits the profile of the vent box.

Sponson 1 (22).JPG

The hull detail is complete.

Sponson 001 (2).jpg

This is a photo of one of the refueling connections.

Sponson 025.jpg

This shows the receiving adapter rigged and the supply vessel hose about to make connection sometime in the late 60’s through the 70’s.

FB_IMG_1693926603129.jpg

Even though the receiving rig is fairly compact three hoses were rigged on Sponsons 1 and 5. I believe they were sending hoses for our escorts but I am not sure. These rigs were called Span Wire Rigs. While we were deployed those hoses were kept rigged while the adapter hose was only rigged during refueling.


I formed and glued up the aft and forward hand rails on the sponson. Then I dry fitted the sponson and the platform so that I could measure and cut a section of railing outboard of the platform. I glued this rail to the platform posts. I cut out a section of the railing to leave space for the fairlead at the forward end of the sponson and again in the aft outboard railing for the second fairlead. I left a gap between the two outboard hand rails where the brow would sit in port. I have some chain rails from Eduard which I will fit to cover this gap after the sponson is attached to the hull. I did the same thing on Sponson 5. There are 3 fuel connections on the deck, 2 bitts and a number of cleats. There is also a deck hatch leading down to the accommodation ladder. Once all of this was finished I made up 3 short refueling hose adapters from lead wire and plastic discs. These were installed in the brackets I had previously installed. The adapters were rigged as a quick disconnect for the supply ship’s hose to seat into.

Sponson 1 (30).JPG

The finished sponson and platform.

Sponson 1 (32).JPG

The completed sponson and platform in place looking forward.

Sponson 1 (33).JPG

The completed sponson and platform in place looking aft.


This is the end of part 1 of this post.
 
Part 22 Starboard Forward Midships Catwalk and Sponson 1 Part 2 of 2 parts


65  CVN  1978  DEATIL UNREP  DECK.jpg

This is a 1976 deployment photo focusing in on Sponson 1 and the overhead catwalk looking aft.

65 04 1978 enterprise.jpg

A Close up if the same area looking forward.


The catwalk between Elevator 1 and 2 was another dual level catwalk. 3 underdeck fuel hose reels were located in the upper aft section. There was a double door landing under the aft catwalk, 2 whip antennas under that section and a third with a caged catwalk under the forward end of the lower level. The Elevator 2 Control station was located in the upper aft section and in the forward section the Elevator 1 Emergency Plate Lock station was situated. There were 2 fire stations and aircraft power cords. The lower area was primarily for the 4 chaff and flare lockers located on the outboard edge. The lockers were flame resistant and designed to be jettisoned entirely if fire threatened them. Thankfully I never saw a situation where this became necessary.

When our AT shop was involved in loading the Chaff Buckets for our aircraft I would occasionally be tasked to help out. We flew chaff and flares most days after we in-chopped to the 7th Fleet. I was a draft horse during this evolution since you had to be certified to handle the chaff, flares and install the loaded buckets in the aircraft. I could however help carry them to the lockers and back to the aircraft. Technically once they were loaded I wasn’t supposed to be handling them but hopefully the Statute of Limitations has run out on that malfeasance.

Catwalk 029.jpg

The crew here are posing on the forward ladder of the lower level.


Getting down to the lockers you took one of the 2 ladders off the flight deck then down a second ladder to the lower level. Oddly there was a hand rail that did not extend above deck level on the 2 flight deck platforms but none on the ladders into the catwalk. I can only imagine this was because of the long drop to the lower level. But it seems like they could have installed cut down rails on the ladders also. Something like that would have been nice on any of those ladders coming off the flight deck. There were deck edge safety nets between the 2 flight deck platforms.

We generally formed a relay line (Bucket Brigade if you will) so we didn’t have to make several trips up or down the ladders. We would hand the chaff bucket off to the next guy and reverse the procedure going back up. As a rule the pilots weren’t permitted to fire off the chaff or flare rounds unless they were being targeted but there were practice days when they could use them. Generally all the aircraft on the schedule for the day would be loaded in the morning. Then only aircraft that needed to be reloaded throughout the day had to be taken care of. Later I believe that this was restricted only to aircraft on a given launch no more getting ahead of the game in the morning.

Cross training and generally helping out became a common practice during Viet Nam into the 70’s. Anyone not actually working on something else would go help the Ordies load bombs or another shop with pulling panels during major inspections or whatever else needed to be done. I didn’t like having to do other shops work at the time because it seemed like it was rarely a two way street but looking back I am glad I got the experience. I worked as a gofer during an engine change once which was quite an operation. We got some cross training and it built up team spirit. This was discontinued for safety reasons during the 80’s on the more dangerous evolutions (like loading bombs) generally you had to have a Personal Qualification Standard (PQS)sign off to do anything technical. There may have been one to tie your shoes but I can’t remember.

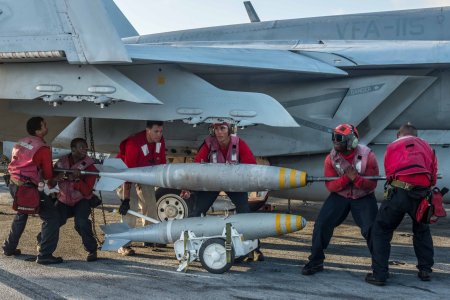
161005-N-OI810-150.jpg

Ordnancemen loading 500 lb. bombs on an F/A-18 using hernia bars.

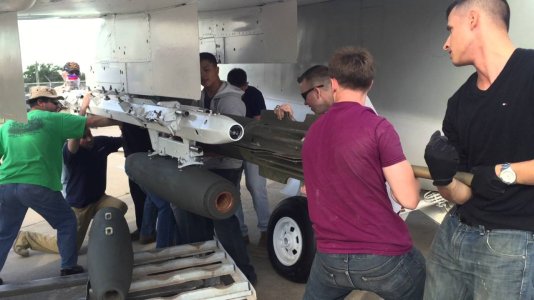
maxresdefault.jpg

Loading bombs on a MER on an A-7E. This photo is from the Aviation Aerospace Museum Ft Worth, TX but I don’t know what the context is. I am assuming the crew are museum employees setting up and exhibit.


During my last tour in 1995 I suggested bringing back the practice of getting other shops involved in loading and unloading evolutions when our Gunner voiced concerns over manning cutbacks. We ended up doing it for loading and unloading ordnance but not chaff and flares. The paperwork for just the ordnance was huge and involved several training sessions to get everyone qualified. In the end we didn’t use it that much and the shops in my division were pissed about doing other shop’s work (huh). I myself found the 500 pound bombs had gotten much heavier from when I was 25.

For clarification in the 60’s and 70’s Pacfleet Navy the Ordnancemen only used powered hoist units on special weapons or bombs heavier than 1000 pounds. I did hear at the time that Lantfleet ships used hoist units on preloaded MERs and TERs. The Pacfleet ships loaded the racks on the plane and then loaded the bombs on the racks. Hoist units or HLU’s were either hand cranked derived from WW-2 hoists or more commonly two stroke powered, hand held winches that used pulleys on the stations to lift ordnance in place.

110516-M-0000N-001.jpg

A USAF ordnance loading lift truck.


The tail hook Navy does not have the lift trucks like the Airforce because they would require moving each plane to be loaded in order to access the stations from the sides. A process so time consuming as to negate any benefit from using these trucks. So loading on navy aircraft was done with teams using a set of “Hernia Bars” threaded into the fuzing holes of the bombs. Lifting was accomplished by multiple strong backs lifting up to125 pounds each, coordinated and guided by an Ordnancemen team leader. The leader would ensure the hooks were cocked, guide the shackles into the hooks and control each lift. He would ensure the sway braces were set and then we would move on to next weapon. It wasn’t much fun but it was good exercise. The weapons would be fuzed by another dedicated team composed only of Ordnancemen. I was glad that we did not fly 1000lb bombs often.

an-aviation-ordnancemen-uses-an-hlu-196ae-bomb-hoist-to-load-an-aim-7-sparrow-missile-aboard-a...jpg

Loading with a HLU-196. A Shrike missile and its launcher.


I followed my normal path building up the catwalk section, basic assembly, support webbing and braces. I added locating pins to the section then doors, platforms, ladders and inside railings. I built up the electrical, fire stations and added control stations. Plumbing and accessories came next followed by the outside rails and finishing touches on the whip platforms. Loudspeakers and life raft baskets were last. One detail in this catwalk was the safety locks for the JBD’s (T bars hanging on the lower deck bulkhead). These were used to prevent accidental closure of the JBD’s when crews were performing maintenance.

Starboard Forward Midships Catwalks (1).JPG

The Eduard part for the aft upper catwalk next to the basic assembly for the catwalk between elevators 1 and 2.


Eduard furnished parts for the catwalks in this area. But they had some errors. In the aft section the 3 under deck fuel hose openings are in a row. But in reality there were 2 aft, a space and then the third. The space was for the 2 doors in the ladder well. Eduard does not have a ladder well in the deck and the metal part does not extend down far enough to represent the 2 doors. They do have 2 circular openings but no photo shows them like that. On the lower level there is no provision for the chaff/flare lockers. They increased the number from 4 to 8 lockers by the final deployment so they were still there during the period represented by the Eduard set. The entire catwalk between the elevators was modified during this time frame. The lower level was lengthened to accommodate the 8 lockers during the major refit after the 1978 deployment. Eduard’s lower deck is the correct length for my time frame but not shaped correctly.

Starboard Forward Midships Catwalks (4).JPG

The basic assembly is complete in this photo.

Starboard Forward Midships Catwalks (7).JPG

This is the catwalk before I corrected the errors on the fuel stations and doors.


If you look closely at the photos of my work in progress you’ll notice that I placed my 3 ovals in a row like Eduard’s. After studying the photos I caught that mistake and another. In my drawing of the lower level I put 3 doors, 2 aft and 1 forward copying the Eduard parts. There should only be 1 door aft and 1 forward. After fixing these problems I added updated power cords like I did around the island instead of cords on a hanger bracket. I think that when I designed the 3 deck pieces I made the aft too short and the forward too long because there was barely room for the modern power cord. I then went ahead and made both fire stations like all the others and called it good. I had spent some time making a basket for the lower salt water fire station but when it was almost finished I dropped it and never found it again. Rather than make a new basket I just went with the plastic box.

Starboard Forward Midships Catwalks (17).JPG

I have corrected the mistakes and added the remaining ladders.

Starboard Forward Midships Catwalks (22).JPG

The construction on the catwalk is almost done here.


Making the chaff/flare lockers was a matter of finding the right cross section of plastic to represent them. I didn’t have anything which looked right so I used some.125” X .125” strip and glued a section of .60” X .125” strip to it to make it thicker. I can’t use the chopper on stuff this thick because it deflects the blade and you don’t get a straight cut. I measured the width of the area where the lockers were mounted then cut a section of the glued strip in a miter box with a razor saw to fit there. Once I had the measured piece I divided it into 4 and cut those in the miter box into 4 equal boxes.

Starboard Forward Midships Catwalks (14).JPG

These 4 blocks will become my 4 lockers.

Starboard Forward Midships Catwalks (15).JPG

The locker assembly looking outboard.


After I had 4 sections I sanded each side until all the rough edges were smooth. I used some 1/16” T profile strip and made a rack to hold the 4 lockers together. Another piece of T under the inboard edge angled the lockers up. I sanded the bottom making it a bit shorter and added a final piece of .010” strip to the outboard edge to locate the assembly. I used some small deck hatches to make double doors on each locker. I left the assembly unattached for now to ease painting.

Starboard Forward Midships Catwalks (18).JPG

The completed catwalk.


Under the Point there is a bulged area that curves down to roughly the main deck (Hanger Deck). There were some pipe runs on the overhang here which I went ahead and added when I was working on the Sponson 1 overhead. Once I had flipped the model back over there was a door and platform at the 01 level on the aft side of the bulge. You can barely find it in most of my photos. I don’t know what this feature was for but whenever we were moored there was a hose or a cord running out of this door, off the platform and down to the pier. It had to have been important enough for them to add these parts to the bulge but it seems incongruous that the first nuclear aircraft carrier had to have such a bubble gum engineered solution to whatever problem this addressed. Oh well Keep It Simple Stupid (KISS).

Sponson 1 (42).JPG

In this photo the platform and door are in place on the bulge.

Hull 101.jpg17

This is the best photo of the platform on the bulge that I found.


It is an interesting and not well known feature so I had to add it. I marked a line on the aft side of the bulge using my Hanger Deck Height Gage. I used a door from the White Ensign set which I glued in position on the line. Then I used some of the unused Eduard photoetch platform that had rails on 2 sides to make the platform. I glued this below the door and reinforced it using some of the catwalk angle brackets for supports. I cut a section of rail to cap off the end of the platform. That brings this part to a close. All the sponsons are built and the midships catwalks are pretty much completed to the point that they could be added to the ship when the time comes.

Sponson 1 (38).JPG

The sponson and the catwalk all dry fitted.


I am going to return to the aft catwalks and finish detailing them next in the coming part. So until next time take care and happy modeling.
 
Mikey I have been following your build from the start and have to say I admire the effort and detail you are putting in working in such small scale.
I Look forward to the rest of this great build

All the best JJ..
 
View attachment 506888

The kit on my workbench

Part 1

The first USS Enterprise was a 70 ton sloop armed with 4 twelve pound cannon captured from the British in 1775 on Lake Champlain. She was burned in 1777 to prevent recapture. The second Enterprise was a originally a private 8 gun schooner built in Maryland that served on Chesapeake Bay and around Maryland during the same time. The third Enterprise was a 135 ton, 85 foot schooner armed with 6 twelve pounders. She served with the Navy from 1799 to 1823 when she ran aground and was lost. During her career she fought in the undeclared war with France from 1799 to 1801 and in the Mediterranean during the Barbary Coast Pirate Wars. She was rebuilt and up gunned to 16 twelve pounders fighting in the war of 1812 when she captured the British brig Boxer. The fourth Enterprise was a schooner of 194 tons armed with ten guns built at the New York Navy Yard. She entered service in 1831 and served in the Atlantic, Pacific and the East India Station. She was sold in 1845. The fifth Enterprise was a wooden steam powered Corvette displacing 1375 tons and was nearly 200 feet long. She was armed with 10 guns and crewed by 184 men. She operated in the Atlantic, Mediterranean and the West Indies. She would become a training ship and was sold in 1909. The sixth Enterprise was a private yacht converted to a Motor Patrol Boat for service in World War I. She was purchased in 1916 and sold in 1919.

The first six ships named Enterprise served proudly but the seventh, CV-6 made a memorable name for herself during WWII. She was built in the late 1930’s at the Newport News Shipbuilding and Dry Dock Company. The keel was laid in July, 1934 and she was launched on October 3, 1936. She was commissioned in 1938 and was the second ship of the Yorktown class, 1 of 3 purpose built aircraft carriers. The Navy’s first. Of the three, only Enterprise would survive WW II. At one point she was the only aircraft carrier in the Pacific. She was the first vessel to sink an enemy combat ship, the submarine I-70. She fought in every major battle in the Pacific and was the most decorated ship in US Naval History receiving 19 battle stars. She was the only ship to receive both the Presidential and Navy Unit Citations. The Japanese called her the Blue Ghost after reporting sinking her several times. Of all the ships built during the war she truly deserved to be set aside as a monument or museum. Tragically she was sold for scrap in 1958 despite the efforts to preserve her. Six portholes from the bridge of CV-6 were removed and used on the Captain’s cabin on CVAN-65. These are to be moved to CVN-80 which will next bear the name of Enterprise.

The keel of USS Enterprise CVAN-65 was also laid down at Newport News Shipbuilding and Dry Dock Company on February 4, 1958. She was launched on September 24, 1960 and was commissioned into the US Navy on November 25, 1961. She first put to sea as a commissioned vessel in January of 1962. In 1975 she was re-designated as a CVN and would remain so for the rest of her service. In 2012 she would complete her final deployment, decommission and be consigned for scrapping. During that 51 year period she would deploy overseas 25 times. After her first overseas deployment she returned to homeport only to put to sea again for the Cuban Missile Crisis. She made 6 combat deployments to Vietnam between 1965 and 1972. During the 1975 deployment she participated in the evacuation of Saigon. Over the course of the War on Terrorism she participated in every major action except Desert Shield/Storm because of a yard period. She served on the East coast, moved to the West coast and returned to the East. 23 Captains commanded her. Over the course of her career she was awarded 19 medals and ribbons, many awarded multiple times. She was the first nuclear powered aircraft carrier and the 8th ship of the U.S. Navy to bear the name Enterprise.

CVAN-65 was 1,123 feet long overall, 1,040 feet at the waterline. Her maximum width is 257 feet with a beam of 133 feet at the waterline. From her keel to the top of the mast she was 269 feet in her 1978 configuration. She was so tall that the UHF mast extension was designed to fold over to get under the Golden Gate and Bay Bridges. She displaced 90,000 tons fully loaded. Various armament configurations were tried over her career but because of budget limitations Enterprise was armed with only her air wing for defense as launched. She went down in history as the first nuclear powered aircraft carrier.

In February, 1958 I was not quite 3 years old. The keel laying made no impression on me. I might have heard her name on the news a time or two as I grew up. In 1969 I watched the news reports in horror while she burned. In 1972 I was in my junior year of high school, a C & D student. A level of scholarship attained more from not trying than any fault of the school, curriculum or the teachers. I had no interest in going to college and generally disliked school. I’d had a part time job since I was 13 so I had no aversion to work just the classroom. I spent most of my free time building model airplanes and day dreaming about flying. When I wasn’t doing that I was riding or working on my motorcycle. I never took the SAT or the ACT college placement tests, I barely did homework. In December of 1972 the draft lottery was held and I watched it with my best friend. This lottery was for men born in 1955 who would be of age (18) in 1973 (Me). They drew my birthday early, I believe as number 44! It turned out that this would be the last year of the draft. The1973 lottery was held but never filled. The All Volunteer Military arrived a year too late for me. My friend was destined for college. Knowing that there was no deferment in my future, I decided to make the rounds of the Armed Forces Recruiters. Better to enlist and get some choice was my thinking at the time. I went with the Navy.

The Navy recruiter in my hometown of Findlay, Ohio was a Chief Aviation Electronics Technician named Don La Favour (I hope I spelled that right Don). He was primarily in patrol aircraft. He had served as aircrew and he was matter of fact, and I felt, honest. After testing me he said that I could virtually ask for any enlisted program and get it. Apparently I had learned something after all. He offered me a six year active duty nuclear power program and then a similar advanced avionics program. I only wanted to serve the minimum and then get out. I told him that all I wanted to do was work on airplanes. He seemed to understand that. I had worn glasses since the fourth grade, so I thought that I probably wouldn’t qualify for any flight program. Working on planes was better than nothing. (I could have gone aircrew after all but when I was rated an Aviation Fire Control Technician there were no flying billets available for my rate.) Chief La Favour was able to guarantee a school seat in 1 of 4 aviation electronics ratings providing I could pass the schools, AT, Aviation Electronics Technician AQ, Aviation Fire Control Technician, AX, Aviation Antisubmarine Warfare Technician or TD, Tradevman or more correctly Training Device Man (More school yay!) So I enlisted in the Navy for a standard 4 year enlistment. (4 years active and 2 more in the reserves, the least amount I could serve for and still get my guaranteed school seat.

He also got me a delayed entry which let me enjoy a final summer vacation with my friends. On September 22, 1973 I arrived at Great Lakes Naval Training Center at 0200 as a Seaman Recruit and began a 22 year career with the Navy. I surely did not know that I would stay that long at the time. I got my draft call-up in October while still in boot camp. They do start out “Greetings…” I took the letter to my Company Commander and asked him what I should do. His answer was to have me drop and give him 50, He said, “The draft can’t have your a_ _ because your a_ _ belongs to the Navy!” By the end of boot camp I knew that I did not want to be a TD because they were virtually on permanent shore duty and they worked on trainers not aircraft. So of course I was designated a TD out of Boot Camp.

From December of 1973 to June of 1975 I went to various Navy Schools. For a guy that hated school it seemed endless. But it was an eye opener too seeing how math and physics all worked together to become electronics and it all slowly was made clear and even interesting to me. The Navy also provided a little better motivational tools than the public schools did, at least in my case. Pass or get stuck in some s_ _ _ job. While I was attending Avionics “A” School I happened to ask if there was a way to change rates during class. Turns out one of my classmates who was designated an AQ, wanted to be a TD because it was his father’s rate. By virtue of a pair of Special Request Chits, the Navy’s version of you can ask for anything and maybe you’ll get it forms, we were able to exchange positions.

In 1974 or 75 the Navy began airing a new batch of television recruiting commercials while I neared the end of my schooling. One of them stands out to this day, Drum roll, “Dawn, the South China Sea, flight deck of the USS Enterprise. You are there.” Some scenes of aircraft on the flight deck and it finished up with “Join the Navy it’s not just a job, it’s an adventure!” I was on my way.

In February of 1975 I reported to NAS Lemoore, California for training at VA 122 (Attack Squadron or ATKRON 122) (again more school). I arrived obligated for 6 years of active duty as a Third Class Petty officer. Something I signed up for while in Tennessee. But this time I was learning my trade and it was a hands-on type of school. I would be part of the Integrated Weapons Team (IWT) for the LTV (Ling, Tempco, Vought) A-7E Corsair II. I learned about the RADAR, Inertial Navigation System, the Tactical Computer, Weapons Delivery, Heads Up Display and a plethora of other equipment. It was actual work on the airplane. While there, two of my classmates and I were told to be prepared to travel immediately overseas. This was during the evacuation of Saigon. We remained on standby for a couple of weeks. In the end we finished our school normally. In June of 1975 I finally checked aboard VA-27. My first fleet unit, the “Royal Maces, were assigned to CVW-14 (Carrier Air Wing 14) which deployed aboard the aircraft carrier USS Enterprise! In January of 1976 the Air Wing went aboard Enterprise for the first time in the deployment cycle as she began REFTRA, (Refresher Training,) this was my first time at sea.

I spent a total of six years with VA-27, two back-to-back sea tours. I made two sets of work-ups and two full deployments to the Western Pacific and Indian Ocean, (WESTPAC/IO) aboard the “Big E” and another deployment aboard the USS Coral Sea CV-43. It turns out that I was good at electronic repair and troubleshooting. I liked what I was doing and so I had stumbled into a job that was my niche in the world, it caught my interest. I became a part of something bigger than just me, a valued member of a team. I found that working on jets on the flight deck was an adventure all right. I saw the world. I saw a bunch of water horizon to horizon too. The stars at night are something to behold at sea. I have a good collection of “Sea Stories that I love to trot out upon meeting (drinking) with other old salts. Most have some element of truth to them. Not long after I left VA-27 I was advanced to First Class Petty Officer.
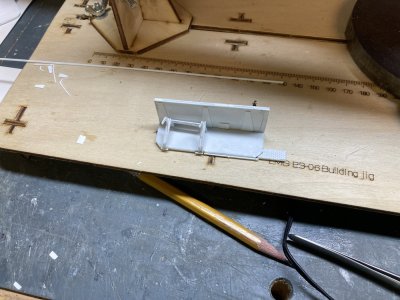
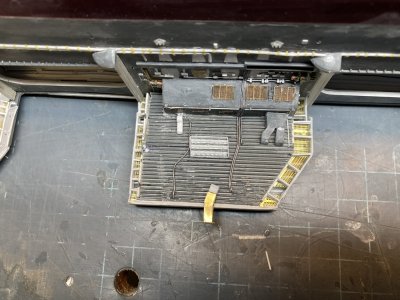
View attachment 506890

Enterprise outward bound from Alameda in 1978

I wanted a model of my first ship as she looked during the 1978 deployment with a full air wing, a time rich in memories for me. This was the ship’s final deployment with the beehive island and my second. I originally set out to build the 1/400 scale Aurora/Monogram/Revell, (A/M/R) kit of the Big E. (They even sold the Aurora version in the Enterprise ship’s store.) In 1992 a friend gave me his Aurora kit which he had started on. Later I found a Monogram version with a more modern air wing and I obtained one Arii aircraft set. I started on it in 2006 this was almost 20 years after I got the Aurora kit. I got a good way into building up a hanger bay for that kit. I had several errors corrected too.

As I labored over the hanger bay I kept finding new photos of the ship almost as soon as I scratch built a part which then required a rework of what I had just done. I quit trying to proceed on memory for everything. I made a good set of drawings to pin down details after scouring the internet for photos. The drawings were based on the 1/400 scale model. First I drew the hanger bay and then the exterior and finally some of the aircraft. I still fiddle with those drawings making corrections. Despite my best efforts I was unable to get any more aircraft sets. The only available one was the Otaki/Arii aircraft set which while not great had all the right types of planes except for the EA-3B Skywarriors. Shapeways sold several aircraft in that scale, but they were expensive and not all that good for the money. I could not find more of the Arii sets or if I did the seller wanted a prohibitive amount of money. With everything I had it wasn’t even half of the full air wing.

View attachment 506893

Work in progress on the hanger on the Monogram kit. I worked in a motorcycle shop at the time the and some of the plastic came from license plate inserts that I kept when the store changed it's name.

There were very few aftermarket parts available in 1/400 scale. There wasn’t even a purpose made set of photoetch. I learned how to make my own photoetch starting with the grated elevators. But this is very messy and labor intensive. Because of that and a warped and twisted hull that wouldn’t stay straight, (despite boiling water and clamping to a flat surface). I finally relegated it to the shelf of doom. I purchased the Arii kit of the early Enterprise but while it has better detail than the Monogram version, disappointingly it isn’t as accurate dimensionally. So I decided to get a 1/350 scale model having seen the Tamiya kit built up in many online posts and magazine articles. It looked very good although most of the builder’s spoke of errors they didn’t specify exactly what. There are a bunch of aftermarket items including additional aircraft in 1/350 scale. You can even buy a 3D printed hanger bay if you can afford it.

View attachment 506895

Elevator 4 from the Monogram kit with my photoetch grate.

Tamiya released their kit of the USS Enterprise CVN-65 in1984. Trumpeter produced what most sources say was a copy of the Tamiya kit in the 1990’s and then in 2001, Mini Hobby got the molds and brought out two versions of the kit, number 80501, Modern and 80502, Early. I found a source in China on eBay and purchased an “Early” version and waited nearly 6 months to get it because of the COVID pandemic. The early version turned out to be the same as the modern with the exception of 2 parts to represent the early beehive island. And those are not accurate. All the sponsons for the modern version are also present on the early version kit, CIWS mounts, MK-29 missile launchers, life raft canisters, antennas and the mast are in both kits. None of which is correct for the ship before 1980. There aren’t any alternate parts trees to truly represent the early version. The one advantage of the Mini Hobby kits is that they are significantly cheaper than the Tamiya. Mine was less than $50.00 and no shipping.

View attachment 506896

The instruction booklet

View attachment 506897

The motorization addendum

View attachment 506898

The parts in the box

View attachment 506899

Motor, battery box, transmission, metal parts and stand

View attachment 506912

The decal sheets the color is a bit too blue and the deck hatch decals should be a white center surrounded by a red and yellow band. The Tamiya sheet is the same but the blue color is more correct.

View attachment 506900

Sprue A

View attachment 506901
Sprue B

View attachment 506902

Sprue C

View attachment 506903

Sprue D. Note the beehive parts, those are the only things in the kit to represent the early version of the Enterprise.

View attachment 506905

Sprue E (X 2)

View attachment 506907

Sprue P (X 8) If you compare this to the Tamiya aircraft set number 1 you will see they are the same.

View attachment 506908

The Hull in the box (note that it is fitted together)

View attachment 506910

Hull and flight deck components compared to the 1/350 scale Fletcher class destroyer

In the box you will find 6 sprues of ship parts, 8 of aircraft, 3 sections of flight deck, a 3 piece hull which is fitted and screwed together but not glued up, 2 sections of stand, a bag of motorization parts and some metal braces and screws. There is a small sheet of decals for the ship and another for the aircraft. Essentially the same stuff with minor differences compared to the Tamiya kit. There is a 20 page, 7 3/8 x 10 ¼) black and white instruction booklet and an additional addendum sheet showing assembly of the motorization components. I watched a You Tube series by Ken Chee Kum , (Modelar)and he says that these motors are often in Mini Hobby Kits. Watching his build brought out a lot of the issues I would face. He used the Eduard photo etch in his build. I find that watching others building models to be very helpful. You can pick up great techniques and have a better idea of the pitfalls. The ship parts are in medium grey plastic except the lower hull which is appropriately in red, while the aircraft are light grey and the stand is black. The sprues are all bagged but not separately, 2 or more are bagged together. And all the aircraft are in one bag. The model is boxed in a sturdy cardboard tray but this is annoyingly slid into an end opening cardboard box. As soon as I started working on the model I modified the box so it could be opened from the top.

My first impression was this is the Tamiya kit. But the detail is on the soft side. None of the sponsons have the cut outs for the elevator supports to pass through. The A/M/R version has these. The upper hull is the same as Tamiya’s in the front and back sections but then it is further divided at the waterline. The Mini Hobby box is long enough to hold the full hull so they could have made the hull without the separate bow especially since the waterline section is a single piece. The flight deck is broken into 3 sections so you can access the batteries in the hull after you motorize it. I vaguely remember the Tamiya kit could be motorized also when it was first released. The beehive island part was reported to be oval rather than round in a review I read, but measuring with a digital caliper shows the parts to be the same in X - Y dimensions. The upper beehive should have 6 rows of Alford T type receiving dipole antennas. Four rows are exposed, some 240 little T’s. Thankfully the upper 2 rows were so fragile they were encased in a protective tube. The kit does not have anything to represent these. Their flight deck breaks down the same way as the Tamiya kit’s, even the metal brackets are similar. The switch for the motor would stick up through the flight deck midsection though! I can’t find any indication of this in any Tamiya builds. The decals for the ship appear to be too light in the blue areas.

I had picked up a Tamiya instruction booklet and a decal sheet from eBay and compared the two kits based on instruction guides. The sprues are lettered the same but they are not laid out identically. The part numbers are not the same. The Tamiya kit appears to have elevator 1 molded with the flight deck and you add the support structure to the underside. The remaining 3 are assembled from 3 parts. All the Mini Hobby elevators are molded separately, but only elevator 1 has a separate underside support structure. The remaining elevators assemble from 2 parts. The aircraft sprues will allow you to build 40 aircraft total but there will be 8 A-7E and 8 F/A-18A or C aircraft. No air wing included both types it was one or the other. Like the Tamiya kit there are no E-2B/C, SH-3D/H or EA-6B’s. Tamiya does make a second aircraft set to cover these planes and also adds F-4C Phantoms. F-4’s were replaced in most air wings by the F-14A’s again one or the other type. F-14’s couldn’t fly from Midway Class or earlier carriers.

I had purchased a set of scale drawings from the Floating Dry Dock in 1/192 scale while working on the Monogram model which were reduced to 1/400 and upped later to 1/350 scale. These were useful in getting my drawings right. The owner helped me a great deal with this he is a modeler as well as an entrepreneur. The plans are from his G series which is made up from USN Booklets of General Plans. These appear to be builder’s proposal drawings not the final product. Curiously the island has Pri-Fly (Primary Flight Control) on the same level as the Navigation Bridge a mistake also present on the A/M/R model. It was always on the level above the Navigation Bridge. Also drawn is a sponson forward of elevator 1 at the hanger deck level which was present on the just launched ship but then later was removed. I could not find any information about this. I do have a photo. The drawings matched the Monogram kit almost exactly but they were off for the Tamiya Kit (and the Arii.) The waterline dimensions were almost right on the money, but the length and width of the flight deck is too big. Maximum width of the flight deck, including catwalks is 257 ft. according to Bert Kinzey’s book. In 1/350 scale that would be 8.811 Inches. Mini Hobby’s measures 9.375 (9 3/8) inches at the widest point, 273 scale feet. The length is a bit long by about .25 inch. The three starboard elevators are out of position by .25 inch too far aft each. I believe these dimensional faults are present on the Tamiya kit also. I do not have any plans to fix these problems. I wasn’t willing to cut up the Arii model to fix similar errors either. The corrections would require a massive amount of work. Tape it all up and it looks like the Enterprise.

View attachment 506913

One of the many drawings I made this is the 1st deck drawing of the hanger bay

The larger flight deck should make it easier to place the whole air wing aboard. The real ship had problems with this for many years especially with the “Grumman Air Wings” of 70’s and 80’s. I intend to build the kit full hull but there is an error with the lower hull that I am thinking about correcting. The keel extends down the centerline aft and comes to a wide blunt end. This is wrong it should end in a tapered blade like shape. The Tamiya and Arii model also have the same problem. I’m not sure why this is wrong on so many kits. The A/M/R hull was more correct. With the full hull on display the error will be visible. Probably no one looking at it would know the difference but the full hull would look more graceful corrected. I do intend to add a full hanger bay. I purchased sheets large enough to cut out the whole thing from Evergreen Plastic.
Spending hours tweaking those tiny railings and fuel stations reminds me of the focus you need when chasing a big win at the tables. After a long session at the bench I always switch gears and hit up https://magyarkaszinokoldalak.com/ reliable hungarian casino guides that break down the best spots for slots blackjack roulette and solid poker action with real player reviews and juicy bonuses so the money side stays sharp and fun. The site keeps everything straight about safe options and big jackpot chances without any fluff which makes it easy to jump in for a quick round then get back to sanding and gluing.
The Mini Hobby kit gets a lot of flak for its fit issues, soft detail, and motorized hull remnants, but it definitely gives you a workable foundation if you're putting in the work to detail it.
 
Last edited:
Mikey I have been following your build from the start and have to say I admire the effort and detail you are putting in working in such small scale.
I Look forward to the rest of this great build

All the best JJ..
Thanks Jack, this build holds some significance for me and I appreciate the compliment.
 
The Mini Hobby kit gets a lot of flak for its fit issues, soft detail, and motorized hull remnants, but it definitely gives you a workable foundation if you're putting in the work to detail it.
It does but then the Tamiya kit has most of the same issues but it generally costs a lot more. I feel like I am closing in on the end now but in reality it will take another year. Thanks for reading and commenting.
 
Back
Top