Model Airways Sopwith Camel 1/16 scale [COMPLETED BUILD]

I was thinking same thing Dean, I'm at this point in the engine and it just don't seem right. If anything you would think it would have been milled at a u shape.
Dean, the front gear may have served a very important task. That is, and I am not sure if this is applicable to the Camel, for the pilot to be able to shoot through the propeller. This was achieved by means of an interruption device, which was controlled by a gear on the reverse of the engine. Just a thought.

Trevor
 
Dean, you have a created a very high bar for all of us who have these Model Airways kits. What makes your models so beautiful, has been your ability to remove all the char, or at least 99% of it, left from the laser etching process. Would you mind taking a few minutes to go through the process and techniques you have used?
Again, your models are beautiful and rate right up there with those displayed next to their 1:1 big brothers at the Boeing Museum of Flight.
 
Dean, the front gear may have served a very important task. That is, and I am not sure if this is applicable to the Camel, for the pilot to be able to shoot through the propeller. This was achieved by means of an interruption device, which was controlled by a gear on the reverse of the engine. Just a thought.

Trevor
I saw an illustration of the assembly of the motor, and I don’t remember if that was the case? But does sound feasible. However it just looks like the wires would be cut by the gear? Perhaps the model method of attachment is incorrect? In which case they would not wrap around the gear, but rather be attached on the backside?
 
Dean, you have a created a very high bar for all of us who have these Model Airways kits. What makes your models so beautiful, has been your ability to remove all the char, or at least 99% of it, left from the laser etching process. Would you mind taking a few minutes to go through the process and techniques you have used?
Again, your models are beautiful and rate right up there with those displayed next to their 1:1 big brothers at the Boeing Museum of Flight.
Thank you very much! I sanded the edges with sandpaper on most of the parts, except in the openings on the wing ribs. On the body there were a few places I actually painted the edges brown. Hope that helps!
 
Dean, you have a created a very high bar for all of us who have these Model Airways kits. What makes your models so beautiful, has been your ability to remove all the char, or at least 99% of it, left from the laser etching process. Would you mind taking a few minutes to go through the process and techniques you have used?
Again, your models are beautiful and rate right up there with those displayed next to their 1:1 big brothers at the Boeing Museum of Flight.
Dean,
I went back to your Feb of '22 post where you stated you had sanded the forming ribs of the wings to remove the char. As these parts are delicate, were you using 150 grit or was it higher? I apologize for being so pedantic, but the whole wing build you described and the pictures were pretty amazing.
Upon revisiting the build procedure mentally, I remembered the ribs for the wings were capped with strips of wood. This negated the need to sand those edges much, if at all.
I believe I used 180 grit or 220 grit, nothing too aggressive! You don’t want to change the profile. ;)
I left the holes in the middle untouched, as I liked the contrast the char gave them. It’s all about personal preferences. So you really don’t have to sand those if you don’t want to. ;)
 
Last edited:
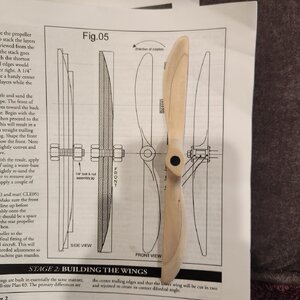
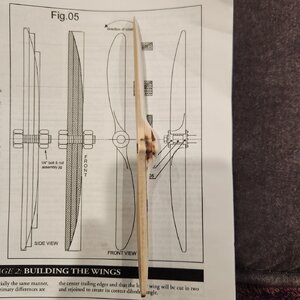
Then I did a search for Sopwith Camel propellers…and found this!
View attachment 290277
I knew then I wanted to make a propeller like this and use it.
So I started making another propeller, I made the hub more pronounced like the one above.
Here it is next to the first one…
View attachment 290278

Then I finished sanding, stained it, added the fade from the hub outwards, then painted the tips and finally clear coat added.
Here is my version…
View attachment 290279
I think it is very close to the pictured one above.
So I’m happy with this one! ;)
16894700695071863844431997864089.jpg

16894700964943863057701118889121.jpg
 
Worked on the lower wing today.
First I had to clean up all of the castings…
View attachment 295787

Then I glued the hinges on the ailerons and added the control horns. Then I painted the compression braces and added them.
View attachment 295790

Then I added the tension wires and turnbuckles…
View attachment 295791

Then it was time to do a little weathering and final details, like bolt heads. Then I glued the halves to the center channels and set them at the proper angle to establish the dihedral.

Later the channels will be glued into the lower fuselage.
View attachment 295792View attachment 295793View attachment 295794
Hey did you add wood too the stress braces? Looks to me like you cut off the ends then glued them to 1/32 × 1/32 wood. If so is that how it would have been originally?
 
Dean,
Been following your Camel build and it’s fabulous! I have the same kit but have put off building it because the lack of the cowl and woodwork around the cockpit and guns. Your 3D parts are just what the doctor ordered! Would it be asking too much to get those from you? I don‘t have the capacity to do such things. I’d gladly pay you for your effort. Let me know. Thanks!

Best Regards …. Rick
Thank you Rick.
Unfortunately I don’t own a printer at the moment, however I do have a friend with a printer. So let me look into the feasibility of getting some more parts printed. I have to find the CAD files first… ROTF
It has been a while since I made them.
 
Back
Top