-

Win a Free Custom Engraved Brass Coin!!!
As a way to introduce our brass coins to the community, we will raffle off a free coin during the month of August. Follow link ABOVE for instructions for entering.
-

PRE-ORDER SHIPS IN SCALE TODAY!
The beloved Ships in Scale Magazine is back and charting a new course for 2026!
Discover new skills, new techniques, and new inspirations in every issue.
NOTE THAT OUR FIRST ISSUE WILL BE JAN/FEB 2026
You are using an out of date browser. It may not display this or other websites correctly.
You should upgrade or use an alternative browser.
You should upgrade or use an alternative browser.
- Joined
- Mar 27, 2019
- Messages
- 823
- Points
- 403

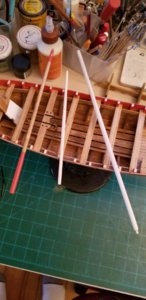
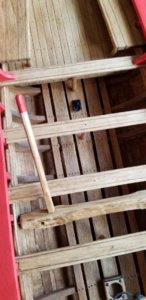
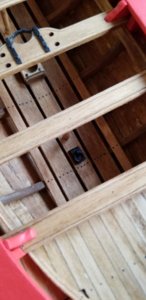
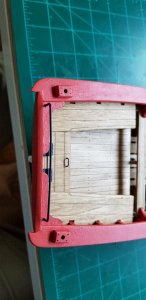
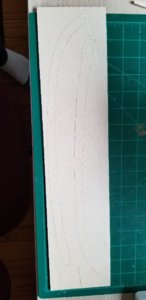
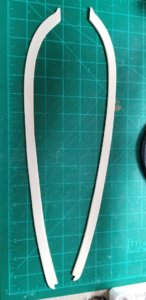
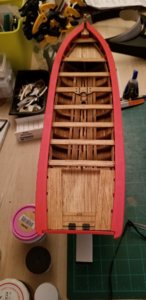
Finally my extra long 1/8" thick basswood sheets ready for pickup. Traced out the cap rails from the saved (and broken) two piece cap rails I previously made. I used CA glue 4 bulkheads at a time and laid down the completed cap rails on each side. No major problems except 4 bulkheads I did not fair properly and had to be shaved down and repainted.


- Joined
- Mar 27, 2019
- Messages
- 823
- Points
- 403

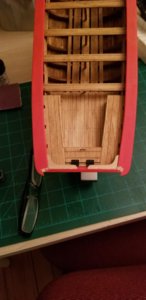
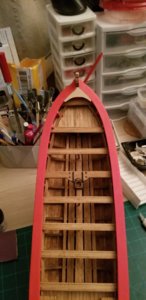
The laser provided Breast Hook did not remotely fit in between the cap rails and bow stem. My cap rails were mostly free hand so of course it wouldn't fit. I went about the same routine of cutting out a cardboard pattern to fit and then traced it onto a 1/16" inch thick basswood sheet. That fit pretty good with some putty to fill in minor cracks. Sanding and painting tomorrow.

- Joined
- Mar 27, 2019
- Messages
- 823
- Points
- 403

Kurt Konrath
Kurt Konrath
It may not have looked like that when built, but we all know what a ships carpenter and blacksmith can do to fix things!
- Joined
- Mar 27, 2019
- Messages
- 823
- Points
- 403

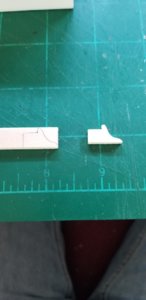
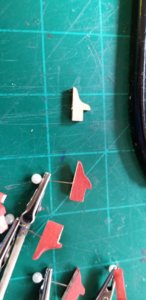
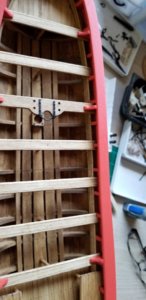
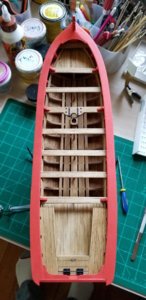
Transom knees, three in total per side. The kit has laser cut pieces included but I ended up scratch building mine.
The directions call for the placement of the bumper rail thingy that runs stem to stern exactly 3/8" down from the top of the bulkheads, refer to one of my earlier posts. The problem is that where the laser cut thwart knees are supposed to fit under the cap rail is much less than 3/8", and they are supposed to be flush with the bottom of the cap rail but there ends up being about a 1/16" gap. I think this another mistake in the plans. Anyway, no big deal to scratch the 6 thwart knees a bit taller and having them flush with the bottom of the cap rail just feels better.
You can see in the second pic how much taller my scratch built knees are compared to the laser cut ones.


- Joined
- Mar 27, 2019
- Messages
- 823
- Points
- 403

Construction of the windlass. Square stock made into a hexagon on the ends and the middle. Eight holes in total drilled out then made square to accept the windlass handles. Kit provided brass wire inserted in both ends and inserted in holes in the bumper rail thingy so that the windlass can rotate. This one actually does rotate
Windlass handles also square stock although smaller. Also hexagon in the middle.
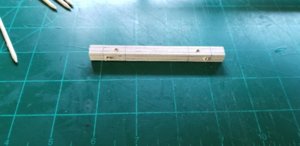
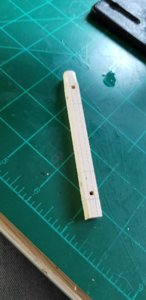
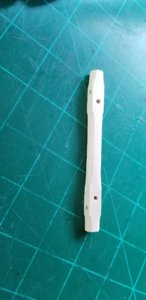
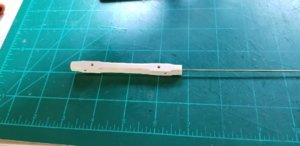
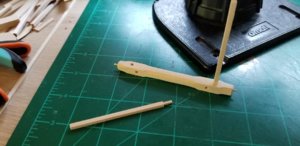
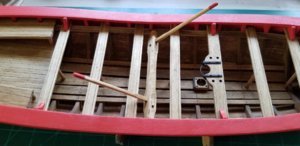
Windlass handles also square stock although smaller. Also hexagon in the middle.


Last edited:
- Joined
- Mar 27, 2019
- Messages
- 823
- Points
- 403

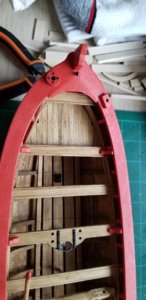
Mount for the main cannon plus the mount for forward swivel gun. There will also be two more swivel guns aft.
These mounts are all provided as laser cutouts. All one needs to do is sand off the laser char and on the swivel gun mounts to chamfer the upper edges just a bit.
For the main cannon mount there are also laser cut holes where iron bolts would be. The kit provided brass nails, cut down a bit, do the trick. I used brass black to darken them and also drilled out the four holes just a bit to accept the nails. For some things I really like using the brass black. The brass never ends up being super dark black but rather a grey-ish color which for simulated iron bolts look right to me. Larger items never take the brass black completely and I think painting black is better.
The swivel gun mounts don't have laser cut holes but I think would have been held down by iron bolts as well. I did the same as with the simulated tree nails: Punch a hole and twist a #2 pencil around a bit. These mounts held the smaller lighter swivel cannon so the bolts would have been smaller anyway.
Oh, and installed an iron ring just behind the bow stem for some future rigging.

- Joined
- Mar 27, 2019
- Messages
- 823
- Points
- 403

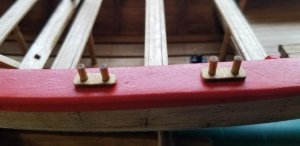
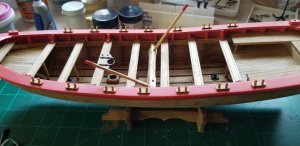
Construction of the oarlocks. The rectangular oarlocks are laser cut. Simple construction: sand off the laser char, chamfer the edges a bit, cut off lengths of dowel to fit in the laser cut holes of the oarlocks, then glue down. I did think that the practicum's direction to make the dowels 3/8" were too long, I mean they just looked way too long. I cut them to 1/4" instead.


Last edited:
- Joined
- Mar 27, 2019
- Messages
- 823
- Points
- 403

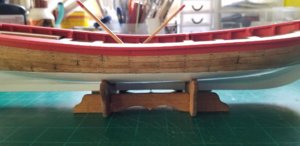
Construction of the rub rail. After painting the red stripe from the bottom of the cap rail down to 3/8" a "rub rail" is installed that wraps around from the bow stem to the transom, then across the transom. After installation a V needs to be cut exactly at the center line to accommodate the rudder.
I have no white paint at my dry dock here except white spray paint. If I constructed the entire rub rail and glued it to the side of the hull painting would be exceedingly difficult, what with masking and all. So I shaped the square stock into a half-round strip, then soaked and bent the strips using the usual method. I cut the transom portion of the rub rail exactly in half and then cut the V into the inside end of each piece. Then I dry mounted the port and starboard pieces of the rub rail and installed the transom pieces on each side (CA glue to hold, then pins, then putty, then sanding). Three coats of semi-gloss white and now I'm letting them dry for two full days.
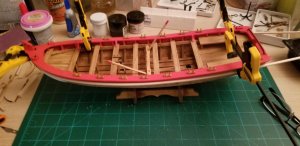
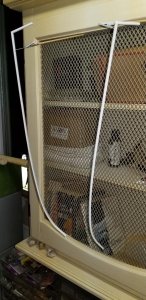
I have no white paint at my dry dock here except white spray paint. If I constructed the entire rub rail and glued it to the side of the hull painting would be exceedingly difficult, what with masking and all. So I shaped the square stock into a half-round strip, then soaked and bent the strips using the usual method. I cut the transom portion of the rub rail exactly in half and then cut the V into the inside end of each piece. Then I dry mounted the port and starboard pieces of the rub rail and installed the transom pieces on each side (CA glue to hold, then pins, then putty, then sanding). Three coats of semi-gloss white and now I'm letting them dry for two full days.


- Joined
- Mar 27, 2019
- Messages
- 823
- Points
- 403

I finally gave up on the kit provided laser cut rudder. Not for any fault of the rudder provided, rather my incompetence at painting the white at the bottom of the rudder. Minor imperfections that I insisted on fixing right away instead of waiting for the paint to dry, touching the wet paint by accident, or inexplicable puckering of the paint as it dried. 5 coats with fixing in between, nearly 1.5 weeks of trying.
I gave up and scratched up another rudder then quickly laid down 3 coats. The results are more than satisfactory. I'm intently letting that baby dry for at least 48 hours before I even think of touching it. The one I'm throwing away is on the right. You probably can't see the problems with it but they are there. Scratches, dents...out it goes.
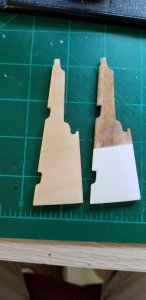
I gave up and scratched up another rudder then quickly laid down 3 coats. The results are more than satisfactory. I'm intently letting that baby dry for at least 48 hours before I even think of touching it. The one I'm throwing away is on the right. You probably can't see the problems with it but they are there. Scratches, dents...out it goes.

- Joined
- Mar 27, 2019
- Messages
- 823
- Points
- 403

Glued down the iron horse, but not before rigging up the block that will accept the boom rigging.
This block is stropped to the horse via a traveler ring which is why it has to be rigged prior to gluing down the horse.
In a related note: I glued down the mast.....before I read in the practicum to NOT GLUE DOWN THE MAST. I have no idea why so stay tuned for future developments.
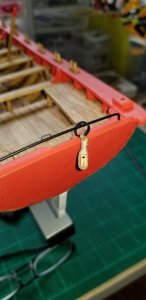
This block is stropped to the horse via a traveler ring which is why it has to be rigged prior to gluing down the horse.
In a related note: I glued down the mast.....before I read in the practicum to NOT GLUE DOWN THE MAST. I have no idea why so stay tuned for future developments.

Kurt Konrath
Kurt Konrath
Maybe you didn't see the note in practicum because your spectacles are still on the build stand under your ship....Glued down the iron horse, but not before rigging up the block that will accept the boom rigging.
This block is stropped to the horse via a traveler ring which is why it has to be rigged prior to gluing down the horse.
In a related note: I glued down the mast.....before I read in the practicum to NOT GLUE DOWN THE MAST. I have no idea why so stay tuned for future developments.
View attachment 147614
Kurt Konrath
Kurt Konrath
I really like the work and extra effort you put in to make the kit a little bit better.
- Joined
- Mar 27, 2019
- Messages
- 823
- Points
- 403

Maybe you didn't see the note in practicum because your spectacles are still on the build stand under your ship....
Hilarious. Or maybe I just got up from my nap and was still muzzy-headed. Or....perhaps I'd already had a drink, or two. I'm not saying.
Kurt Konrath
Kurt Konrath
We can blame it on the C-19 virus lag and delays
- Joined
- Mar 27, 2019
- Messages
- 823
- Points
- 403

Rudder and tiller finished....finally. My scratch built rudder came out pretty good. I traced out the basic rudder pattern on that same sheet of basswood that became available and sanded out the edges. Then I traced it out again, then sanded out the second piece. Then I glued the two patterns together and with a lot more sanding it was a twin with the original laser cut piece. Four coats of white paint, then let dry for 2+ days, then conditioned and stained. Finally, I added the previously made tiller. And red at the top of the tiller.
The practicum calls for whittling the very end of the tiller into a round dowel type protuberance which would then fit into a drilled hole into the top of the rudder front to back. My end-of-tiller dowel was not perfect and a bit off center. I found it much better to lop off the whittled dowel and then drill a hole in the back end of the tiller and add the dowel. This looks nice as what the tiller would have looked like through and through. Then I pinned the now flat back of the tiller and inserted into the front of the rudder.
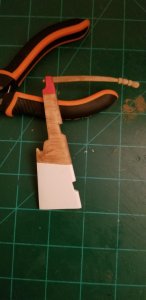
The practicum calls for whittling the very end of the tiller into a round dowel type protuberance which would then fit into a drilled hole into the top of the rudder front to back. My end-of-tiller dowel was not perfect and a bit off center. I found it much better to lop off the whittled dowel and then drill a hole in the back end of the tiller and add the dowel. This looks nice as what the tiller would have looked like through and through. Then I pinned the now flat back of the tiller and inserted into the front of the rudder.


