-

Win a Free Custom Engraved Brass Coin!!!
As a way to introduce our brass coins to the community, we will raffle off a free coin during the month of August. Follow link ABOVE for instructions for entering.
-

PRE-ORDER SHIPS IN SCALE TODAY!
The beloved Ships in Scale Magazine is back and charting a new course for 2026!
Discover new skills, new techniques, and new inspirations in every issue.
NOTE THAT OUR FIRST ISSUE WILL BE JAN/FEB 2026
You are using an out of date browser. It may not display this or other websites correctly.
You should upgrade or use an alternative browser.
You should upgrade or use an alternative browser.
- Joined
- Mar 27, 2019
- Messages
- 823
- Points
- 403

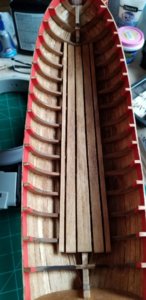
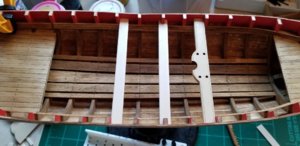
Next step is to install the floorboards. One center plank 1/2" wide, two neighboring planks 3/8" wide and two further planks on the extreme outside 1/4" wide. Well, the extreme outside floorboards are supposed to be 1/4" wide but as I indicated in an earlier post there are simply not enough 1/4" wide included in this kit for the hull planking let alone for other applications like this here. I am using 3/16" wide strips instead.
!!If you are going to do this kit buy more 1/4" x 1/16" planks in advance!!
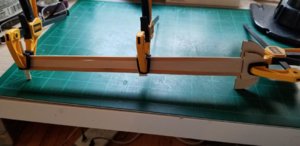
So, the center floorboard plank has to be tapered towards the bow per instructions. When the neighboring floorboards are laid down it's pretty tricky to glue them down and still maintain a 1/16" clearance evenly down the entire length of the floorboard, the strip has to be subtly curved as it's glued down. The solution is to soak the neighbor planks in hot water then edge clamp with the already tapered center floorboard until dry. Then stain and set aside. Tomorrow I'll glue them down and simulate nails.
The picture shows the (wet) outside floorboards edge clamped to the center floorboard. After drying the subtle curve is maintained and it should (fingers crossed) be easier to glue down with consistent spacing between boards.

- Joined
- Mar 27, 2019
- Messages
- 823
- Points
- 403

So....I was talking about soaking the floorboards then edge clamping to make it easier to keep the floorboards aligned. Forget all that. Just ignore that portion of the practicum. The curve just does not hold after removing the clamps, even after letting the strips dry overnight. In any case, it's not a huge problem. Placing a 1/6" strip in between each successive neighbor floorboard when gluing them down is more than sufficient. CA (medium) glue is best. Laying down a drop on each bulkhead, then laying the floorboard down one/two bulkhead(s) at a time keeping flush with the 1/6" spacer does the trick.

- Joined
- Mar 27, 2019
- Messages
- 823
- Points
- 403

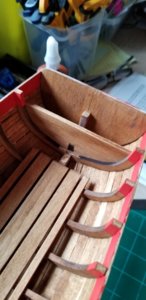
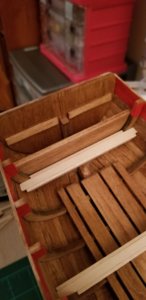
Stern locker bulkhead installed. This was actually the center portion of bulkhead #6 and shaped a bit to fit behind bulkhead #7, then two wood strips are glued to the inside of the transom. This is where the lid for the stern locker will be installed at a later step. "Stern Locker...think.....a Coleman cooler filled with ice and beer and placed at the aft end of your fishing boat. The stern locker was permanently installed on this armed longboat of course.


- Joined
- Mar 27, 2019
- Messages
- 823
- Points
- 403

Supports for the forward platform and the aft platform. No need to stain these pieces as they'll be underneath the platforms. Just keep 'em as level as possible port/starboard.
The instruction in the practicum to measure down 3/8" from the top of the strake to where the platform supports should rest is valid for the aft platform. There is very little curve on the rails aft, but there is a severe curve up towards the bow where the forward platform will be.
I'd advise locating the forward wood strip for the forward support at the 3/8" point down from the strake (or close to it depending on how you have sanded down the bow pillar) then when the glue dries on that piece lay a straight edge or wood strip on the glued in forward support. Eyeball it from a profile view and locate the aft support for the bow platform as close to level as you can estimate.
The practicum just says "install the bow supports as you did the aft supports". ??What?? No mention of measurements and no mention of that severe curve I mentioned. Initially I marked out 3/8" down from the strakes for both the forward and aft supports for this bow platform and it was almost comical how much it sloped down towards the stern. I decided to do it this way. Notice the pic with the forward platform supports. The aft support is much higher towards the strake as the forward support, this is to compensate for the curve downwards that the strake makes.
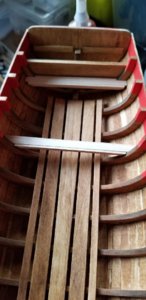
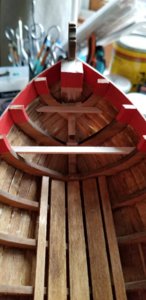


- Joined
- Mar 27, 2019
- Messages
- 823
- Points
- 403

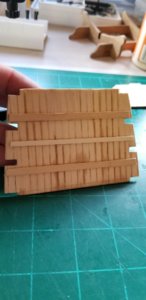
For the platform I started with a cardboard cutout roughly the dimensions of the platform (aft in this case) then kept scissoring away here and there until I got a pretty good tight fit with where the platform will fit in. On top of this cutout will be wood strips glued edge on with of course simulated caulking in between and iron nails when finished.
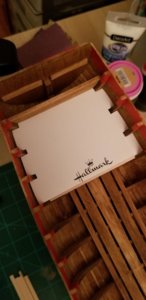
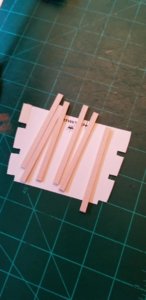


Great description and will be very helpful as I work through my model (when it finally arrives). Thanks.For the platform I started with a cardboard cutout roughly the dimensions of the platform (aft in this case) then kept scissoring away here and there until I got a pretty good tight fit with where the platform will fit in. On top of this cutout will be wood strips glued edge on with of course simulated caulking in between and iron nails when finished.
View attachment 142084View attachment 142085
- Joined
- Mar 27, 2019
- Messages
- 823
- Points
- 403

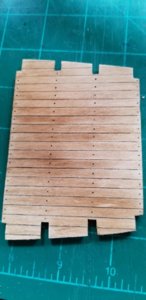
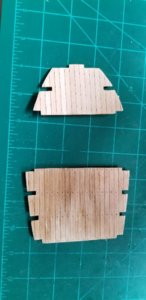
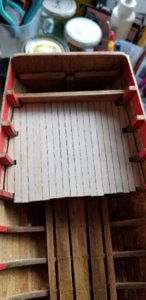
I was expecting the fab of the platforms would be more difficult. Don't get me wrong, perhaps 6 hours of labor went into the following pictures. But I was expecting more problems, more snags that would slow things down. I didn't have to redo anything. If I had any advise it would be to spend all the time you need making the cardboard cutouts and make them exact, and when you lay down the cardboard template on your edge glued wood strips trace out the outline precisely...and then cut out the wood slightly outside the lines, you can always sand down.
Template and actual cutout:
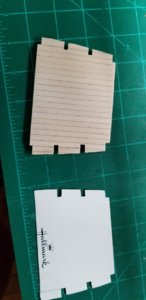
Template and actual cutout:


- Joined
- Mar 27, 2019
- Messages
- 823
- Points
- 403

- Joined
- Mar 27, 2019
- Messages
- 823
- Points
- 403

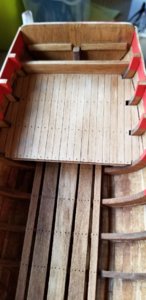
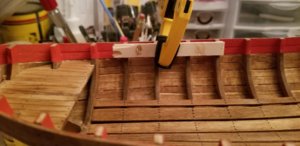
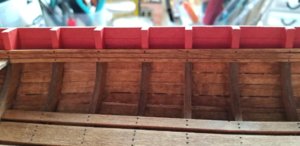
With the platforms glued down it's time to move on to the thwart risers. Think of them being bumpers along the inside of the hull just under the rail cap. The thwarts (seats) will lay down on top of the risers from port to starboard. It's not necessary to be exactly 3/8" down from the top of each bulkhead just that the measurement down from the top of the each bulkhead should be the same port and starboard, that way the thwarts will sit even side to side and to each other.
The plan calls for 1/4" wide strips, like I said earlier these are the same planks used for the hull planking and the kit didn't have enough strips for just the hull planking let alone for all the other furniture calling for this size strip. I have some 1/4" wide strips that are thinner than the kit strips and after installing the starboard side riser it looks just fine to me. In fact, having a thinner strip makes edge bending at the bow and stern easier.
Installation is much simpler if you soak the ends of two foot long strips in water, then clamp and let dry.
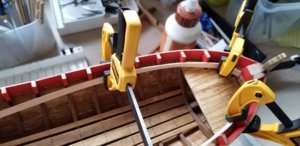

- Joined
- Mar 27, 2019
- Messages
- 823
- Points
- 403

I also had to modify this 1/4" strip because of my decision not to install the bow platform an even distance down from the rails. My platform is almost even with the keel rather than sloping towards the stern. I like the look much better. But the 1/4" riser as it interfaces with the bow platform makes it impossible to edge bend the riser as you glue it down bulkhead by bulkhead. By cutting out a notch (see pic below) a nice gentle curve is possible as the riser is glued down bulkhead by bulkhead bow to stern.
Also you can see the decorative lines along the riser. Just lay down a straightedge about 1/16" from each edge and run your #11 blade down the strip. Then widen the cut line with a punch. Move slowly, I trashed one strip because I was getting overconfident and was running the punch too quickly, so I turned the strip over to use the other side and trashed that side too. The decorative lines don't have to be perfect but the curly-q I made would have been too obvious.
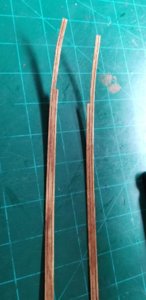
Also you can see the decorative lines along the riser. Just lay down a straightedge about 1/16" from each edge and run your #11 blade down the strip. Then widen the cut line with a punch. Move slowly, I trashed one strip because I was getting overconfident and was running the punch too quickly, so I turned the strip over to use the other side and trashed that side too. The decorative lines don't have to be perfect but the curly-q I made would have been too obvious.

Hi,I have some tipsAfter conditioning the wood I sanded again with 230 grit then stained with Minwax golden oak. I'll do the simulated tree nails then a second coat of stain.
I have a problem. I marked out the waterline and for the life of me I can't get masking tape to stick so I can get a nice crisp line for the white paint below the waterline. I've tried two different types and nothing will stick. Anybody have an idea on what I can use?
View attachment 141106
You must have a "bottomcolor"(varnisch or groundpaint),then the masking tape and then paint the "bottomcolor against the masking tape on that side you want a nice edge,let dry,paint your color and remove the tape at once after that
Hope you understand my English//Lasse
- Joined
- Mar 27, 2019
- Messages
- 823
- Points
- 403

So now with the thwarts (seats), starting with the laser cut thwart which will accomodate the mast at bulkhead C. This is the only laser cut thwart, the rest are fashioned out of 3/8" wide strips. Some will straddle a bulkhead and a notch will have to be cut out, some will be squared up with the hull and only require a very slight chamfer on the underside at each end to match the slight curve of the hull. All will have the same decorative lines and iron nail marks.
This picture clearly shows what I was saying earlier about the shear strake. This unsightly mess between the two aft thwarts is what you end up with if you don't use a single wood strip that runs from stem to stern. It looks like a V at the nadir of the curve rather than a graceful arc. The other side looks much better. I haven't figured out how yet but I'll have to cover this up somehow.
This picture clearly shows what I was saying earlier about the shear strake. This unsightly mess between the two aft thwarts is what you end up with if you don't use a single wood strip that runs from stem to stern. It looks like a V at the nadir of the curve rather than a graceful arc. The other side looks much better. I haven't figured out how yet but I'll have to cover this up somehow.

- Joined
- Mar 27, 2019
- Messages
- 823
- Points
- 403

Hi,I have some tips
You must have a "bottomcolor"(varnisch or groundpaint),then the masking tape and then paint the "bottomcolor against the masking tape on that side you want a nice edge,let dry,paint your color and remove the tape at once after that
Hope you understand my English//Lasse
Yep, that makes sense. Thank you Larsa!
After reviewing and thinking about this i think i am going to spile the planks using BEECH and 1/16inch X 3/8 inch, has been a long time since i did a POB build will get to it soon out of a lot of materials virus take ove. THANKS Don
- Joined
- Mar 27, 2019
- Messages
- 823
- Points
- 403

After reviewing and thinking about this i think i am going to spile the planks using BEECH and 1/16inch X 3/8 inch, has been a long time since i did a POB build will get to it soon out of a lot of materials virus take ove. THANKS Don
I think beachwood for the planking would look fantastic.

