Nice work on the rigging , its a fiddly job.
-

Win a Free Custom Engraved Brass Coin!!!
As a way to introduce our brass coins to the community, we will raffle off a free coin during the month of August. Follow link ABOVE for instructions for entering.
-

PRE-ORDER SHIPS IN SCALE TODAY!
The beloved Ships in Scale Magazine is back and charting a new course for 2026!
Discover new skills, new techniques, and new inspirations in every issue.
NOTE THAT OUR FIRST ISSUE WILL BE JAN/FEB 2026
You are using an out of date browser. It may not display this or other websites correctly.
You should upgrade or use an alternative browser.
You should upgrade or use an alternative browser.
Paul, a good deal. Now it remains to buy a rope winding machine (or make it yourself) and good threads. And you will take your rigging to the next level 
This took 10 tries to get it semi right. Different lines, different colors, different amount of threads..... even tried using a nylon covering for the weave. Finally settled on number 10 as the method that I will use. The ones that I make for the model will turn out better now that I know what to do. Now back to working other sections until the new thread arrives. Also the mouse model that is shown.....didn't work out, it needs to be longer and shaped like a cone as #10 is.
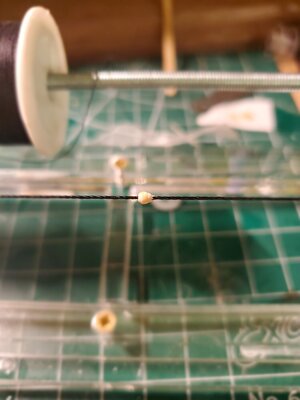
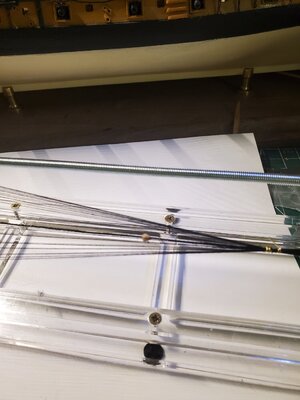
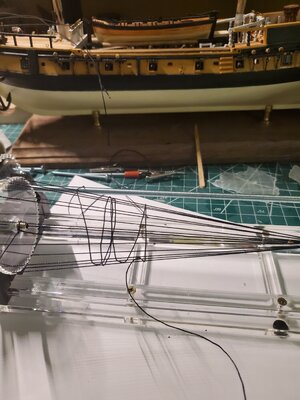
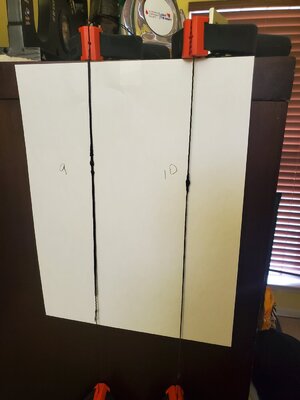
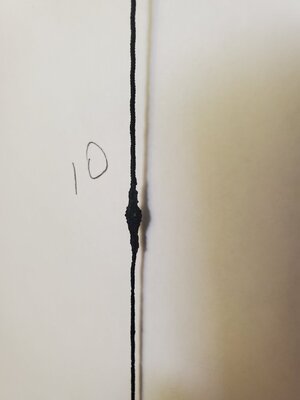


Your devise for winding/braiding the threads over the wood mouse form is amazing. I never would have known how you did this without your log photos stream. Where did you become aware of the devise and from where? That is a lot of foresightful work on your part. Nicely done. Rich (PT-2)This took 10 tries to get it semi right. Different lines, different colors, different amount of threads..... even tried using a nylon covering for the weave. Finally settled on number 10 as the method that I will use. The ones that I make for the model will turn out better now that I know what to do. Now back to working other sections until the new thread arrives. Also the mouse model that is shown.....didn't work out, it needs to be longer and shaped like a cone as #10 is.View attachment 251236View attachment 251237View attachment 251238View attachment 251239View attachment 251240View attachment 251241View attachment 251242View attachment 251244View attachment 251245View attachment 251246
Rich,Your devise for winding/braiding the threads over the wood mouse form is amazing. I never would have known how you did this without your log photos stream. Where did you become aware of the devise and from where? That is a lot of foresightful work on your part. Nicely done. Rich (PT-2)
It was on the Ship Work Shop page:
My problems were:
Figuring out how many strands to make, for this size it is 15.
The right line to use.
The proper shape for the mouse.
Properly applying tension and and tweezer help with tightening the weave.
When the line arrives that I just ordered, I'll do a step by step on it.
The ones that I make should turn out better.
Of course, Sasha might comer on and give some more advise.....
Early practice and experience is a great tack. . .practicing before the game and in the way that the game is played pays big dividends. Rich (PT-2)Rich,
It was on the Ship Work Shop page:
My problems were:
Figuring out how many strands to make, for this size it is 15.
The right line to use.
The proper shape for the mouse.
Properly applying tension and and tweezer help with tightening the weave.
When the line arrives that I just ordered, I'll do a step by step on it.
The ones that I make should turn out better.
Of course, Sasha might comer on and give some more advise.....That is why I wanted to get these pictures out there before I make them for the model.
Paul, have a good day. If About Sasha is about me, then I am ready to share some advice.Rich,
It was on the Ship Work Shop page:
My problems were:
Figuring out how many strands to make, for this size it is 15.
The right line to use.
The proper shape for the mouse.
Properly applying tension and and tweezer help with tightening the weave.
When the line arrives that I just ordered, I'll do a step by step on it.
The ones that I make should turn out better.
Of course, Sasha might comer on and give some more advise.....That is why I wanted to get these pictures out there before I make them for the model.
First you need to work with your rope machine. Because the cage is not dense.
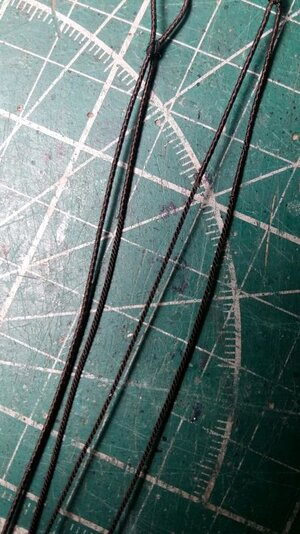

This was done by me not on a typewriter (I do not have one), but manually. I don’t know how the machine works, but after a dozen rolls I manually shift the winding by hand, as if compacting it.
Your served bight in the last photo is very well done and looks like it was woven into the line before being served. I will have to think about a way to do that with my hand crank Syrene Serv-O-Matic which works OK for serving straight lines. . . at least so far. Great work you do. RichPaul, have a good day. If About Sasha is about me, then I am ready to share some advice.
First you need to work with your rope machine. Because the cage is not dense.View attachment 251274View attachment 251275
This was done by me not on a typewriter (I do not have one), but manually. I don’t know how the machine works, but after a dozen rolls I manually shift the winding by hand, as if compacting it.
The thickness of the thread on the mousing itself should be thinner than the rope itself and much thinner. The number of longitudinal threads should always be odd (everything is correct here). Something like that. If something is not clear explained, ask.
Rich, thanks. While winding on a typewriter, try to stop after about 10 turns and push the winding towards the beginning with your hand, as if compacting it. I'll say it again, I don't have a car (I do it with my hands), I don't know how it works, but you can try it.Your served bight in the last photo is very well done and looks like it was woven into the line before being served. I will have to think about a way to do that with my hand crank Syrene Serv-O-Matic which works OK for serving straight lines. . . at least so far. Great work you do. Rich
Sasha, thanks.The thickness of the thread on the mousing itself should be thinner than the rope itself and much thinner. The number of longitudinal threads should always be odd (everything is correct here). Something like that. If something is not clear explained, ask.
Next question, is there a specific type of thread that should be use, nylon....cotton.... ?
Paul, I'm using Gutermann threads. They will not lint like cotton. There is no need to push through the wax and burn the pile. I use Guterman Tera 180 and Skala 240. Skala 240 is very thin for a rope less than 0.3 mm. I weave all the ropes of the standing rigging from Tera 180. Color No. 696.Sasha, thanks.
Next question, is there a specific type of thread that should be use, nylon....cotton.... ?
Thanks SashaPaul, I'm using Gutermann threads. They will not lint like cotton. There is no need to push through the wax and burn the pile. I use Guterman Tera 180 and Skala 240. Skala 240 is very thin for a rope less than 0.3 mm. I weave all the ropes of the standing rigging from Tera 180. Color No. 696.
I ordered the Guterman threads. I also checked out a local upholstery store to see if they had anything close to it what I ordered.
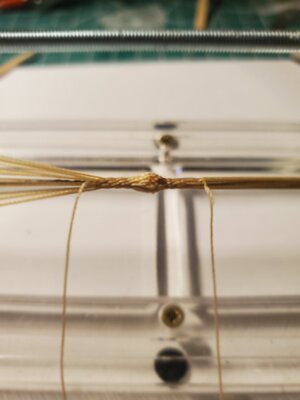
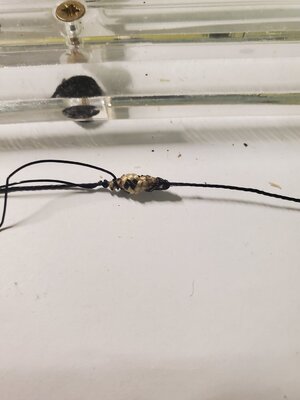
I found a close match and decided to try for #11. This one turned out okay I think. It might end up going on the model. I need a little more practice weaving the mouse.... might try a little different shape. I can't really go wider...because the dowel one fit in the dremel. The next mouse I might try building with the thread.....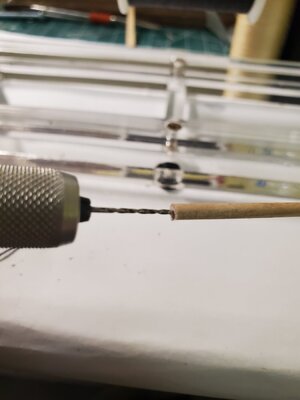
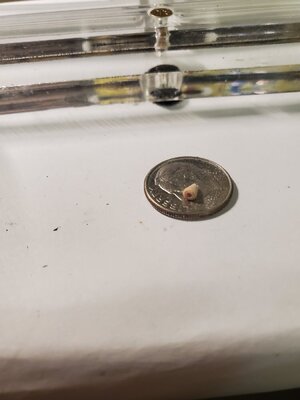
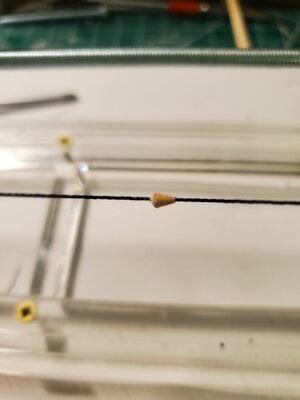
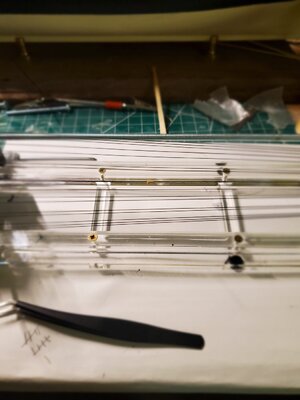
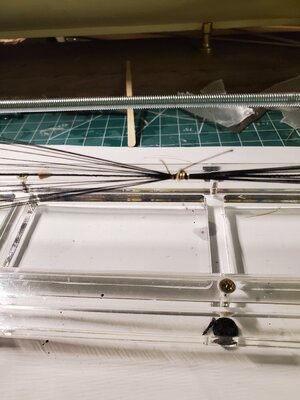
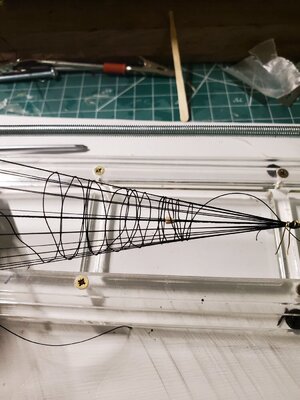
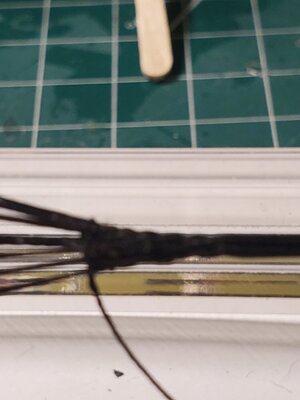
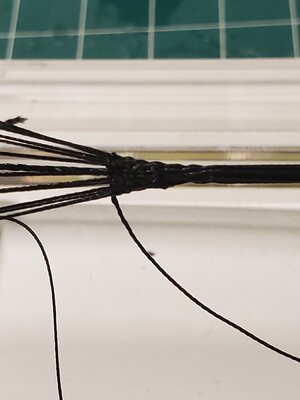
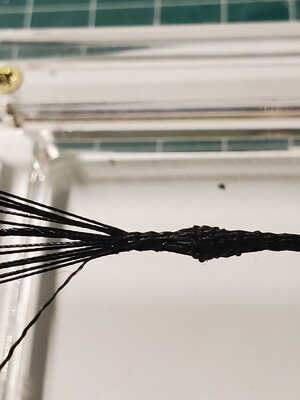
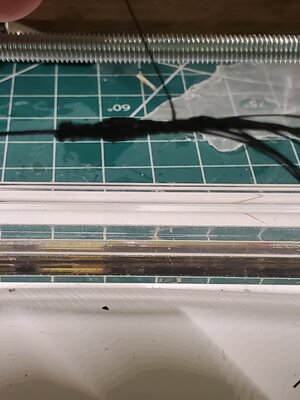
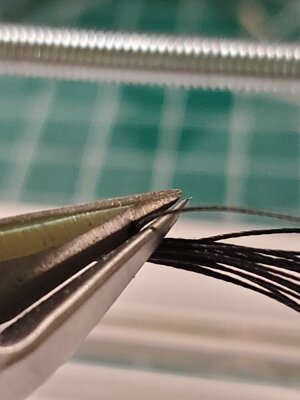
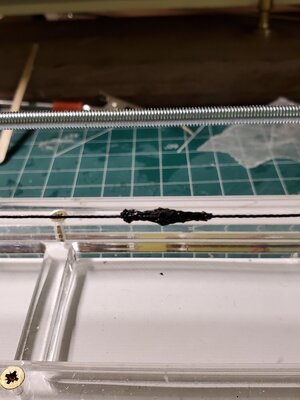
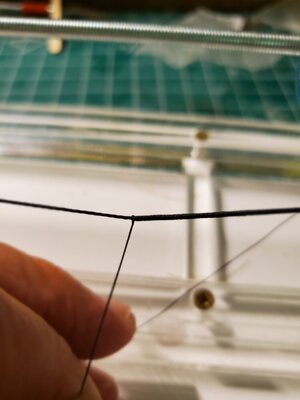
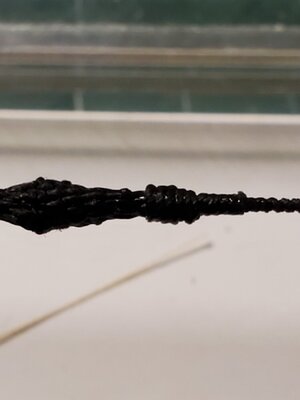
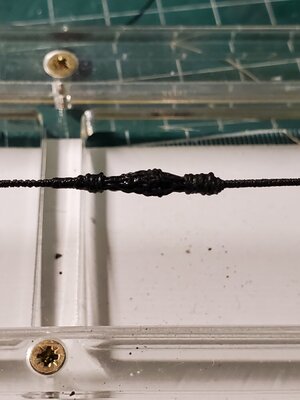
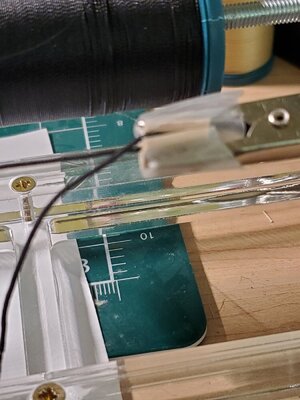
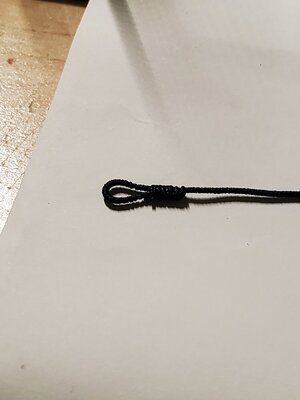
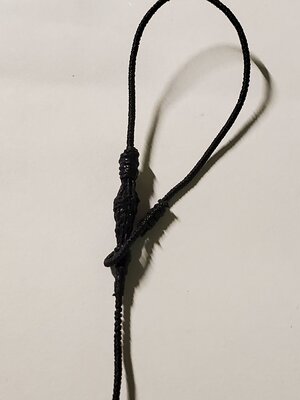

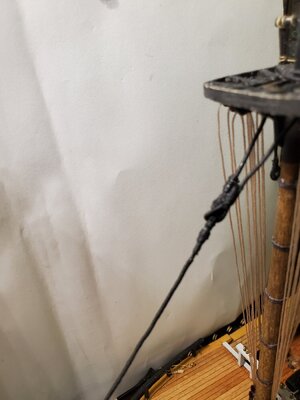
I found a close match and decided to try for #11. This one turned out okay I think. It might end up going on the model. I need a little more practice weaving the mouse.... might try a little different shape. I can't really go wider...because the dowel one fit in the dremel. The next mouse I might try building with the thread.....


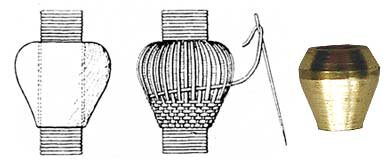
I am wondering how the spiral of thread gets woven over and under the threads coming from the sides???? You are doing well with this part of the rigging and I see a forest of falls beside the mast. You will have a very presentable ship. Rich (PT-2)I ordered the Guterman threads. I also checked out a local upholstery store to see if they had anything close to it what I ordered.
I found a close match and decided to try for #11. This one turned out okay I think. It might end up going on the model. I need a little more practice weaving the mouse.... might try a little different shape. I can't really go wider...because the dowel one fit in the dremel. The next mouse I might try building with the thread.....View attachment 251537View attachment 251538View attachment 251539View attachment 251540View attachment 251541View attachment 251542View attachment 251545View attachment 251546View attachment 251547View attachment 251548View attachment 251549View attachment 251551View attachment 251552View attachment 251553View attachment 251554View attachment 251555View attachment 251556View attachment 251557View attachment 251558View attachment 251559
Rich,I am wondering how the spiral of thread gets woven over and under the threads coming from the sides???? You are doing well with this part of the rigging and I see a forest of falls beside the mast. You will have a very presentable ship. Rich (PT-2)
I don't understand what you are asking. Keep in mind, I'm left handed and a retired Infantryman....
The forest is for the yards. I'm doing crowsfeet so I needed to pre rig that before I put the shrouds on. Once the shrouds are on.... I don't think I'll be able to thread the blocks.
I was looking at your mouse woven covering and trying to match that to your devise, photos shown, and the separate illustration of passing thread over and under with a needle to "weave" that covering which you seem to be able to do with your devise. I'll never put a lefty or infantry man down and your work is well coordinated. RichRich,
I don't understand what you are asking. Keep in mind, I'm left handed and a retired Infantryman....
The forest is for the yards. I'm doing crowsfeet so I needed to pre rig that before I put the shrouds on. Once the shrouds are on.... I don't think I'll be able to thread the blocks.
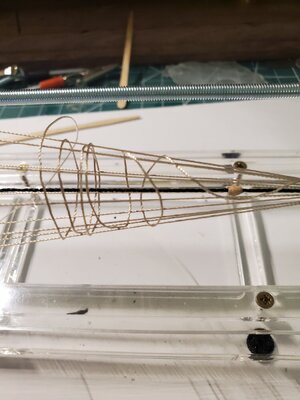
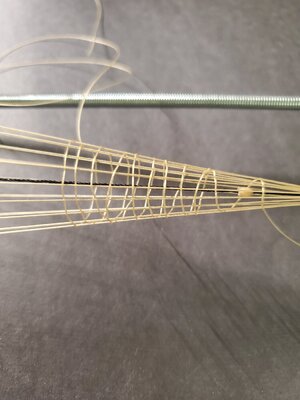
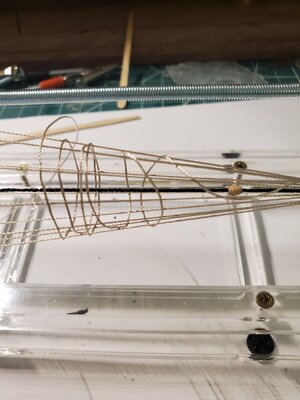
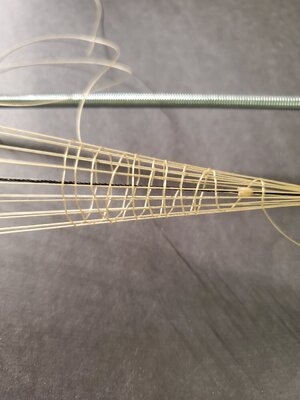
Got it. I start the weave close to the big end using my fingers and tweezers.
Under and over, as it progresses I gently push the line to the right with tweezers.
I don't tighten the line until I have 4 loops past the mouse.
At that point I pull the loose end on the right and the weave starts to form.
About mid weave on the mouse I need to start tightening from the right side at the mouse, not from the left lose end but from where the weave has formed on the mouse.
This takes up most of the time because now I am tightening using tweezers.
Once past the left edge of the mouse, it starts to go faster again.
I came to this method because it is too hard to see the individual strands when they are closer together around the mouse. If you miss one strand, say #4 of 15 while making the loops, you lose the weave. Weaving where it is wide makes it easier to see if you went under when you should have gone over.
Now that I have explained this..... I will use two different colors. Black for the 15 lines and tan for the weave. I will be able to see very quickly if I missed a line because of the color offset. This will save time because I won't have to unleavened to correct a mistake, the mistake would be obvious the moment I make it.
I take more pictures of that part of the process on my next attempt.
This 11th attempt will not be on the ship. There were two places that I didn't tighten the serve enough, one around the mouse going towards the bowsprit and another point about midway to the bowsprit. I didn't see that until I took a picture, I corrected it but now the line isn't long enough. Once it is attached to the heart, there will be about a 3/4 inch gap between the 2 hearts... too much for this scale.
So, attempt 12 will be the first one for the ship.


Last edited:
Oh, I see the over and under spiral now. Thanks for the close view. RichGot it. I start the weave close to the big end using my fingers and tweezers.
Under and over, as it progresses I gently push the line to the right with tweezers.
I don't tighten the line until I have 4 loops past the mouse.
At that point I pull the loose end on the right and the weave starts to form.
About mid weave on the mouse I need to start tightening from the right side at the mouse, not from the left lose end but from where the weave has formed on the mouse.
This takes up most of the time because now I am tightening using tweezers.
Once past the left edge of the mouse, it starts to go faster again.
I came to this method because it is too hard to see the individual strands when they are closer together around the mouse. If you miss one strand, say #4 of 15 while making the loops, you lose the weave. Weaving where it is wide makes it easier to see if you went under when you should have gone over.
Now that I have explained this..... I will use two different colors. Black for the 15 lines and tan for the weave. I will be able to see very quickly if I missed a line because of the color offset. This will save time because I won't have to unleavened to correct a mistake, the mistake would be obvious the moment I make it.
I take more pictures of that part of the process on my next attempt.
This 11th attempt will not be on the ship. There were two places that I didn't tighten the serve enough, one around the mouse going towards the bowsprit and another point about midway to the bowsprit. I didn't see that until I took a picture, I corrected it but now the line isn't long enough. Once it is attached to the heart, there will be about a 3/4 inch gap between the 2 hearts... too much for this scale.
So, attempt 12 will be the first one for the ship.
View attachment 251595View attachment 251596


