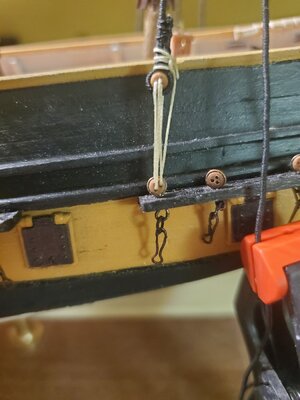
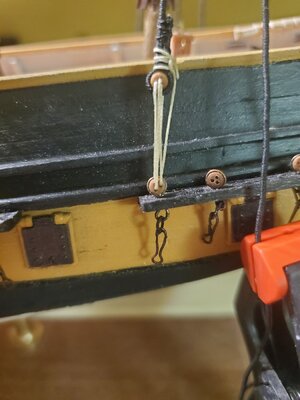
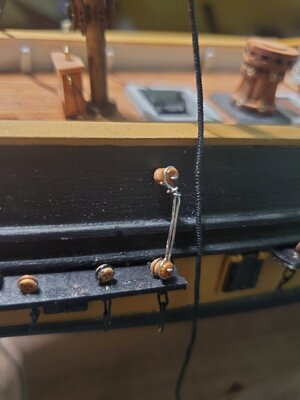
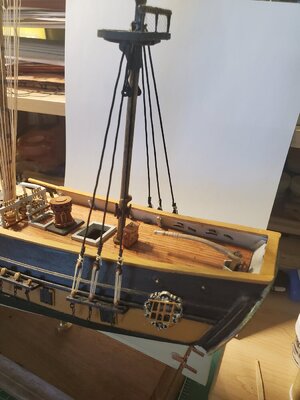
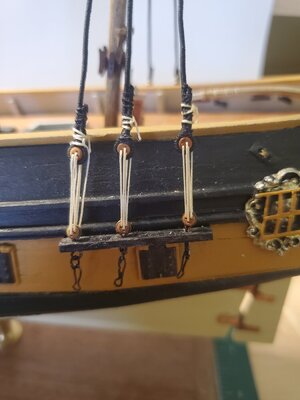
Your method of lacing the lanyards before attaching them to the shroud or chain-plate in a downwards rotation is a revelation to me. I had not considered lower chain-plate deadeyes as moveable and had not tried to tension the shroud from above the upper deadeye. I had seen the wire spacer but did not understand the application for it to provide tension while the upper shroud was secured. It is more precise than my flat jig approach where the shrouds are formed around a dowel at one end and then tensioned for tying the ratlines and lastly the end deadeye. It is less precise than your sequence. Too late for your loose deadeyes lacing method for me now but I'll use it on the next model. Thanks, RichServed 10 shrouds and started rigging the deadeyes....
I'm thinking that I run the shrouds from the mast top and then connect them to the deadeyes.... making sure to keep it even... secure the deadeyes so they don't move or secure the shroud and then adjust the deadeyes???
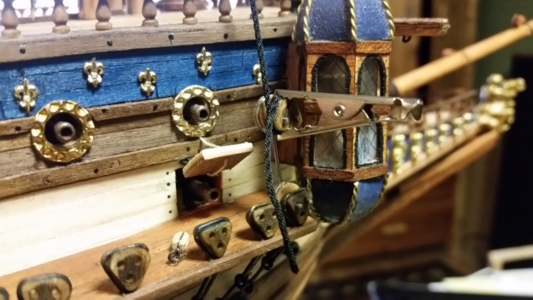
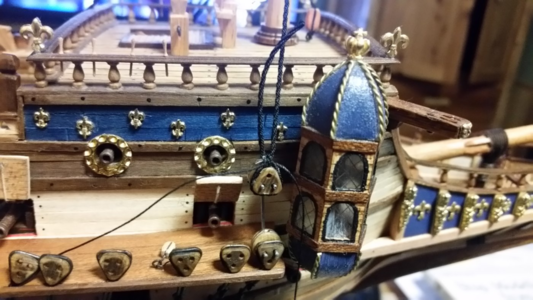
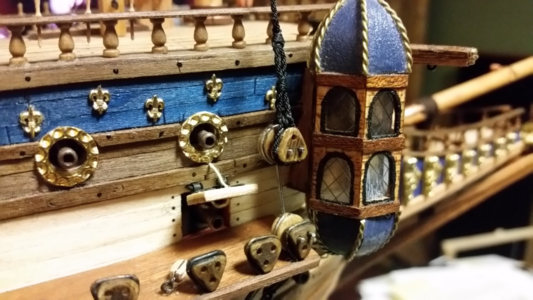
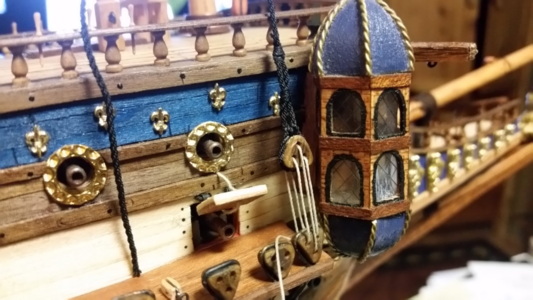
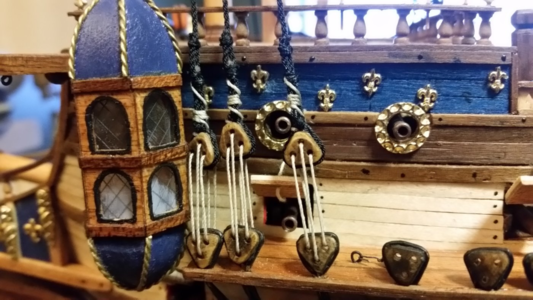
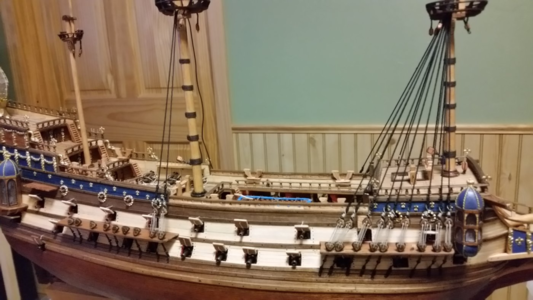
View attachment 253726View attachment 253727View attachment 253728
Is there a better way?
-

Win a Free Custom Engraved Brass Coin!!!
As a way to introduce our brass coins to the community, we will raffle off a free coin during the month of August. Follow link ABOVE for instructions for entering.
-

PRE-ORDER SHIPS IN SCALE TODAY!
The beloved Ships in Scale Magazine is back and charting a new course for 2026!
Discover new skills, new techniques, and new inspirations in every issue.
NOTE THAT OUR FIRST ISSUE WILL BE JAN/FEB 2026
You are using an out of date browser. It may not display this or other websites correctly.
You should upgrade or use an alternative browser.
You should upgrade or use an alternative browser.
Rich,Your method of lacing the lanyards before attaching them to the shroud or chain-plate in a downwards rotation is a revelation to me. I had not considered lower chain-plate deadeyes as moveable and had not tried to tension the shroud from above the upper deadeye. I had seen the wire spacer but did not understand the application for it to provide tension while the upper shroud was secured. It is more precise than my flat jig approach where the shrouds are formed around a dowel at one end and then tensioned for tying the ratlines and lastly the end deadeye. It is less precise than your sequence. Too late for your loose deadeyes lacing method for me now but I'll use it on the next model. Thanks, Rich
I'm not sure if my method will work....
I'm hoping Sasha will come on and give me some rudder adjustments.
A common way is to install the shrouds in pairs, port and starboard, from fore to aft, and tying the upper deadeye at the correct location on the shroud line using the jig similar to the one below. Then the deadeyes are lashed. This will avoid getting tangles and wrestling with the deadeye lashings, and is quite easy once you do a few.
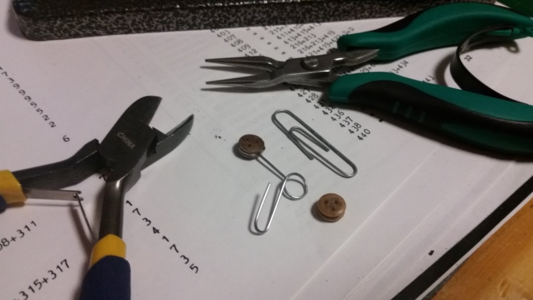
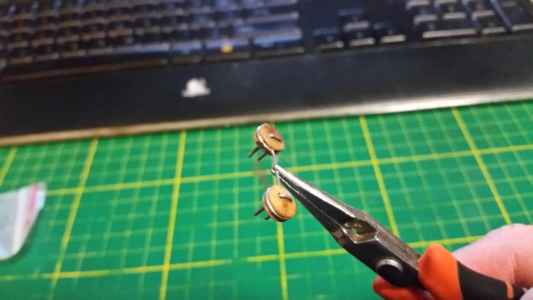
Wrap the shroud round the deadeye and set the desired tension. Secure the shroud like to the deadeye with a bit of CA that was applied to the groove of the deadeye.
Sieze the shroud at the top of the deadeye. Use thin needles and a needle nosed pliers to make maneuvering of the siezing line easier, and alligator clips to hold the end of the shroud out of the way above. Ensure no gap between the deadeye and the loop of the shroud remains. Secure the seize with diluted PVA glue.
Bind the bitter end of the shroud to the standing part as shown, apply diluted PVA to the siezes, the cut the shroud end to length.
Remove the jig and lash the deadeyes. If you were good at making the shroud tensions even, then adjusting the distance between the deadeyes to make the top deadeyes line up in a perfectly straight, horizontal row will not pull your mast out of alignment. Using poly material for the shrouds gives you more room for error in the tension because it is stretchy. Cotton or linen do not stretch easily, so care should be taken in making the tension even from port to starboard. Periodically check your mast alignment to be sure you are not over tensioning the shrouds and distorting the masts. There should be a slight tension on each shroud, and zero slack.
Tie off your deadeye lashings in the manner befitting the time period and method for your ship. There are variations.
When viewed from the side, the shrouds should ALWAYS line up perfectly with the angle of the chainplates below the chainwales, since the chainplates transfer the tension of the shrouds to the hull, and no side pressure is applied to the chainwale. If there is interference with gun ports, the location of the shroud should be shifted fore or aft to ensure the gun has a clear field of fire.


Wrap the shroud round the deadeye and set the desired tension. Secure the shroud like to the deadeye with a bit of CA that was applied to the groove of the deadeye.

Sieze the shroud at the top of the deadeye. Use thin needles and a needle nosed pliers to make maneuvering of the siezing line easier, and alligator clips to hold the end of the shroud out of the way above. Ensure no gap between the deadeye and the loop of the shroud remains. Secure the seize with diluted PVA glue.

Bind the bitter end of the shroud to the standing part as shown, apply diluted PVA to the siezes, the cut the shroud end to length.

Remove the jig and lash the deadeyes. If you were good at making the shroud tensions even, then adjusting the distance between the deadeyes to make the top deadeyes line up in a perfectly straight, horizontal row will not pull your mast out of alignment. Using poly material for the shrouds gives you more room for error in the tension because it is stretchy. Cotton or linen do not stretch easily, so care should be taken in making the tension even from port to starboard. Periodically check your mast alignment to be sure you are not over tensioning the shrouds and distorting the masts. There should be a slight tension on each shroud, and zero slack.

Tie off your deadeye lashings in the manner befitting the time period and method for your ship. There are variations.

When viewed from the side, the shrouds should ALWAYS line up perfectly with the angle of the chainplates below the chainwales, since the chainplates transfer the tension of the shrouds to the hull, and no side pressure is applied to the chainwale. If there is interference with gun ports, the location of the shroud should be shifted fore or aft to ensure the gun has a clear field of fire.

Last edited:
You have very precise work that is shown. The method is clear and demands patient moves. The scale of the model facilitates this. For smaller modeling the steps would be the same except that everything is smaller and becomes a greater challenge. Beautiful ship. Thanks, Rich (PT-2)A common way is to install the shrouds in pairs, port and starboard, from fore to aft, and tying the upper deadeye at the correct location on the shroud line using the jig similar to the one below. Then the deadeyes are lashed. This will avoid getting tangles and wrestling with the deadeye lashings, and is quite easy once you do a few.
View attachment 253770
View attachment 253771
Wrap the shroud round the deadeye and set the desired tension. Secure the shroud like to the deadeye with a bit of CA that was applied to the groove of the deadeye.
View attachment 253772
Sieze the shroud at the top of the deadeye. Use thin needles and a needle nosed pliers to make maneuvering of the siezing line easier, and alligator clips to hold the end of the shroud out of the way above. Ensure no gap between the deadeye and the loop of the shroud remains. Secure the seize with diluted PVA glue.
View attachment 253773
Bind the bitter end of the shroud to the standing part as shown, apply diluted PVA to the siezes, the cut the shroud end to length.
View attachment 253774
Remove the jig and lash the deadeyes. If you were good at making the shroud tensions even, then adjusting the distance between the deadeyes to make the top deadeyes line up in a perfectly straight, horizontal row will not pull your mast out of alignment. Using poly material for the shrouds gives you more room for error in the tension because it is stretchy. Cotton or linen do not stretch easily, so care should be taken in making the tension even from port to starboard. Periodically check your mast alignment to be sure you are not over tensioning the shrouds and distorting the masts. There should be a slight tension on each shroud, and zero slack.
View attachment 253775
Tie off your deadeye lashings in the manner befitting the time period and method for your ship. There are variations.
View attachment 253776
When viewed from the side, the shrouds should ALWAYS line up perfectly with the angle of the chainplates below the chainwales, since the chainplates transfer the tension of the shrouds to the hull, and no side pressure is applied to the chainwale. If there is interference with gun ports, the location of the shroud should be shifted fore or aft to ensure the gun has a clear field of fire.
View attachment 253777
The 1:64 scale USS Rattlesnake model he is working on has deadeyes that are the same size as the main shrouds on La Couronne, which is 1:100 scale. The smallest deadeyes on La Couronne were 3mm, and the same process was used because it avoids tangles. Plus, there's much less of a chance of lashing an upper and lower deadeye backwards, because you can see what you're doing.You have very precise work that is shown. The method is clear and demands patient moves. The scale of the model facilitates this. For smaller modeling the steps would be the same except that everything is smaller and becomes a greater challenge. Beautiful ship. Thanks, Rich (PT-2)
I have never used the method by which a set of shrouds and ratlines are made on a triangular jig, then attached as an assembly to the model for fear of having some of the shroud lines being loose in tension or the ratlines not be horizontally level or too loose. That method works for some people. For me, I can control the line tension and ratline placement much better working directly on the model, which sits in a multi-positional keel vice so as to allow my arms to be steady and comfortable.
Last edited:
Next question; from what I have been able to find, the shrouds are under the stays on the tops of the masts. If I secure the shrouds to the deadeyes.... it is going to be very difficult to anchor the stays along the center line....
Is the proper order to secure the shrouds up top, then secure the stays up top and then the bottom ends of the stays followed by securing the bottom ends of the shrouds?
Is the proper order to secure the shrouds up top, then secure the stays up top and then the bottom ends of the stays followed by securing the bottom ends of the shrouds?
I have been trying to consider the sequence of stepping the mast and then standing rigging to secure it. It is a bit of a balancing act as I have never been present when a full sized schooner was set up before sailing from a winter all spars down for storage and repairs. On my MS2130 BN rigging details for the top masts the shrouds are placed before the stays aligned along the midship center/keel line.Next question; from what I have been able to find, the shrouds are under the stays on the tops of the masts. If I secure the shrouds to the deadeyes.... it is going to be very difficult to anchor the stays along the center line....
Is the proper order to secure the shrouds up top, then secure the stays up top and then the bottom ends of the stays followed by securing the bottom ends of the shrouds?
For other types of ships I cannot say as I have not studied or done one.
Rich
Kit instructions are often horrible at telling you the sequence of rigging lines. Corel does a good job in guiding the rigging sequence with a series of drawings that you follow in a specific order. Often, you have to figure it out on your own. There are conventions many modelers follow in the order of rigging, and forums offer some guidance, but they are scant compared to help you find with planking and hull work. This is especially true for older vessels like 17th century men of war that have much more rigging than later ships.
In general, the stays are typically rigged after the shrouds. However, if you are concerned that the masts may be bent rearward as the shrouds are tensioned, there is an easy way to preserve the precise angular position of the masts. Tie temporary stay lines to the masts, starting between the masthead of the fore mast (above the shroud loops) and the bowsprit, and main mast masthead to the bottom of the foremast. These lines are temporary, and a great way to prevent distortion of the masts while you work on the lower shrouds. When the shrouds are done, cut the temporary stay lines free.
You will also want to use temporary lines later in construction to support the topmasts and topgallant masts to ensure everything stays lined up where you want it. I also used temporary brace lines in the last stages of the rigging process to hold the yard arms at the desired angle while rigging the running rigging for the sails and yardarms.
Thread is cheap. Misalignments made as you rig are work and time intensive to correct, if you can correct them at all! Check alignment of masts and yards frequently throughout the rigging process.
When all the lower shrouds are down, rig the stay lines. At that point the ship should look like this:
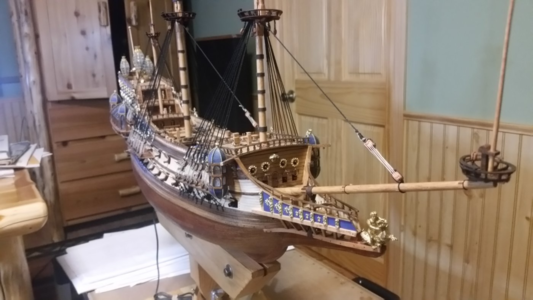

Last edited:
Thanks for the guidance. I'm not really concerned with the rearward bend. I think I need to do the shrouds on the mizzen first, then the stays. Move forward to the main mast and repeat.
I was originally thinking that I had to do all the shrouds first, then the stays. It would have been very difficult to anchor the mizzen stays if the main mast shrouds were already up.
So..... one mast at a time starting aft...
Does that make sense?
I was originally thinking that I had to do all the shrouds first, then the stays. It would have been very difficult to anchor the mizzen stays if the main mast shrouds were already up.
So..... one mast at a time starting aft...
Does that make sense?
It will be harder to rig the stays and running rigging for the mizzen once the main shrouds are up. I usually start at the front of the ship by supporting the foremast with a temporary stay, then work aft. You have to weight the advantages and disadvantages of the direction of progress to reduce the number of closed off areas and finger traps later in the rigging process. Ratlines will close off access a bit more after you finish the shrouds. Tying lines to belaying points and leaving lengths of line loose until routing them later may save you some difficult work tying to belaying points later. You have to judge when and where to apply this method.Thanks for the guidance. I'm not really concerned with the rearward bend. I think I need to do the shrouds on the mizzen first, then the stays. Move forward to the main mast and repeat.
I was originally thinking that I had to do all the shrouds first, then the stays. It would have been very difficult to anchor the mizzen stays if the main mast shrouds were already up.
So..... one mast at a time starting aft...
Does that make sense?
In tight areas, use a 4" long piece of wire to act as a long needle to fish the ends of running rigging lines through tight spots like the tops, passing just aft of the shroud lines. Sheets, clue lines, buntlines, and leech lines have to be fed through some tight areas like that later in the rigging process. It's easier to tie these lines at their belaying points on the deck or bulwarks and fish them upwards to their final tie-off point high up in the masts/yards.
Lost me? I'm on vacation but I will answer
Paul, hello. Probably this method has a right to exist, but in my opinion it has a number of disadvantages. First you need to align all the lengths of the lanyards, and then tie the cables. It seems to me that this method is not very convenient. I first tie all the padded jackets to the shrouds, while they are in the free position, adjust the height of the upper paddle according to the template, similar to what Kurt Suleski described. Vanta, after reaching the yuffers, is tied in 3 - 4 places. According to your method, it will not be convenient.Rich,
I'm not sure if my method will work....
I'm hoping Sasha will come on and give me some rudder adjustments.
Advice for this post. Only the front cable is caged, which can come into contact with the sail. The rest of the guys do not need to cage.
Now further about the lanyards. Kurt wrote it right and I agree with him. The fact is that the lanyards pull the cables and after the tension they are wrapped around the cable and are fixed on it. It is better to start pulling the cables on each mast from the stern to the bow. right-left-right-left side and so on in turn. It is also possible in pairs, two cables on the right - two on the left. Then, after stretching the stays, the front masts do not sag.
If you have any questions, ask. I'll explain everything.
Paul, you can ask. I'm already at the monitor. I won't tell you about the bottles, I'm not an expert hereThanks for your replies Sasha. I'm good for now with your guidance for the shrouds and stays. I don't want to interrupt your vacation. If I have any questions. ... I'll work on this until you get back.View attachment 254512
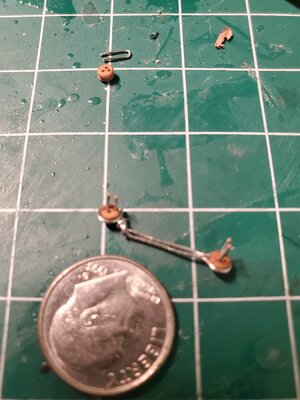
You are doing well with the crisp tension in the lanyards which is a major challenge for me. Looking good. Rich (PT-2)I finished the lower shrouds on the mizzen.... the first one I did by hand, then as Darivs suggested.... I made a jig. Really saved time....
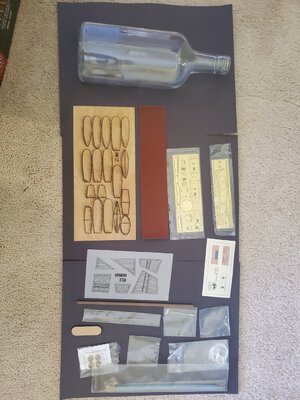
The ship in the bottle is going to have to wait.View attachment 254594View attachment 254595View attachment 254596View attachment 254597View attachment 254598


