Model Shipways Massachusetts Privateer Rattlesnake

Number 13.... I think I am there now. I used different color threads which greatly helped the weave. Just need to shorten the weave on both sides of the mouse and it should be good. I'm seriously thinking about not dyeing the tan line. It seems to bring out the detail of the weave.View attachment 251890View attachment 251891View attachment 251892View attachment 251893View attachment 251894View attachment 251895View attachment 251896View attachment 251897View attachment 251898View attachment 251899View attachment 251900View attachment 251901View attachment 251902View attachment 251903View attachment 251904
amazing technique !!!
excellent results
 
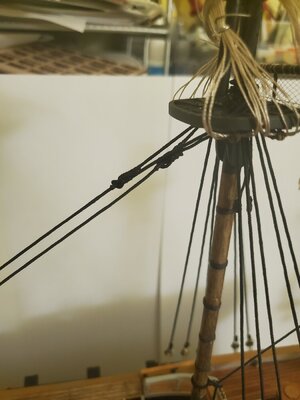
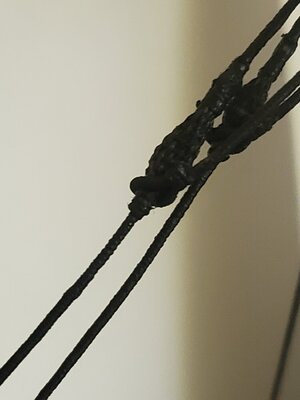
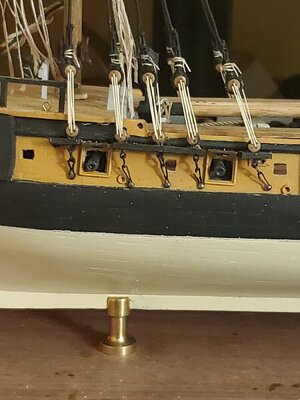
Continuing forward on the ship. The main mast shrouds are up, there is a gap between shrouds 3 & 4 on each side because of the cannons. I should have placed the chain plates closer together. It will be pretty obvious when I tie in the rat lines. Both main mast stays are in. I ended up serving the ring that I made to anchor the stay in the deck. I think this is my 20th mouse that I have made, this one turned out pretty good. Only 3 are on the boat now, I think I have 5 more to make.20210918_214118.jpg20210919_120427.jpg20210919_143108.jpg20210919_150842.jpg20210919_155640.jpg20210919_230306.jpg20210919_230311.jpg20210919_230315.jpg20210919_230319.jpg20210919_230331.jpg20210919_230338.jpg20210919_230420.jpg
 
Сейчас в лодке всего 3 штуки, думаю, мне нужно сделать еще 5.
Paul, your Musings are excellent. Keep it up. And just need 5 more? I understand 2 on the focal stag and one straps. Right? I would clarify in the drawings or books, on all the levels of masts were Musings. This reasoning on the topic can be said.
 
Sasha, I'm not sure. I know 2 for the fore mast and I think 3 for the top masts...

I also think that the higher I go up, the lines will be thinner? Which means the mouse will be smaller...

I'll count tonight.
 
Last edited:
  • Like
Reactions: PGN
Sasha, I'm not sure. I know 2 for the fore mast and I think 3 for the top masts...

I also think that the higher I go up, the lines will be thinner? Which means the mouse will be smaller...

I'll count tonight.
Exactly. The lines get thinner as you go higher. You will have to locate some research sources to determine the correct line thickness for your model. I think some of the fellows on the forum have some tables that can be helpful.
 
  • Like
Reactions: PGN
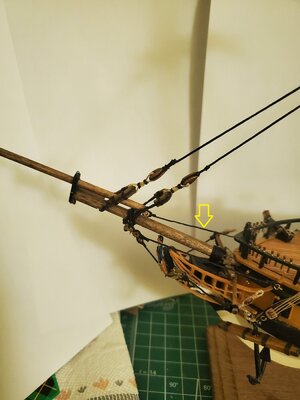
But there are some little things that spoil the view. But it is not too late to fix them.20211003_221246.jpg20211003_221312.jpg
Some of the tackles seem to be not stretched (indicated by arrows). Especially the lanyards of the Ufers. And the sufers themselves must be on the same line. I think this can just be fixed by tightening the lanyards.
 
Hi Sasha, good catches on the shrouds. The bowsprit stay will be easy enough to fix. I'm not sure about the fore mast stays.

I might have to cut the shrouds and stays off and start again.
 
Slowly fixing the port fore mast shrouds. I need to lower the last one.

I wanted to take a try at making the crow's feet. I understand what it is meant for now. This is my first attempt, it is going to be taken down. The euphroe block is way too big. Next attempt will be half that size.20211007_224907.jpg20211007_225711.jpg
 
I started the build on 26 December, I'm really enjoying it.

I didn't do an inventory of the parts in the box, I figure if something is missing, I'll order it.

I did get the Model Shipways jig, which helped prep me for beginning the build. As simple as the jig is...you have to fill in the blanks with the directions. It also gave me an opportunity to remember how easily the wood break. So far, I'm happy with the jig, the only pain is that when locking the jig, you need a pair of needle nose plyers to hold the bolt as you're tightening the butterfly nut.

View attachment 206746View attachment 206747
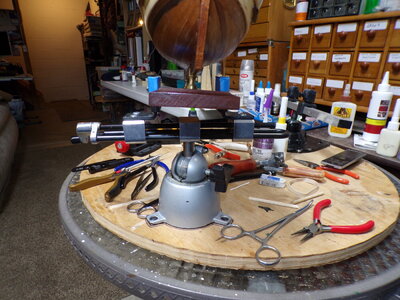
I have the "Fair A Frame" jig also. I have the same problem with the screws. One just turns with the wingnut. I want to use it with my PanArt "Victory Bow and Section" to keep the frames vertical and perpendicular to the keel, but I can't tighten the keel clamp, so the false keel moves and that screws everything up. I prefer using these two tools. The one with the long bar and two clamps is by Amati and the other is a PanaVise with the extra wide jaws. These won't work with the large models, but are great for the small and medium sizes ones. The best thing is that you are able to rotate the model as you are working on it.101_0287.JPG101_0288.JPG101_0289.JPG101_0290.JPG
 
Last edited:
I have the "Fair A Frame" jig also. I have the same problem with the screws. One just turns with the wingnut. I want to use it with my PanArt "Victory Bow and Section" to keep the frames vertical and perpendicular to the keel, but I can't tighten the keel clamp, so the false keel moves and that screws everything up. I prefer using these two tools. The one with the long bar and two clamps is by Amati and the other is a PanaVise with the extra wide jaws. These won't work with the large models, but are great for the small and medium sizes ones. The best thing is that you are able to rotate the model as you are working on it.View attachment 260486View attachment 260487View attachment 260488View attachment 260489
I just got a Fair-a-frame at my local hobby shop’s going-out-of-business sale, and as I started to assemble the base it struck me that the bolts would have that issue. I plan to swap them out with carriage bolts before I continue with the assembly. Hoping that will do the trick.
 
I just got a Fair-a-frame at my local hobby shop’s going-out-of-business sale, and as I started to assemble the base it struck me that the bolts would have that issue. I plan to swap them out with carriage bolts before I continue with the assembly. Hoping that will do the trick.
I'm going to try 5 min epoxy on the heads and see if that helps. The frame is a good idea but lousy construction.
 
Back
Top