Extremely well details with the precision that we all love to see. Your ship will be a product of care shown at every step of the way. RichMy rule is, when deciding to paint or not, is to stain first. If you don’t like the way it looks, then consider painting. There will be no paint!
View attachment 263245View attachment 263246
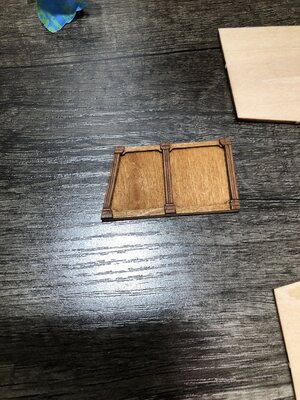
The deck will become darker after stain and finishing. But I do want a contrast between the deck and walls.
Now I have to start on the other walls, which are at angles. This will help me determine where to stop the deck boards, as it’s looking like I could run out with three more decks to go. But I can always buy more wood!
So the goal now is to build the walls, and that will allow me to finish planking and add nails. Then the walls will go in permanently so the upper decks can go on top of them.
-

Win a Free Custom Engraved Brass Coin!!!
As a way to introduce our brass coins to the community, we will raffle off a free coin during the month of August. Follow link ABOVE for instructions for entering.
-

PRE-ORDER SHIPS IN SCALE TODAY!
The beloved Ships in Scale Magazine is back and charting a new course for 2026!
Discover new skills, new techniques, and new inspirations in every issue.
NOTE THAT OUR FIRST ISSUE WILL BE JAN/FEB 2026
You are using an out of date browser. It may not display this or other websites correctly.
You should upgrade or use an alternative browser.
You should upgrade or use an alternative browser.
NORSKE LOVE - Billing Boats 1:75 scale
- Thread starter Dean62
- Start date
- Watchers 74
-
- Tags
- billing boats norske lowe
Hi Dean.My rule is, when deciding to paint or not, is to stain first. If you don’t like the way it looks, then consider painting. There will be no paint!
View attachment 263245View attachment 263246
The deck will become darker after stain and finishing. But I do want a contrast between the deck and walls.
Now I have to start on the other walls, which are at angles. This will help me determine where to stop the deck boards, as it’s looking like I could run out with three more decks to go. But I can always buy more wood!
So the goal now is to build the walls, and that will allow me to finish planking and add nails. Then the walls will go in permanently so the upper decks can go on top of them.
I like the non-painting wood parts the most. Different types and coulors of wood with different forms of conservation. With the deck with the sanded charcoal and the passage with columns and traverse as a great example. And I can clearly see your ‘lighthouse building experience’. Scratch is now part of your system!
Regards, Peter
Hi Dean,
Getting away from painting wood seems to be a current theme in some other build logs which I whole heartedly agree with. Painted wood does have its place from time to time but I for one will keep it at a minimum. I really like the weathered deck look you have achieved, I had accidently stumbled onto that effect (using charcoal pencil) with my first ship HMS Fly. At that time I opted for a brand new pristine look so had abandoned the technique. Applying columns and beams to the walls and staining them looks awesome, you are going to have another outstanding build for all to enjoy! Thanks for sharing.
Getting away from painting wood seems to be a current theme in some other build logs which I whole heartedly agree with. Painted wood does have its place from time to time but I for one will keep it at a minimum. I really like the weathered deck look you have achieved, I had accidently stumbled onto that effect (using charcoal pencil) with my first ship HMS Fly. At that time I opted for a brand new pristine look so had abandoned the technique. Applying columns and beams to the walls and staining them looks awesome, you are going to have another outstanding build for all to enjoy! Thanks for sharing.
Using different wood species and non-paint finishes must require a lumber yard of items for the pallet but Dean has both types well controlled and able to use in the best manner. Well done Dean as you continue your vision. RichHi Dean,
Getting away from painting wood seems to be a current theme in some other build logs which I whole heartedly agree with. Painted wood does have its place from time to time but I for one will keep it at a minimum. I really like the weathered deck look you have achieved, I had accidently stumbled onto that effect (using charcoal pencil) with my first ship HMS Fly. At that time I opted for a brand new pristine look so had abandoned the technique. Applying columns and beams to the walls and staining them looks awesome, you are going to have another outstanding build for all to enjoy! Thanks for sharing.
Thank you to everyone for the compliments and encouragement! As you know it’s a labor of love, with tedious details and obstacles at every turn. Sometimes I can’t wait to get to a point where I can see it all come together, but as you know you can’t rush, or you will only regret not giving every detail the attention it deserves. So onward we go…board by board. 
Yes, indeed he does.Using different wood species and non-paint finishes must require a lumber yard of items for the pallet but Dean has both types well controlled and able to use in the best manner. Well done Dean as you continue your vision. Rich
Hello, my friend. I might miss it in reading earlier posts, do you plan for treenails? If yes what method\s you will use?
Hi Jimsky…mio amico, on the hull will be wood above the water line (painted white below). Metal on the whales.Hello, my friend. I might miss it in reading earlier posts, do you plan for treenails? If yes what method\s you will use?
On the deck I’m undecided. Don’t know if I should make holes and add lead, or brass or wood? They will be very small! Probably about .015”
Suggestions?
Last edited:
Well...as you mentioned above there are many ways to accomplish treenailing. Giving your scale, some of the methods I personally like simply will not going to work. let see...Hi Jimsky…mio amico, on the hull will be wood above the water line (painted white below). Metal on the whales.
On the deck I’m undecided. Don’t know if I should make holes and add lead, or brass or wood? They will be very small! Probably about .015”
Suggestions?
- drilling just a hole and leave as it. the size of the drill bit is 0.3mm
- drilling holes and cover them with the same/similar color of putty ( drilling the holes is what the time,e spend, covering with a putty relatively easy process: you cover large space, then scrape out the excess.) This method I use on very small scales, also hard to find matching putty.
- drilling the holes and insert the brass wire (looks really good, from time will get a natural patina after air oxidation, but... time-consuming, you must insert the vire strictly vertical, avoiding any bents as they will destroy the hole. Also, you must have a very sharp tool to cut the vire flat close to the deck, because...if your deck planking timber is soft, while you will shape out the excess you will make dents around the brass nail. Softer material will be shaped first.

- Joined
- Sep 3, 2021
- Messages
- 5,190
- Points
- 738

Ever the engineer. Looking good.I also made a gusset at the same angle to give it more strength.
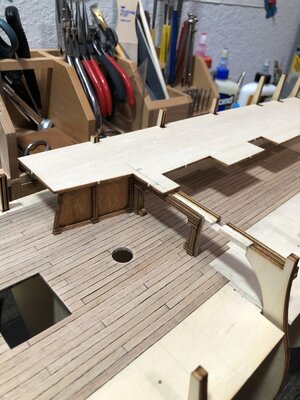
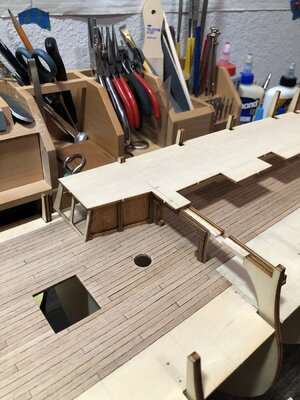
Beautiful work as always. Your precision with small millwork detailing is amazing!!! Rich (PT-2)Built a side wall, it will be at an angle…have a few pics for reference with it sitting in place and deck sheet on top, not fitted exactly, just for reference.
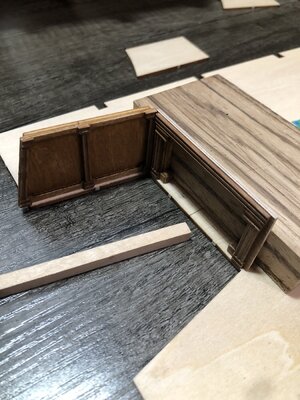
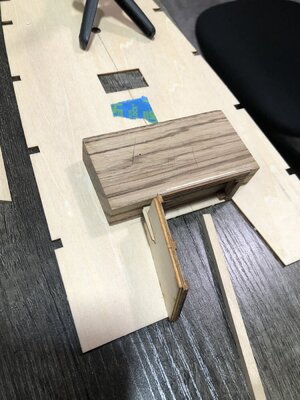
View attachment 263415View attachment 263416View attachment 263417View attachment 263418View attachment 263419View attachment 263420
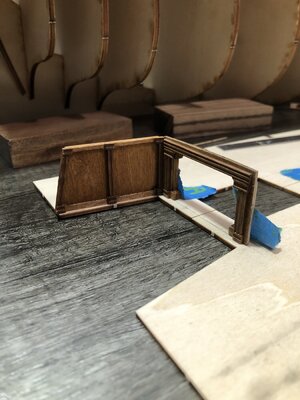
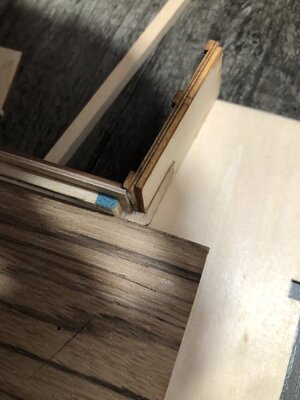
You are a real ship carpenter, working on the interior witch have always angles everywhere. Great job!I adjusted the height of the entrance wall, then adjusted the side wall. Then I glued the side wall to the entrance wall using the deck sheet angle as a reference. I also made a gusset at the same angle to give it more strength.
View attachment 263458View attachment 263459View attachment 263460
Regards, Peter
Hi PaulI vote for NOT painting the eyes.
The Lord did not bless me with the skill to perform the magnificent detail Dean has achieved .He did bless me with determination to never stop trying to get there though.
Dean, I'm really impressed with your construction method, I can see this is going to be a real eye catcher.I adjusted the height of the entrance wall, then adjusted the side wall. Then I glued the side wall to the entrance wall using the deck sheet angle as a reference. I also made a gusset at the same angle to give it more strength.
View attachment 263458View attachment 263459View attachment 263460
Thanks again to everyone for the compliments. I am trying to establish the walls at the appropriate angles prior to installation on the ship, which will happen after I finish the deck. This way I can install it as a sub assembly, with all construction, stain, etc, completed. I just have to ensure the walls are located properly and are solid. 
Next wall completed. I used the deck sheet to verify the angle when gluing, and also used it trace the angle on my gusset I made. 
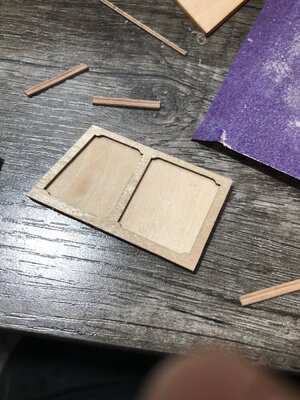
Glued on the trim pieces is applied with a toothpick and spread thin to avoid squeeze out. Any squeeze out was scraped off the wood with an xacto knife to prevent any areas from not taking the stain. On the back of the wall, with the gusset, glue was applied liberally since you will not see it, and I want to ensure a strong joint!
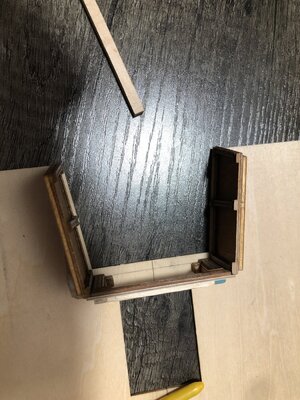
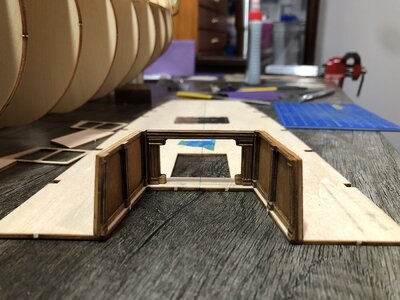
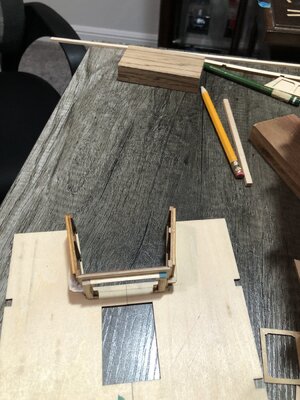
The new wall will be sanded flush up top when the glue dries. Then on to the front walls!
Glued on the trim pieces is applied with a toothpick and spread thin to avoid squeeze out. Any squeeze out was scraped off the wood with an xacto knife to prevent any areas from not taking the stain. On the back of the wall, with the gusset, glue was applied liberally since you will not see it, and I want to ensure a strong joint!


The new wall will be sanded flush up top when the glue dries. Then on to the front walls!


