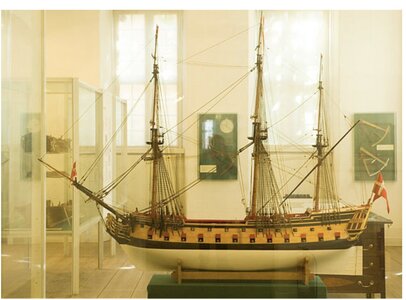
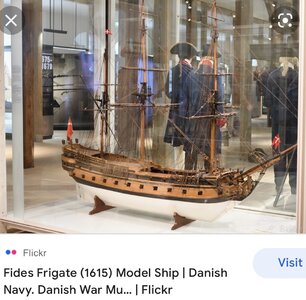
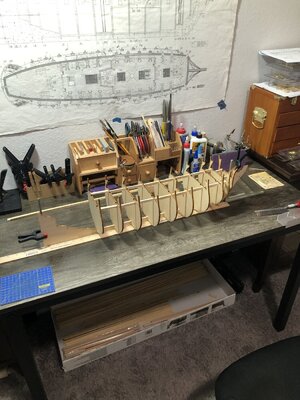
NORSKE LOVE - Billing Boats 1:75 scale

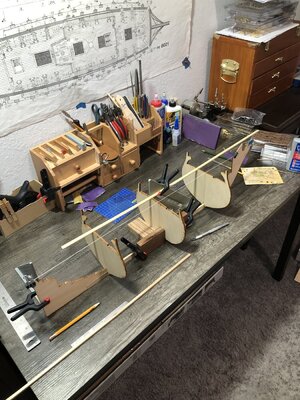
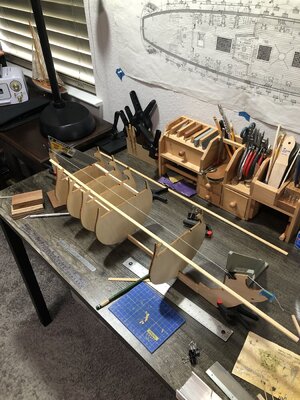
I get the fact that the keel ends have to be joined via a centre board. I get how the frames are mounted on the "keel" - that is sort of a nice difference and slightly more challenging. But why oh why are there differences in the thickness of the wood ??? It is not as if that is going to test building skill - especially not yours. So in my book that just goes down as an irritation and poor execution by the manufacturer.

Glad to hear that you are not going for the yellow/black look!
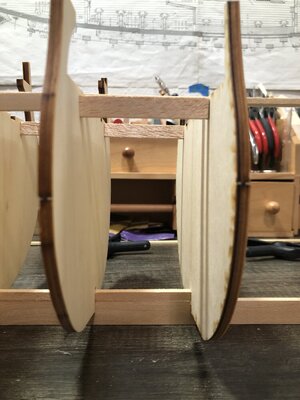
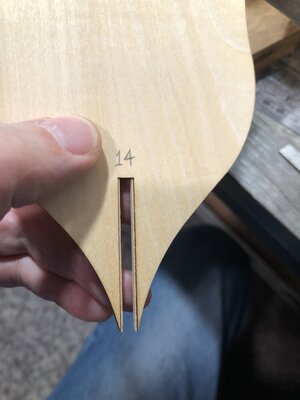
Agreed Heinrich, just an issue with the plywood being too thin by 1mm. Even worse is the fact the frames have a 5mm slot! So all frames mounted on the plywood will need to be shimmed inside the slot with some veneer strips, or I will use another piece of wood to glue to the frame and keel to tie them together better, which I usually do anyway.
In addition, that means the length of the boards between frames on the keel now have to be adjusted accordingly.
Sometimes manufacturers create more work than is necessary, but we deal with it. ;)
 
Last edited:
Ahoy Dean!
I may be too late for a front row seat but I will defiantly be in the second row! I may just have to holler a little louder is all. I can tell you have a Billings alright, had the same problem with my Billings VASA keel. Looks like you have a good start so enjoy the build!
 
Ahoy Dean!
I may be too late for a front row seat but I will defiantly be in the second row! I may just have to holler a little louder is all. I can tell you have a Billings alright, had the same problem with my Billings VASA keel. Looks like you have a good start so enjoy the build!
Thank you Daniel, welcome aboard!
Not sure why they don’t adjust the plywood, or have better quality control…sigh!
 
Bugger, and he's off to a flying start! ;)
I don't know if it's of any help, but in the Netherlands a replica was build of the spiegelretourschip the Amsterdam. It's is a contemporary ship (relatively speaking) to the Norske Love, but it was a merchant vessel, rather than a ship of war, although it was heavily armed as well, to defend itself against unwelcome guests.
If you're interested, this link, Spiegelretourschip de Amsterdam, takes you to a page with external pictures of the ship, whereas this page, Interior_of_the_Amsterdam , presents a treasure of pictures of it's interior.
Maybe it will give you some inspiration for your intended customization.
Thank you Johan, I will certainly look into it! Welcome aboard! :)
 
There are so many great craftsman on SOS, I am often reluctant to share techniques for fear I am being rhetorical. But I remind myself there are plenty of first time ship builders as well. That said, I will share a technique I use to keep boards square and precise in length. In this case, I need three boards the exact same length, otherwise it can skew my frames and ruin my crucial ship foundation, of the keel and frames.
First, I always ensure my measurements start from the end of the board…
CBDA704C-9E92-4124-B119-0E82A7E7A76C.jpeg

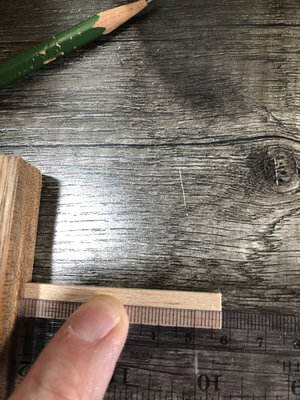
I use a block to assist with this. I need 57.5 mm length on three boards.
When the first one is exact, I use it with the block, to copy to a second board. But I use an xacto mark instead of a pencil, because a pencil could add distance.
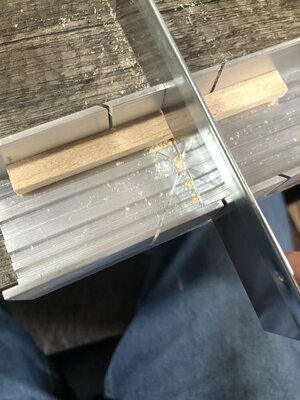
Then I cut to the right side of the line, in a miter box, ensuring the left side of the saw is on the right side of the line, so as not to loose any length.
A7B0AE54-AE0A-41C7-A9B9-44A32B6EBCE8.jpeg023520AF-5B88-4501-8F02-EDCD1FF7532C.jpeg
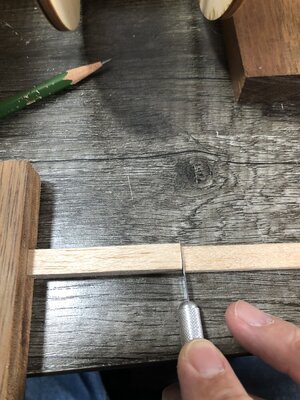
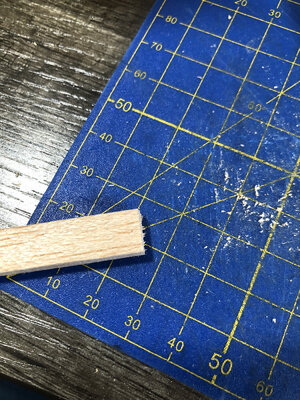
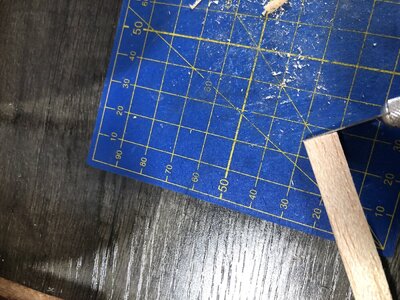
Next, there may be some small wood fibers on the end, due to the hand saw. You will be tempted to sand these off…don’t! You normally end up with a convex surface when hand sanding a small board face. To ensure it remains square, I cut any wood fibers on the edge of the board with an xacto knife. This ensures I don’t ruin my square end face on the board.
2A69DC70-B73C-43E1-AD4B-B941F88A6536.jpeg6A65A8E2-C816-4D36-8D3D-684F940F296D.jpeg
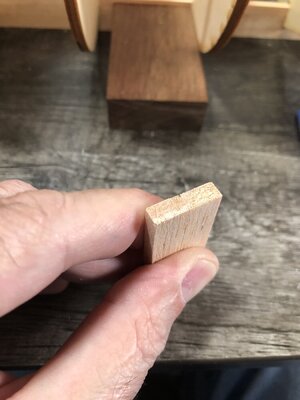
Then I stand the boards on end to verify they are exactly the same length…
D1453620-565B-40AA-9031-A92213FA02AA.jpeg

Now you have boards that are the same exact length, with square ends, all done by hand. Those who have power tools, will have put this type of technique behind them. But for those who work by hand, this is my technique.
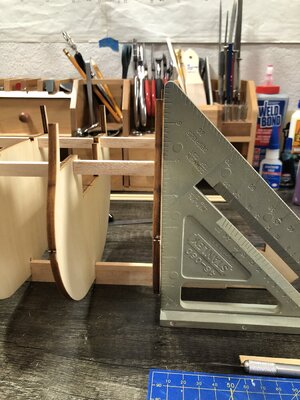
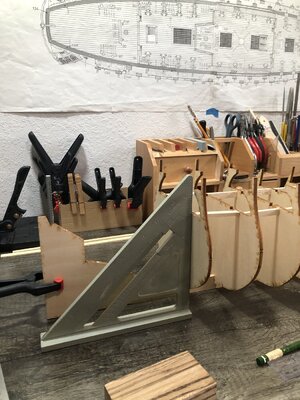
Using these boards (3), I ensured all of my frames were square. 1 board on top of the keel (at the bottom of the frame), and 2 boards (1 on each side) at the top of the frame. This squares the frames to each other, top to bottom, and side to side. Of course I dry fit first, and check with a square in both directions, and then verify with a square once glued.
B9B3BC1C-2031-4086-9127-78E8B2305626.jpeg6C0993C4-91B0-4036-8569-69B3F9E4F3E5.jpeg

09208E81-D049-4D82-AC60-E3D710FF9DCF.jpeg
 
Last edited:
There are so many great craftsman on SOS, I am often reluctant to share techniques for fear I am being rhetorical. But I remind myself there are plenty of first time ship builders as well. That said, I will share a technique I use to keep boards square and precise in length. In this case, I need three boards the exact same length, otherwise it can skew my frames and ruin my crucial ship foundation, of the keel and frames.
First, I always ensure my measurements start from the end of the board…
View attachment 259143

I use a block to assist with this. I need 57.5 mm length on three boards.
When the first one is exact, I use it with the block, to copy to a second board. But I use an xacto mark instead of a pencil, because a pencil could add distance.
Then I cut to the right side of the line, in a miter box, ensuring the left side of the saw is on the right side of the line, so as not to loose any length.
View attachment 259144View attachment 259145
Next, there may be some small wood fibers on the end, due to the hand saw. You will be tempted to sand these off…don’t! You normally end up with a convex surface when hand sanding a small board face. To ensure it remains square, I cut any wood fibers on the edge of the board with an xacto knife. This ensures I don’t ruin my square end face on the board.
View attachment 259146View attachment 259147
Then I stand the boards on end to verify they are exactly the same length…
View attachment 259148

Now you have boards that are the same exact length, with square ends, all done by hand. Those who have power tools, will have put this type of technique behind them. But for those who work by hand, this is my technique.
Using these boards (3), I ensured all of my frames were square. 1 board on top of the keel (at the bottom of the frame), and 2 boards (1 on each side) at the top of the frame. This squares the frames to each other, top to bottom, and side to side. Of course I dry fit first, and check with a square in both directions, and then verify with a square once glued.
View attachment 259149View attachment 259150

View attachment 259152
Well explained and illustrated. Thank you. Rich
 
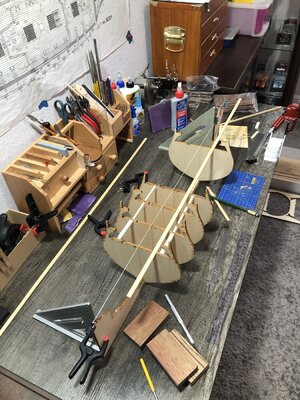
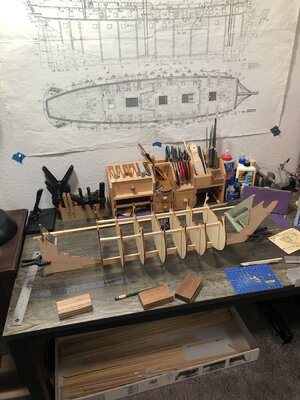
It’s been a productive two days! The big girl is taking shape! 4 more frames to install on the stern!
Plywood is 4mm thick and the slot in the frame is 5mm, because that should be the thickness of the ply. So I added some beechwood veneer boards inside the slot. ;)
Problem solved…View attachment 259176
View attachment 259177
Fortunate to have a good lumber and sheet stock close at hand for such needs. Nice work-around to the problem or should I say inside solution. Rich
 
Great explanation of technique, thanks Dean I found one part (cut tear out with exacto not sand it) something I had not considered before. I did know it is almost impossible to sand down an end section of wood 'square' to the sides.
 
Hmm. She's a big girl - going to be too big for your work table...
You beat me again, Dr. Paul a.k.a. Mon Ami (after the upgrade) :p I was just about to say that Dean might look for a bigger table\space to build her without margins.

@Dean62 You are off to a very good start, and as you said it is better to be late than ...never ;) Not sure what you will do with a bigger table, but you definitely need a bigger cutting mat :)

I am taking my seat next to a Dr. Paul (I hoping he doesn't mind)
That's a deal Jim! You do the machine work - I'll do the painting!
 
Back
Top