NORSKE LOVE - Billing Boats 1:75 scale

You beat me again, Dr. Paul a.k.a. Mon Ami (after the upgrade) :p I was just about to say that Dean might look for a bigger table\space to build her without margins.

@Dean62 You are off to a very good start, and as you said it is better to be late than ...never ;) Not sure what you will do with a bigger table, but you definitely need a bigger cutting mat :)

I am taking my seat next to a Dr. Paul (I hoping he doesn't mind)
Welcome aboard Jimsky, glad to see you here.

@Jimsky @dockattner … did you take note the cannon carriages were red on the Norske Love! :p
 
Welcome aboard Jimsky, glad to see you here.

@Jimsky @dockattner … did you take note the cannon carriages were red on the Norske Love! :p
...well, do we want to go that route again? :D:D:D:D I know, they are red but I also know, that 'artistic license' will prevail :p I have already made a deal with Dr. Paul to do all paintings, so red carriages might not be a dream anymore (for me).
 
...well, do we want to go that route again? :D:D:D:D I know, they are red but I also know, that 'artistic license' will prevail :p I have already made a deal with Dr. Paul to do all paintings, so red carriages might not be a dream anymore (for me).
Funny thing is, first time I painted them brown, because I just assumed they would be. ;)
 
Looking great Dean, nice tutorial on equal length spacer cutting too! But what a lot of work, time to get a Byrnes saw and sliding fixture, repeat cuts are a breeze! Set the stop and slice away!! You are doing really well on that old school kit, that’s way before CNC and slot and jig assembly! I remember wanting to do that kit way back when I first started this awesome hobby!! Keep up your usual skillful work!
 
Looking great Dean, nice tutorial on equal length spacer cutting too! But what a lot of work, time to get a Byrnes saw and sliding fixture, repeat cuts are a breeze! Set the stop and slice away!! You are doing really well on that old school kit, that’s way before CNC and slot and jig assembly! I remember wanting to do that kit way back when I first started this awesome hobby!! Keep up your usual skillful work!
Thanks Lou, good to hear from you, and welcome aboard! :)
I do need to invest in some small scale power tools.
 
A solid right angle base starts, Dean.
The time you need to set the circular saw to 57.5 has long passed after setting the size on the 3 bars.
With mass production it becomes a different story. Never forget the (old) handicraft. :)
Regards, Peter
 
Last edited:
After spending a few days doing research, there is not a lot to be found on the Norske Love. I posted the info I found in my first post. If anyone has anything to share or add...feel free. I did find the following additional reference material:

A ship image from the Copenhagen museum, which appears to be the same design ship...
View attachment 258934

A painting of a Danish-Norwegian ship...
View attachment 258935

and of course the Billing boats demo model picture...
View attachment 258936

and finally a similar Swedish ship...
View attachment 258937

View attachment 258938
View attachment 258939

So there you have it...this is what I have to start with, and will therefore be making many decisions along the way in my build. One is I will have to decide which color scheme to go with. I can use the early dark tar-brown or the later black with light yellow version, both of which the Norske love could have been displayed with due to the timeline it was in service. Did it start with one and get updated to the later? Who knows? But I think I can obviously choose from one of the two and still be correct. Also is the color up top, the BB kit shows green...not sure where they got that from? But it could be black, or red, or even blue. Anyway, those are a just a few decisions ahead. But for now I must start with the keel. See you when I have the keel built! :)
Hi, I am Danish-born, but living more than 49 Years in Spain.
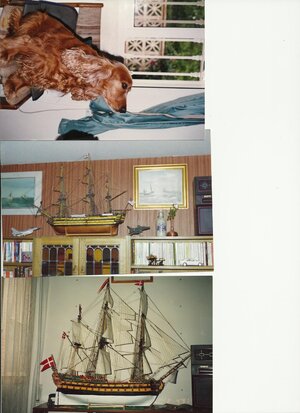
I build my First Norske Loce about 1970 -It latest 42 Years. survived the Transport from Denmark to Spain. It was before the Laser Cut came through and all blocks-single, double and even Deadeyes were all made of Plastic. NO WAY to rig them correct. When I came to Madrid Spain, I found the biggest shop specialised in Hobby building, so nearly all the Riggen were changed from plastic to wooden blocks -correctly Rigged - I this shop -still exists Model Reina you can find and buy nearly everything -pr amount of pieces or grams- so finally satisfied. since the I have built two more -now Laser Cut and wooden fittings except the Figures on the Gallery
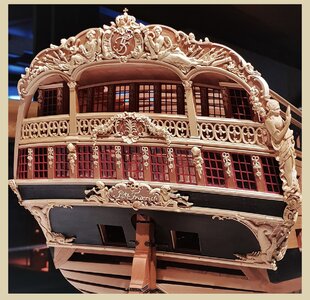
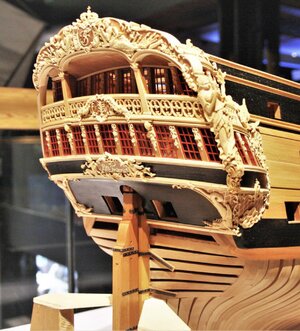
With the last two, I started to scratch build parts, as they are both failure and lousy materials- but we will have to take into account, that this model from Billing is in the lower price Rande -250 -300€ whereas the same type from Occre is about 450 -599 € and the Admiral model about from 800 -1200 €. Anyway it is a beautiful ship- here un Ship ob Building there is an extreme WELL build Model of Prinz Frederich - build bt a German : Karl Matze. the image above is from 1975 about. Thre Vicririaa was aso without Lasercut. All handwork

Imagen.jpg
 
I hope I am still in time to make it to the front row of the concert - this is a build I am really looking forward to. I am certainly no expert on Swedish, Danish or Norwegian warships of any era and am therefore wondering why the Norwegians would have chosen the yellow and black "Nelson" color scheme of the later British ships. Even though it could be historically assumed with the information that you have mentioned, I would opt for the earlier color scheme and stay away from a Victory - lookalike look.
no, you are wrong. the colours of the late editions are black and yellow. there are some other references to the Danish/ Norwegian warships ar that time both in gun types and riggen. At that time -until the Battle between Nelson and the danish fleet in front of Copenhagen 1801 - Norway was as Part of Denmark. after the loss to Nelson, Norway was taken over by Sweden and was a part of Sweden until the piece conference in 1920 -after the 1Th Worldwar- and from then on independent, but the king of Norway was Danish -a brother to KingChristian 10 -and took a Norwegian name-Haakon -as far I remember
 
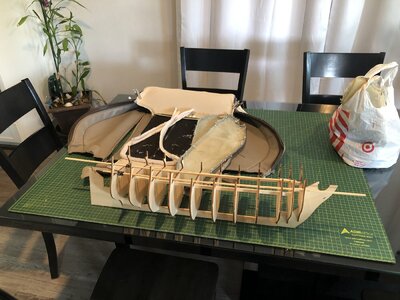
Installing the first frame. You can use a square to keep it perpendicular to the keel, and a square to keep it perpendicular to the table or bottom of the keel. But port to starboard you can’t use a square, so I used the typical method of a string on the center of the keel bow to stern. Then just make a mark in the top center of the frame to align with.
View attachment 259036

View attachment 259038

Only 13 more frames to go… :p
Welcome little brother "Norske Love"! Looking forward seeing you growing up.
Your brother "Printz Friderich"
 
You beat me again, Dr. Paul a.k.a. Mon Ami (after the upgrade) :p I was just about to say that Dean might look for a bigger table\space to build her without margins.

@Dean62 You are off to a very good start, and as you said it is better to be late than ...never ;) Not sure what you will do with a bigger table, but you definitely need a bigger cutting mat :)

I am taking my seat next to a Dr. Paul (I hoping he doesn't mind)
I forgot to mention I have a large cutting mat that I share with my wife. She uses it for doing upholstery work, me for ship building. Most stuff I can do on the small mat, but if I need a big one…
7A9780CD-F2CA-4C89-A72A-9D9B427729F5.jpeg
 
Hi, I am Danish-born, but living more than 49 Years in Spain.
I build my First Norske Loce about 1970 -It latest 42 Years. survived the Transport from Denmark to Spain. It was before the Laser Cut came through and all blocks-single, double and even Deadeyes were all made of Plastic. NO WAY to rig them correct. When I came to Madrid Spain, I found the biggest shop specialised in Hobby building, so nearly all the Riggen were changed from plastic to wooden blocks -correctly Rigged - I this shop -still exists Model Reina you can find and buy nearly everything -pr amount of pieces or grams- so finally satisfied. since the I have built two more -now Laser Cut and wooden fittings except the Figures on the Gallery
With the last two, I started to scratch build parts, as they are both failure and lousy materials- but we will have to take into account, that this model from Billing is in the lower price Rande -250 -300€ whereas the same type from Occre is about 450 -599 € and the Admiral model about from 800 -1200 €. Anyway it is a beautiful ship- here un Ship ob Building there is an extreme WELL build Model of Prinz Frederich - build bt a German : Karl Matze. the image above is from 1975 about. Thre Vicririaa was aso without Lasercut. All handwork
Thanks for this info, I had forgotten about the post by @Uwek …this is a great reference and inspiration!
563358F4-0689-4548-89B1-27C60D14265D.jpegA140DCA2-1B60-4B96-85BD-352C95CFC338.jpegF64FB35E-3B2C-4949-B670-1C4512FA92FE.jpeg65787F75-4180-4928-93BC-E0FB8CA72B3F.jpeg
 
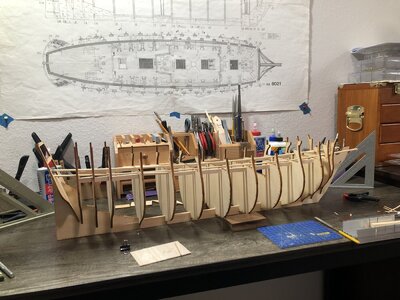
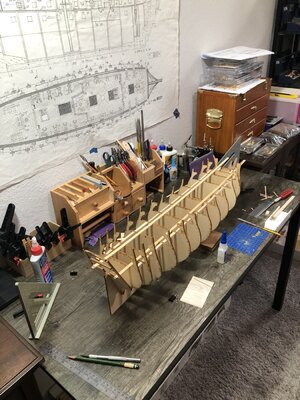
All frames are on the keel finally! Spacer boards up top are a little random, but my only goal was to maintain an exact distance at 3 points (1 on keel, 2 port and starboard up top) within less than 1/2 mm. I measured each one in multiple places along the width as I installed them and they all pass! This is a straight, square assembly! ;)
First milestone…
AFB9FABE-D658-4489-A399-86313B94D7C0.jpeg7EEFFDB0-241D-4E46-8A13-7BB6AE97B284.jpeg
 
Last edited:
Welcome little brother "Norske Love"! Looking forward seeing you growing up.
Your brother "Printz Friderich"
Thank you, welcome aboard! Your Printz Friderich, pictured above, is an absolute masterpiece and inspiration!
I am starting with a kit, so I plan to make many embellishments! ;)


Danke, willkommen an Bord! Dein oben abgebildetes Printz Friderich ist ein absolutes Meisterwerk und Inspiration! Ich beginne mit einem Kit, also plane ich viele Verzierungen!
 
Last edited:
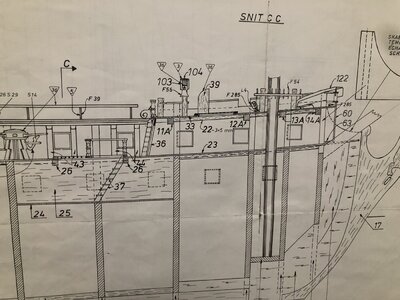
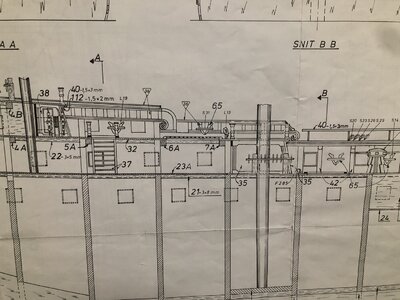
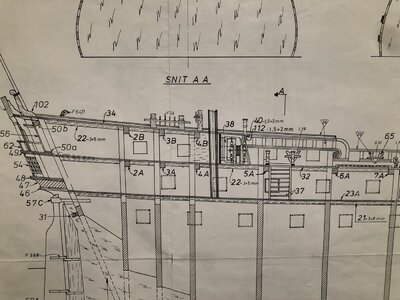
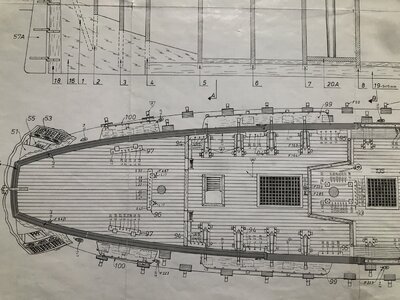
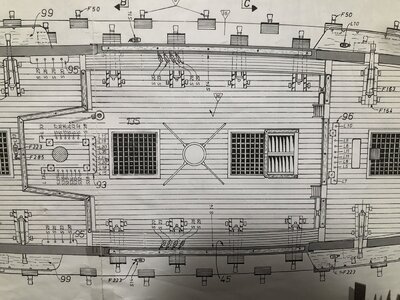
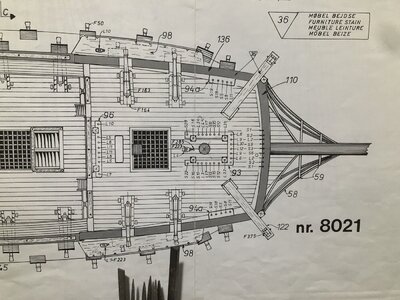
The structure looks good Dean! Question: I am looking at the drawings that you have up behind the model and can only see one deck. Is this correct?
 
I remember admiring this kit in the local hobby shop way back in 1970's. It must be a 50 year old design.
It’s still a good foundation to work with. There is much room for embellishments, and I plan to utilize that. I will not be using the figurehead, and I have plans for the embellishments of the gallery, railings, etc. so we will see how far I go, given what I have to work with and my personal limits. ;)
 
Installing the first frame. You can use a square to keep it perpendicular to the keel, and a square to keep it perpendicular to the table or bottom of the keel. But port to starboard you can’t use a square, so I used the typical method of a string on the center of the keel bow to stern. Then just make a mark in the top center of the frame to align with.
View attachment 259036

View attachment 259038

Only 13 more frames to go… :p
Interesting methodology. I don’t think I would have thought of it.
 
Back
Top