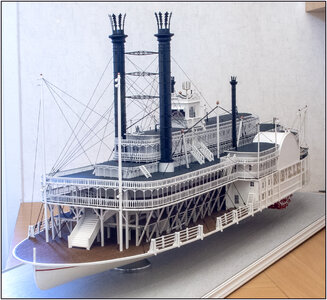
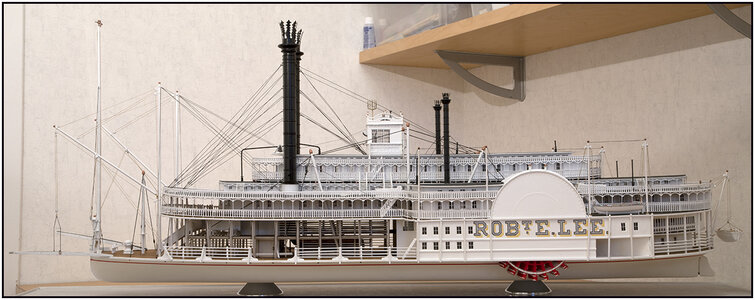
Paddle Steamer Robert E. Lee, scale 1:96, scratch build by the Alan L. Bates drawings [COMPLETED BUILD]

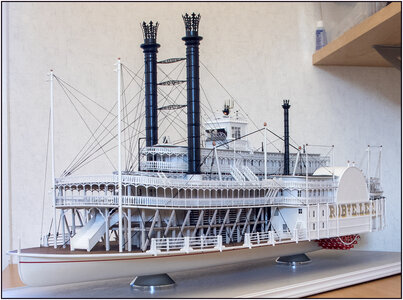
Tailoring the bull rails and placing them went ahead more prosperously than I expected.
On the starboard side:
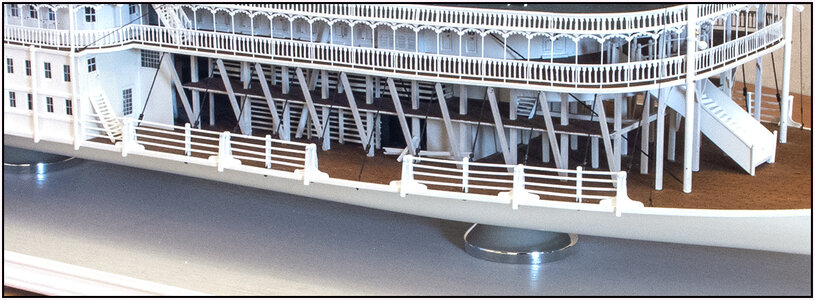
276 Verschansing10.jpg
Sorry for the little overlighted picture ;).

On port side from a lower point of view:
277 Verschansing11.jpg

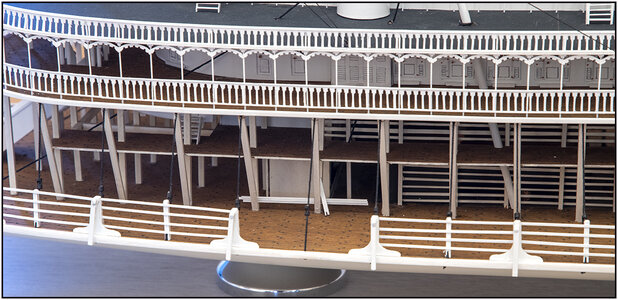
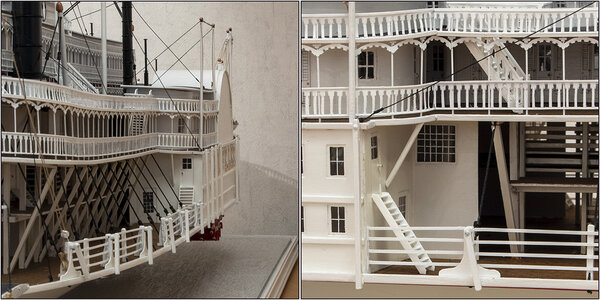
On both sides I left one part open. The bull rails and intermediate supports can be taken out and stored behind the side braces:
278 Verschansing12.jpg

And a overview:
279 Verschansing13.jpg

The observant look will see that I have afforded myself a builder's freedom.
On the photo of the original Lee II you can see there are only 5 uprights. With in the front and back a larger space between them. With my 0.5x1 mm bull rails, that space would be too large to be able to place the them straight. Therefore, chosen 6, with a more regular gap.

Now I can go to the front deck and set it up.
Regards, Peter
 
Last edited:
Tailoring the bull rails and placing them went ahead more prosperously than I expected.
On the starboard side:
View attachment 208718
Sorry for the little overlighted picture ;).

On port side from a lower point of view:
View attachment 208719

On both sides I left one part open. The bull rails and intermediate supports can be taken out and stored behind the side braces:
View attachment 208725

And a overview:
View attachment 208726

The observant look will see that I have afforded myself a builder's freedom.
On the photo of the original Lee II you can see there are only 5 uprights. With in the front and back a larger space between them. With my 0.5x1 mm bull rails, that space would be too large to be able to place the them straight. Therefore, chosen 6, with a more regular gap.

Now I can go to the front deck and set it up.
Regards, Peter
You are the captain of your ship. Good job!
 
It took a while to show some content again.
I had to make the parts for the front deck more or less equal. Because they have a coherence in terms of place and connection. For some parts, I had to start again during the building.

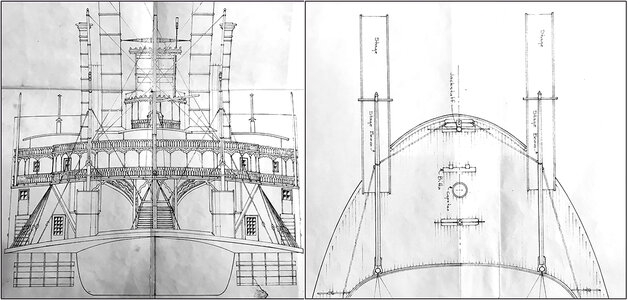
Alan Bates' drawings show this format:
280 Voordek1.jpg
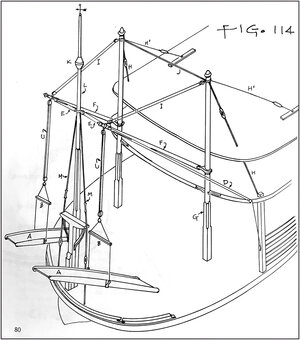
Then you have to find out which quy and which boom belongs to which mast.
But also here, Bates's Cyclopedium puts a beautiful drawing in perspective:
281 Voordek2.jpg
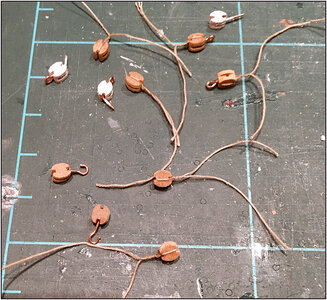
That means about 20 pulleys in different versions. With eye, with hook, only a pulley:
282 Voordek3.jpg
These are not all 20, because there are already some in the two masts where the loading trees will hang.

Of course, I didn't choose the easiest way for both swinging stages: 2 side boards, a deck and 2 eyes for the suspension.
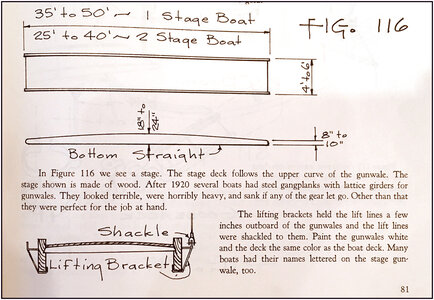
The Cyclopedeum gave this info:
283 Voordek4.jpg
The stage deck follows the upper curve of the gunwale. To the side’s it is also curved.
The bottom is straight.

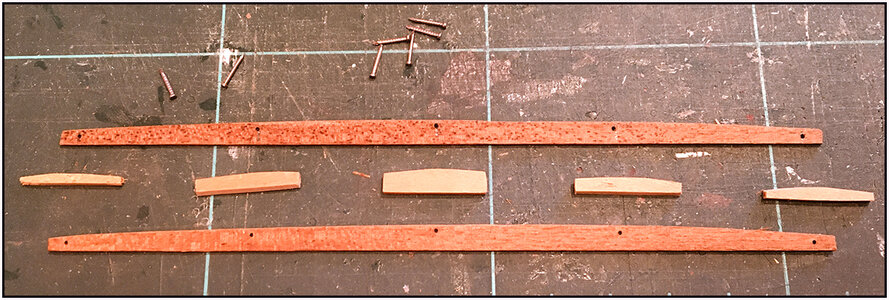
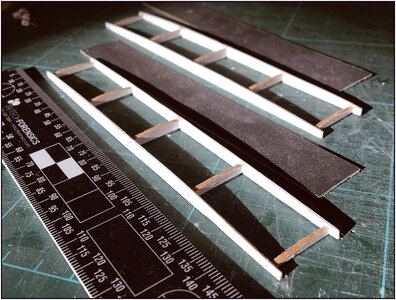
2 gunwales with 5 partitions that I'm going to put together with glued small nails:
284 Voordek5.jpg
Put together painted. With the deck, also provided with the P800 sandpaper, with 2 layers of transparant paint:
285 Voordek6.jpg
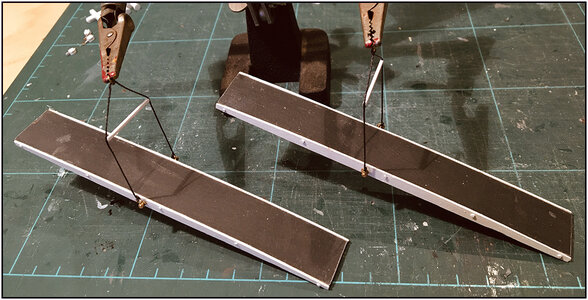
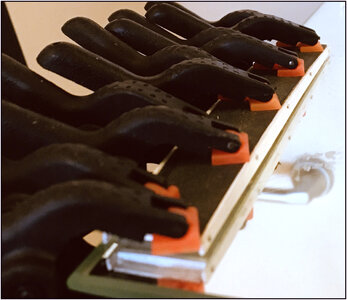
Because curving in the length and transverse direction, the deck want to pop straight again, everything with 10 clamps fixed:
286 Voordek7.jpg
With eventually 2 stages with spreader bars and stage support lines:
287 Voordek8.jpg

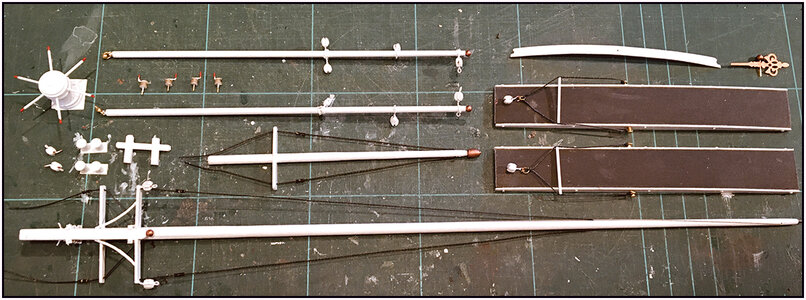
Then the front mast/jackstaff, a 'brace' for supporting the front deck and the 2 loading booms turned into shape from beech, round 6, 4 and 3mm. The jackstaff had to go from square, to octagonal to round. It's 34 cm high and that doesn't fit in my lathe. But with the square underside in the 4-claw, I was able to skew it in a stable way.
That underside has become a nice bunch of parts. I'll show you the details when it's plached.
The other details will come later, but I can now put this on the front deck:
288 Voordek9.jpg

More soon ......
Regards, Peter
 
Last edited:
Everytime you post a new progress I am once more surprised how many details such a paddle steamer had
and also amazed how you are able to make these details within your model - very good work
Thanxs Uwe.
When I got the drawings, a long time ago, I couldn't imagine what The LEE was going to be like. And during the construction, from time to time, I scratched behind my ears, how to fix things. But in the Netherlands we have an expression: comes time, comes advice.
Regards, Peter
 
The installation of the parts on the front has some delay.
The inspection officer, in this case Alan Bates itself, has arrived on the ship.
First has got a view in the Pilot house:
289 Captain.jpg
Picture from www.steamboats.com out the Online Museum. Rescaled to the 1:96 of the model.

Then he went to the front deck, inspected the 4 winches and carefully monitored the upright of the brace with chains:
290 Inspection.jpg
His first note: "I am missing the front first step of the main stairs!".
Ai ai sir, it is on the list.

Now you also can get a impression of the size of the ship. Later he will pose with the whole ship in view.
Regards, Peter
 
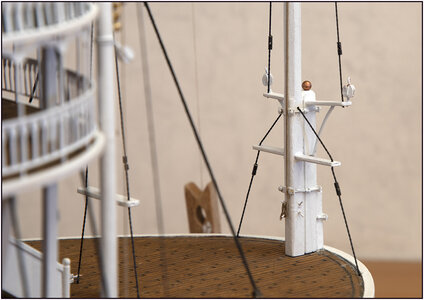
Before the two stages could be hung, the front mast had to be placed first, the Jackstaff:
292 JackStaff1.jpg

Alan Bates came to check if everything that was made is allright. He stands with a 5-meter black&white liner in his left hand:
293 JackStaff2.jpg

Such a large mast must be firmly mounted to the construction of the ship. Thanks to Bates's Cyclopedeum in know now the terms used at the time:
294 JackStaff3.jpg
The mast is attached to the 'Stempeace' on the square part with locking bands, which is again attached to the continuous part of the keel protection of The Lee.
In my supply of subsemples I still had M0.8 bolts and nuts. So I was able to put together the straps with them.
From about 3/4, the Jackstaff has Jackstaff Stays, fixed to the 'Gallow Frame' crossbar, which is attached to the 'Stempiece' with the straps.
From the top of the square part the Guard chains goes to the deck.
On the outside of the 'Gallow Frame' are the pulleys to pull the loading trees in sideways.
At the rear of the square part you can see the rope for the flag that can be hoisted in top.
Of course, the cable tensioners not forgotten.

When the Jackstaff was fixed, I could start with the swing guys:
295 Guys1.jpg
296 Guys2.jpg
The side swing guys for pulling the booms with stage to the side at landings runs to a pulleys on the front uprights of the entrenchment.
The center swing guys for pulling back to the middle of the boat runs to the pulleys on 'Gallow Frame' on the Jackstaff.
Because of the 3-point connection of the loading trees, to the left, right and up, I could tighten the wiring nicely tightly.
And the bundled ropes of the swing guys beside the Jackstaff and the uprights.

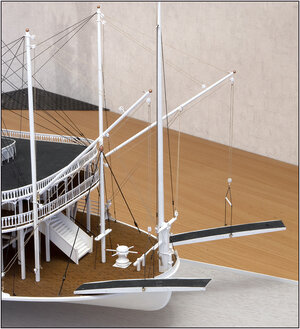
Then I could hang both walkways.
I turned the port on the front and the left. As it is going to rest on the wharf.
The one on starboard hangs at rest as during the sailing.
The cables for pulling up and lowering the stages run along the loading booms via a pulley to the winches.

On the front deck also the capstan placed, with 2 wooden bitts with crossbar.
On either side of the deck, at the end of the decorative strip, each 2 metal bitts.

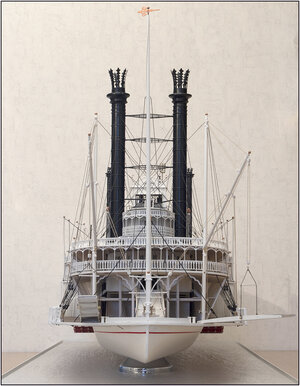
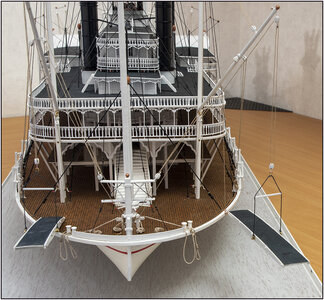
The total picture en-face:
297 2021-02-06-Voor.jpg
With on top of the Jackstaff the wind vane. Here with wind angled from the side.
(PS: I just saw I has to cut 1 forgotten line ;))

En-profile:
298 2021-02-06-Zij.jpg

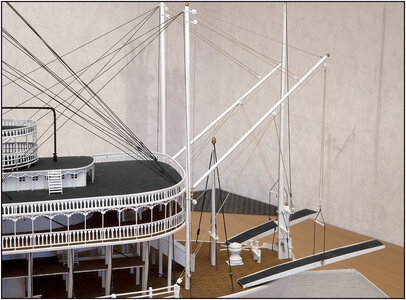
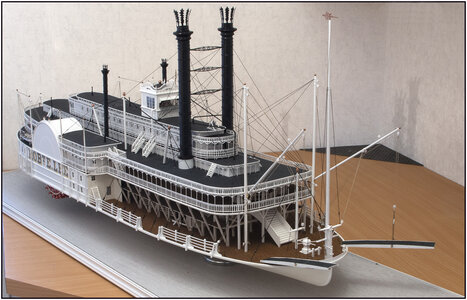
In birdeye view:
299 2021-02-06-DrieKwart.jpg
With the wind vane straight forward. Yes, it can rotate free!

And NO........ The Lee is not done yet.
The inspection officer Alan Bates handed over a (small) list with 'still to do'.
So there will be another contribution.

Then I go into the photo studio with The Lee. To make a nicely photo series with The Lee nicely highlighted
Regards, Peter
 
Last edited:
Before the two stages could be hung, the front mast had to be placed first, the Jackstaff:
View attachment 211325

Alan Bates came to check on everything that was made right. He stands with a 5-meter black&white line in his left hand:
View attachment 211326

Such a large mast must be firmly mounted to the construction of the ship. Thanks to Bates's Cyclopedeum in know now the terms used at the time:
View attachment 211327
The mast is attached to the 'Stempeace' on the square part with locking bands, which is again attached to the continuous part of the keel protection of The Lee.
In my supply of subsemples I still had M0.8 bolts and nuts. So I was able to put together the straps with them.
From about 3/4, the mast has Jackstaff Stays, fixed to the 'Gallow Frame' crossbar, which is attached to the 'Stempiece' with the straps.
From the top of the square part the Guard chains goes to the deck.
On the outside of the 'Gallow Frame' are the pulleys to pull the loading trees in sideways.
At the rear of the square part you can see the rope for the flag that can be hoisted in top.
Of course, the cable tensioners did not forget the rope tensioners.

When the Jackstaff was fixed, I could start with the swing guys:
View attachment 211328
View attachment 211329
The side swing guys for pulling the booms with stage to the side at landings runs to a pulleys on the front uprights of the entrenchment.
The center swing guys for pulling back to the middle of the boat runs to the pulleys on 'Gallow Frame' on the Jackstaff.
Because of the 3-point connection of the loading trees, to the left, right and up, I could tighten the wiring nicely tightly.

Then I could hang both walkways.
I turned the port on the front and the lerft. If it were to rest on the wharf.
The one on starboard hangs at rest as during the sailing.
The cables for pulling up and lowering the stages run along the loading booms via a pulley to the winches.

On the front deck also the capstan placed, with 2 wooden bitts with crossbar.
On either side of the deck, at the end of the decorative strip, each 2 metal bitts.

The total picture en-face:
View attachment 211330
With on top of the Jackstaff the wind vane. Here with wind angled from the side.
(PS: I just saw I has to cut 1 forgotten line ;))

En-profile:
View attachment 211331

In birdeye view:
View attachment 211332
With the wind vane straight forward. Yes, it can rotate free!

And NO........ The Lee is not done yet.
The inspection officer Alan Bates handed over a (small) list with 'still to do'.
So there will be another contribution.

Then I go into the photo studio with The Lee. To make a nicely photo series with The Lee nicely highlighted
Regards, Peter
it's so beautiful, well done Thumbsup :)
 
Wow, it’s incredible what you accomplish.

Jan
it's so beautiful, well done Thumbsup :)
Hello Jan and Shota,
Thank you very much for your repy’s. I really appreciate the reactions.
I am very happy with the result (so far) and still looking to the pictures myself.
Regards, Peter
 
The to-do list finished:
-on both sides a brace to reinforce the overhanging Boiler deck just in front of the Side Cabins:
-the 1st step of the Main Stair;
-on both sides 2 ropes to moor;
-the attachment to the deck of the stages during sailing,
-the hand guy to raise the rear part of the stages when turned sideways towards the quay. Otherwise, they'd be dragging across the deck. The hoists of the stages themselves are secured slightly in front of the middle so that they come up and continue and the back-side stays on the deck.

The braces:
300 Schoor.jpg

An overview of extras on the front deck:
301 Div.jpg

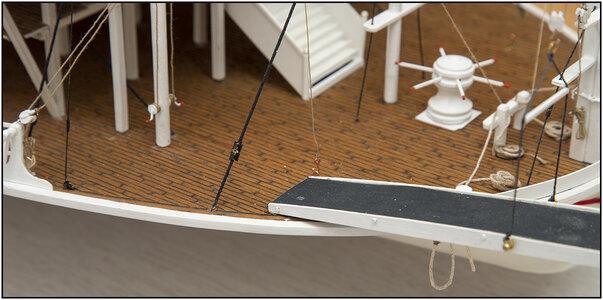
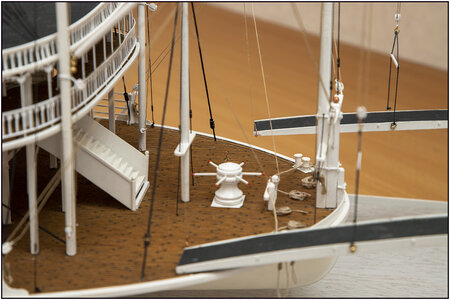
The attachment of the stages to the deck. There's an eye in the back of the stage. This also allows the stage to be attached to the deck with a pin. On the eye is also the hook of the hand guy:
302 Stage1.jpg

Behind the capstan the eye in the deck for securing. Beyond it, the stage that is hoisted out:
303 Stage2.jpg
The first step of the stairs can also be seen here.

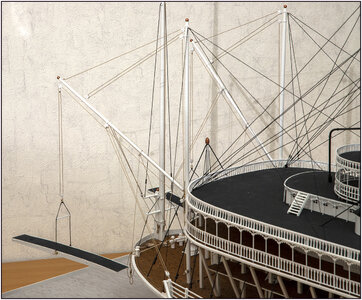
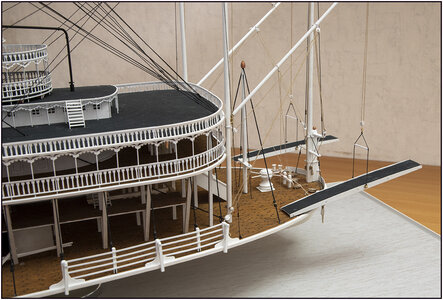
An image of outside stage. With the necessary wiring in the picture. See if you can follow them:
304 Stage3.jpg

From a different angle:
305 Stage4.jpg
 
Last edited:
Back
Top