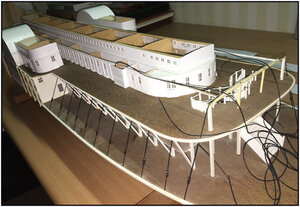
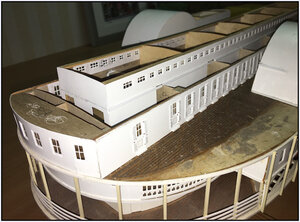
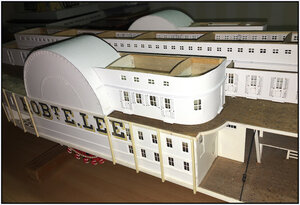
Paddle Steamer Robert E. Lee, scale 1:96, scratch build by the Alan L. Bates drawings [COMPLETED BUILD]

Joined
Jun 19, 2020
Messages
5,715
Points
738

Location
Woudrichem, Netherlands
After introductie myself:
I start this building blog.
In this building blog, I will take you through 3 different periods of building the Mississippi Paddle Steamer: the Robert E. Lee. A magnificent Side Wheeler from around 1870.
At first, the period between 1987 and 1991, when I started with the building.
At second, the period from 2019 till now.
At last, when you all are equal to the standing for now, I will show you the rest of the building.
In the blog I will also describe and show you with pictures, sometimes step-by-step, what kind of techniques I have used and how I find out how I could manage a problem. Because by building from scratch with only the drawing and some pictures, there is no user guide of manual.

In 1987 I found a address in Germany for buying a set of drawings from Alan L. Bates from the Robert E. Lee:
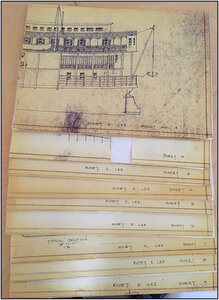
004 Bates Set.JPG
I think this set of great drawing shows the Robert E. Lee I:
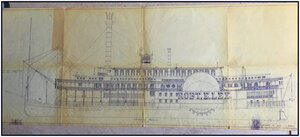
005 Lee.JPG

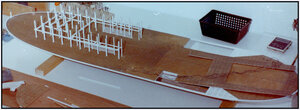
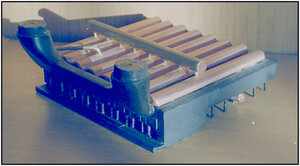
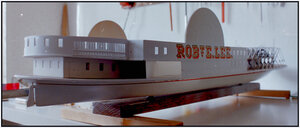
In this situation, the model was standing from 1991 till 2019, catching dirt and dust:
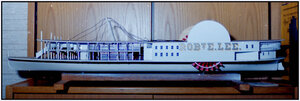
003 Boiler-Deck Paddle.jpg

The starting in 1987:
The HULL:
Looking to the line-drawings and inspired by the form of the hull, I decided to build the hull by stacking planks.
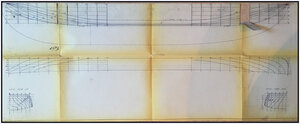
006 Lijnenplan.JPG

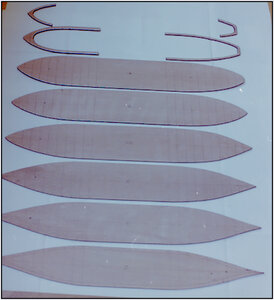
I cut the drawing in half and draw with carbon-paper the lines on 5mm triplex
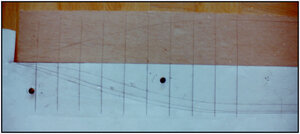
007 Lijnenplan.jpg

Then I started sawing:
008 Lagen Los.jpg

Painted all the sides black for indications by the sanding:
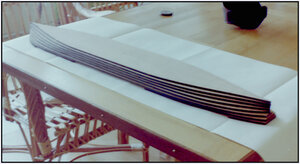
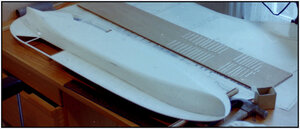
009 Lagen Stapel.jpg

The back-side of the hull, with the main shaped of the hull:
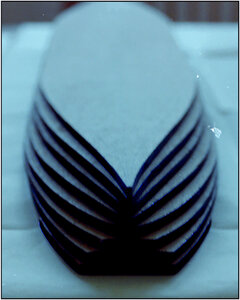
010 Lagen Stapel Achter.jpg

In time, the next part.
Regards, Peter Voogt
 
Last edited:
Very interesting start of your building log - I will follow your work with big interest :cool:
 
Thank you for your reply's.
@JosephH: I can imagine it's impressive to see and hear a Paddle Wheeler on the river. In the Netherlands we had in the eighties a modern sternwheeler Mississippi Queen. But after a few years it is sold to Germany. I have seen it passing on the river Waal/Merwede in front of my house. Although it was not under steam.
@Jan and Uwe: I will post a new chapter very soon. Hoping it will be interesting ;)
Regards, Peter
 
In my first post, I wrote that for the building of this model, there was no user guide or manual.
However: Alan L. Bates wrote The Western Rivers STEAMBOAT CYCLOPEDIUM.
This book helps me very much by the building.

The Hull and Main Deck:
When I started with the building, I didn’t have the intention to start a building blog.
Therefore I didn’t make many pictures. From the hull itself I could not find one.
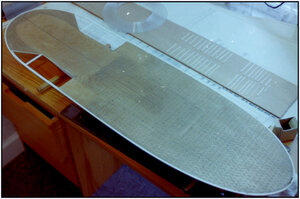
The next picture is from the painted hull with the Main Deck installed.
The Main Deck is supported with guards. On the picture they are laying beside the Main Deck, waiting to be installed.
011 Romp Main-Deck.jpg

The Main Deck is covered with wood laminate. I made it by carving the seams with a blunt knife. After the carving I highlighted them with a pencil.
012 Main-Deck.jpg

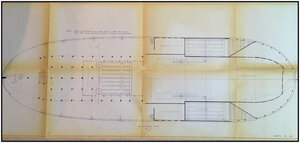
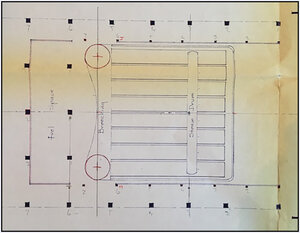
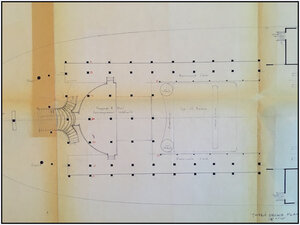
Sheet 3 of the drawing shows the layout of the Main Deck.
013 MainDeck BoilerDeck.JPG

I started in the front with a lot of stanchions / stationaries and cross-beam.
On the back of the deck you see the H-shape Barricade Deck. This is the ‘Tween Deck in the front. On the back side comes also a ‘Tween Deck.
The Barricade Deck comes on the cross-beams halfway between the Main Deck and the Boiler Deck.
014 Main-Deck Boiler-Deck.jpg
The measurements of the Main-Deck:
Length: 93 cm / 36,6 inch,
Width: 27 cm / 10,6 inch,
Later on it will be lengthen in the front with the swinging stage and on the back with a david and a yawl.
The height of the model will be 39 cm / 15,3 inch.
Regards, Peter
 
Last edited:
Thank you for your reply's.
@JosephH: I can imagine it's impressive to see and hear a Paddle Wheeler on the river. In the Netherlands we had in the eighties a modern sternwheeler Mississippi Queen. But after a few years it is sold to Germany. I have seen it passing on the river Waal/Merwede in front of my house. Although it was not under steam.
@Jan and Uwe: I will post a new chapter very soon. Hoping it will be interesting ;)
Regards, Peter

yea ours are modern too but there are a couple that are original that come through the area. I used to work on one back in the day when I was a chef. it was a floating restaurant and we had a 3 hr dinner cruise every sat and sun
 
Steam Engine:
Sheet 3 shows the upper side of the steamengine:
015 SteamBoven.JPG

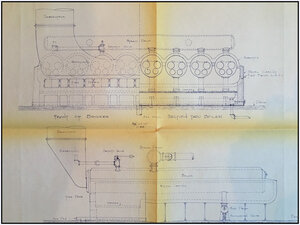
A other sheet shows the front and left side:
016 Steam Voor-Zijkant.JPG

On that sheet also the detailed transmission for the Side Wheels:
017 Engine.JPG

In the model you can see nothing of the technical part. Therefore I dicided not to build them.
The result of the Steam Engine:
018 Boiler.jpg
For the most it is maid of wood. The transition from the firehouse to both of the
Smoke Stacks is made of balsa. A lot of carving and sanding!
The steam pipes are from brass and brass-paper.

Regards, Peter
 
Last edited:
Steam Engine:
Sheet 3 shows the upper side of the steamengine:
full


A other sheet shows the front and left side:
full


On that sheet also the detailed transmission for the Side Wheels:
full


In the model you can see nothing of the technical part. Therefore I dicided not to build them.
The result of the Steam Engine:
full


For the most it is maid of wood. The transition from the firehouse to both of the
Smoke Stacks is made of balsa. A lot of carving and sanding!
The steam pipes are from brass and brass-paper.

Regards, Peter

Man wished I didnt lose my stuff in computer fry I had that engine cadded that I had done for a customer and it was going to be a working design. My partner had a guy working on the boiler etc but the original customer couldnt come up with the cash
 
Main Deck + Barricade Deck Deck + Main Stairs:
Now some more details from some parts on the Main Deck.
Barricade Deck:
On the sides and through the floor of the Barricade Deck, there are a lot of stanchions. All of them have to be lined out …….
019 TweenDeck.JPG

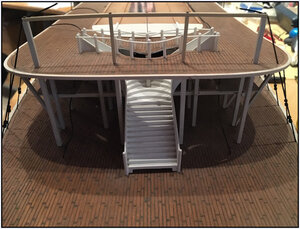
Main Stairs:
The Main Stairs lead from the front and halfway it is bending to the left and the right.
You have to combine the drawing from above and in front, to come from 2D to a 3D model:
020 MainStair.JPG

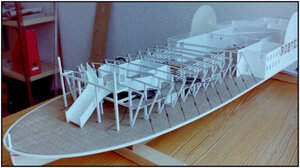
I have no detail-pictures from the several building steps, but this picture show the total build-up of the Main Deck.
021 Main Opbouw.jpg
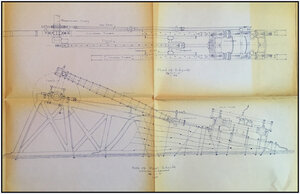
And you see the Cross Chains to support the outboard edges of the front Main Deck.
They are running over the cross bars. I though this also where named Carlines,
The ends of them are supported again with side braces.
Later on I will explain more about these chains and braces.

And the back side with the cabin walls on the Main Deck and ‘Tween Deck.
022 Main Opbouw Totaal.jpg

Regards, Peter
 
Last edited:
I have book and Plans for the USS Susquehanna https://shipmodeler.wordpress.com/2019/05/04/woody-joes-new-uss-susquehanna-kit-in-the-works/ Not the greatest Plans but one day I might build it.
What a coincidence JosephH, for 2 weeks ego I was looking to this shipmodel!
I am little by little already looking for what kind of ship my next model will be. I consider the clipper Cutty Sark. But I also saw the USS Susquehanna. A beatifull combinatie of sails and steam.
Peter
 
Paddlewheels:
Before I could close the construction of the Main Deck with the Boiler Deck, the Paddlewheels had to be made.
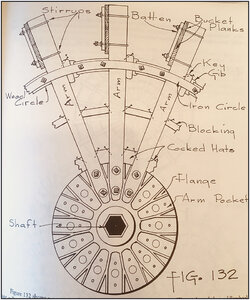
The Bates’s Cyclopedium helps me a lot by the designing and by the choices of witch details I will fit on.
023a Bates Wheel.jpg

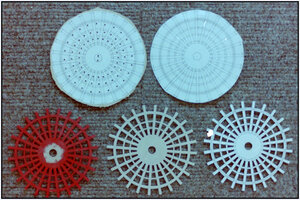
Each wheel got 5 blades:
023b Paddle Fasen.jpg
From right-above to left-under:
1: a design on paper, glued on 1mm triplex;
2: drilling the holes, ready the saw;
3: all the holes out;
4: released from the paper and sanded;
5: painted in mat-red.

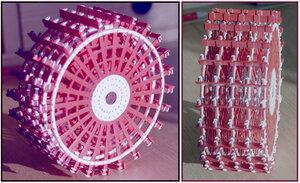
A wheel completed:
024 Paddle Compleet.jpg
Each wheel has:
-5 blades with 24 arms on each blade;
-24 bucket planks, each joining 5 arms;
-24x5x2 stirrups, around the arms, drilled through the bucket plank and fitted in 5 battens which are placed in the front of the bucket planks;
-24x5 battens on the bucketplanks where the stirrups ended in;
-a inside and outside ‘iron’ circle almost on the end of each blade, each circle with 24x2 nails;
-a inside and outside flange around the shaft hole of each blade, each flange with 24x2 nails.
For each nail: cutting off the nail-head, drill a hole and stich and glue the nail-head in it.
And all of this 2x. It took ‘some time’, but I am content with the result.

The wheel fitted in the wheelhouse.
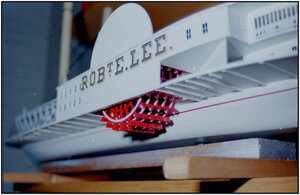
025 Paddle Tekst.jpg

Regards, Peter
 
Last edited:
Lettering:
On the last picture, you see also the lettering on the outside of the wheelhouse.
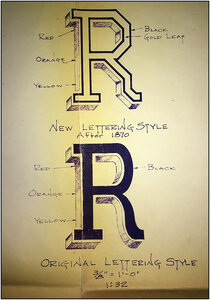
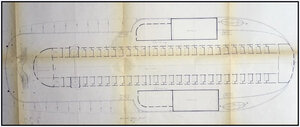
A sheet gives the details for the design:
026a Tekst.JPG
I choose for the “New LetteringStyle After 1970”. But not for the for the shadow to left-under.

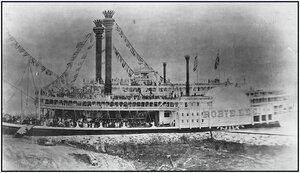
During the beginning of the building, I was searching for original pictures. By my visit to the Scheepvaartmuseum in Rotterdam, I also visited the library. A helpful employee found me a book with a nice picture of the Robert E. Lee II. And I am thankful to the museum to allow me to make a copy!
026b Rob-E-Lee Museum.jpg
The picture was titled “Rob’t E. Lee II in Gala Attire”.
And the shadow of the lettering was to right-under.
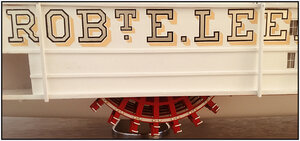
Here you see my result:
026c Tekst.jpg
For the making I used adhesive paper in gold and orange.

Version I or II:
The Robert E. Lee II is partly different from version I.
-the Texas Cabin has also a Skylight, stiched through the Texas Roof. And therefore a extra Skylight Roof;
-it has also stationary's with railings and bulkheads around the Texas;
-a little railing on the Texas Roof. Version I was only fitted with drapers.

I decided to build the model according to version II. It gives the top more style and body. And a lot of extra work, but I will explain that later on.

After installing both wheels, I could fit the Boiler Deck. Alas, I have no pictures of the design of this deck: making a card-board copy, fitted on the model and then cutting and sawing it out of 1,5mm triplex.
On this picture you can see it.
027 Boiler-Deck Paddle.jpg

It is this situation in 1991, when the model got his big rest until 2019!
Spending 336 hours!
Regards, Peter
 
Last edited:
Now I am starting the second building period, from april 2019 till the now.
Building up the Boiler Deck.

Main stairs:
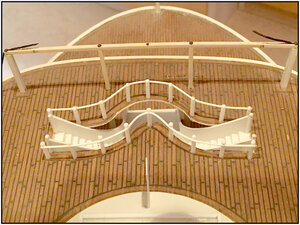
First I made the pillars and handrail around the gap of the top of the main stairs.
028 Boiler MainStair1.JPG

029 MainStair2.JPG
Now you have also a better view on the laminated main- and boiler deck.
And the front cross chain that runs over the main carline of the Hurricane Deck.

Boiler Deck:
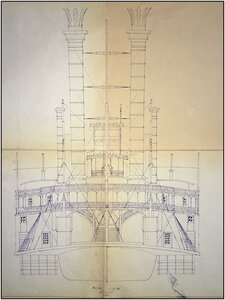
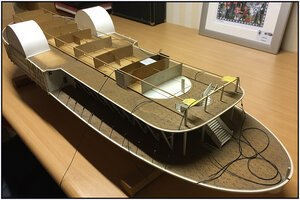
Sheet 5 shows the layout of the Boiler Deck with the Main and Side Cabins:
030 BoilerDeck.jpg
I took me some time to get the impression of the total structure.
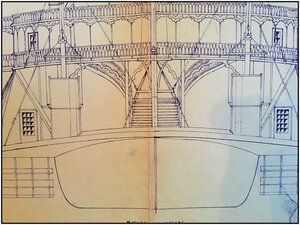
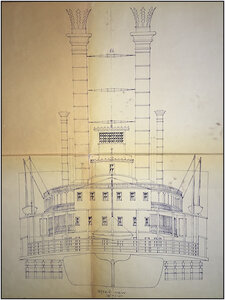
The drawing from the total front and back helps me.
031 Voorzijde.JPG

032 Achterzijde.JPG

I started to make a frame where I could attach the walls and put on the Hurricane Deck.
I had to pay attention with the camber of the deck, special from the Hurricane Deck which came on top of it. By the overall length, with the sheer.
First some thin slats on the deck in the lengthwise direction to support later on the under side of the walls.
Some between walls and connect them also with 2 side slats:
033 Boiler FrameV.JPG

034 Boiler FrameA.JPG

The Main Cabin has inside and outside walls:
035 MainCabin0.JPG
The inside walls runs till above the Hurricane Deck/Roof, the Skylight. On top of these walls rests the Skylight Roof.
On the outside walls rests the Hurricane Deck and for the cabin itself it is the Hurricane Roof.
Regards, Peter
 
Last edited:
Inside and outside walls:
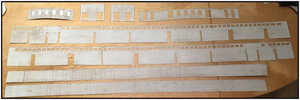
I made a paper model of the inside walls with 120gr paper.
036 MainCabin1.JPG
With some adjusting they got the right sheer.
And also the outside walls.
038 MainCabin3.JPG

039 MainCabin4.JPG

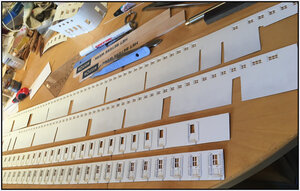
The wall models I have taken over on 0,5mm triplex. Its stiff enough when the structure is completed and I can bend it round on the front without watering.
I signed all the lines of the windows and door and start cutting:
040 MainCabin5.JPG

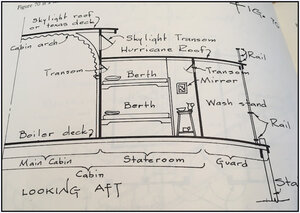
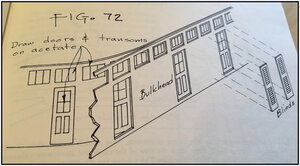
For the construction of the wall including windows and doors, the previously cited Cyclopedeum also gave useful tips:
041 MainCabin6.JPG

Behind the recesses for the doors and windows I used the 120g of paper to make the doors and window frames, incl window cutouts.
Behind that I made the windows again with transparent printer sheets. The window styles applied to it with white ink.
I used the cut-out pieces for the doors again for the door blind.
Just cut it all in half and fitted/draw the blinds.
Then equipped with doorknobs and hinges.
042 MainCabin7.JPG

Regards, Peter
 
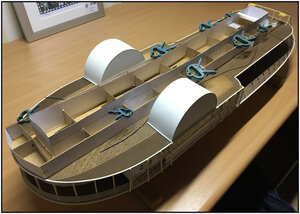
Building up the Boiler Deck:
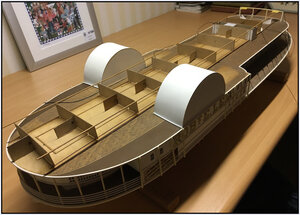
To align the inside walls, I made some transverse walls with on top the right curve of the camber for the Skylight roof.
First, I put the inside walls, together with the transverse walls. On top of the wall an extra bar to secure later on the Skylight Roof.
After that I put the outside walls with also the round curved front cabin.
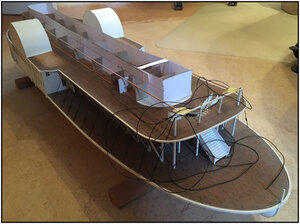
043 MainCabin8.JPG
The clumsy black strings on the front are the chains in the length of direction. I show them later.

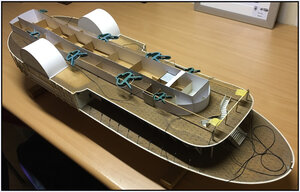
On the inner walls I have placed slats on which later the inner edges of the Hurricain Deck are glued. Because of the curve of this deck that wants to straighten that out.
044 MainCabin9.JPG

Together with the Main Cabin, I also made both Side Cabins.
Also with the slats to support the outside parts of the Hurricane Deck.
045 SideCabin.JPG

PS:
In some Evergreen-parts, many years after installing, you can see a color difference. With flashlight this is provided even more! Part by part I take it with me during dyeing/spraying. The paint I used in the first phase doesn't exist anymore. Now I use RAL 9016 (Traffic White) Satin. Both in the airbrush, jar with brush and spray can.
Regards, Peter
 
Last edited:
Back
Top