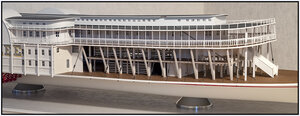
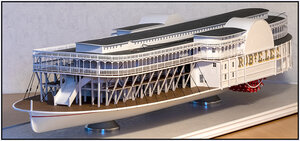
Paddle Steamer Robert E. Lee, scale 1:96, scratch build by the Alan L. Bates drawings [COMPLETED BUILD]

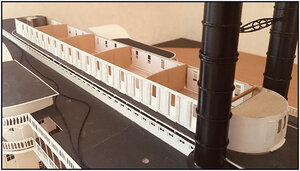
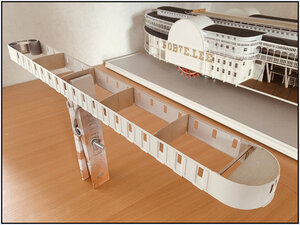
Phoe .... I can close another chapter. At the beginning of May I had placed all the uprights for the railing on the outside of the Boiler and Hurricane deck.
This morning the last piece fixed to the Hurricane deck by the Side cabins.
2 photo of the 2 different deck stages:
097 Railing Boiler.jpg
098 Railing Hurricane.jpg

All in all, it went about 100 hours.

On to the next chapter: the Texas. The cabins atop the Main Cabin.
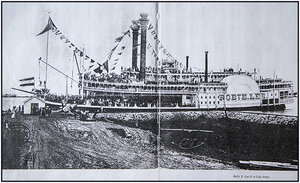
As I mentioned, I decided to continue building here as the Robert E. Lee II was. Actually, I was already obliged to do so, because the "I" doesn't have the longitudinal "Braces and Chains". Therefor they're not on Bates' drawings either. But for sure on the photo from post #15 witch I found in the Scheepvaartmuseum in Rotterdam. With that caption "Rob't E. Lee II in Gala Attire”.

Last weekend I was already trying to figure out what the Texas of the "II" looked like with its Skylight and exactly: its railing and drapery.
I came across another pretty sharp picture of the “II” in the digital Madison Libraries of the University of Wisconsin. With pretty visible details. But..... WITHOUT the longitudinal "Braces and Chains" Redface !! Different versions of the “II” Speechless ?

Anyway, I've now found 4 photos with that longitudinal "Braces and Chains", so that's it.
It's just a pity that the drapery under the Hurricane deck at the "II" are a little different than the “I”. I found it out a little too late. But I'm not going to change that anymore.
I'm building the Robert E. Lee for myself. At the end I'll have a nice Peddle Steamer in my room. And too bad he's not entirely historically accountable. I'm not going to competitions with it anyway. And the first one that reminds me that something is not right by the drapery, he/she gets a “Bossche Bol” from me. That's a famous delicacy from 's-Hertogenbosch. I live nearby that city in the south of the Netherlands.
Ps:
When browsing through the photos I now have of the “II”, I found out that I didn't post by #15 the photo of the copy from Rotterdam. The one in #15 is a slightly edited photo. And from that picture I found a further edited somewhere else. The photographers of that time were already doing photo editing.
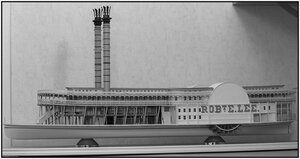
This is my copy from Rotterdam. With a picture of my model, in a pretty similar position. When it's finished, I'm going to take on the challenge of getting that exactly right. (But without the flags and people.)
099 Org-II.jpg
100 Mod-II.jpg

Regards, Peter
 
Planning required:
In figuring out how the Texas should take shape, I found out that at this stage of construction, a number of things come together:
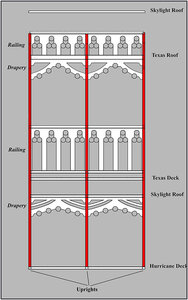
1: Railing and Drapery:
-the Texas stands on a floating floor, which is placed with spacers on the roof of the Skylight of the Main Cabin;
-under the roof of the Skylight of the Main Cabin and Texas, draperies are hung;
-on the floor and roof of the Texas comes railings.
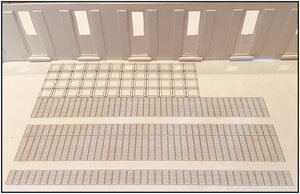
I first draw them in Photoshop to project later on to the molds to be scanned:
101 RailingOrnament .jpg

2: Uprights:
The above mentioned railings and draperies are affixed to uprights which thus:
-from the Hurricane Deck;
-through the Skylight Roof;
-through the Texas Deck;
-through the Texas Roof;
-continues to the Texas Roof in support of railing.
Holes have to be drilled for that, all of which come in line to place the uprights all in vertical line of the waterline.

3: Roof and floor:
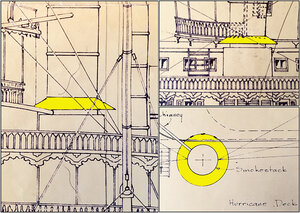
The Smokestacks come out through the Hurricane Deck and going right past the Skylight of the Main Cabin. In the roof of the Skylight, cut-outs have been made on both sides.
The floor and roof of the Texas have cut-outs at that place as well.
In order to drill the holes listed under point 2, the floor and roof of the Texas, with their cut-outs for the Smokestack, must be aligned accordingly.

4: Smokestacks:
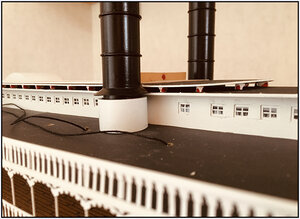
The Smokestacks have an oblique ring at the spot where they come "outdoors", to drain the dripping water. This ring extends between the roof of the Skylight and the floor of the Texas.
102 SmokeRain.jpg
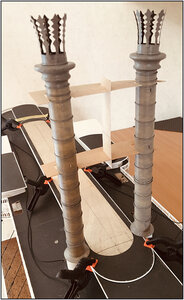
If the Smokestacks are placed through all the roof recesses on the Steam engine, then they are fixed in such a way that I can no longer place the 3 Spreader Bars between the two chimneys.
The installation of the Smokestacks is again important for aligning the floor and roof of the Texas.

Ultimately I have chosen for this order:
1: draw and cut out the floor and roof for the Texas and provide the roofing, waterproof sandpaper 800 with 2 layers of varnish.
2: Make and apply the oblique rings to the Smokestacks.
3: Make the 3 Speaderbars.
4: Spray the Smokestacks and Spreaderbars.
5: Temporarily stacked places of the floor and roof of the Texas on the roof of the Skylight.
6: Temporarily placing the Smokestacks including the Spreaderbars, so the Texas floor and roof are fixed in the length direction.
7: Fixating the Texas floor and roof in the width direction.
8: Remove smokestacks again.
9: Drilling holes for the uprights/uprights.
10: Unfix the Texas floor and roof.
11: Smokestacks with the 3 Spreaderbars finally places. The water ring rises just above the roof of the Skylight.
12: Put spacers under the floor of the Texas.
And then I can permanently place the floor of the Texas, which then falls just above the water ring of the Smokestacks. And then I can start making the walls of the Texas and Skylight.

All in all, a whole story. And a lot of thinking. Each time I came across something that could no longer be made, placed or not to align.
Later on the results of the beginning of this stages.

Regards, Peter
 
Peter, this is a truly captivating model- the best I've seen of any paddle steamer.
Looking at the the historical photo you posted earlier I noticed the circled parts on the deck- do you know what that is?
View attachment 166653
John,
You have studied the picture well Thumbsup
Removable fences can be placed between those supports.
It’s depending of witch cargo is transported and how the ship is moored on a wharf.
Regards, Peter
 
Last edited:
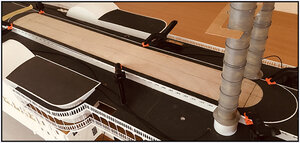
The following pictures show the following steps:

-The Texas floor made and all around along the white frame, fitted each 12mm with a hole for the 0,5mm uprights. This serves as a mold for the "through and through" drilling of the holes in the Texas roof and the Main Cabin Skylight roof.
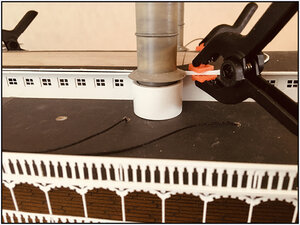
-The Smokestacks featured the oblique water frame. Put the chimneys trough the deck holes on the steam engine.
-On the roof of the Skylight first laid the Texas roof and on top of it the Texas floor.
-The Smokestacks are placed so that the Texas floor and roof are well aligned through all the recesses.
-On the Hurricane Deck, the Smokstacks have heat protectors. These extend to the wall of the Skylight and in the height to just below the roof.
103 Texas Floor.jpg

The temporary stacking of the Texas floor and roof with the heat protector and smokestacks with water rings:
104 Uitsparingen.jpg

To align the two Smokestacks well vertically and at right angles to the waterline, a little mold made to fix them. Now that these are in good position, partly because of the recesses in the already fixed Skylight roof, the Texas floor and roof also come to be well laid down and I can fix them to drill the holes for the uprights later:
105 Smoke Spacer.jpg

Regards, Peter
 
Last edited:
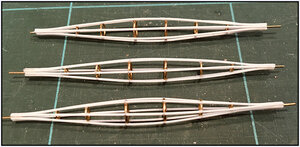
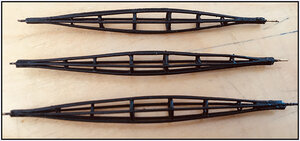
Spreader Bars:
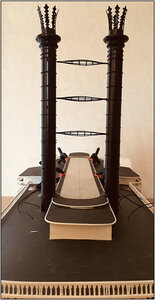
I had already made previous attempts to make the 3 Spreader Bars. Those spacers are between the two Smokestacks. To keep them in position, together with the guy wires to be added later.
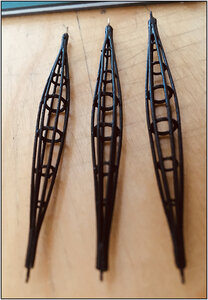
Each bar consists of 6 rods or wires that are joined at the ends. In between are 6 rings with 3 different diameters.
I had already tried everything from building from 1 bar and then adding the rings and the other bars, to starting with 2 bars and then adding the rings etc. But each time it didn't manage to get everything pretty tight. Metal rods were too stiff or not nice to get into curvature.
Because I'm going to have to install both chimneys before I can build the Texas, these must have been sprayed. And when placing, those spacers have to be right in between. So I didn't escape taking another shot.

In the end, this became the method:
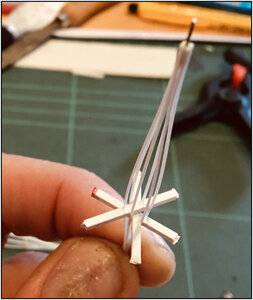
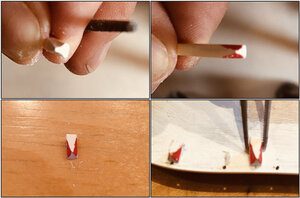
Glue the 6 sticks of 0.5mm Evergreen on either side around a piece of brass rod of 0.5 mm. First, one on both sides. Then at the ends you automatically get " 3 in a row of 0.5mm" and on both sides 2 to 2 the remaining rods can be glued.
Then the 6 bars 2 to 2 are separated by 3 bars.
106 Spreader1.jpg

Before the rings I had already been doing homemade rounds, but that didn't look like anything.
Searching the internet I came across brass rings of 2, 3, 4 and 5mm.
First, those of 5mm where alright for the middle 2.
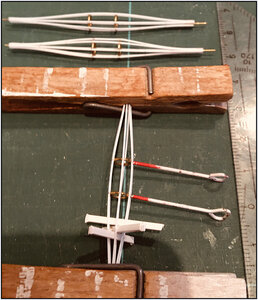
The final technique: temporarily gluing the ring to a needle, placing it between 6 rods and tying it with CA.
Then grab the ring with tweezers and loosen the needle.
107 Spreader2.jpg

Similarly, the following 2 rings of 4 mm:
108 Spreader3.jpg

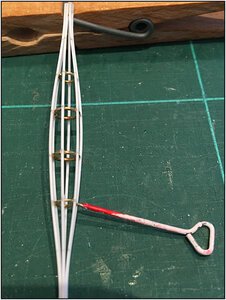
Then on either side 2 rings of 2mm and then they are complete:
109 Spreader4.jpg

Another solved thing I've been hiccuping at for a long time!
Regards, Peter
 
Last edited:
And the final contribution for today so that you are equal to the current state.

Done some painting with the paint spray can.
The Spreader Bars as you see them right in front:
110 Spreader5.jpg

From the side, with the rings visible:
111 Spreader6.jpg

And between the Smokestacks and placed for permanent fixation of the Texas floor and roof, before drilling:
112 Spreader7.jpg

Then I can now start drilling the holes for the uprights/uprights, after taking away the Smokestacks.

Regards, Peter
 
Always happy :) when in practice the idea (see post #44) turns out to work!
I went through the 12 steps with this as a result.


From point 12, the spacers:
File, accentuate, cut, paste:
113 Spacers1.jpg

With all 56 posted:
114 Spacers2.jpg

In finally placing the Smook stacks with the heat protection and sloping rings between the Skylight roof and Texas floor with its spacers:
115 Smoke1.jpg

With another picture of the current state:
116  28-jul-2020.jpg

I am still very happy with the 3 Spreader Bars between the Smook stacks. Because it took me several stages of failure Explosion.

Now we can go back upwards.
Making molds for the Texas walls in 3 parts: exterior wall, window frames and window glass.

Regards, Peter
 
Little up-date.
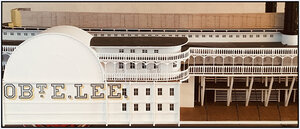
Texas:
I chose to build the Texas with its Skylight differently than with the Main Cabin and its Skylight.
There I let the Skylight walls run as interior walls to the floor. And they then crossed through an opening in the roof of the Hurricane Deck (see post #17, #18, #22 and #24).
Because the floor and roof of the Texas are much narrower (70mm) and the edge (walkway) next to the walls is only 7.5mm wide, that could become a fragile construction. The edge of the roof next to the recess would therefore also only 7.5 mm wide. Who also has to get the sheer.

I'm building the walls of the Texas now on the floating floor. In the transverse direction there are again several shots that get on bottom and top the camber. That's where the continuous roof comes on, and because this roof is 1 whole, I can secure it much tighter on the walls.
On the roof come the walls of the Skylight.
In itself a small shift from the problem. Because those Skylight walls are only 10mm high and have full-length windows. In Dutch: “A Lot of holes and little meat”. But I have now gained plenty of experience with the other walls with all their windows.

Using the paper molds of the Main Cabin and Skylight, the side walls are made.
Lots of steps, sanding, fittings, sanding...... until they seamlessly joined the floating floor of the Texas. Here's a look at them:
117 Texas1.jpg
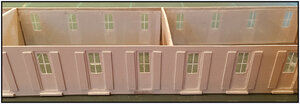
Using the photos and aligned on the windows of the Main Cabjn Skylight (and the doors below) the doors on the Texas walls measured out. And the windows of the Skylight, again in line with the doors.
From top to bottom:
-Skylight right
-Texas right
mirrored on the sheer, relative to the rights
-Texas left
-Skylight left
118 Texas2.jpg

Also always watching on the model whether it is correct:
119 Texas3.jpg

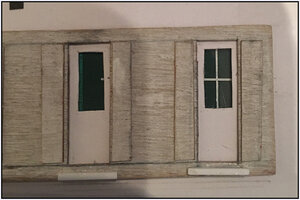
In detail the drawn doors and windows.
120 Texas4.jpg
HxW are the doors 21x7mm, de windows 5x7 and 5x11mm. With 2mm space between/under/above.
So close-up the lines of the windows in the length direction do not seem neatly aligned. That will come with cutting along the steel ruler guide again good/straight.

Regards, Peter
 
At the end of post #17 I showed how I built the walls of the Main Cabin and its Skylight:
-the exterior wall with recesses for the doors and windows,
-there behind the layer of doors and window frames,
-there behind a transparent for the glass with the window styles.

To get the final result, a lot of steps were needed.
Perhaps quite interesting to show what those steps are, why and how built up.

So it started with (see just above):
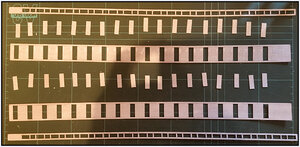
1: making the walls with 0.5mm plywood for the Texas and its Skylight.
2: drawing out the windows and doors.

3:
I first provided the 4 parts with a diluted layer of base paint. It pulls into the wood fibers. Once dry, those fibers are a little harder. Then the wood splinters less when cutting.
4:
Starting with cutting out the windows of both Skylight walls. 2x37 pieces.
Then cut out from both Texas walls 2x18 doors.
The cut-out doors kept.
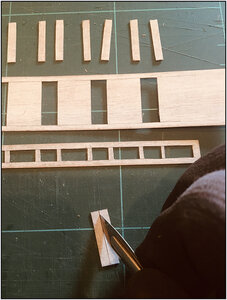
121 Texas5.jpg
5:
These doors are cut in half lengthways, because that's what the louvre doors are:
122 Texas6.jpg
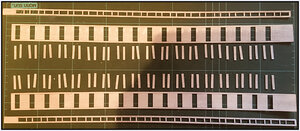
6:
These are 2x18x2=72 louvre doors:
123 Texas7.jpg
7:
Glued to either side of the doorways and put everything back on top of each other.
124 Texas8.jpg
8:
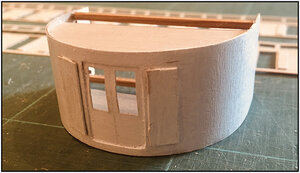
On both sides you can see the Skylight sticking out beside of the walls of the Texas. In itself, the Skylight falls within the Texas Cabin. The two Texas walls still run a little bit with the rounded front stretch of the Texas. The Skylight stops just inside the round.
125 Texas9.jpg
9:
All doorways equipped with a step:
126 Texas10.jpg

Now I can get rid of the frayed edges and provide everything with part a 1st and partly a 2nd layer of base paint.
Then I can use the 4 parts as a mold for drawing out the layer behind it with the doors and window frames.
To be continued ….

Regards, Peter
 
Model construction = winter time.
But with this 35gr...... then stay indoors by the airco and don't worry.....

A few more steps:
10:
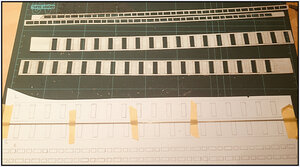
The 4 walls on 120g of paper and the recesses for the windows and doors are taken over.
The top sides of the cutouts to be made with the help of a brass rod aligned so that they also follow the sheer. From that line further drawn the cutouts:
127 Texas11.jpg
11:
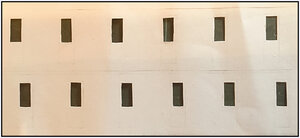
Started with cutting out the door windows of the Texas , only doorwindows, because I'll have to place them before I can finish the Skylight on the roof of the Texas. The windows roughly cut out:
128 Texas12.jpg
By such a close-up you see every tiny mistake ......
12:
The help lines eroded again and the windows trimmed:
129 Texas13.jpg
And fit if it's right:
130 Texas14.jpg
13:
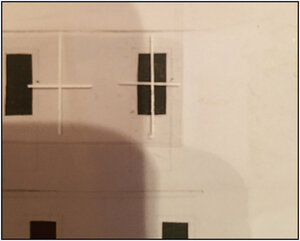
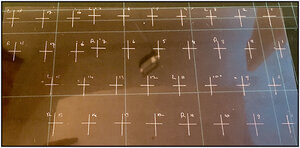
On the paper cut-outs the transparently laid and drawn on the window styles. Old-fashioned with a Rotring pen. Because those new fine-liners with white ink are drying out, leaking........ not comfortable to work with:
131 Texas15.jpg
Getting a sharp phone by using a transparant ....... the camera won't cooperate.
And let's see if it's all right.
132 Texas16.jpg
Not quite straight, but a matter of drawing 36 crosses, cutting them out later and sticking them behind the paper window/door frame.

But first, draw the rest completely, cut out windows and create window styles.
Then assemble the Texas with the exterior walls and stick the paper parts with window frames and doors behind it. With a few intersides for reinforcement. Then spray the whole and glue the windows styles on the inside of the windows and doors.

A lot to do, so it's going to take me a while to get back on the line. But then we're not there yet......
Regards, Peter
 
Last edited:
At first: Thanks for all the likes. Hopefully it won't be to boring all this step, by step, by step, .....
Just for one time for this chapter a different way of making my posts :).
When the Texas is done, back to normal.

Time for a few steps:
14:
On the transparent all window styles drawn, in blocks of 3 or 4 windows. Later I will cut them out into strips so I have space enough to stick them tight:
133 Texas17.jpg
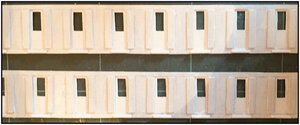
15:
The 120gr paperstrips with the doors and carved windows cut blocks of 3 and 4 doors/windows and glued on the inside of the Texas walls:
134 Texas18.jpg
With this view at the front:
135 Texas19.jpg
16:
Put everything in a new/second layer of base paint, it gets a bit tighter. Sorry for the not sharp picture.
136 Texas20.jpg
17
Sanded everything again and filed the edges. Merged the front and back with the two side walls. With 4 inner walls to reinforce. Now you can also see why the inner strips (and soon the transparent strips with the window styles) have been cut into blocks of 3 and 4 doors/windows. They fit right between the inner walls.
137 Texas21.jpg
But before the Texas is sprayed, first fit with the roof on which the Skylight will come.
138 Texas22.jpg
Otherwise, there is still some updating to be done.
Phoe, the plan is still working ......
Regards, Peter
 
Last edited:
18:
Sprayed the Texas:
139 Texas23.jpg
19:
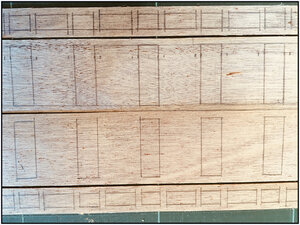
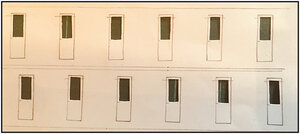
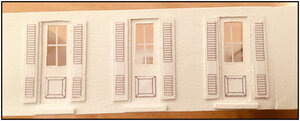
At the Main Cabin I had drawn the louvre doors and the panel in the door with a pencil. I wasn't entirely satisfied with that. But they are largely obscured by the roof.
At the Texas, they're much more in sight. That's why they went back to Photoshop and they drew and printed out:
141 Texas25.jpg
20:
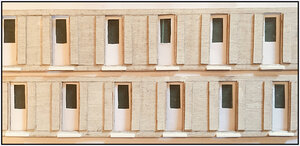
Cut the transparant strips with the window styles and glued on the inside behind the doors:
140 Texas24.jpg
21:
Now I have to do a lot of cutting for the panels and louvres ........ but the first 3 are attached:
142 Texas26.jpg
33 panels and 66 louvres to go ....... (A Louvre is 2mmx18mm)
Regards, Peter
 
Back
Top