Thanxs for the compliment, Vic.Thank you so much for sharing this labor of love, Peter!
Stay tuned and you will see the final chapters of the build.
Regards, Peter
 |
As a way to introduce our brass coins to the community, we will raffle off a free coin during the month of August. Follow link ABOVE for instructions for entering. |
 |
 |
The beloved Ships in Scale Magazine is back and charting a new course for 2026! Discover new skills, new techniques, and new inspirations in every issue. NOTE THAT OUR FIRST ISSUE WILL BE JAN/FEB 2026 |
 |
Thanxs for the compliment, Vic.Thank you so much for sharing this labor of love, Peter!
Will do.Thanxs for the compliment, Vic.
Stay tuned and you will see the final chapters of the build.
Regards, Peter
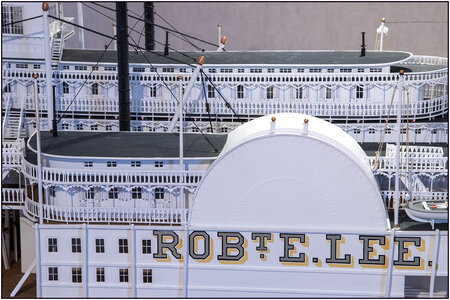
Peter, great work as usual! You truly have one of the best Robert E Lee builds I have seen! I have looked at the kits available and builds from kits, and they just don't compare to what you have built. Fantastic job sir!2 items can be cut off from the list.
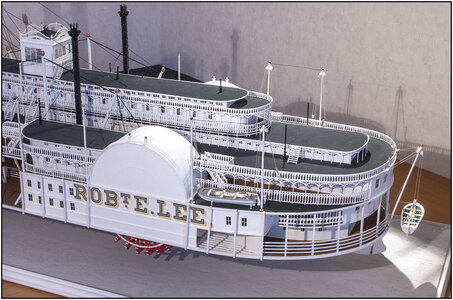
The moldings on the two Wheelhouses with the 2 little ornaments. And at both SideCabins each 2 flagpoles.
Should have a bit of harder light, otherwise no contrast with the white WheelHouse hoods:
View attachment 207133
Of course with lines and there 'frogs'. Don't know precies what the English word is. You wrap the end of the lines on them: \_/.
With light and shadow action, the back is quite lively:
View attachment 207134
Perhaps I will add 2 frags on those flagpoles. But I want to have 2 historical correct flag from +/- 1876 from the States and New Orleans - St. Louis, Missouri.
And I just saw on the old photos, there must me a line between the flagpoles and over the Wheelhouse to the rowboat boom. New item on the list
Back to work in the direction of the front.
Regards, Peter
Thanxs Vic. Still working on the edge, and sometime a step beside ......I am amazed at your precision!
Thanxs Dean for the compliment, it makes me a little quiet......Peter, great work as usual! You truly have one of the best Robert E Lee builds I have seen! I have looked at the kits available and builds from kits, and they just don't compare to what you have built. Fantastic job sir!
It’s the little details that make all the difference! They also seem to take a lot of effort!Thanxs Vic. Still working on the edge, and sometime a step beside ......
Thanxs Dean for the compliment, it makes me a little quiet......
In 1986/1987 I thought there weren't that many kits on the market and my choice fell on the drawings.
Not knowing what problems and headaches I'd come across.
But I still have very much respect for those who do build these kits. everything depends on your own possibilities and difficulties that you do not want to get out of the way.
Take the little moldings on the Wheelhouses. To show how I finally made them.
Mwa..... 2 pieces of drawing with a passer ..... cut out ...... Paste.
Try cutting out a curve straight. 2 times round on each other is never round!
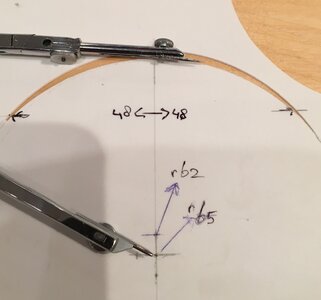
So, First measured the roundness of the Wheelhouse: r = 66mm
Then the upper rounding that needs to come back together on either side.
First on paper with the passer with 2 metal points.
That 66mm was just too big and gave a crack.
Ended up at 0.5mm Evergreen:
View attachment 207173
Inside r=65 mm and outside with a higher center r=62 mm.
And both cirkels must come together left and right in point 48 mm from the centre.
Because it fits on one side to the roof of the Side cabin. And on the other side on hight of the Hurricane deck.
20 times with the passer back and forth and you're through the Evergreen.
And the 2 little ornaments: cut on lengt, give the bevel of the ronding of the WheelHouse, make a slice in the middle so it fits over the molding.
Phoe, for that little moldong .....
Regards, Peter
Good understanding of the geometry involved in use of what I call a "drafting compass" for your precise work. Quality in all aspects. RIchThanxs Vic. Still working on the edge, and sometime a step beside ......
Thanxs Dean for the compliment, it makes me a little quiet......
In 1986/1987 I thought there weren't that many kits on the market and my choice fell on the drawings.
Not knowing what problems and headaches I'd come across.
But I still have very much respect for those who do build these kits. everything depends on your own possibilities and difficulties that you do not want to get out of the way.
Take the little moldings on the Wheelhouses. To show how I finally made them.
Mwa..... 2 pieces of drawing with a passer ..... cut out ...... Paste.
Try cutting out a curve straight. 2 times round on each other is never round!
So, First measured the roundness of the Wheelhouse: r = 66mm
Then the upper rounding that needs to come back together on either side.
First on paper with the passer with 2 metal points.
That 66mm was just too big and gave a crack.
Ended up at 0.5mm Evergreen:
View attachment 207173
Inside r=65 mm and outside with a higher center r=62 mm.
And both cirkels must come together left and right in point 48 mm from the centre.
Because it fits on one side to the roof of the Side cabin. And on the other side on hight of the Hurricane deck.
20 times with the passer back and forth and you're through the Evergreen.
And the 2 little ornaments: cut on lengt, give the bevel of the ronding of the WheelHouse, make a slice in the middle so it fits over the molding.
Phoe, for that little moldong .....
Regards, Peter
Thanxs Rich for your kind words and compliment.Good understanding of the geometry involved in use of what I call a "drafting compass" for your precise work. Quality in all aspects. RIch
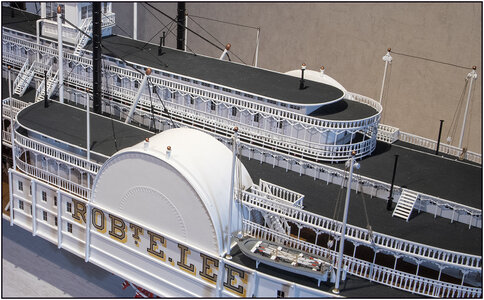
Peter, this is a truly captivating model- the best I've seen of any paddle steamer.
Looking at the the historical photo you posted earlier I noticed the circled parts on the deck- do you know what that is?
View attachment 166653

Amazement continues to come from your minute detailing!!! RichThe forgotten lines between the flagpoles. On closer examination of several photographs, the line between the flagpoles, over the Wheelhouse, to the Davits, appeared to be drawn in some of the photographs. Like some flags. And not on my scan from the Maritime Museum. Apparently an original photo.
Therefore only between the flagpoles with a sagging to the roof of the SideCabins:
View attachment 207676
A new challenge in the chapter 'Railing'.
Which is mounted on the MainDeck from the Wheelhouse to the front.
@JohnA : Now your question from July 24e gets a answer!
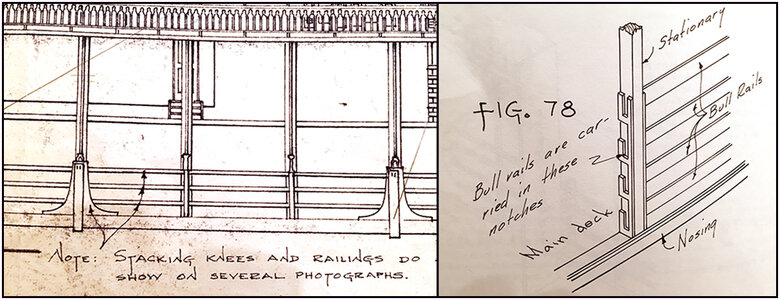
Schematically affixed to the drawing. But Bates' Cyclopedium gave more info here:
View attachment 207677
In the old picture you can see that they are almost human high:
View attachment 207678
Bates has written: "to prevent accidental loss of freight and cattle".
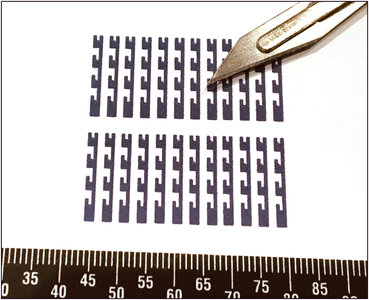
In Photoshop the strips with notches drawn. 17x2 mm. With space for a bull rail on every 4mm. The bull rails are made of Evergreen 1x0.5 mm. In terms of construction scale 1:92 it has to be a bit proportional.
View attachment 207679
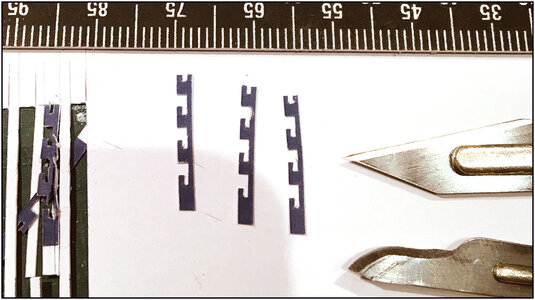
Started cutting, testing the skill again. Walking on the edge of cutting, with the occasional fall off: (see left)
View attachment 207680
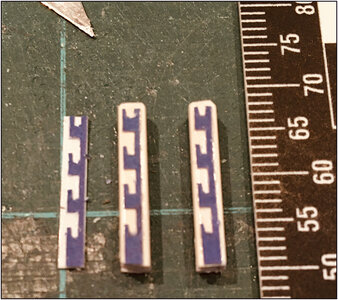
The stationaries made of Evergreen 3x3 and glued the strips on. First as a trial a pair for the first pieces:
View attachment 207681
From the WheelHouse started, the first 2 stationaries, 4 bull rails and an intermediate.
The uprights also had to be saw in because they stand over the cross chains:
View attachment 207682
For secure the bullrails glued in the notches. Fitting them is fragile!
To test the longest-strengthening against it:
View attachment 207683
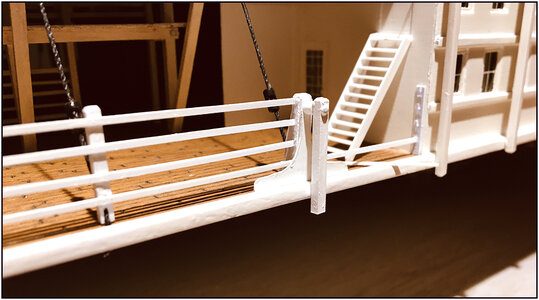
And the fenders:
View attachment 207684
Moderately satisfied. There is still some fine-tuning to take place.
But without macro shots with ordinary vision, it already looks tight.
Regards, Peter
Thanxs Rich. .Amazement continues to come from your minute detailing!!! Rich
Now that is detail! I am not sure I would have attempted to cut it out of one piece! I would have made it out of several pieces - one long thin vertical on the right, and then 4 L shaped pieces on the left side, if that makes sense? Then glue them together and paint. However your approach seems to be working for you just fine!The forgotten lines between the flagpoles. On closer examination of several photographs, the line between the flagpoles, over the Wheelhouse, to the Davits, appeared to be drawn in some of the photographs. Like some flags. And not on my scan from the Maritime Museum. Apparently an original photo.
Therefore only between the flagpoles with a sagging to the roof of the SideCabins:
View attachment 207676
A new challenge in the chapter 'Railing'.
Which is mounted on the MainDeck from the Wheelhouse to the front.
@JohnA : Now your question from July 24e gets a answer!
Schematically affixed to the drawing. But Bates' Cyclopedium gave more info here:
View attachment 207677
In the old picture you can see that they are almost human high:
View attachment 207678
Bates has written: "to prevent accidental loss of freight and cattle".
In Photoshop the strips with notches drawn. 17x2 mm. With space for a bull rail on every 4mm. The bull rails are made of Evergreen 1x0.5 mm. In terms of construction scale 1:92 it has to be a bit proportional.
View attachment 207679
Started cutting, testing the skill again. Walking on the edge of cutting, with the occasional fall off: (see left)
View attachment 207680
The stationaries made of Evergreen 3x3 and glued the strips on. First as a trial a pair for the first pieces:
View attachment 207681
From the WheelHouse started, the first 2 stationaries, 4 bull rails and an intermediate.
The uprights also had to be saw in because they stand over the cross chains:
View attachment 207682
For secure the bullrails glued in the notches. Fitting them is fragile!
To test the longest-strengthening against it:
View attachment 207683
And the fenders:
View attachment 207684
Moderately satisfied. There is still some fine-tuning to take place.
But without macro shots with ordinary vision, it already looks tight.
Regards, Peter
Hi Dean,Now that is detail! I am not sure I would have attempted to cut it out of one piece! I would have made it out of several pieces - one long thin vertical on the right, and then 4 L shaped pieces on the left side, if that makes sense? Then glue them together and paint. However your approach seems to be working for you just fine!
With paper...yes! If you use a thin veneer wood, you could make one piece of each. Just a thought.Hi Dean,
Thanks for your thoughts! Cutting them out in one piece was tricky. You can see one of the more failures on the left of the picture with the 3 cutouts.
But glueing several tiny items is also tricky. To keep all the 4 L’s on the same hight by al the strips.
With one designed in Photoshop with 23 copies make them all the same.
And after some failures just simply print again the sheet and do some extra cuttings.
And with all the railings of last months, I am now a pro-tiny-cutter.
Regards, Peter
The Lee is looking so good! Great work as usual!With a little update:
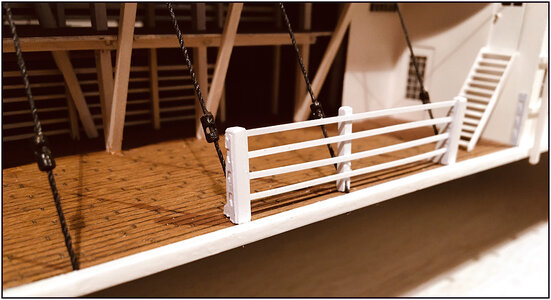
All uprights and Fenders in place.
View attachment 208557
When the glue is dry, starting with cutting the bull rails.
Regards, Peter
I will try that by the next ...... Kept in mind, DeanWith paper...yes! If you use a thin veneer wood, you could make one piece of each. Just a thought.
It was impressive of the size of this boat when I saw the size of the people along the rails in the old photo. Totally new perspective for the work that you are producing. RIchWith a little update:
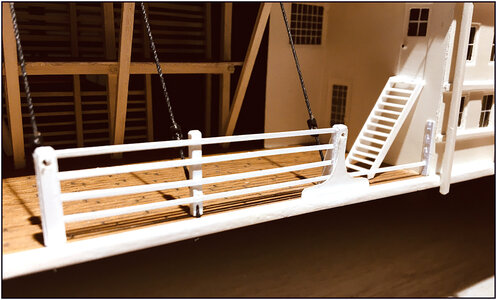
The parts.
All uprights got the strips and 2 litlle shaves to reinforce bachwards. Then painted:
View attachment 208574
All uprights and Fenders in place.
View attachment 208557
When the glue is dry, starting with cutting the bull rails.
Regards, Peter
You are correct, Rich. Also here, (human) size does matters!It was impressive of the size of this boat when I saw the size of the people along the rails in the old photo. Totally new perspective for the work that you are producing. RIch
