Thanxs. I see you speak (a little) Dutch? Dankjewel!Fantastisch!
Regards, Peter
 |
As a way to introduce our brass coins to the community, we will raffle off a free coin during the month of August. Follow link ABOVE for instructions for entering. |
 |
 |
The beloved Ships in Scale Magazine is back and charting a new course for 2026! Discover new skills, new techniques, and new inspirations in every issue. NOTE THAT OUR FIRST ISSUE WILL BE JAN/FEB 2026 |
 |
Thanxs. I see you speak (a little) Dutch? Dankjewel!Fantastisch!
Your turning work fits very precisely into your paddle-wheeler. Cardbord as I recall and very well done. Rich (PT-2)Chimneys:
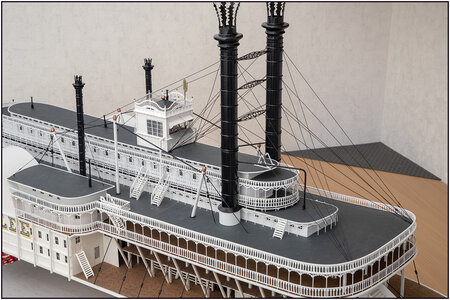
There are now 2 parts in the build that gives possibly problems with each other. The chimneys on different places and the guys of the 4 largest chimneys.
If I place the guys first then I have to go through it to place the little chimneys. Or first place the chimneys, then I have to be very careful with the application of the guys. You're easy to make a move and to tap one of those.
Still decided to make all the chimneys first because I don't have the right wire for the guys yet.
10 pieces in total: 2 semi large, 6 small on the back and two in the front that connects to the big chimneys.
For the 2 semi sized I had already made the tube, suitable in the existing holes. From 8 mm balsa rod. On the Lee-II, these also have feathers on the puddings. The large feathers of the large chimneys (see post #26) in Photoshop reduced so they could be placed around the head. Just 2-π-R of just over 8,1 mm diameter is 24,75 wide in the base
So the base narrowed to that 24.75mm. Printed and cut out with shorter feathers.
For the puddings, I had to lath again. I made the big puddings with my regular drill. On its side and secured with a clamp. And the round wood with a screw through it in the tension head. Mwa......
Therefore, a while ago I bought a Proxxon DB250 lathe and put it into service, under supervision of my White Shepherd:
View attachment 199814
I had already calculated the measurements for the puddings. Started with a piece of balsa round wood of 20 mm.
The left one as a test en later on the 2 others. The top ring is 16 mm wide:
View attachment 199815
Then a layer of ground paint and after drying sanded. It's so easy in the lathe.
View attachment 199816
It's going to take a little more reworking. Then some layers paint again, because balsa is very stringy.
Next time I will use a little harder wood.
Then the parts for the small chimneys:
-Evergreen 1,6 mm and 3,2 mm rod,
-skirts and hoods on the little chimneys to kept the rain out of them.
These last two I made from copper paper which I got years ago from an old shipmodeller. With the 6-hole pliers I cut rounds of 4.5 and 3.5 mm punched. With the round end of one of the legs of an electric plug, each round 'forced' on the flexible cutting mat to rounded bowls. In the skirt bowls a hole struck with the hollow pipe.
All parts:
View attachment 199817
The picture shows also the thin copper paper and the used plug
First the feathers glued on the puddings:
View attachment 199818
For the segment rings, the Rolls, I had filed in the balsa bar several cutouts. In it I glued thin electric wire.
The macro is again very unforgivable, but when looking normally it is quite tight after spraying.
Everything mounted and ready to spray:
View attachment 199819
After drying all the chimneys placed on the Lee.
The 2 chimneys at the front are connect to the large chimneys. The Pilot will not be bothered by the smoke with the shutters opened:
View attachment 199820
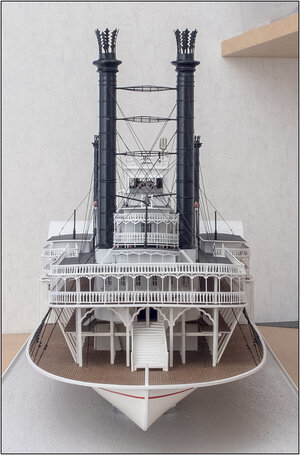
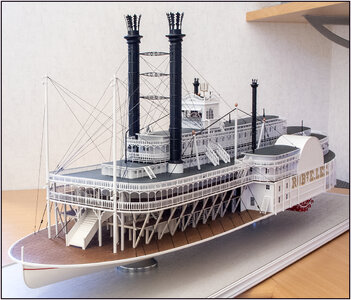
The forest of chimneys on the back:View attachment 199821
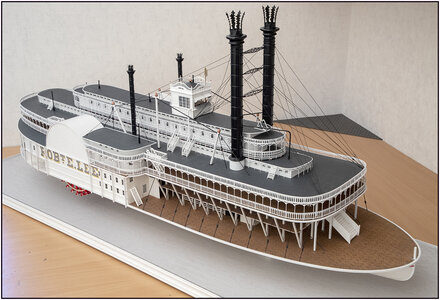
And again the overall picture:
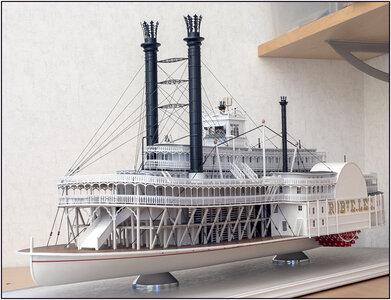
View attachment 199822
Bij the Main Stairs you can see some new ornaments between the 4 stationaries.
The Lee is now breathing steam from all his fibers!
Now wait for the delivery of the guy wire.
Regards, Peter
solved. Well done. RichGuys wires: Chimneys:
Another chapter I've been working on for a while to figure out.
First, about all the cables and how they run. Because with the Lee-I, it's different than the Lee-II. But thanks to comparing the old photos a lot, I've come in the right direction.
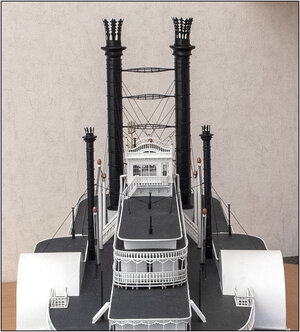
Secondly, about which thread I was going to use. I can't find a suitable yarn in terms of thickness or material. After a lot of searching I ended up on black nylon coated stainless steel wire of 0.45 mm. But that again has its pros and cons. As an advantage: it shows more beautiful, as a disadvantage: through the eyes 2 parts can not be pulled together on tension. I now have to strain every part and turn around after the eye and move on. Then all 3 separate wires per large chimney and per side must remain on tension. Even after doing the other side.
Anyway, ultimately this result:
View attachment 200827
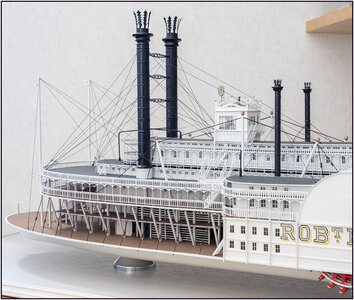
All these threads do give a lot of input to take pictures from a different perspective:
View attachment 200828
View attachment 200829
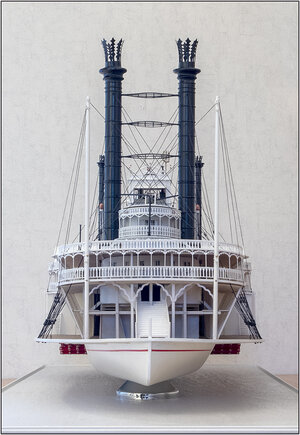
The whole:
View attachment 200830
And from the perspective of the quay:
View attachment 200831
All in all, I'm happy with it. And all the guys got there turnbuckle
But there are more guy wires to do ........
Regards, Peter
That's right, Rich. Every ship with rigging will be in demand.I guess that square riggers are not the only boats and ships with rigging complications to be solved. Well done. Rich
@shota70 Thanxs. I couldn't have imagined months ago that The Lee was growing like this. And quietly not ready.Dear Peter
it's looks beautiful
Hello Don,Wonderful Peter, so pleasing to the eye. The rigging has truly brought it alive!
Very fine. . . through and through. Your attention to small details tells the story. Rich (PT-2)Guys wires / stays: Masts:
Part 2 is the rigging of the two masts with stays, where the booms will be attached for the swinging stages. The stages hang forward at rest, but docked they turn outwards.
But the booms were also used to hoist heavier loads on board. The stages are then disconnected.
The forces on both masts must be removed backwards and sideways.
Each mast has 4 stays. 2 after stays, 1 side and 1 diagonal. Only there is little space for the side stay to the outside.
But the walkway at the right mast, seen in the direction of navigation, turns to the right so that the force is picked up to the left and back by 3 stays.
For the diagonal stays it was a bit of a search for how to walk freely between the guy wires of the chimneys.
In the end, this job is also done.
The front:
View attachment 201065
Obliquely forward:
View attachment 201066
En-profile:
View attachment 201067
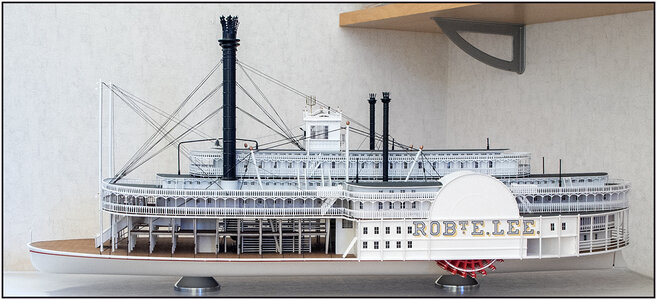
An overview:
View attachment 201068
And not forgotten the little turnbuckles
The light for the pictures was not very fine. Here in the Netherlands the days are filled with fog, rain, wind ........
Another chapter closed!
Now I'm going to work from back to front. Yawls, davits, flagpoles, bull rails ......... Etc.
PS a little later: On top of the masts the copper balls forgotten.
Also needs to straighten out a railing pillar.
Regards, Peter
Thanxs Rich, but it is also my ‘problem’, it’s working on my edge. And steps sometimes beside it.Very fine. . . through and through. Your attention to small details tells the story. Rich (PT-2)
Yes Heinrich, after the second blink, it’s still the same.I see you this so I have to believe it. Mind-boggling excellence!


Hello Bilal.Dear Peter
Amazing work and details. It's really inspiring.
Thanks for sharing this beauty.
Best Regards.
This is worthy of presentation in the SoS photo gallery. I hope that it arrives. Rich (PT-2)Still one with the highlighted masts with balls.
At least I made it up, The Lee was complained too, naked with no balls in top. "But please, don't make a Christmas tree of me!"
View attachment 201140
Magnificent work Peter,The promised images of how "The Lee" stands now.
View attachment 174080
With a good view on the sheer.
View attachment 174081
View attachment 174082
The rectangle saved in the roofing is for the Skylight with its own roof.
Regards, Peter
