Thank you!Wow ! Fantastic !
-

Win a Free Custom Engraved Brass Coin!!!
As a way to introduce our brass coins to the community, we will raffle off a free coin during the month of August. Follow link ABOVE for instructions for entering.
-

PRE-ORDER SHIPS IN SCALE TODAY!
The beloved Ships in Scale Magazine is back and charting a new course for 2026!
Discover new skills, new techniques, and new inspirations in every issue.
NOTE THAT OUR FIRST ISSUE WILL BE JAN/FEB 2026
You are using an out of date browser. It may not display this or other websites correctly.
You should upgrade or use an alternative browser.
You should upgrade or use an alternative browser.
Lovely little pad saw there. Still available and spare blades?
Got it on Amazon if this is what you mean.Lovely little pad saw there. Still available and spare blades?
Many thanks Jagpilot. Loving your build by the way. I’m now doing the gunports in the frames on mine. A lot of fiddly work on this stage. A fantastic kit though.Got it on Amazon if this is what you mean.
True storyThat looks terrific.
It’s a Zona sawGot it on Amazon if this is what you mean.
Thank you!The antique finish you are applying looks gorgeous. In fact the whole model does. I start watching this build today!
I’ll start from the beginning and catch up when time allows.
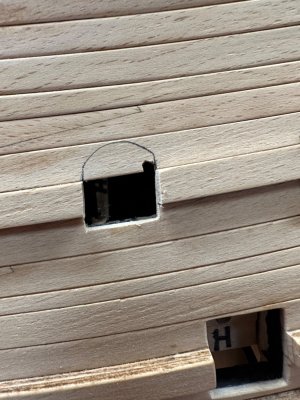
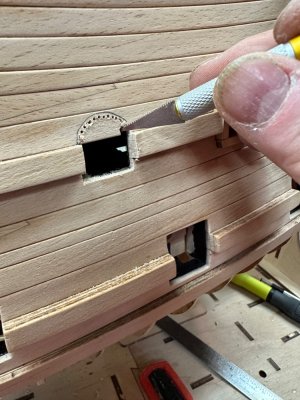
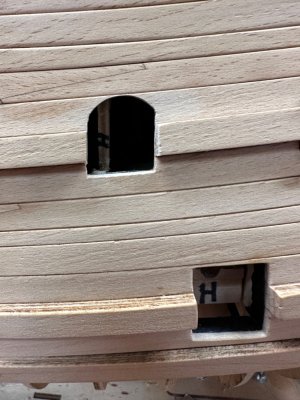
Got the stern planked today. A lot of lay out involved to get everything to line up correctly. I used double sided tape. This let me take on off the planks as many times as needed to adjust. Once I was happy with layout I struck a line for one plank glued and let dry. Easy sailing from there. I also thought it would be easier to use the door instead of the plug. Just snuck a piece of veneer to hold it in place. Now just need to trim the overhanging planks. A job for tomorrow.View attachment 390491View attachment 390490View attachment 390489View attachment 390488View attachment 390487View attachment 390486View attachment 390485View attachment 390484View attachment 390483
Hi Jagpilot. Do I assume that you reversed all these planks so the laser burn numbers are now on the side being glued ?Got the stern planked today. A lot of lay out involved to get everything to line up correctly. I used double sided tape. This let me take on off the planks as many times as needed to adjust. Once I was happy with layout I struck a line for one plank glued and let dry. Easy sailing from there. I also thought it would be easier to use the door instead of the plug. Just snuck a piece of veneer to hold it in place. Now just need to trim the overhanging planks. A job for tomorrow.View attachment 390491View attachment 390490View attachment 390489View attachment 390488View attachment 390487View attachment 390486View attachment 390485View attachment 390484View attachment 390483
Hello Neil M, I actually forget if they had numbers burned on the planks themselves. But if they did, they are glued face down. Hope this helps.Hi Jagpilot. Do I assume that you reversed all these planks so the laser burn numbers are now on the side being glued ?
Thank you. It does help, gives me peace of mind.Hello Neil M, I actually forget if they had numbers burned on the planks themselves. But if they did, they are glued face down. Hope this helps.
Lovely little pad saw there. Still available and spare blades?
Gotta love it when you discover a new tool on someone else's thread!Got it on Amazon if this is what you mean.
 I've got the orange-handled Manwah blade set I also see in your photos, Jagpilot, but the blades have been a bit too wobbly and I lack control in using them, so have always defaulted to the X-Acto knives. I do have the larger kerf saw, but with no handle. I've now got a new Amazon shipment on order...
Excellent work on your San Bartolome. Neilm and I have recently connected on here, as I have just begun Pavel's Santa Maria. Great work on your build, sir. Continued success...
Hey Jagpilot.
Is there a reason why you haven’t glued the gun ports in place yet. Why not at the hull planking stage ?
Is there a reason why you haven’t glued the gun ports in place yet. Why not at the hull planking stage ?
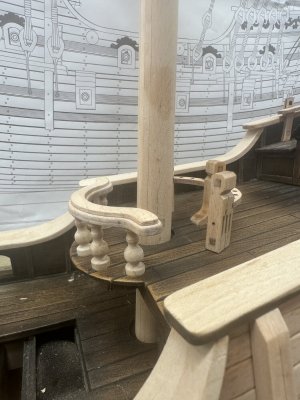
Very descriptive photos from useful angles in the exact area I am working. If you have the time I'd like to know in what order did you paint those rear cap rails possibly before glueing them in place. Does the glue stick well enough to those painted surfaces? Asking because I'm not quite seeing how to paint the cap rail components after they are glued in place.Evening ship modelers . Worked on the quarter deck for the past couple of nights. And I can finally say one part of the ship is done. Construction wise that is. I still may mess around with dyes until I get the highlights the way I like. Trying to go for a pretty aged and weathered look.View attachment 472972
View attachment 472973View attachment 472974View attachment 472975View attachment 472976View attachment 472977View attachment 472978View attachment 472979View attachment 472980View attachment 472981View attachment 472982View attachment 472983
I dyed all the parts before assembly so the danish oil I am using does not interfere with glue up.Very descriptive photos from useful angles in the exact area I am working. If you have the time I'd like to know in what order did you paint those rear cap rails possibly before glueing them in place. Does the glue stick well enough to those painted surfaces? Asking because I'm not quite seeing how to paint the cap rail components after they are glued in place.
Hi Jag,
Drilling the small holes prior to cutting out the pieces in the hull is something that works really well in my experience as well. If you don't mind would you post a little something, including your photos in the topic that was started a little while back called Tricks of the Trade here at SoS? Hopefully members that may not see it on your build log will see it there and benefit from your post.
Thank you very much!
Allan
Tricks of the trade
After posting a picture on rounding axles a member had the idea of a thread with little "how-to" items or tricks of the trade that might be of interest for both kit and scratch builders.. Hope this is of interest for one and all to contribute their little tricks. If this subject has already...
shipsofscale.com
thanksI dyed all the parts before assembly so the danish oil I am using does not interfere with glue up.
thanksI dyed all the parts before assembly so the danish oil I am using does not interfere with glue up.


