Please help me with planking?

At one point during you planking you'll have to add some inserts, like shown in the instructions, no big deal.
On a smaller vessel there might be need of a stealer aft or a drop plank forward, but not usually. Lining off the hull is key and you did a great job of it. Run a thread along every three or four strake lines and temporarily glue it in place. Run it to the stem and mark the spot. Once you have a few bands strung you can eyeball the spaces in between very easily. In general IF you want realistic planking ignore the kit instructions as they have nothing to do with how a ship was actually planked and continue as you are. The Passaro videos are great and the very first scene in video number one shows the tick marks on the stem.
and https://thenrg.org/resources/Documents/articles/LiningOffYourHullPlankingTutorialAndFan.pdf A tutorial on planking by David Antscherl is also a great source. https://thenrg.org/resources/Documents/articles/APrimerOnPlanking.pdf
Allan
 
Last edited:
Hi Toni, I was exactly the same as you regarding planking. I read, measured and used pencils and tapered off the hull and took all day to lay 2 planks. Like you I wanted to practise on the first planking and make it as beautiful as I could. Anyway, I came across an expert and visited him. He had already built about a dozen large kits. He saw what I was doing and said it was too much work and I should do what he does: taper ON the hull. He didn’t use maths but watched the run of the plank, laid the new plank over the glued previous plank, let it sit on the secured plank and marked in pencil the run on the secured plank and trimmed the “stealer” off the hull with a very sharp knife, and then laid the new plank snuggly up against the old secure plank. Because he worked fairly quickly, he was able to trim a slightly damp plank which made it easier. Of course lots of trimming fore and aft and a careful use of the eye to check what’s right. He used a plank bender and soaking and clamps rather than nails. He also told me to replace the wide kit provided walnut planks with much narrower walnut which added to the planking process but with such thin planks to work with, bending was much much easier.

that is exactly how i planked the Matthew
 
i use to have one of those plank benders that heat up but ended up tossing it away. It requires steam to bend planks and those benders do not get hot enough.
So what i use is one of these. i heat up a can or piece of pipe and bend a wet plank around the hot can. It is hot enough to produce instant steam. You can spend $40.00 on a plank bender or 20 bucks on a torch and buy a can of beans, eat the beans and use the can.

99.JPG
 
i use to have one of those plank benders that heat up but ended up tossing it away. It requires steam to bend planks and those benders do not get hot enough.
So what i use is one of these. i heat up a can or piece of pipe and bend a wet plank around the hot can. It is hot enough to produce instant steam. You can spend $40.00 on a plank bender or 20 bucks on a torch and buy a can of beans, eat the beans and use the can.

View attachment 449749


Dave! ..open flame after eating a can of beans..?!
 
Definitely agree with Jeff's suggestion on the Electric Plank Bender. I also use a crimping tool as below
View attachment 449743
I have tried one of these and they help a bit but they do not remove any wood on the inside of the curve and it is difficult to make an effective cut without snipping off the end of the strip. A sequence of shallow saw cuts is more controlled and removes a bit of wood to make room for compression.
 

ROTF I had to think about this one.. Oranje ('orange') is the Dutch national color. Boom is 'tree' in English.
But I guess you mean Oranje KaBOOM!! ROTF

By the way, van Speyk's last words "Dan nog liever de lucht in!" (I would rather blow myself up!) is still sometimes used today (metaphorically!).

again..sorry Toni for this off-topic stuff
 
haha...you guys are funny :)

I didn't mean to abandon this thread and thank you all so much for all of your input. You've helped me so much, you have no idea. I've actually only managed to get 3 more planks laid but, still, at least it was done with a bit more of an educated point of view!

The reading material that you've suggested, most especially Chuck Passaro's, I've read and reread and still run into question marks in my head. Chuck's lining off seems straightforward until you take someone like me who has no idea how to lay tape/string in the lining off stage until it "looks right" because I have no idea what looks right. That's where I get stuck with him. Same with the Simple Hull Planking for Beginner's. When it gets to the point of laying battens, I have no idea where to lay them so that they "look right". And so it goes.

This YouTube guy (Modelkit Stuff) has caught my interest as he talks on a level I can understand. I've watched a couple of his videos over and over and they seem to be helping a bit:
He doesn't gloss over anything. Even simple things like when your ruler tilts off the planks and messes up your taper line, etc. He addresses so many things that others leave out. He also talks a lot about the bow and stern areas which most people skim over. Anyway, he's the guy I'm watching and part of my inspiration for at least summoning up the courage to lay a few more planks.

I'm laughing at myself here thinking that I've made so much progress by laying 3 planks. Well, it is what it is, right?

Thanks again for all of your replies. You've all been so helpful and generous with your time. I'll be posting pics on my Albatros build log soon so if you ever get curious about how I'm coming along the link is in my signature.

Have a beautiful day!!
 
I, too, am a beginner with plank on bulkhead modeling. I just finished the 1st planking of the Polaris. I've read many articles and watched a number of videos including the one above. What I found (in my case) was that no matter the width of your calculations for tapering the planks across the hull, unless you are dead-nuts-on sanding or trimming each plank, the calculations will wander for the remaining planks. Therefore, as you proceed you will need to re-check the remaining area for each bulkhead particularly at the bow and stern and adjust accordingly. I like the idea of lining out to divide the hull into sections. That way the accumulated tapering errors would be minimized. I'm going to employ this on the next one.

As a side note... I used a $3.00 curling iron I picked up at a thrift shop to bend the planks with a form I made from 2 leftover pieces of 3/8" poplar that were glued together. Worked perfectly fine. Save your money and apply it towards a decent digital caliper.
As beginners, we are like vacuums or sponges trying to take in as much information as we can whilst learning by our mistakes to apply those lessons to the next build. Just my 2 cents worth. Best of luck with your build. I've taken some progress pics of my Polaris build and will soon begin a log.
...henry
 
haha...you guys are funny :)

I didn't mean to abandon this thread and thank you all so much for all of your input. You've helped me so much, you have no idea. I've actually only managed to get 3 more planks laid but, still, at least it was done with a bit more of an educated point of view!

The reading material that you've suggested, most especially Chuck Passaro's, I've read and reread and still run into question marks in my head. Chuck's lining off seems straightforward until you take someone like me who has no idea how to lay tape/string in the lining off stage until it "looks right" because I have no idea what looks right. That's where I get stuck with him. Same with the Simple Hull Planking for Beginner's. When it gets to the point of laying battens, I have no idea where to lay them so that they "look right". And so it goes.

This YouTube guy (Modelkit Stuff) has caught my interest as he talks on a level I can understand. I've watched a couple of his videos over and over and they seem to be helping a bit:
He doesn't gloss over anything. Even simple things like when your ruler tilts off the planks and messes up your taper line, etc. He addresses so many things that others leave out. He also talks a lot about the bow and stern areas which most people skim over. Anyway, he's the guy I'm watching and part of my inspiration for at least summoning up the courage to lay a few more planks.

I'm laughing at myself here thinking that I've made so much progress by laying 3 planks. Well, it is what it is, right?

Thanks again for all of your replies. You've all been so helpful and generous with your time. I'll be posting pics on my Albatros build log soon so if you ever get curious about how I'm coming along the link is in my signature.

Have a beautiful day!!
Very glad you found one you like. :) Looking forward to the pictures. :)
 
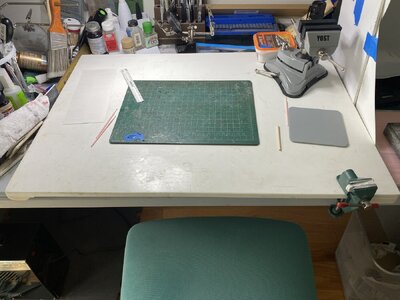
So, what is the minimum tools required, I have one saw and one exacto blade with knife.
I need a clamp on plastic work gadget to save my oak table!
Do I need electric plank bender or a cutter.
My next boat is Lady Nelson, which brand?
 Ty
 
Hi @LadyG ,

Welcome to the forums !
There is a great post on the topic in this forums of what tools are required at this link:
Tools for beginners
An electric plank bender is not required, but it can be helpful if you want to shape (or bend if you prefer) the wood using the liquid and heat method.
If you have additional questions after reviewing the tools listed, please feel free to ask. There are many (maybe too many) of us willing to respond and be helpful!

Jeff
 
Back
Top