Good to hear from you Mike
-

Win a Free Custom Engraved Brass Coin!!!
As a way to introduce our brass coins to the community, we will raffle off a free coin during the month of August. Follow link ABOVE for instructions for entering.
-

PRE-ORDER SHIPS IN SCALE TODAY!
The beloved Ships in Scale Magazine is back and charting a new course for 2026!
Discover new skills, new techniques, and new inspirations in every issue.
NOTE THAT OUR FIRST ISSUE WILL BE JAN/FEB 2026
You are using an out of date browser. It may not display this or other websites correctly.
You should upgrade or use an alternative browser.
You should upgrade or use an alternative browser.
Ragusian Galley by Don Robinson - MarisStella
- Thread starter DonRobinson
- Start date
- Watchers 17
Nice progress Don!!
Hello all, Thanks for stopping in and for all the comments and likes. A little more got done in the past week, but now with the weather finally getting nicer the yard has been calling me and more time is being spent outside.

building the foot supports, again I thought it easier to build off ship. The two long pieces, 1.5 x 1.5 mm, are taped to the plans using double sided tape. Then the short pieces, again 1.5 x 1.5 mm, are glued into place at the proper angle.
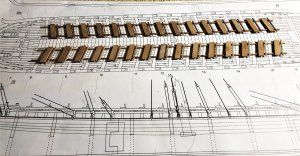
And here they are completed, the wider pieces are 1.5 x 5 mm
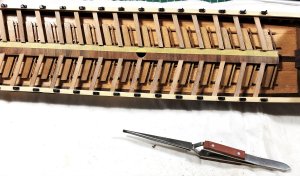
Seats being installed, the tape is used to keep everything straight

Bitts being made. I measure and shape then cut the bitt off of the strip to the required length

I paint both sides of the cleats before removing from the billet
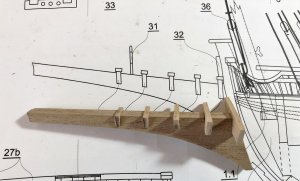
Assembling the beak
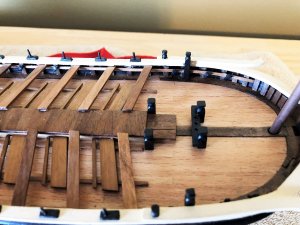
Bitts and cleats installed. Some dusting is also needed!!
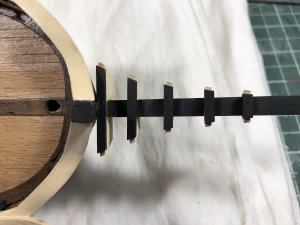
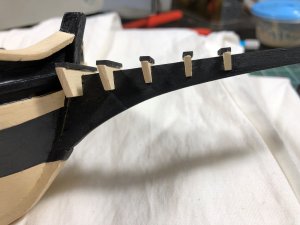

Finally, how she looks as of this morning.
Next is to finish the beak which requires more pieces added to it including some photo etch. Following that will be eyebolts, cannons and carriages then maybe permanently attach masts.
Thanks again to all of You, and have a Good Day

building the foot supports, again I thought it easier to build off ship. The two long pieces, 1.5 x 1.5 mm, are taped to the plans using double sided tape. Then the short pieces, again 1.5 x 1.5 mm, are glued into place at the proper angle.

And here they are completed, the wider pieces are 1.5 x 5 mm

Seats being installed, the tape is used to keep everything straight

Bitts being made. I measure and shape then cut the bitt off of the strip to the required length

I paint both sides of the cleats before removing from the billet

Assembling the beak

Bitts and cleats installed. Some dusting is also needed!!


Finally, how she looks as of this morning.
Next is to finish the beak which requires more pieces added to it including some photo etch. Following that will be eyebolts, cannons and carriages then maybe permanently attach masts.
Thanks again to all of You, and have a Good Day
Really nice, Don!
Hello All, how are things today? The workshop was busy this past few days but from the progress I have made you would never know it!! More work was done on the bow then I turned my attention to making one of the sails......well that was a bad idea!! 

 I thought I could show you that here today....not so....I may have to start a different log just for the sails. LOL
En-light of this here is what I have done:
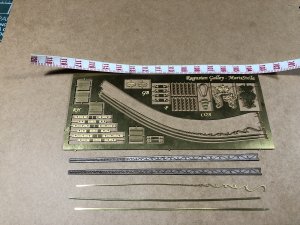
Here, are the pieces required for the bow. The two wooden pieces are laser cut on .5 mm walnut then each of these wood pieces gets the three pieces of photo etch, shown detached from the sheet. These pieces come on the sheet with quite a bend which needs to be straightened in order to fit properly on the wooden pieces. I'm not sure why they were made this way, unless they were made to be glued on edge rather than flat as I did. The bend, if installed on edge, would have been almost perfect. I'll see what you think and maybe I'll have to quit my modelling career early!!

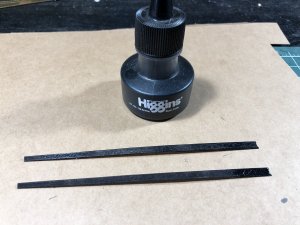
These are the two wooden pieces after being treated with India Ink. The reason for using this, other than it looks great, is so glue would bond to it better. Can be a little messy but nice stuff.
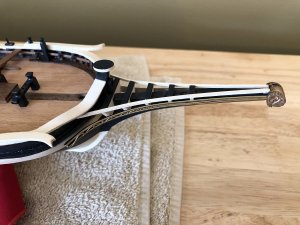
Here it is completed, there is a little wave in the photo etch that when I seen the picture I immediately checked the model and cannot see anything, so I'm not sure what is happening(which is a normal happening for me).
The ram's head comes laser cut in three pieces, head and two horns, that need to be shaped and slightly carved. This is certainly not the quality work of Janos but did stretch my limits and I know now carving will not be on my resume. I certainly do, however, have great respect and jealousy those like Janos and others who can carve.
Almost forgot the two top pieces, these were 1.5 x 1.5 mm strips just cut to length and glued in place.
You will notice the ram's head in later pictures has been repainted, this was my failed attempt at trying to get paint down into the grooves( I think it is called a wash or something). I was supposed to learn this technique when I was down in North Carolina last year but it never happened!! Maybe Mike will share this little bit of knowledge with me, as promised, someday.
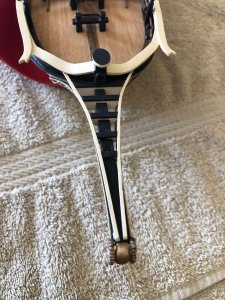
OK, I just ran back to the model, and yes the head is mounted crooked . You really have to love this sport!! And you wonder why ships sometimes do fly
 . I wonder what the chances of that coming off in one piece are?

This piece is a bracket that is mounted to the beak to support the bowsprit. As you can see on the plans it is supposed to be made of 1 mm wire. I really did not think it would look that good so I made it from a 1.5 x 5 mm walnut strip. Here it still needs to be painted and cut to length. The bowsprit is made from 3 mm walnut dowel and tapered according to the plans
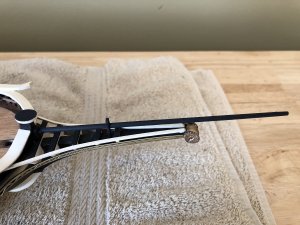
the assembly in place and thankfully not glued as the ram's head has to come off
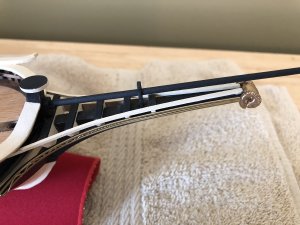
A little closer picture and the ram's head re-painted. Here I can also see a little touch up painting required(probably more after removal of ram's head) LOL
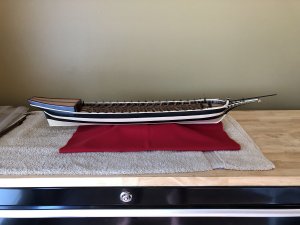
And here is a wonderful picture of my tool chest lock.(click to enlarge) hahaha
Hope you all enjoyed and Thanks so much for all your visits, likes and comments. I'll be back with some sail updates hopefully soon.
A quick note to Don Farr...........go buy a needle and thread and start practising sewing lololololol
I got to go I'm right in the middle of Uwe's La Salamandre build, check it out it's awesome!!!!!
Take Care
En-light of this here is what I have done:

Here, are the pieces required for the bow. The two wooden pieces are laser cut on .5 mm walnut then each of these wood pieces gets the three pieces of photo etch, shown detached from the sheet. These pieces come on the sheet with quite a bend which needs to be straightened in order to fit properly on the wooden pieces. I'm not sure why they were made this way, unless they were made to be glued on edge rather than flat as I did. The bend, if installed on edge, would have been almost perfect. I'll see what you think and maybe I'll have to quit my modelling career early!!

These are the two wooden pieces after being treated with India Ink. The reason for using this, other than it looks great, is so glue would bond to it better. Can be a little messy but nice stuff.

Here it is completed, there is a little wave in the photo etch that when I seen the picture I immediately checked the model and cannot see anything, so I'm not sure what is happening(which is a normal happening for me).
The ram's head comes laser cut in three pieces, head and two horns, that need to be shaped and slightly carved. This is certainly not the quality work of Janos but did stretch my limits and I know now carving will not be on my resume. I certainly do, however, have great respect and jealousy those like Janos and others who can carve.
Almost forgot the two top pieces, these were 1.5 x 1.5 mm strips just cut to length and glued in place.
You will notice the ram's head in later pictures has been repainted, this was my failed attempt at trying to get paint down into the grooves( I think it is called a wash or something). I was supposed to learn this technique when I was down in North Carolina last year but it never happened!! Maybe Mike will share this little bit of knowledge with me, as promised, someday.

OK, I just ran back to the model, and yes the head is mounted crooked
 . You really have to love this sport!! And you wonder why ships sometimes do fly
This piece is a bracket that is mounted to the beak to support the bowsprit. As you can see on the plans it is supposed to be made of 1 mm wire. I really did not think it would look that good so I made it from a 1.5 x 5 mm walnut strip. Here it still needs to be painted and cut to length. The bowsprit is made from 3 mm walnut dowel and tapered according to the plans

the assembly in place and thankfully not glued as the ram's head has to come off

A little closer picture and the ram's head re-painted. Here I can also see a little touch up painting required(probably more after removal of ram's head) LOL

And here is a wonderful picture of my tool chest lock.(click to enlarge) hahaha
Hope you all enjoyed and Thanks so much for all your visits, likes and comments. I'll be back with some sail updates hopefully soon.
A quick note to Don Farr...........go buy a needle and thread and start practising sewing lololololol
I got to go I'm right in the middle of Uwe's La Salamandre build, check it out it's awesome!!!!!
Take Care
Awesome work, Don! This really is quite a spectacular kit!
Unfortunately, I've crossed over to the dark side (scratch building) and I doubt I'll finish all the kits in my stash in my lifetime, much less add new ones. The only one I'm committed to is Bob Hunt's Lauck Street "Kingfisher". All boxwood framing and beautiful!
You need to get going on your 17th Century Battle Station! Sorry to nag!
Thanks Dave. Battle Station is next in line, although, sewing these sails may send me over to it sooner
Hi Don Robinson, no not for me, like paint rigging and sails do not go with DON FARR, many reasons but one stands out do not know what I am doing, that is why I watch the GREAT BUILDS LIKE YOU&RS MAYBE ONE DAY. Don
You have a lot more patience than I do Don. Looking good my friend. For that wash you are going to need some soap and water ....
Dave/Don - is our 17th Century Battle Station scratch built or a kit? I forgot ...
Only a brave man paints with India Ink!!!!
Dave/Don - is our 17th Century Battle Station scratch built or a kit? I forgot ...
Only a brave man paints with India Ink!!!!
Hi Don,
That is a very interesting looking model and you're doing a great job. It looks like it's quite a bit of fun.
David
That is a very interesting looking model and you're doing a great job. It looks like it's quite a bit of fun.
David
Mike, I cannot paint at all (not with the paint nor Ink)Only a brave man paints with India Ink!!!
ME TOO. Don
Thanks so much guys,glad you all stopped in
wow, just catching up on your build log Don. Its looking wonderful.
Hi Don. I am catching up as well. Nice. Clean lines and painting looks perfect.
Hello all, Thanks to all of you for your likes, comments and for stopping in.
I have completed the first sail after many hours of hand sewing, and this was the small one. Hopefully the next one will go faster but in the meantime I will go back to building on the hull. This update is a little boring so you may want to pour an extra strong beverage in order to stay awake, or just go the the end to see the finished sail.

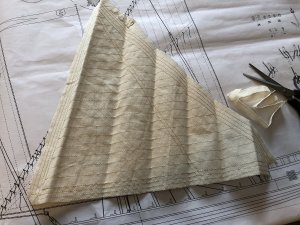
The sail as it comes out of the package
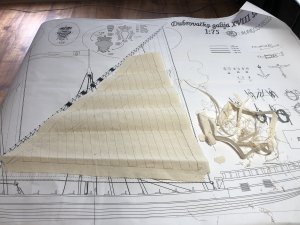
The first order of business is to remove excess material and the first two rows of stitching
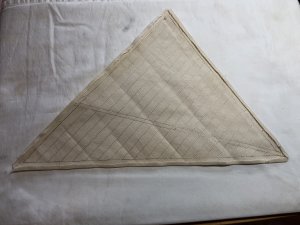
Fold and iron

Add and glue rope

Sew rope into place
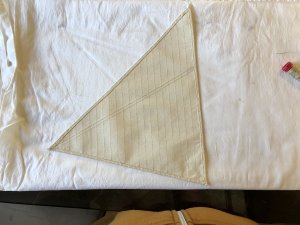
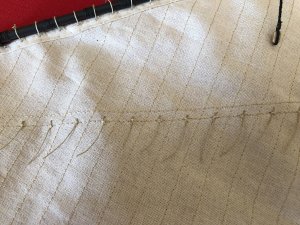
Two rows of stitching done, one is single and the other is double
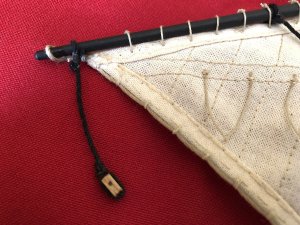
Sail on spar, here you can see the bolt rope has been attached and the nettles also
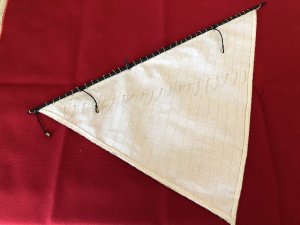
Completed sail and spar
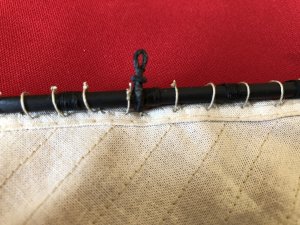
Thanks again for stopping in
Take Care
I have completed the first sail after many hours of hand sewing, and this was the small one. Hopefully the next one will go faster but in the meantime I will go back to building on the hull. This update is a little boring so you may want to pour an extra strong beverage in order to stay awake, or just go the the end to see the finished sail.

The sail as it comes out of the package

The first order of business is to remove excess material and the first two rows of stitching

Fold and iron

Add and glue rope

Sew rope into place

Two rows of stitching done, one is single and the other is double

Sail on spar, here you can see the bolt rope has been attached and the nettles also

Completed sail and spar


Thanks again for stopping in
Take Care
Last edited:
Very nice job on the sails, Don! I would never have the patience. Good work!
Incredible!
Thanks Doc and David
Last edited:


