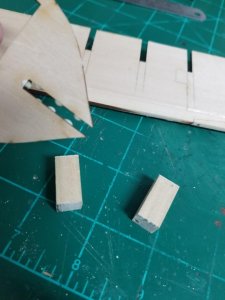
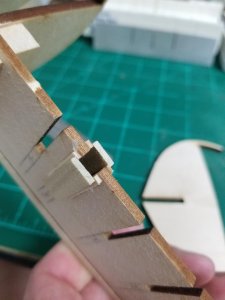
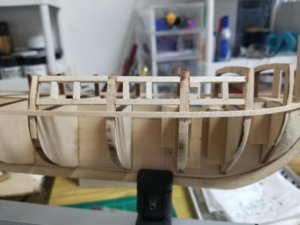
On kit parts that are substandard: you can, as you desire, scratch build replacements. But you can also find suitable replacements in model ship building websites under ship fittings. Just pay attention to scale. I swap out parts from kits with parts from web sites all the time! Of course, some offerings are better than others...
-

Win a Free Custom Engraved Brass Coin!!!
As a way to introduce our brass coins to the community, we will raffle off a free coin during the month of August. Follow link ABOVE for instructions for entering.
-

PRE-ORDER SHIPS IN SCALE TODAY!
The beloved Ships in Scale Magazine is back and charting a new course for 2026!
Discover new skills, new techniques, and new inspirations in every issue.
NOTE THAT OUR FIRST ISSUE WILL BE JAN/FEB 2026
You are using an out of date browser. It may not display this or other websites correctly.
You should upgrade or use an alternative browser.
You should upgrade or use an alternative browser.
- Joined
- Mar 27, 2019
- Messages
- 823
- Points
- 403

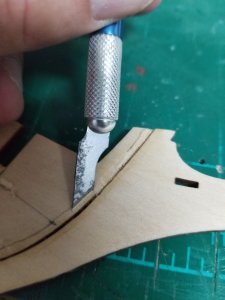
After transferring the beard line to the center keel section I scraped down from the beard line to the keel (not quite 1/3 of the keel thickness on either side) forming a rabbit. This is the start/end of each hull plank which will fit right into that little slot. Any kind of chisel blade works well, I find a larger blade for straight sections and a smaller blade for curved sections works the best.
Next: mounting the bulkheads.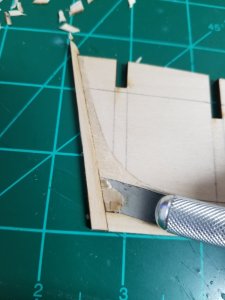
Next: mounting the bulkheads.


- Joined
- Mar 27, 2019
- Messages
- 823
- Points
- 403

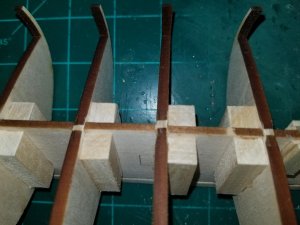
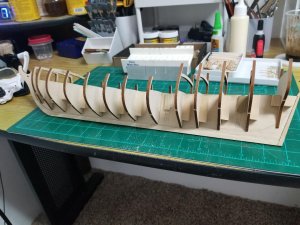
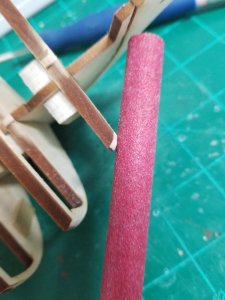
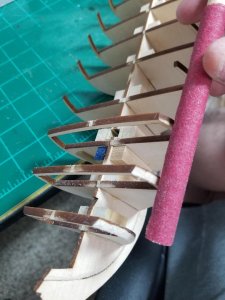
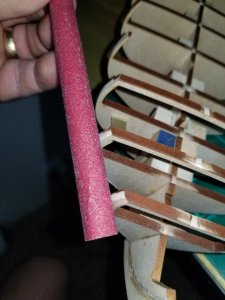
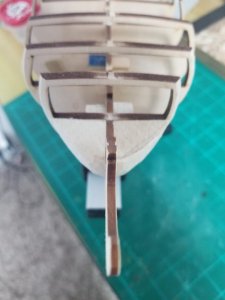
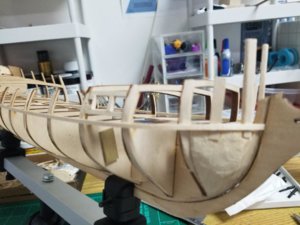
Most of the bulkheads need to be beveled on the forward edge for the front of the ship and on the aft edge for the aft end of the ship. Midships bulkheads are mostly flat. The desire is to have a smooth run for the hull planks without any bumps or hollows. This is called "fairing". Once a bulkhead is mounted it needs to be braced to keep a 90 degree angle to the keel while the glue dries.
I'm using carpenter's glue for the bulkheads and CA glue for the braces, this locks the bulkheads in for good.
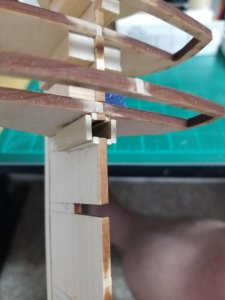
I also built up around the three slots where the masts will slide in.
I'm using carpenter's glue for the bulkheads and CA glue for the braces, this locks the bulkheads in for good.
I also built up around the three slots where the masts will slide in.
- Joined
- Mar 27, 2019
- Messages
- 823
- Points
- 403

- Joined
- Mar 27, 2019
- Messages
- 823
- Points
- 403

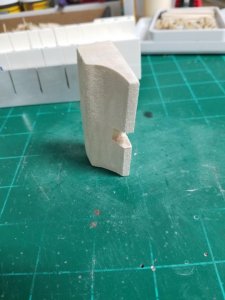
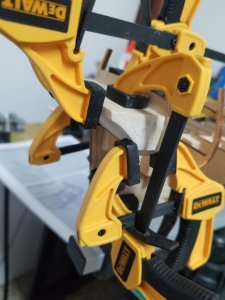
I carved the stern filler from a solid block of wood according to the plans. Slightly beveled on both sides, curved underneath to eventually accept stern counter planks, and a trapezoidal slot cut in the very center of the aft end where the rudder assembly will slide through. I then glued the stern filler to the aft most bulkhead using carpenter's glue. While waiting for the glue to dry I'll return to the gun carriages.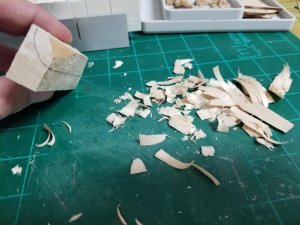


Last edited:
- Joined
- Mar 27, 2019
- Messages
- 823
- Points
- 403

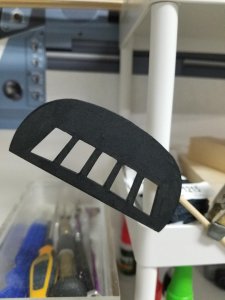
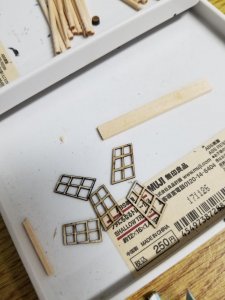
I let the stern filler to dry for 4 hours, enough to mount the transom supports. Four supports in all, two on the sides and two inside. Some adjustments were needed to the filler block, specifically I had to trim down the end as it extended past the end of the supports. Now it matches up nicely. I sanded and painted a first coat to the transom. The window frames will eventually be painted light blue with a false background and "inserted" in to the transom.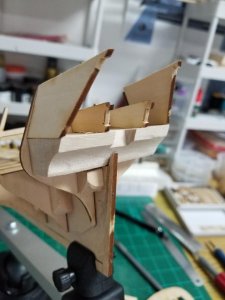


Last edited:
- Joined
- Mar 27, 2019
- Messages
- 823
- Points
- 403

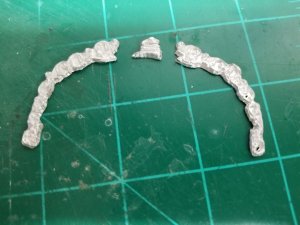
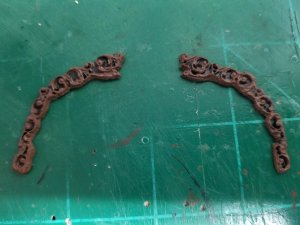
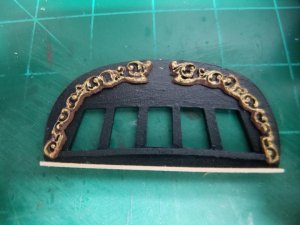
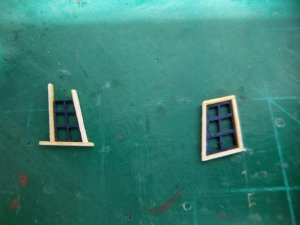
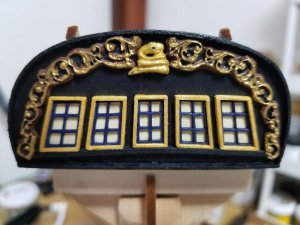
Finished the transom over a couple of days work. The provided white metal carvings for the transom did not in the wildest imagination fit the footprint of the laser cut transom. What to do, what to do... I decided to cut the britannia metal transom carving into three pieces: carvings to the left and right, plus the rattlesnake. I trimed all the metal as close as I could get off the carvings and snake, put a base coat of black in all the hollows, then brown all over to simulate wood. Then gilded highlights on the actual carvings left and right and the entire rattlesnake.
After mounting the carvings, some trim for the windows (gilt), plastic in back of the windows (from a microwave popcorn bag) painted a dull white and trim around the bottom of the transom and around the upper curve painted black to match the rest of the transom. Still have to apply the photo etched "rattlesnake" letters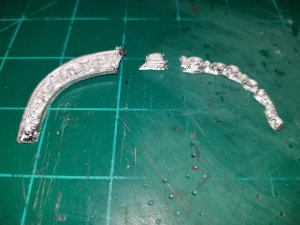
 once they arrive from Model Dockyard fittings.
After mounting the carvings, some trim for the windows (gilt), plastic in back of the windows (from a microwave popcorn bag) painted a dull white and trim around the bottom of the transom and around the upper curve painted black to match the rest of the transom. Still have to apply the photo etched "rattlesnake" letters


 once they arrive from Model Dockyard fittings.
- Joined
- Mar 27, 2019
- Messages
- 823
- Points
- 403

Some more progress with the gun carriages. 5 are complete with eyelets to handle the rigging, 5 to go. Still contemplating how many of the other 10 gun ports to display a cannon. I ordered enough dummy gun barrels to fill every one of those 10 gun ports but am thinking of maybe 4 of those gun ports should have an actual gun carriage with cannon, although not rigged. The gun deck fore and aft will be closed off and it's still very unclear to me how much can actually be seen from the outside of the hull.
Any thoughts on using dummy gun barrels versus and actual gun carriage on a lower deck closed off except for what can be seen from the outside of the hull?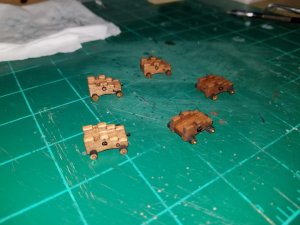
Any thoughts on using dummy gun barrels versus and actual gun carriage on a lower deck closed off except for what can be seen from the outside of the hull?

Takm,
I have read several build logs on the Rattlesnake, your treatment of the stern carvings is the first I have seen using your technique, very nice and quite ingenious, what did you use to trim the excess off, keep up the good work
Ed
I have read several build logs on the Rattlesnake, your treatment of the stern carvings is the first I have seen using your technique, very nice and quite ingenious, what did you use to trim the excess off, keep up the good work
Ed
- Joined
- Mar 27, 2019
- Messages
- 823
- Points
- 403

Hi Ed. Thank you for the compliment, I can only hope I can pull this project off. I used my rotary tool with a diamond engraving attachment (very thin, like a drill bit) to clean up what I snipped off with a hand held wire snipper. The gross amount of material comes off easily with the snips and the rotary tool cleans it up and polishes it somewhat. That first "snip" was nerve racking I must say, a leap of faith that what I had in my mind would turn out OK. I'm still going to go back and slim down the window frames a bit, in my opinion they look a bit too clunky and cartoonish.Takm,
I have read several build logs on the Rattlesnake, your treatment of the stern carvings is the first I have seen using your technique, very nice and quite ingenious, what did you use to trim the excess off, keep up the good work
Ed
The dummy cannons work well for the last 3 ports under the quarter deck, and the 2 ports forward, I left the first port open no cannon as it turned out it worked for me as there is allot of rigging around the 1 port. I also did not build the portable gangways, as for me they hid to much of the work I did rigging the cannons. Your build is coming along very nice, glad your looking at it from the point of view your going to have to come up allot of your own work arounds. As you have done with the transom carving. Great idea I’m sure others will follow it. I did not us any of the supplied casting, decided it was better to learn how to make my own parts, to get the look I wanted, killed allot of wood getting there. I also bought allot of rigging line, blocks pins, deadeyes wood, ect. I guess I should just say I got nice box and not much else. I kit items are ok; I just like using my own suppliers for better quality. You will have to buy double and triple blocks the plans call for them but 0 supplied. If your going to double plank the hull, you will need more wood, kit only has enough for a single planking. Anyway always glad to see this ship being built, it great to see all the new ways to solving the old problems.
Nice job on the transom!
- Joined
- Mar 27, 2019
- Messages
- 823
- Points
- 403

OK that's about what I thought. Apparently, the actual Rattlesnake didn't carry cannon for the first gun port forward for just the reason you stated. My latest thought is to leave that port closed but the other 4 gun ports located under deck open with a dummy cannon. I share your thoughts, the provided britannia metal gun port covers are...not good. I'll scratch build those.The dummy cannons work well for the last 3 ports under the quarter deck, and the 2 ports forward, I left the first port open no cannon as it turned out it worked for me as there is allot of rigging around the 1 port. I also did not build the portable gangways, as for me they hid to much of the work I did rigging the cannons. Your build is coming along very nice, glad your looking at it from the point of view your going to have to come up allot of your own work arounds. As you have done with the transom carving. Great idea I’m sure others will follow it. I did not us any of the supplied casting, decided it was better to learn how to make my own parts, to get the look I wanted, killed allot of wood getting there. I also bought allot of rigging line, blocks pins, deadeyes wood, ect. I guess I should just say I got nice box and not much else. I kit items are ok; I just like using my own suppliers for better quality. You will have to buy double and triple blocks the plans call for them but 0 supplied. If your going to double plank the hull, you will need more wood, kit only has enough for a single planking. Anyway always glad to see this ship being built, it great to see all the new ways to solving the old problems.
I've been doing research but still cannot find out whether Rattlesnake had a copper bottom or not. I love the look (and it covers up many flaws in the planking process) but if it didn't have copper sheathing like other period ships then I have to paint the hull. Any thoughts?
- Joined
- Mar 27, 2019
- Messages
- 823
- Points
- 403

Temporary batten port and starboard installed. This batten represents the top of the wale. After checking that the run from fore to aft is smooth the planking above and below can begin. So far, so good. I plan on installing a single plank above the batten then counter plank the stern filler. This must really be done first. By planking the stern first and leaving the ends of the planks long the side hull planks can meet up in a bevel. Better to have too much material left and trim it off than to have not much material and have to rely on (gack!) wood filler. 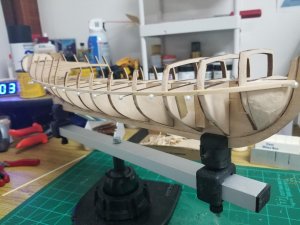

I have said this many time on the site, I come the school of you build for you, how do you want the builds to look and feel? You’re the one who’s going to put in the time, you have to be happy with the end result. We all don’t come out of the same box. Yes, this gets the look from the historical correct builders, I have no problem with the correct look, I just believe that if everyone built the same way and followed the same style, we end up with a whole lot of “oh look another Rattlesnake”
Anyway, to the point if you like the look and want to copper the hull copper it. I always double plank with a nice wood, to cover the minor flaws of the first planking. As for paint, I don’t like covering up the wood. I stain as it brings out the natural look of the wood. If you’re thinking about the painting direction when I would double hall using. 05mm strips to get a good smooth finish. Again, its just my own style, everyone has to build their way.
Anyway, to the point if you like the look and want to copper the hull copper it. I always double plank with a nice wood, to cover the minor flaws of the first planking. As for paint, I don’t like covering up the wood. I stain as it brings out the natural look of the wood. If you’re thinking about the painting direction when I would double hall using. 05mm strips to get a good smooth finish. Again, its just my own style, everyone has to build their way.
- Joined
- Mar 27, 2019
- Messages
- 823
- Points
- 403

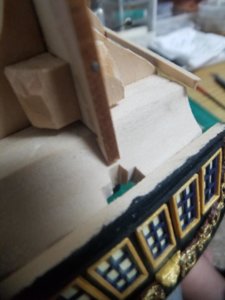
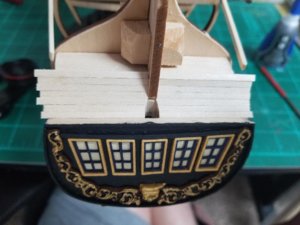
I finished counter planking the stern. Once I had all the planks installed I cleaned up the slot that the rudder will fit through. I tested the fit by inserting the rudder and checked the fit and clearance. I purposely left the counter planks long, after the hull planking is done I can carefully trim it up so it's symmetrical.