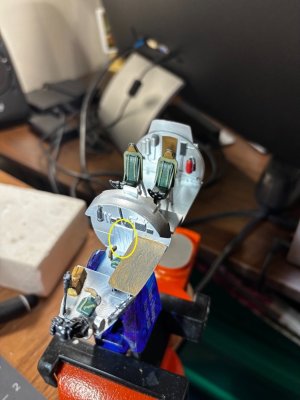
Just for your information, that "door" between the cockpit and the Navigator, bombardier was usually canvas or just open.
-

Win a Free Custom Engraved Brass Coin!!!
As a way to introduce our brass coins to the community, we will raffle off a free coin during the month of August. Follow link ABOVE for instructions for entering.
-

PRE-ORDER SHIPS IN SCALE TODAY!
The beloved Ships in Scale Magazine is back and charting a new course for 2026!
Discover new skills, new techniques, and new inspirations in every issue.
NOTE THAT OUR FIRST ISSUE WILL BE JAN/FEB 2026
You are using an out of date browser. It may not display this or other websites correctly.
You should upgrade or use an alternative browser.
You should upgrade or use an alternative browser.
What a nice video, Daniel. With the dropping of the boat on the parachutes. Both interior parts are looking very realistic.I have a little more progress and a Video showing the boat drop. I was wondering if any of the B17's were armed up when dropping the boats as in my dad's plane (wished now I could talk to him and ask questions, but he passed away in 2014). I found this YouTube link that answers my question.
View attachment 486801View attachment 486802View attachment 486803
Check it out.
Regards, Peter
Your painting is realy very good, Daniel. I like it.
Thanks Peter, for a while there I was torn about using the machine gun turrets, but the video resolved that nicely.What a nice video, Daniel. With the dropping of the boat on the parachutes. Both interior parts are looking very realistic.
Regards, Peter
Thank you, Adi, I look at painting as a necessary evil and I really am trying to change my attitude about it. I suspect it has something to do with my patients, like anything else it takes lots of practice and I have such a long way to go with it.Your painting is realy very good, Daniel. I like it.
Another tip for your painting, which I think is great. I often use the tip of a tooth pick to "paint" (really just leave a dab of color) small controls (like throttle tips) or instruments with a contrasting color to pick them out.
Thats sage advice Johan. I am just guessing here but until the war was over, the rescue B-17's may very well have kept their armory active as a defensive strategy if needed during their rescue missions. The stock photos I found and posted earlier in this build (with the exception of my dad of course) were after the war in the late 40's and in the early fifties, I think.Don't move too fast; winter has yet to begin...
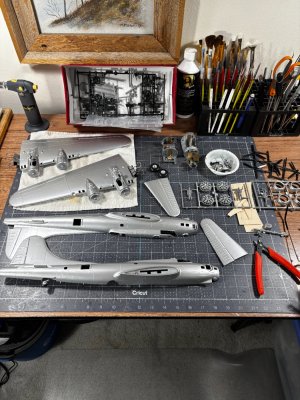
Good evening all, hope those of you who celebrate Thanksgiving had a great celebration with your families. I finally sprayed out the rest of the large pieces, wings & fuselage. Having gotten used to my airbrush I couldn't be happier with the results. I top coated everything with a clear sealer which was recommended if you are going to use decals. I have purchased some waterslide decal paper and will print my own decals for the Rescue verbiage called out from my research photos.
Here is an overview so far.
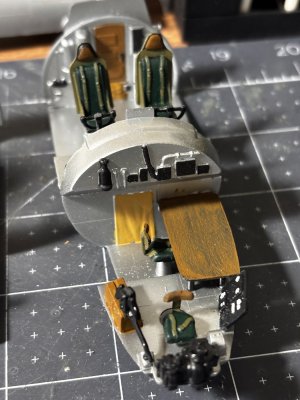
I painted the curtain Rob pointed out in the bombardier's cabin.
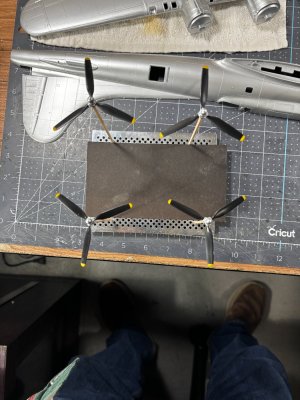
The propellers were fun to do, I will probably give the hub a wash since I know how to do it now.
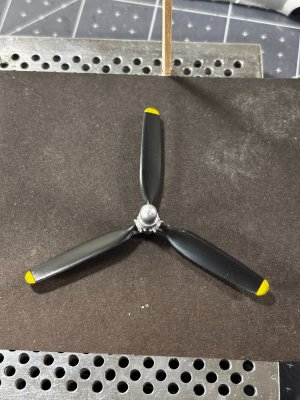
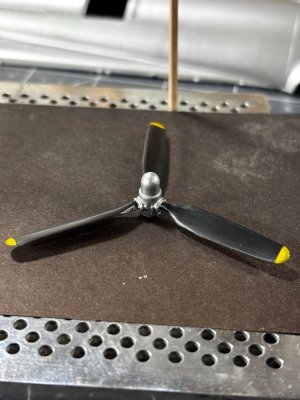
And finally, for today the boat. From original putty up to a final product. I lost count of the number of coats of yellow, I may even put a few more on but it looks ok now. It has that very used look of having been dropped a few times before .
.
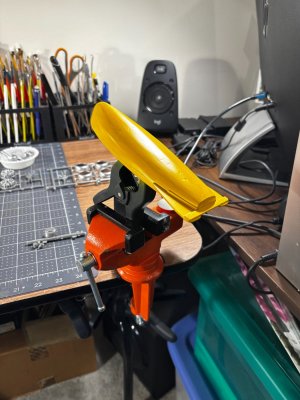
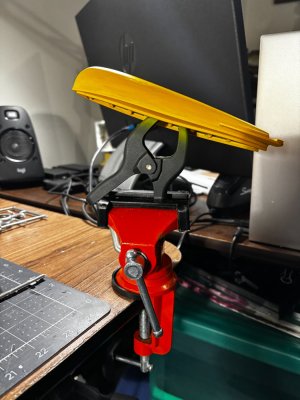
I'm counting on the obvious imperfections to not be that noticeable when on display, if it becomes an eye sore, I'll have to sand it back down. It is amazing what showed up after I thought I had it smoothed out.
Hope you enjoyed the progress, till next time thanks for looking in.
Here is an overview so far.

I painted the curtain Rob pointed out in the bombardier's cabin.

The propellers were fun to do, I will probably give the hub a wash since I know how to do it now.


And finally, for today the boat. From original putty up to a final product. I lost count of the number of coats of yellow, I may even put a few more on but it looks ok now. It has that very used look of having been dropped a few times before
 .
.

I'm counting on the obvious imperfections to not be that noticeable when on display, if it becomes an eye sore, I'll have to sand it back down. It is amazing what showed up after I thought I had it smoothed out.
Hope you enjoyed the progress, till next time thanks for looking in.
Some very nice work you are showing us, Daniel!
Thank you PaulSome very nice work you are showing us, Daniel!
Thank you Johan. The turkey came out really fast this yearYou apparently spend little time preparing the Thanksgiving turkey...
Wonderful progress, Dan.

Those propellers look nice and crisp! Besides giving them a wash, you may want to add a little silver flecks at points on the leading edges of the propellers to look like wear of the paint down to the underlying aluminum. I use a silver marker pen to do that.
Rob
Rob
Thats a great idea Rob, I will have to practice on some of the black sprue as I know that kind of accent would have to be very light.Those propellers look nice and crisp! Besides giving them a wash, you may want to add a little silver flecks at points on the leading edges of the propellers to look like wear of the paint down to the underlying aluminum. I use a silver marker pen to do that.
Rob
Daniel,Good evening all, hope those of you who celebrate Thanksgiving had a great celebration with your families. I finally sprayed out the rest of the large pieces, wings & fuselage. Having gotten used to my airbrush I couldn't be happier with the results. I top coated everything with a clear sealer which was recommended if you are going to use decals. I have purchased some waterslide decal paper and will print my own decals for the Rescue verbiage called out from my research photos.
Here is an overview so far.
I painted the curtain Rob pointed out in the bombardier's cabin.
The propellers were fun to do, I will probably give the hub a wash since I know how to do it now.
And finally, for today the boat. From original putty up to a final product. I lost count of the number of coats of yellow, I may even put a few more on but it looks ok now. It has that very used look of having been dropped a few times before.
I'm counting on the obvious imperfections to not be that noticeable when on display, if it becomes an eye sore, I'll have to sand it back down. It is amazing what showed up after I thought I had it smoothed out.
Hope you enjoyed the progress, till next time thanks for looking in.
If it's of any interest to you, I recently tried Acrylic Gouache on a build and am very pleased with it so far. I found it in the art section of a local store. It's got better opacity than either acrylic model paints or craft paints, and it's formulated to add texture to a painting so from a modelling perspective it has inherent properties as a filler/surfacer. It might be just the thing for your Higgins boat.
A small piece of soft foam or sponge is ideal for something like that. Get a small dab of paint on it, dab it on a piece of paper towel until there's nearly no paint left and then lightly dab it on the model until you get the effect you want. That's the technique I used for beating up this Matilda:Those propellers look nice and crisp! Besides giving them a wash, you may want to add a little silver flecks at points on the leading edges of the propellers to look like wear of the paint down to the underlying aluminum. I use a silver marker pen to do that.
Rob
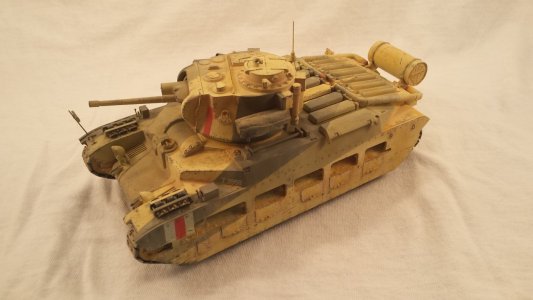
Tons of tutorials for sponge chipping on the 'net.
I recently tried Acrylic Gouache
I love the painting pointers Namabiiru, keep them coming. For the Higgins boat I was after a smooth hard-shell look. My results so far point out a lack of proper sanding in the beginning, you can see like a sharp stick in the eye the hills and valleys that show up under certain lighting. Using Vallejo Model Air paints which are already thinned out for use in an airbrush, was also a surprise with how thin it was requiring way too many coats to cover the different shades of wood and putty fillers. On the positive side of this experiment, because of the repeated use of my airbrush, I started learning the tricks to its proper use, there are numerous little things one can do in terms of adjustments, intermediate cleaning between color changes, pressure settings, and needle and tip sizes for the type of paints. All which I am a beginning to get better at. Your suggestion of the Acrylic Gouache sounds interesting, if its thick enough to act like a filler I could apply it with a spatula over the lower groove areas and after drying a light sanding with 400 + paper then respray?the technique I used for beating up this Matilda


