Revell Black Pearl

Joined
Aug 23, 2017
Messages
29
Points
48

Hello everyone! I'm new to this forum but I love models so I thought this would be the place for my interest! So Revell recently came out with the beautiful remastered version of the Zvezda Black Pearl ship model or a slightly different version of the Black Swan ship model. Well I recently bought this model on Amazon and I can't find anything about what paints to use for the hull, sails, cannons, deck, and etc not even from the Zvezda model. So I was wondering if anyone on this forum knows for which colors of paints to use, also should I use Humbrol or Acrylic? I have lot's of questions but I would really appreciate if anyone will be able to answer them for me. P.S if I put this discussion in the wrong place please let me know, Thank You!
 
Hi. I have built a lot of plastic kits in the past and if you are going to try and get it something like the ship in the movies you will need to get into a lot of shading and colourwashing to get the look right. As such, acrylics will be your best bet and since they are water-based can be thinned easily which will help a lot. Regards.
 
I realize that you are building plastic version, but maybe you can get some ideas from the wooden section as there are a few wooden Black Pearls being built. I used a technique I made up on my own by layering shades of paint (enamel) like on the hull and mast, etc. Then I lightly sanded the part and the different shades of paint showed through.
The hull was black plastic and I painted it in varying shades of tan brown, etc. then as I lightly sanded the paint, then the wood grain of the hull started to show up (black) due to me sanding through the different layers.
WIth the BP, it will be different and I don't think i would paint it totally black, but add some dark orange rust colors, gray colors, etc. Hinges and things like that can be rusted effect.
Try www.micromark.com as they have some weathering agents to put on to make things look old and on plastic too. To me I would play around with many different shades of gray and black and a very dark orange for a rusting effect. you can take like a cotton ball or q-tip or sponge to get some types of effects. The sails, well, I would make my own out of very dark tan gift wrapping tissue paper, dip it in water, etc to age it and to form it to the yards.

This is a link to a Lindberg Captain Kidd plastic that I used some of these techniques.
http://www.shipsofscale.com/WVH/WVH01.html

Thanks for joining and have fun. I hope that you will continue your build log so we can see this come together.

Donnie
 
This company makes very good paints for weathering realistic wood effects.

http://ak-interactive.com/v2/product/old-weathered-wood-vol-1/

http://ak-interactive.com/v2/product/old-weathered-wood-vol-2/

Check out this video on YouTube:

http://youtu.be/WN-g2NJucPQ
 
May I just say a big thank you to you guys, you got me a start to build this model! Sorry for a very late reply life has just been crazy lately mainly because of school. But now that I am looking at more detail one thing and maybe the biggest thing to figure out is what enamel paint color should I use for the hull itself? I was thinking about using a coal black so it isn't to dark. What do you guys think about this or do you guys think I should use a different color? Now one key note is I am trying to make this model look like a "new Black Pearl" not the movie version. (On a side note I was planing to buy the 1:150 scale Black Pearl to paint it up to be the movie version.

https://www.amazon.com/Revell-Limited-Disney-Pirates-Caribbean/dp/B06X9V3JHF/ref=sr_1_4?ie=UTF8&qid=1505704312&sr=8-4&keywords=black+pearl

This is the link to the amazon page to see kinda how I want to paint it.
 
Azog,
I will look at model masters and Testors. But i think both of these are the same. They have an online color chart and the last time i visited the site, the color chart was kinda hard to find. If you could do me a favor and take some pictures of the natural color of the parts as is from the box. Is the kit all gray, black or what. In the meantime i will look. The sails in my opinion should have various shades of gray on top of the natural color of sails. The whole ship is
going to have to have a mixture of black and gray tones to it.

Donnie
 
You can start out with these colors and mix shades together to get diff effects. (F) = flat

Engine Black (F)4888
Grimy Black(F)4887
Railroad Tie Brown (F)4885
 
Donnie post_id=22698 time=1505709590 user_id=5 said:
Azog,
I will look at model masters and Testors. But i think both of these are the same. They have an online color chart and the last time i visited the site, the color chart was kinda hard to find. If you could do me a favor and take some pictures of the natural color of the parts as is from the box. Is the kit all gray, black or what. In the meantime i will look. The sails in my opinion should have various shades of gray on top of the natural color of sails. The whole ship is
going to have to have a mixture of black and gray tones to it.

Donnie

So all of the plastic in the kit is in a light grey color as the molded color, not black. However there is one small sheet that is all clear but that should not be a problem.
 
Azog,
take a look at this Lindberg Captain Kidd (plastic) and read my log.

http://www.shipsofscale.com/WVH/WVH02.html

You will see that I used different layers of colors on the hull. Then using a light sand paper, I lightly sanded the hull as the different layers of colors shown through revealing the GRAIN of the planks in the hull.

Now, I know that you want your ship to be overall a blackish - gray color- that is fine. But, I do believe that you can achive a 3D look with different layers of black and gray. Let dry and sand lightly in different parts of the hull so that the vary colors of gray and black will show through. The same with the sails. I would just a base coat of the dark tan first, then follow with gray and then black last. As you lightly sand the Black away, the gray and the dark tan will start to come through. As you do this technique through the build it will be nice I do believe.

I hope that this helps some. Those colors were Model Masters site.

Donnie
 
So Today for an update I purchased two railroad tie brown paints, two grimy black paints, and two engine black paints all by model master! I would have gotten more but sadly the store didn't have much in stock at this time, so I pay another visit later in the month. The important this is now at least I can get started on the hull! Which leads me to my next question, should I paint one paint at a time (etc. 1.railroad tie brown 2.grimy black 3.engine black) and if so which order do you guys recommend I do? Or should I mix the paint together then paint it all at once? Also should I put a black primer on first before I paint or don't worry about it? Then my last question doesn't have anything to do with the hull but should I paint the sails, hull and deck in acrylic and then paint everything else in enamel? Or should I do all of the ship in acrylic? I will say though That I do plane to paint the lanterns and figure head in a enamel gold, so it has a nice shine to it.

And to answer that last question, of course I will be posting tons of pictures onto this forum! One thing to note is that even though I can start the hull anytime, it probably won't happen for a week or two. So just note that I will be posting tons and tons of pictures of the ship on this forum but they will be posted slowly :D
 
I will respond to this tomorrow as I am just now reading this.
You have a lot of questions to be addressed.
Did you see my link to the captain Kidd ?
 
1) should I paint one paint at a time (etc. 1.railroad tie brown 2.grimy black 3.engine black) and if so which order do you guys recommend.
If you go to my Captain Kidd build log ( http://www.shipsofscale.com/WVH/WVH02.html ), you will see the effect that I used that I layered the paint. Then as you take like 500 grit sand paper as you sand the part, the different colors will reveal themselves.
Try it on a test piece from the kit. I would paint and let dry in this order: Brown, Grimy Black, Engine Black. Let all dry and as you sand off, the various colors will show through. Stop sanding when you reach the effect you want. You know that aged wood has different tones to it.


2)Or should I mix the paint together then paint it all at once?
I would not do that as you would end of with only ONE color. I would not do that. The ship would be one color.

3)Also should I put a black primer on first before I paint or don't worry about it?
I would not - go back to answer to #1 - this should be done ok.

4) should I paint the sails, hull and deck in acrylic and then paint everything else in enamel?
Unless I am wrong, acrylic is water based and is best for wood as the wood absorbs the color. Use enamel and a mineral spirit to reduce the thickness of the color - again - layer the colors. I would use the enamel brown and grimy black alternating and reduce the thickness with mineral spirits with light strokes of a brush until you achieve the results.

... tons and tons of pictures of the ship on this forum but they will be posted slowly
First of all, it is usually customary to take a picture of the box and contents so that people will know what kind of model you have and the contents helps others see what you have to help you better.
Lastly, a simple thank you would be good in order because even though people on this forum love to help others, they also want to know if they are helping or not.


Donnie
 
Hello again everyone! The time has come for pictures!!!! I am sorry for the lack of replies so let me give some backstory on that. I have been very busy so I could not have gotten too much done on my model at one time. So I didn't think you guys would care to see one picture of me gluing the hull and have to wait a week for me to paint it :lol:. So instead I took my time like this project will be and got a ton done and now it is finally time to show you the Black Pearl (what I gotten done of it) right before the spooky season begins! :banana-rock:

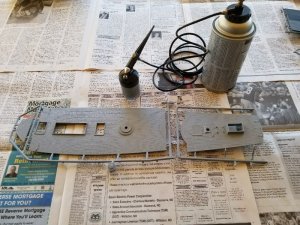
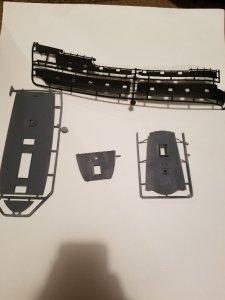
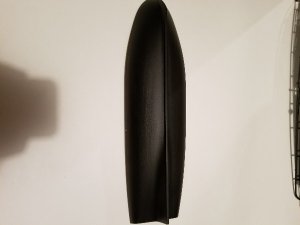
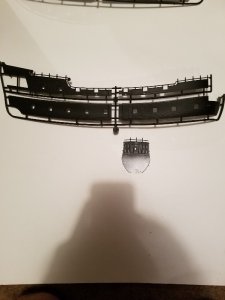
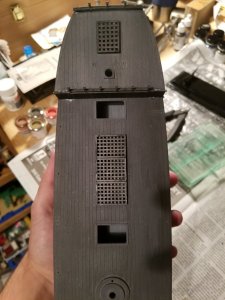
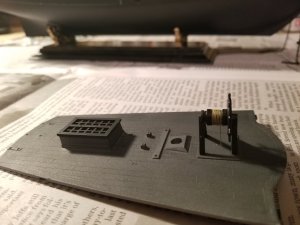
So in this image I was about to spray the deck with an acrylic paint called Gunship Grey. And yes I said spray! Mainly I wanted to show you this picture so you guys can get a feel for how the deck and all the plastic part look strait out of the box.
So with this spray can I can poor whatever paint I am using into a glass bottle that will then be sucked up from the air can to make a nice thin layer of paint! Really cool and even though my dad bought this one in the 90's you can still pick up one today and it really does make a difference.
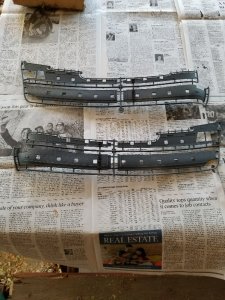
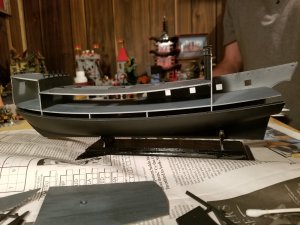
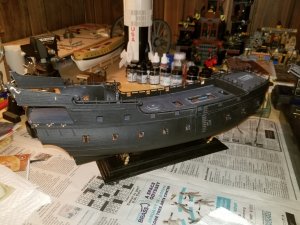
So this is actually how the deck turned out for now. Like I said I sprayed it with a Gunship Grey color to give it that lighter look to compromise the black hull as see there. Ps: the deck isn't finished yet, I plan to water down the Engine Black Paint that I ended up using for the hull to do a light black layer on top to give it a nicer realism look.

How the hull was painted is I used an acrylic Grimy Black paint as the first layer, mainly to have a nicer undercoat but also to lighten up the Engine Black paint that was about to go over it.

After I coated it with the Engine Black it turned out just the way I wanted it! I know what your thinking, why do you want it to look so plain and new? Well I plan to display this ship for the rest of my life because of my love to the Pirates of the Caribbean movies, so simply I wanted to have a brand new looking Black Pearl where it looks like it just rose from Davy Jones's locker :grin:. One thing that weirded me out about the "real" ship was the fact that there was no difference in paint from the water line and the paint of the hull. Do you guys think I should leave it as it is or paint the water line a Flat Black?

The hull is the same color as the side parts to hull which is very accurate to how the ship was in the movie.

One thing to note is that the final product of this model will end up having gold painted on any decorative element to spice up and lighten up all this blackness.

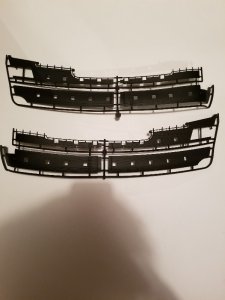
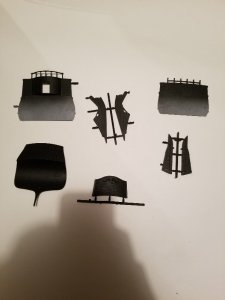
As in this picture you can see all the other elements so far that will end up being the same color of the ship such as the entrance to the captains cabin (which I plan to glue the door slightly open to give some more character to the model. Also do you guys think I should paint the door a different shade of black just to have some settle differences?), The forefront of the ship that figure head will connect to (just need to glue the two sides together), A set of railings that will go on the front of the ship, The rudder (same as the forefront, I will need to glue the two sides to together.), the back of the ship, and the part on the back where the lanterns will attach.

These are all the different paints that I have used for the ship so far and very excited to use more!

This is all that I have gotten done so far on this ship! I am very excited to work on more of it but like I said I am not rushing to get this done. Thank you all for reading and viewing all of these photos! From now on I will try to keep you guys posted on what I am doing every weekend. Let me know your opinions because without you guys this ship might not have looked as good as it is today!preview.jpgPicsArt_10-29-08.23.49.jpgPicsArt_10-29-08.27.40.jpgPicsArt_10-29-08.24.57.jpgPicsArt_10-29-08.27.11.jpgPicsArt_10-29-08.26.53.jpgPicsArt_10-29-08.25.19.jpgPicsArt_10-29-08.25.58.jpgPicsArt_10-29-08.26.19.jpgPicsArt_10-29-08.24.09.jpg
 
Last edited by a moderator:
Very nice so far - enjoy reading it !

Donnie
 
So I have done a lot on my model dince the last post and I will be happy to post pictures of everything but lets start where I left off! 20171111_202857.jpg
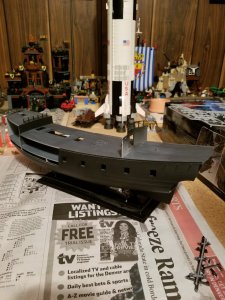
After painting the decks and hull with the spray gun I decided to glue the deck to the hull. The deck was quite easy to glue compared to future events. However the back decks did take some time due to the lack of support in the back. Their only glueing location was the back wall which was the door to the cabbin.


20171112_231116.jpg
Even though those side hull parts are not glued in yet due to the lack of cannons so far, I atill needed to snap in the sides just to make sure the back deck pieces were supported and at the right angle while gluing.
 
The cannons is where the fun begins. It took me a grand total of 24 hours to get all 32 done.
20171206_222946.jpg
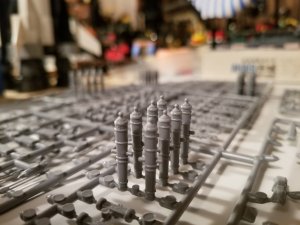
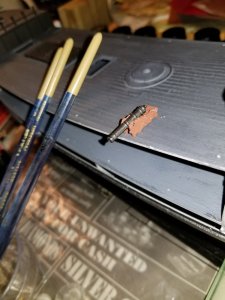
Now the cannon barrels themselves come in two seperate pieces. The tip and the rest of the barrel. Glueing these were easy and no problems occured. However the glue did not hold the greatest if you drilled in better holes for the actual cannon. I had a couple of the tips fall off but once on the ship they have not been a problem yet so don't worry about that.
20171209_201403.jpg
This is what the cannons looked like before I painted them. The detail that was given on the cannons was jaw dropping. When I saw it I knew I had to take advantage of it.
20171210_143457.jpg
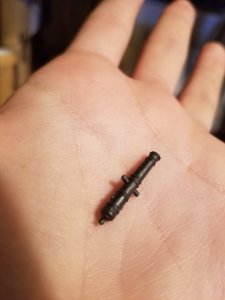
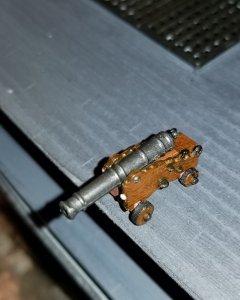
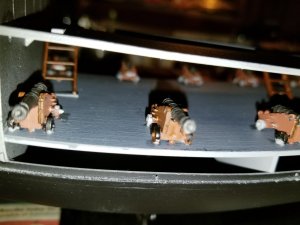
The main struggle on the barrels was the paint. On any other ship you can easily get away with just painting the barrel black. But how do you paint a black cannon on a black ship. I didn't want to make the cannons blend in with the rest of the ship so I was stuck. I ended up finding some paint that is like miracle grow. Its buffing metalizer by model master. It was expensive compared to the rest of the paints being around $6. But it was worth it.
What I did was painted the whole cannon barrel basic enamel black. Then I painted the metalizer on. Because it was buffing I later used a Qutip and rubbed the barrels. It gives it a very realistic metal shine. And a clear seperation between the black hull.
20171212_203705.jpg
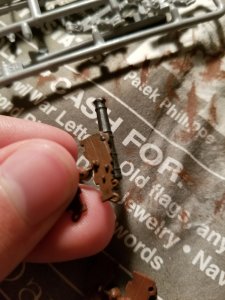
Now came the carriages. Brown and black is a very ugly color mixture so it wasn't my initial intent. I was originaly thinking about a dark grey color. But feared it would look fake compared to the rest of the ship, and blend in with the deck. So I decided to take the leap and paint it brown. So it got me thinking. How do you paint a realistic wood color so it wouldn't be just smooth looking brown. I then discovered a paint called smoke. To go with the smoke I bought a mahogany brown for the main color.
20171213_231406.jpg
The finished product looks something like this. What I did was paint a mahogany brown as the undercoat and then painted the smoke over the brown. The smoke is an interesting paint because its really not a paint. It doesn't stick to your fingers and it is almost like a water. I also learned with the smoke that the less you brush it the darker you will get your wood to look. Which is exactly what I wanted. 20180104_183712.jpg
After the smoke I painted some black paint around the wheels and on the different hooks provided on the carriage. I was going to paint them the metalizer as well same as the barrels but being so small you could barely notice the difference.
After all this painting that took 24 hours and more to discover all the different paints needed I think it was worth it. They turned out so great and I am very proud of the cannons.
 
Before I continue on the rest of the ship I wanted to focus on some of the smaller accessories I painted that attached to the main deck.
20171210_221106.jpg
Now this could be arguable the fact that I painted the grates to lower decks the same iron color as the cannons. Due to the fact that some ships have wooden grates so it's lighter for the crew to open. Mainly I went with metal just because I thought it looked better than a solid brown surface on the deck of a black and grey ship. I also really just love the paint!
20180116_160849.jpg
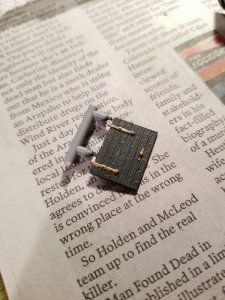
The next seperate item that I painted roughly at the same time was the cabbin door. Now the whole front including the door is a disaster with accuracy. It is nothing like the movies and looks really plain. So I tried to spice it up a tad with painting the door a different color from the rest of the ship. So the door is painted in grimey black which is the undercoat of the entire ship just without the engine black over coat. Then I decided to add some flare which is probally not too realistic but c'mon its a black ship. I decided to paint a flat brass paint for the handle and the bolts that hold the door in place. It gives some shine to the dull deck.
 
The next step was to do the rest of the sides to the hull. In which case I needed to glue the cannons down to the gun deck.
20180118_211709.jpg
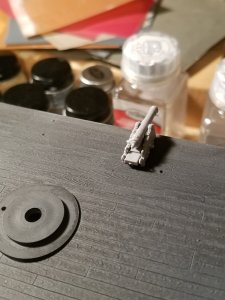
Now these cannons look terrible. So don't judge those haha. I only painted up the top deck ones due to the lack of vision in the under decks. I was careless on the glue for these cannons because once again no one is going to see it, so why not make sure they are not going to fall out. Also I did not take pictures of the ladders (forgot) but they are painted the exact same way as the cannon carriages for the top deck.
20180119_224214.jpg
Now this is where I took the model in my own hands! I don't like using a string that they provide for an anchor! It makes absolutely no sence and the 5th film clearly shows the anchor chain as Barbossa is hanging on it to rescue Jack. So I decided to buy an anchor chain and attach it my self. Due to this wall support being where it is, if I wanted the chain it would not fit withou lt cutting away some plastic. Overall it was pretty easy to do and I will never see this carving on the outside of the ship so they're was nothing to lose.
20180119_230954.jpg
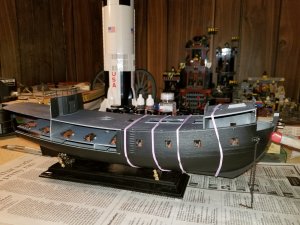
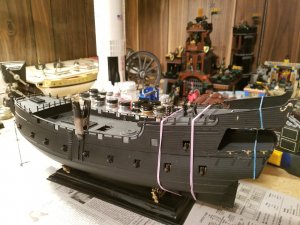
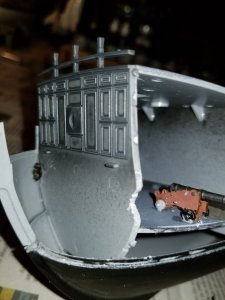
Now this is where this ship officially becomes different from most models. There is 9 different hull pieces. So this front section had to be glued on seperatly from the back section. This was a real pain to glue on. It just wouldn't line up right.
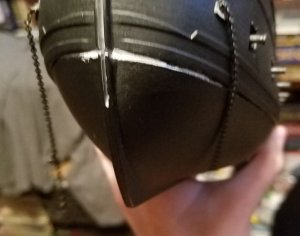
20180216_141601.jpg
As you can see in this image the front didn't line up right. This actually wasn't my fault. The sides themselves lined up pretty good judt not the front. Just like many other places on this ship I am going to buy putty which is actually my next step to do touchups on these areas.
20180121_211449.jpg
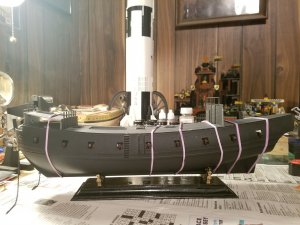
After I let the front sides dry with the rubber bands for 2 days I then attached the back sides which were not as hard as the front sides. Still though...it should have been easier.
20180125_230444.jpg
Now I actually forgot to take a picture of the top deck front sides. Oops but as you can see here all sides are on which was a blessing. These sides were wayyy to difficult to glue on and I will not be doing it again. Definetly one of the hardest parts of the model.
20180204_233251.jpg
Now the top deck or the helm! This was creative. The stering wheel didn't ask for any string to go through the deck but I wanted some realism. So I wrapped the running rigging string around the wheel and drilled a whole in the decm to put the string through. I think this looks fantastic! Now this picture was taken before I realized that the top window to thw cabin was on upside down. Oops once again haha.
20180209_224521.jpg
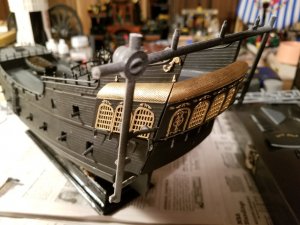
Super excited about how the back is looking though. In person the back looks super impressive just how tall it is. With the gold detailing and having the nice looking helm. Great stuff ahead still though.
 
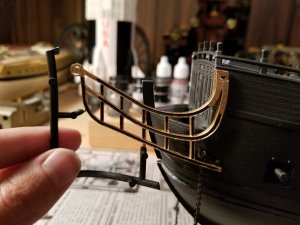
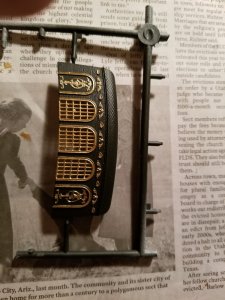
Now here is some of thr shinny fine detailings! These took a long time to do due the fact of them being so tiny and I wanted to get it as perfect as I could.
20180210_144844.jpg
20180210_144950.jpg
These decrotive railings turned out perfect! Having the black in the center avoids the front being too shiney and the gold just looks so pleasent against the black.
20180211_192230.jpg
Now this is where the black pearl really becomes the pearl that we know and love. Those iconic back cabin windows with its gold detailing. The leaves above the windows were some fine detailing and did require some touchups.
20180212_200609.jpg
This has to be the hardest painting so far. The fake windos on both sides was super hard to paint gold. There wasn't enough depth between the black flat area and the lifted gold area. Which made my brush slide quite offten. Super happy for how these turned out however.
20180219_191920.jpg
Now this was interesting. The roofs above the windows I didn't want to be a solid shinny gold due to the fact that the ship could have looked too bright in the back. So what I ended up doing was a heavier dry brush with the gold which allowed it to not be as shinny and allowed some black to keep peeping through and giving it a dirtier look. Not as fine I guess. They turned out just the way I wanted because in some lighting it looks a little tan which is exactly like the "real" ship in the movies. Now were all caught up to where I stand right now. Once again I will post more pics once more is done. The next step as said earlier is to buy some putty to fill in all the gaps that the model delightfully provided. Hope you enjoyed so far! I certainly am and my goal is to at least get the entire model done with just standing rigging by april 2nd! I will then finish the running rigging afterwards. Please ask questions if you like, I would love to answer them!
 
Back
Top