Revell Cutty Sark 1:96 with 3D printed modifications

I'm not going to be a shrinking violet here and hide behind false modesty! I still feel very proud of the little scratch designed winches that I made. These are only about 2cm (3/4") long by 1.5cm (1/2") tall and were my first real success at micro-machinery.

View attachment 325835
View attachment 325836
Hi Kevin. You are right to be proud of making this winches. It looks great.
I always like to see the build of special kind of Cutty Sark. And I like the scale.
Looking forward to the next post.
Regards, Peter
 
Your build so far is nothing short of incredible. So much attention lavished on a plastic kit really raises it up. Keep at it!
Where do you live? If you could possibly visit Cutty Sark in Greenwich, you'd be blown away. I literally shed tears when I first laid eyes on her, having built that same kit as a pre-teen. Nothing like your build of course, but it hooked me on sailing ships.
 
Where do you live?
All of about 1 hours journey away from Greenwich :). I need to pay another visit soon, to get a better understanding of the masts, spars and rigging, but have been waiting for the school holidays to end so that it quietens down. Thank you for the compliment, at this stage I find it easier to make the parts if I can see the kit part first, but I'd hope, in time, to not even buy the kit.
 
All of about 1 hours journey away from Greenwich :). I need to pay another visit soon, to get a better understanding of the masts, spars and rigging, but have been waiting for the school holidays to end so that it quietens down. Thank you for the compliment, at this stage I find it easier to make the parts if I can see the kit part first, but I'd hope, in time, to not even buy the kit.
Take lots of photos for reference!
 
Take lots of photos for reference!
Well there's the thing. It felt like I took thousands in february, of every conceivable aspect that I might want pictures of: but in reality I only took a few hundred and, naturally, nowhere near enough of the bits I really needed. But there is so much on the web, including some great videos, that it's usually possible to get at least a glimpse of the detail you want.
 
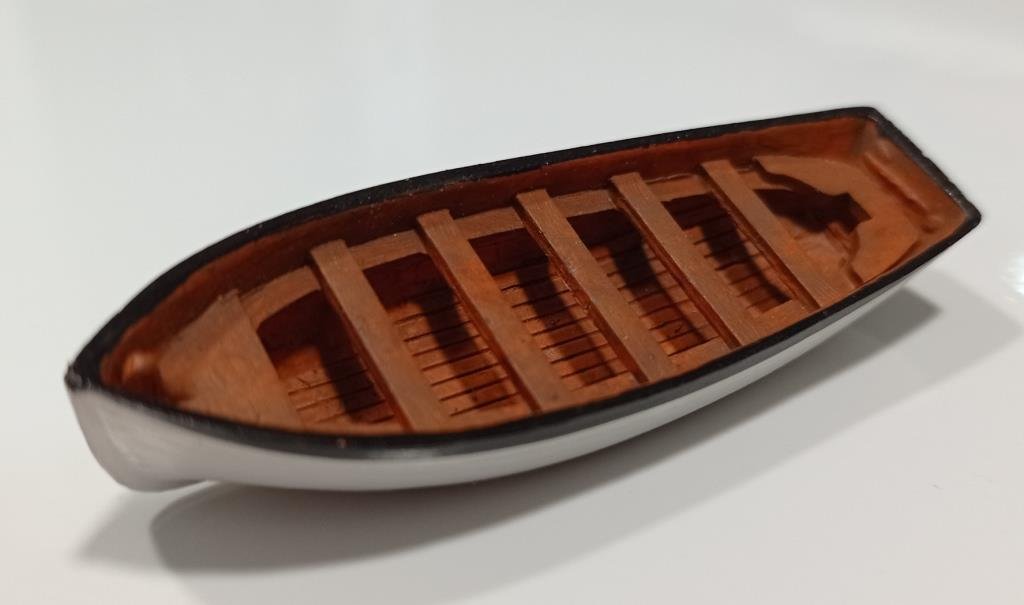
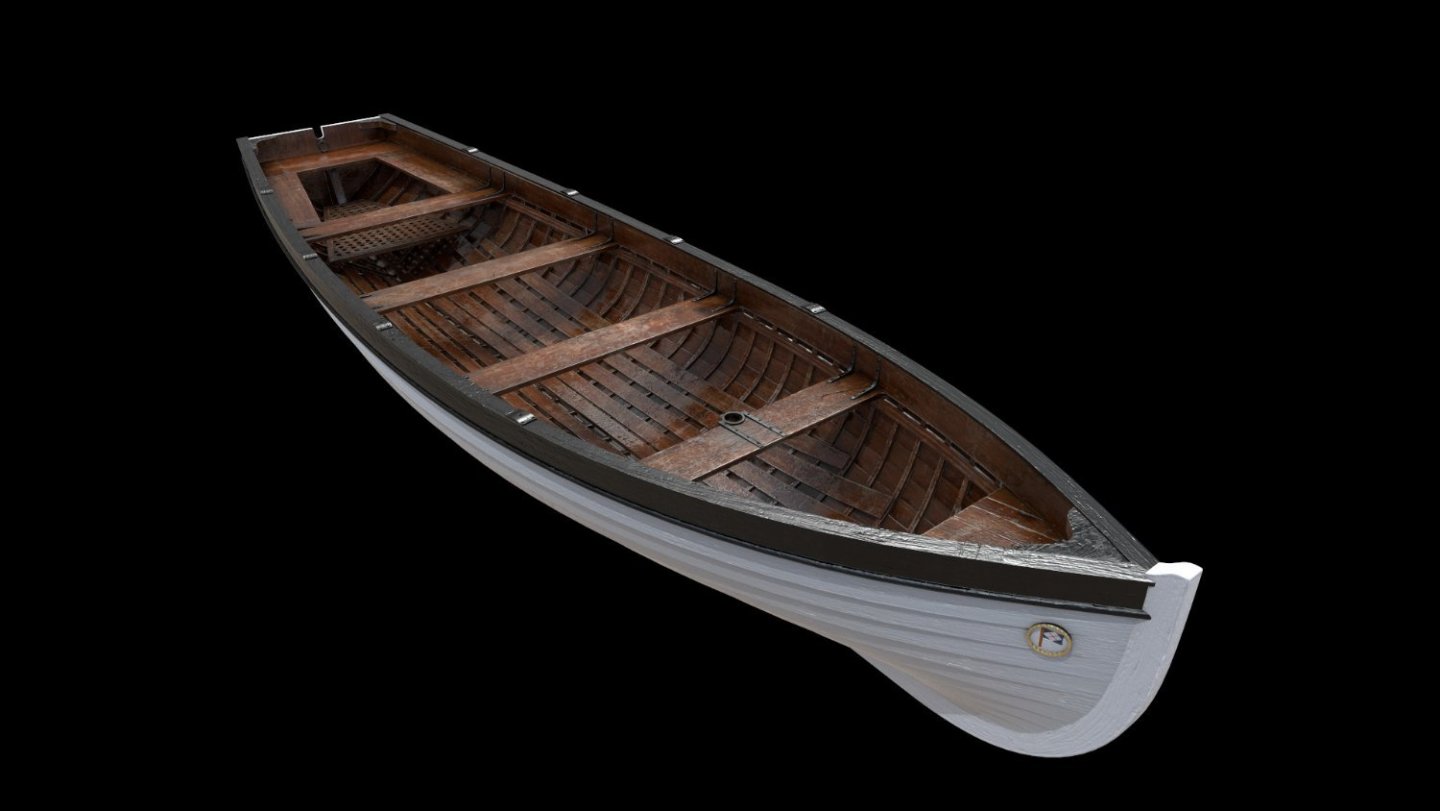
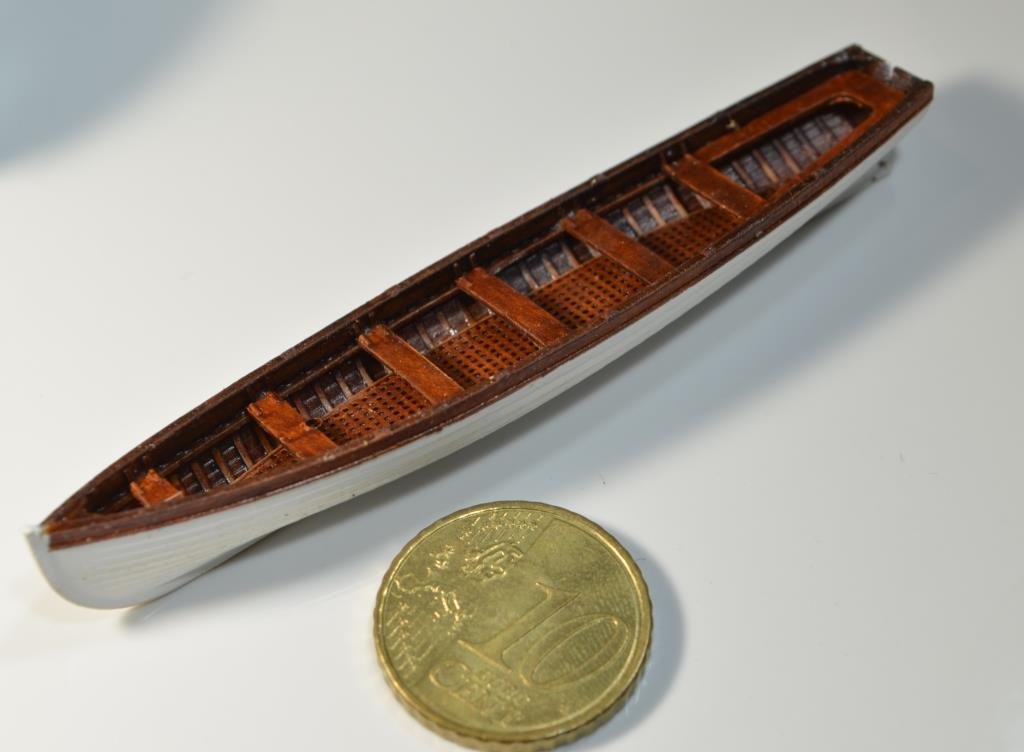
I've spent far more time on these boats than I should, but it's been interesting and enjoyable. I'm still working on the lifeboat but here are the jolly and gig (which is omitted from the kit). For info, I had to fiddle with the thicknesses of several areas including the hull because scaling down to 1/96 resulted in paper thin parts, but I think the end result is a pretty fair representation.

Revell's jolly boat. Not too bad, a bit crude and clunky though.
image.jpeg.513d860208a44b810b95b10ee33779e3.jpeg
The real jolly boat

richard-dunn-screenshot003.thumb.jpg.56848d4c8e4bd3d5400b4f9edf4cd9ab.jpg


The model. The paintwork is much darker in the flesh, similar to the real thing; I over-exposed the photo just to show the detail a little more clearly. I omitted the little circular badges on the prow, too small for painting.
103151393_DSC_0006(13).JPG.9128d76ceba41171f251e947b3b717e8.JPG
The sleek gig; if I was a sailor this is what I'd want to drive
image.jpeg.4994d18e75b9a14645df454d7eba717d.jpeg

This is a better representation of the actual colour.
783018382_DSC_0004(15).JPG.959535d02b16a2e83a00dda6904e8b1e.JPG354726125_DSC_0010(10).JPG.1f93289ba42231ab85cfac77f8e61272.JPG
 
I'm just about to start this kit as my first step into maritime modelling - what you've done looks wonderful. Would you consider selling the windlass / small boat prints?

I can't quite tell your modification of the rails - the painted ones in your post Aug 28 look wonderful certainly, but I am missing some context there on figuring out the actual changes.

Do you have any other tips for this newbie?
 
Hello William

As it happens I'm just putting the finishing touches to the lifeboats this evening, which brings the set up to four, and am about to make some oars. I'll be more than happy to sell prints of just about anything I've made, other than bits where I think it would disappoint the buyer. Some things are near perfect, in the sense that you should be able to just paint and fit, others require a bit of fettling and fiddling. Bear in mind that 99% of what I'm doing here is a learning exercise, experimental scratch building using 3D printing as the medium, and not everything comes out as well as I'd hope. Anyway, send me a pm and we'll come to some kind of arrangement.

The pin rails: I cut away all of the gussets on the inner hull, metaphorically threw away the kit pin rails and deadeyes and made a continuous rail that included what some people call the 'lozenges', those long white slot shapes in the teak bulwarks. I don't think what I've done adds much, to be honest, and it didn't come out that well. I did it mainly because I want to do proper deadeyes, lanyards and shrouds. What I learned from this bit was that, when you take into account the new decks I made and so on, it would have been better to make my own hull and design in better pin rails! (That's a work in progress by the way, for another day - I have to resist getting distracted or I'll never finish anything). Once I've finally wrapped up the boats I'll be focussing on the deadeyes through to the masts and spars, and posting on it presently.
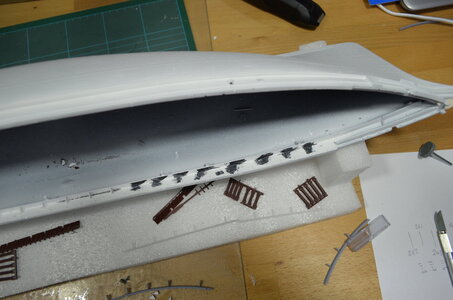

DSC_0015 (5).JPGDSC_0058 (2).JPG

Tips: As far as you can, try to decide how much modification you want to do, and what kit parts you'll settle for, early in your build. I sometimes wish I had bought the Cutty Sark first, as I would have just built it out of the box, blissfully unaware of all the amazing work you see on these hobby sites. In the event I started with HMS Victory and, because the instructions where so bad, went googling for better. But that's another story.

I think I would recommend setting out to make the fewest modifications you can live with, just buy a few bits that you think will lift the model and crack on. I've only seen photos of 'out-of-the-box' builds and they tend to be pretty presentable. Bob Cochran is doing a build with not too much modification here https://modelshipworld.com/topic/31751-cutty-sark-by-bcochran-revell-196/ which is worth a look. If you haven't already spotted them, there are some wonderful aftermarket parts available here https://www.hismodel.com/articles-category-14. I've used the photo etch signage which is simply exquisite.

Despite being in three parts, the kit deck can come out okay, with a little work. You'll find a longer version of this blog here https://modelshipworld.com/topic/30964-cutty-sark-by-kevin-the-lubber-revell-196-plastic/ where I cogitate more on the ups and downs of using these parts.

I don't know if you're new / returning to modelling but on a more general note, things I've learned since returning to the hobby after nearly 50 years;
- don't stint on tools, they are not very expensive and it's good to support your local hobby shop. same with supplies - get lots of plastruct or evergreen!
- airbrushing: just buy a decent airbrush from the outset and save yourself some pain. My tool of choice now is a iwata neo.
- play with different paint mediums. I have grown to love oil paints.
- try not to over-read other people's logs! this will lead you into temptation, slow you down and make you feel inadequate :). As the slogan says, Just Do It
- do start a build log on here or elsewhere. I was very shy of doing that at first, a couple of years ago, kind of embarrassed at being a newbie, but people take an interest, help each other out and there are some very skilled, experienced folk on these forums.

Have fun,

Kevin
 
Kevin, thank you so much for your advice. I have an airbrush and generally use acrylics with oil washes - particularly for the teak as you have so excellently demonstrated. I will PM you re: the parts presently.

With regard to your advice about 'fewest modifications', though I'm sure it would be fun to do a fully rigged ship, the thread you linked with Bob Cochran seems to have burnt out after his desire for more accuracy than the Revell kit could provide but without requisite experience - a lot like my starting position...
 
Hi William, so not a beginner - you should fly on this then. Bob is also a pretty experienced modeller (unlike me!) but new to rigging and is still working away at it as far as I know. I’ll be the same, I know I’m going to bog down learning all that’s required but this is a necessary exercise as the Cutty Sark is not the prize for me, and I need to know the ropes (boom, boom) for what I want to eventually do. I’ll email you over the weekend about parts.
 
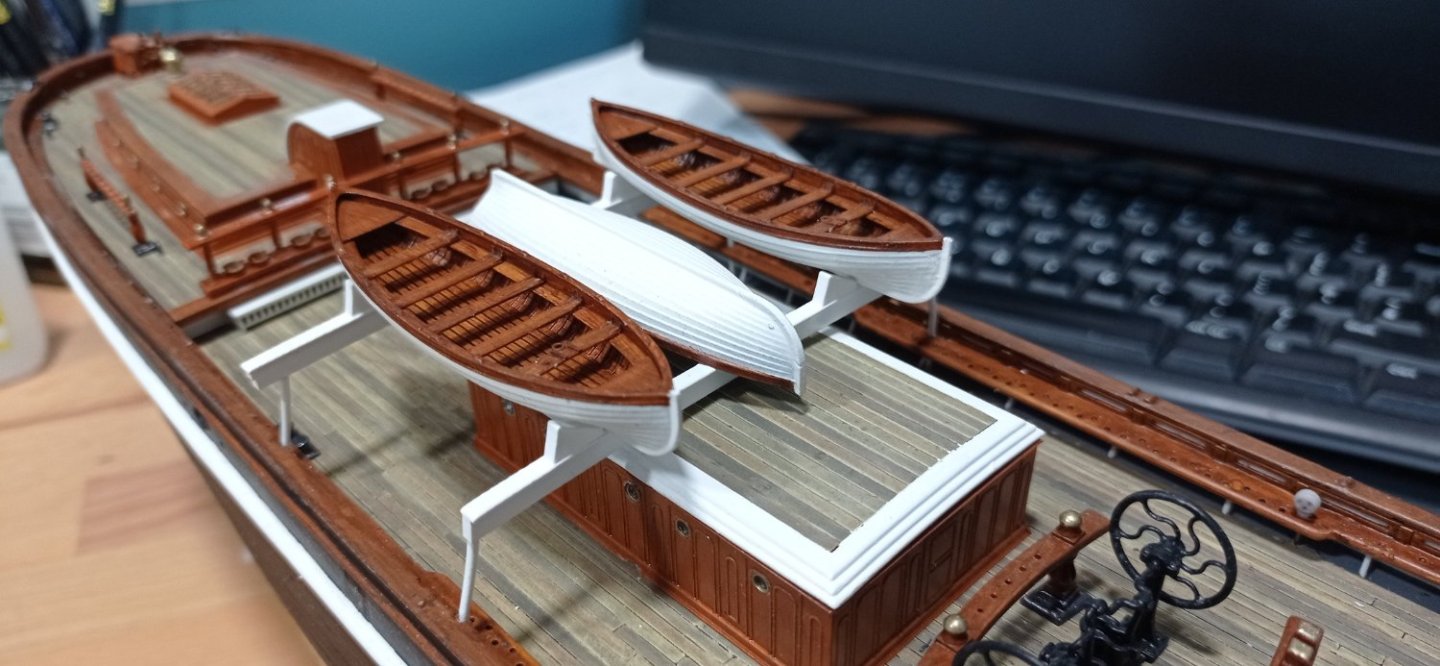
The boats are finished now, along with new skids to accommodate the jolly boat being in the middle. I'm still fiddling with skids on the fore cabin roof as the kit parts are all wrong for a gig.

In other news, I've been working on the foremast and spars, coupled with the deadeyes as these are all part of a piece, over the last month while waiting for boats to print, paint to dry, summer to return etc. It's another good exercise; I'm already beginning to learn the names of rigging parts and understand how some things relate to others. It may be a while until I'm ready to post on that though and I'm reconciled to this project running well into next year. I still have no idea how I'm going to make sails though!
image.thumb.jpeg.da1354f7b1b18071e016ec6dac6559af.jpeg
 
I first built this model some 50 years ago, in my teens. And Thermopylae as well. I have bought the kit again to rekindle my modelling passion and use it and others, both plastic and wood as my skills return and learn new ones for my retirement years. Way back then I had plans to build a wood kit (IMAI) and include it in a bar! I still have that kit, but now plan to sell it and get a more modern version (already bought an older Billings kit and just purchased the current version). Enjoying your log very much!
 
I first built this model some 50 years ago, in my teens. And Thermopylae as well. I have bought the kit again to rekindle my modelling passion and use it and others, both plastic and wood as my skills return and learn new ones for my retirement years. Way back then I had plans to build a wood kit (IMAI) and include it in a bar! I still have that kit, but now plan to sell it and get a more modern version (already bought an older Billings kit and just purchased the current version). Enjoying your log very much!
Rob, I built loads of planes back then but only one ship, the Endeavour. I loved that kit, was immensely proud of what I made at the time, but after a family of spiders took up residence my mum made me get rid of it! At this age it would be a bit of a challenge to work at that scale, hence a Cutty Sark at 1/96. I’m not sure I’d have the patience for a wood kit. One of the things I like about 3D printing is that, if I make a mistake, I can just print another one.
 
Folks, there's a question/plea for help in this further down, which I'll underline

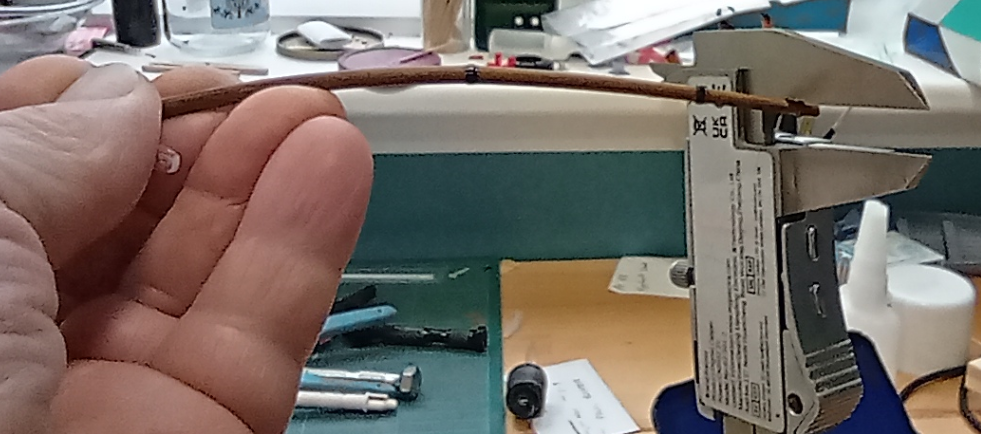
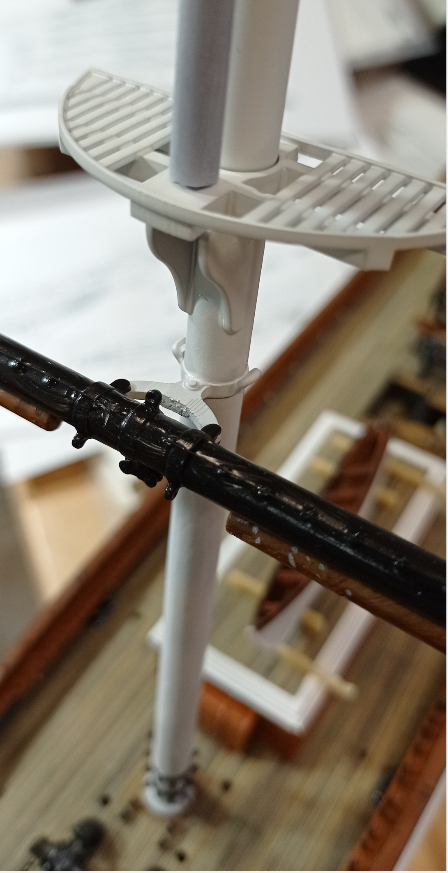
Second draft. The R&D department has been busy over the last two or three weeks and found a decent method of manufacturing the masts and yards as whole tubes, aided by some very nice, extra long micro drills; below, standard 1mm bit and 100mm long bit - you don't see many of those about, do you. By happy coincidence the lady who sells these on ebay is only a couple of miles away from me and has a veritable cornucopia of modelling tools, many of which will no doubt become mine over time. Anyway, these long drill bits allow me to bore out the barrels of tubes, which close up a little during printing, in order to slide in a CF stiffening rod.
image.png.c7a1eb7350c7e99fcbdd7d405720397a.png
The results, in terms of being able to make even the thinnest of yards, are really very, very good; this is a 3mm or 4mm stiffened resin-printed yard-arm taking the full weight of my vernier caliper. with this amount of weight it'll bend, but not break, and returns to shape instantly. The mast and lower yard simply don't bend or break, solid as a rock.
image.png.eef94788731c30cf3b712884bf74eb36.png
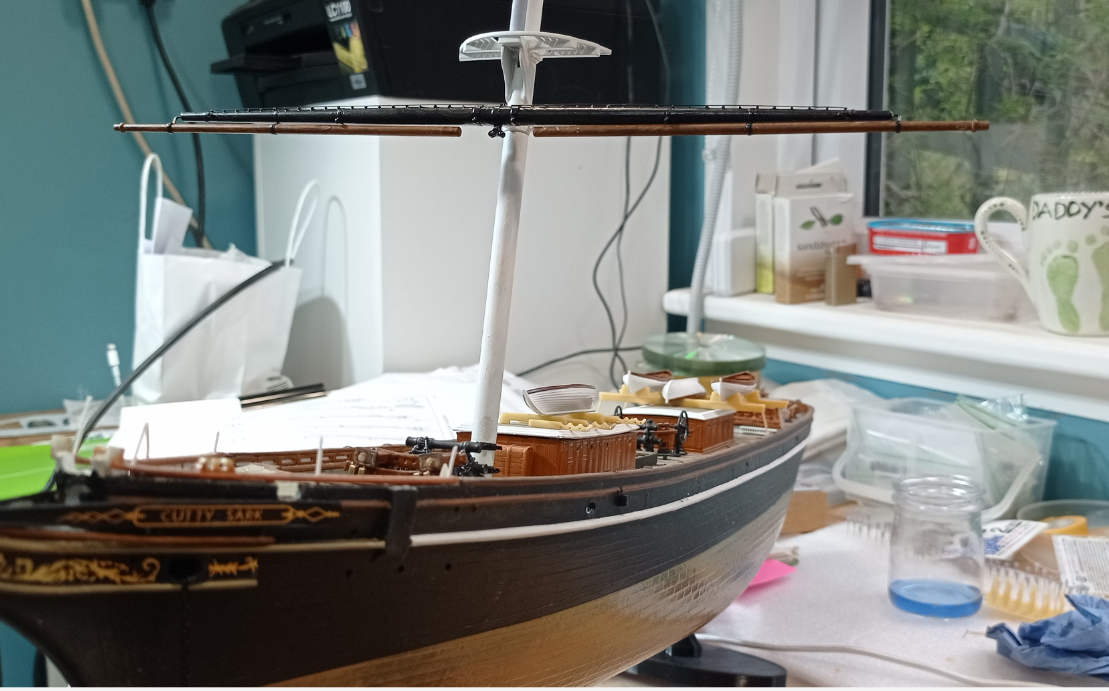
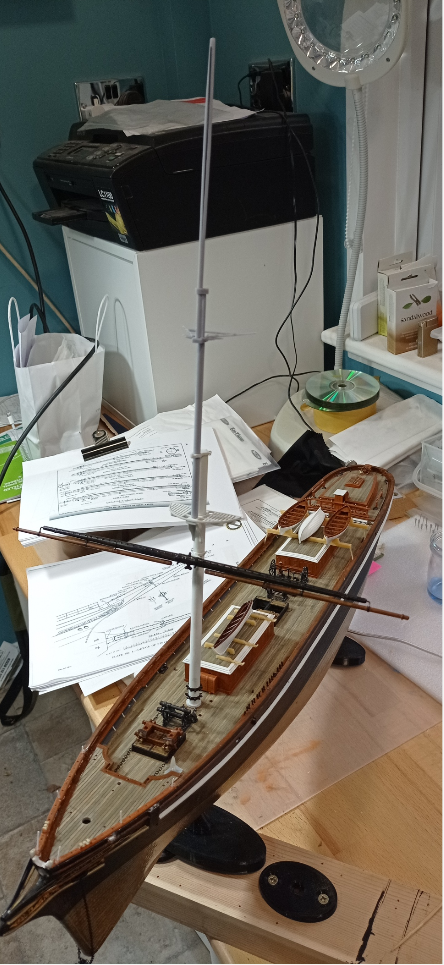
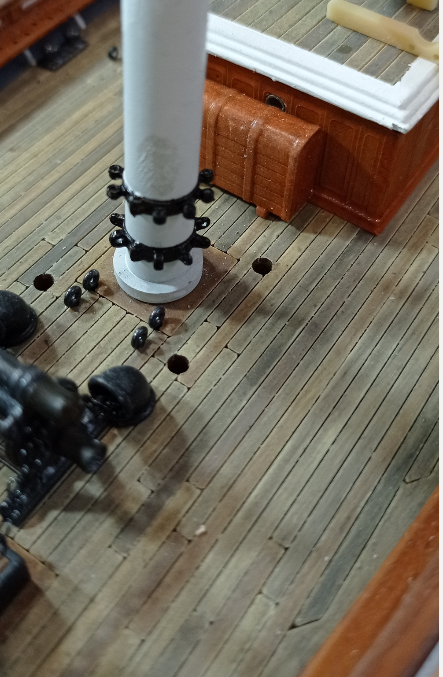
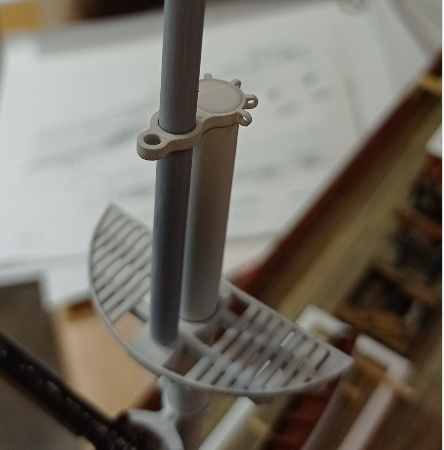
So we're in business from that perspective and here are a few detail photos of a 'dress rehearsal' of the lower foremast, largely so I can ask my questions! I find it is sometimes easier to see what changes are still needed if I do a quick'n'dirty paint up of the assembly, even though this iteration will end up in the scrap bin. Stiffeners are the magic ingredient here, well that and getting a resin mix that balances stiffness with flexibiity. You won't see it but I inserted two tiny brass pins in the truss that links the yard to the futtock band, which stops this weak point from breaking.
image.png.69d425d36248b782e347fb1fe5bca632.png
image.png.8ede570e02890c48b6eb5ae00f329391.pngimage.png.6c8fccab43c572f82538eaa65ca2cd81.pngimage.png.4b67183a1c54d904fab0d54e96cb1d6a.pngimage.png.bf076ddb76723749aab2c2cc570da69c.png
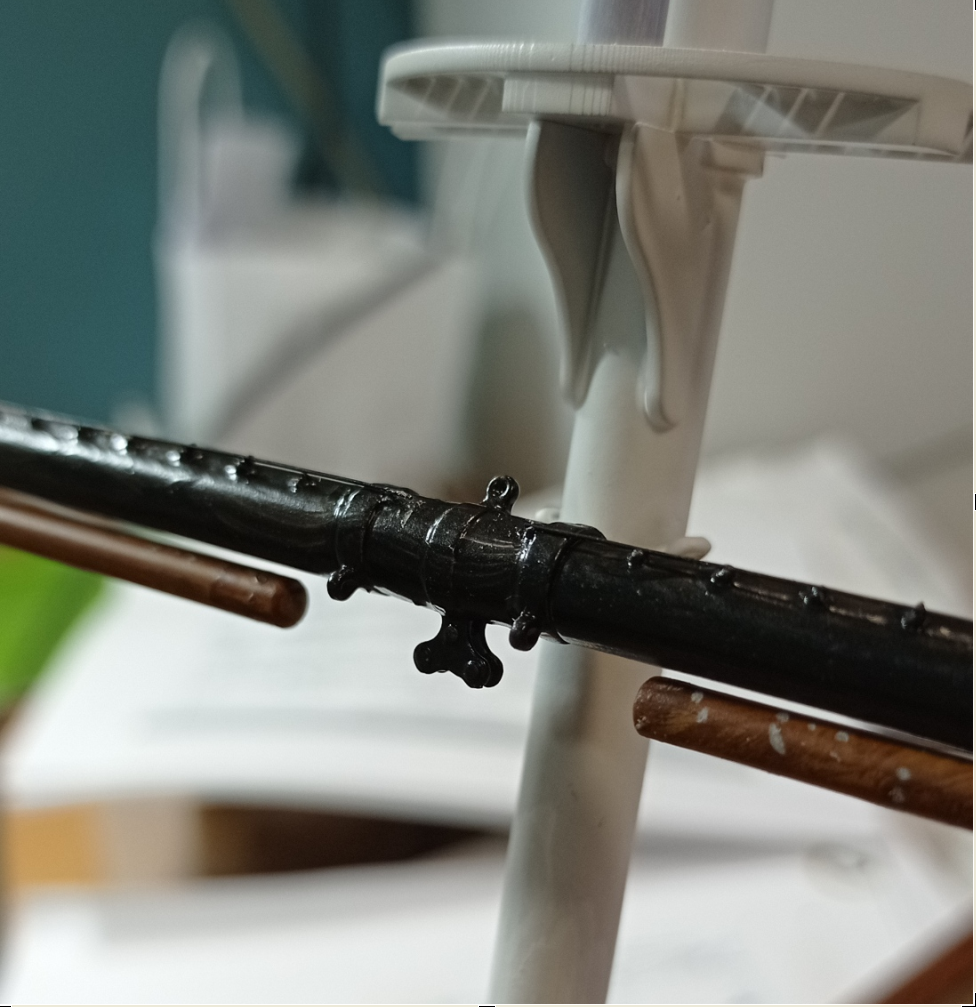
However, I am not confident in my interpretation of the fittings on the lower yard: in particular, I am not convinced that the orientation of the sheet block, fairleads and cheek blocks relative to each other are correct and would very much appreciate a steer on this. I'd also be grateful for any pointers around details I've missed - bear in mind I've treated both the lower mast and yard as steel rather than timber, though the yard-arms are treated as timber. Getting this right at this point is key, because this mast and yard will essentially be the template for most of the others.

Hopefully the two photos below show the current setup well enough. Looking at the yard from a side view, as per Underhill I've made the sheet block parallel to the mast. The cheek blocks are perpendicular to the mast. The fairleads (two on each side) are roughly halfway between parallel and perpendicular. I decided to orientate them like this because otherwise they would seem to foul the yard arms, or sit behind the same which seems illogical. My arrangement means the lower topsail sheets are going to slightly 'twist' their way around the yard as they pass from chain block through to sheet block. Is that correct? (Ignore the misalignment of the yard arms, they aren't glued in place)
image.png.3641cc115e2091a402ffdb7e1e847c3c.png
image.png.ef70a5a6495ed4671834ecaa3bdabdcd.png
 
Yes, entry (hobby) level kit. A Creality Ender 3 Pro for FDM and both an Elegoo Mars 2 and Elegoo Saturn for resin. The quality of resin printing is mind-blowing, way, way better than that of injection-moulded kits. A few people are starting to sell resin aftermarket parts for popular kits like this and the Victory (I may join them presently) and there are even some newer kits that include some resin parts.
I have never heard of Hobby level 3D printers. Where are they found?

Bill
 
I made another visit to the Cutty Sark last week and took around 1000 photos. For obvious reasons these are all detail photos aimed at helping me with aspects of the model. They are largely focussed on the masts, spars & rigging. I'm uploading these to dropbox for anyone to download and do with as you will. Due to free storage limitations I'll need to do this in three or four. The first tranche is accessible via this link

https://www.dropbox.com/sh/5xnj0nrvpfztcnj/AAAAgu-W1ZY5fpTL8c3hYcKHa?dl=0. I'm not at all au fait with dropbox so if that doesn't work I won't know how to fix it!

I'll delete these and upload the next load in about 2 weeks time, and so on. If anyone reads this, say next year, drop me a pm if you want them.
 
I have never heard of Hobby level 3D printers. Where are they found?
William, sorry but I didn't get an alert for your reply. There are loads and loads of hobby level 3D printers - search for the Creality Ender 3, or the Elegoo Mars; the former is FDM (filament printing), the latter is resin. Each of these has many competitors and, I suspect, there is probably little difference like for like. I use those two, plus an Elegoo Saturn.
 
William, sorry but I didn't get an alert for your reply. There are loads and loads of hobby level 3D printers - search for the Creality Ender 3, or the Elegoo Mars; the former is FDM (filament printing), the latter is resin. Each of these has many competitors and, I suspect, there is probably little difference like for like. I use those two, plus an Elegoo Saturn.
Thank you! I greatly appreciate your response.
Bill
 
William, and any others thinking about dipping a toe into 3D printing - Elegoo are doing a 30% - 50% price reduction at the moment, means you could get a small resin printer for just over $100, which is fantastic value.
 
Photo set 2 is on dropbox, this is the link https://www.dropbox.com/s/qzgifbreac8850s/Set2.zip?dl=0


If you can't access/download I'm afraid there's nothing I can do about it, you just have to try again on another day. Dropbox temporarily stops allowing downloads after X many, then allows them again after a day or two. They would like me to buy lots of storage space to avoid this, but that's not happening!
 
Back
Top