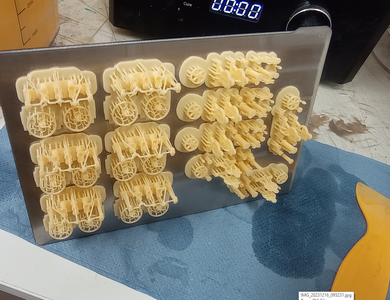
Revell Cutty Sark 1:96 with 3D printed modifications

Thanks for the advice. Already received extra FEP sheets and screen protectors. The spare plate and vat are great ideas. I have two spring plates for my little printer, very handy swapping. A second build plate will do the job just fine for the big one. Interesting on the laser. I read that ventilation is key, it's good you've tackled that. It's hard to know what to choose, nothing like experience. I can read great info, but it doesn't mean much until I'm there, myself.
And wishful thinking - "I'm sure I'll be happy with the little the..." Great you've got a dedicated laptop for it.

Waiting for the update on parts!
 
I have two spring plates for my little printer,
sounds like you've followed the same path as me - first purchase the little one, then realise bigger is better! Same applies to laser - I'm already wishing I'd got one with a bigger capacity, but hopefully elegoo will market an extension kit quite soon.
 
The 12k is a good size and trust me, you’ll be blown away by the quality of prints. Also good to have bought the wash’n’cure from the outset, hand washing is messy and a PITA. Can I give you a couple of tips. Get a spare build plate, a spare tank, a spare screen and a pack of FEP early on. The spare plate allows you to start the next print immediately. The other three are all about being able to carry on printing when you stuff up, without having to wait for replacements to arrive. And here’s a lesson learned that can help you not wreck the screen too early! You’ll probably have a few fails early on while learning to print. When you have a fail, use the tank clean routine rather than just trying to remove the fail remnants from the FEP. This avoids creating weak spots in the FEP, which if these become even a microscopic hole results in resin being cured directly onto the expensive screen. Obviously the tank clean routine wastes a bit of resin, but on balance I’d rather waste 10 pence worth of resin each time than have to shell out £80 to replace a screen that only has 30 hours on the clock. Let alone the hassle of replacing it.

Lasering: easier to learn than 3D printing but I hadn’t appreciated just how much space is needed, and the ‘hidden’ costs. I’ve needed to spend a good few £100’s on a work surface big enough, an enclosure and on air extraction. I wouldn’t have been able to tolerate the fumes from cutting plywood. Luckily I already had a spare laptop so have been able to create a dedicated laser station in my garage. However, I’m already realising that an even bigger machine would have been better. But pretty expensive.

I‘ll post an update on parts for purchase in January, I’m prepping a load as we speak.
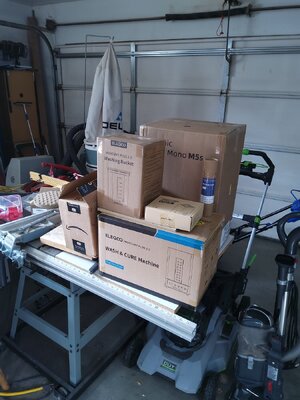
Well...I guess I'm jumping in with both feet. I now have the printer, the Elegoo wash station, 2nd bucket for the wash station, replacement FEP film (nFEP), ACF FEP film on order, 2nd build plate, air filters, 3 different types of resin, and 5 gallons of IPA. Being a retired engineer and woodworker, I have a LOT of tools at my disposal so this addition should be fun. I have found about 2400 posts about printing ship's cannons aleady! I am looking foreard to your posts! I ordered a 2nd vat this morning too.
 
Hello Gents, Philski and Kevin,

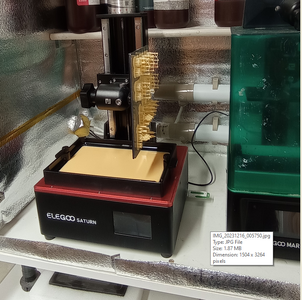
You are off and running. I played with my new printer yesterday - it's BIG. The resin that is left on the top of the build plate is about a bathtub full ! (They really should have made the top of the plate more pointy for drainage!) Only done XPS validation chips, but I'm zeroed in. I hope to do the crew on this baby, the tests awhile back didn't look great on the little guy, but now they should look like mini people!

Great to have tools already on hand. There's always so much you need. A whatsit here, a thingamabob there... I bought an extra silicone mat, but I really need another one. And instead if a few paper towels, I think I need a roll a minute!
 
On my Elegoo Saturn I can hang the plate at 90 degrees over the tank to let the excess drain off, though as I mostly run prints overnight they’ve usually drained as much as they ever will by the morning anyway. For fun, weigh all the finished prints you get out of a litre of resin. You’ll be shocked by how much is wasted.
 
I haven't played with the hanging yet, but i will now. I put the plate down on a paper towel for a minute, and when I went back to it there was a swimming pool of resin! It definitely would be interesting to see how many mls of resin are wasted.
 
Hello Gents, Philski and Kevin,

You are off and running. I played with my new printer yesterday - it's BIG. The resin that is left on the top of the build plate is about a bathtub full ! (They really should have made the top of the plate more pointy for drainage!) Only done XPS validation chips, but I'm zeroed in. I hope to do the crew on this baby, the tests awhile back didn't look great on the little guy, but now they should look like mini people!

Great to have tools already on hand. There's always so much you need. A whatsit here, a thingamabob there... I bought an extra silicone mat, but I really need another one. And instead if a few paper towels, I think I need a roll a minute!
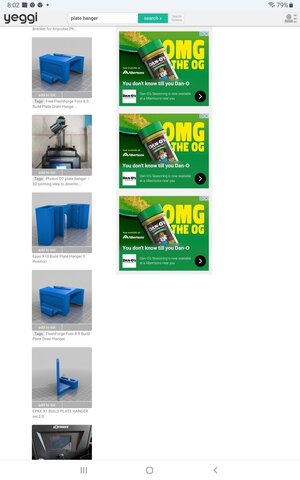
I have seen several variations of build plate hangers - guessing it is machine dependent - that allows the build plate to hang at an angle to allow resin to drip back into the vat. You can even print one!Screenshot_20231215-080215_Chrome.jpg
 
Hello Gents, Philski and Kevin,

You are off and running. I played with my new printer yesterday - it's BIG. The resin that is left on the top of the build plate is about a bathtub full ! (They really should have made the top of the plate more pointy for drainage!) Only done XPS validation chips, but I'm zeroed in. I hope to do the crew on this baby, the tests awhile back didn't look great on the little guy, but now they should look like mini people!

Great to have tools already on hand. There's always so much you need. A whatsit here, a thingamabob there... I bought an extra silicone mat, but I really need another one. And instead if a few paper towels, I think I need a roll a minute!
My acquisitions are just about finished. I have some more resin, an additional vat and a heater due in today and tomorrow (loving Amazon right now). Then the setup and initialization will commence!

20231215_133312.jpg
 
Thanks for the hanger info. I think it's the way to go, sooo much drains off.

You've got all the stuff! What a nice pile of goodies.
 
Some quick pics on the draining and lasering topic

With Elegoo resin printers you can hang the plate at 90' for draining
1703100732736.png

... and after an hour or so there is virtually no waste resin still on the plate
1703100798300.png

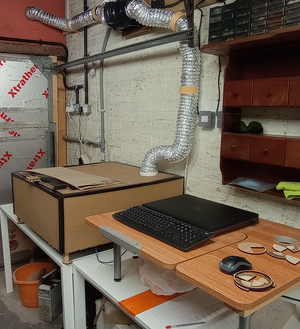
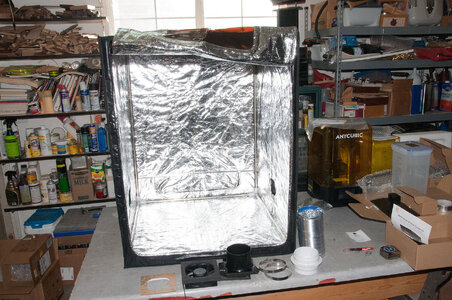
Laser machines are space hungry, need large tables and fume extraction. The cardboard cover is about 800mm x 800mm, housing a laser with a cutting bed of 400mm x 400mm. ironically, the cover was intended to be short term while I await delivery of the real thing, but it's so effective I might tart it up a bit and make it permanent. For anyone going this route (lasering) note the gap at the bottom: if you want to suck smoke out you have to be able to suck clean air in.
1703100867171.png
 
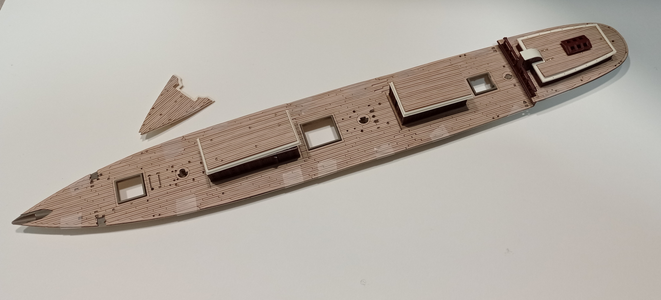
And now for something more interesting. Beta version of a laser-cut oak veneer deck skin. It's taped on at present to keep it more or less in place. The true colour is closer to the photos underneath, the top photo was flashlit.
1703101236054.png

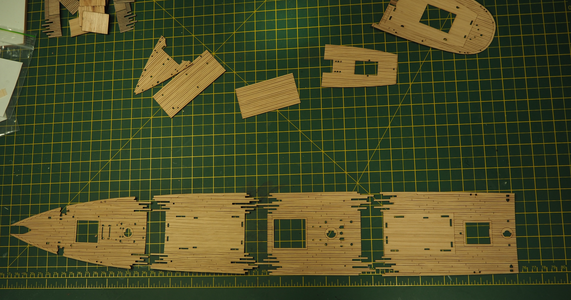
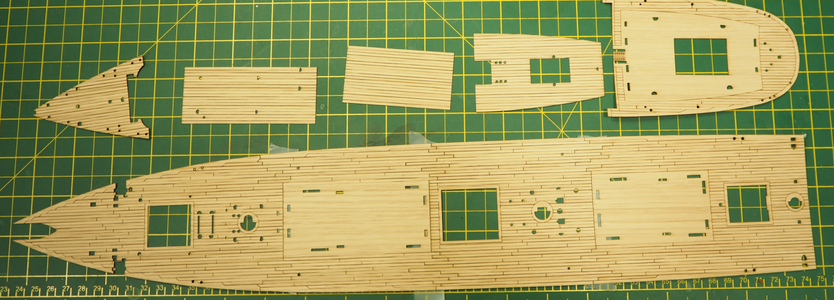
I've used the same multi-part approach as I did when making a replacement deck. Personally I think the joins blend in quite well and are a sight less intrusive than those on the bare kit deck. I think I'll stick with this format as it can be posted as a medium sized card (i.e. birthday/christmas.) and that will keep the postage costs down.
1703101445499.png

1703101363326.png

Next up will be a paper/card version of the same. While getting this right I used heavyweight art paper as it cuts and engraves very nicely and is a fraction of the cost of veneer. It occurred to me, along the way, that if it was nicely painted it would be a viable, lower cost alternative. So that's the task for some point over the next week or two.
 
Some quick pics on the draining and lasering topic

With Elegoo resin printers you can hang the plate at 90' for draining
View attachment 415348

... and after an hour or so there is virtually no waste resin still on the plate
View attachment 415349

Laser machines are space hungry, need large tables and fume extraction. The cardboard cover is about 800mm x 800mm, housing a laser with a cutting bed of 400mm x 400mm. ironically, the cover was intended to be short term while I await delivery of the real thing, but it's so effective I might tart it up a bit and make it permanent. For anyone going this route (lasering) note the gap at the bottom: if you want to suck smoke out you have to be able to suck clean

Some quick pics on the draining and lasering topic

With Elegoo resin printers you can hang the plate at 90' for draining
View attachment 415348

... and after an hour or so there is virtually no waste resin still on the plate
View attachment 415349

Laser machines are space hungry, need large tables and fume extraction. The cardboard cover is about 800mm x 800mm, housing a laser with a cutting bed of 400mm x 400mm. ironically, the cover was intended to be short term while I await delivery of the real thing, but it's so effective I might tart it up a bit and make it permanent. For anyone going this route (lasering) note the gap at the bottom: if you want to suck smoke out you have to be able to suck clean air in.
View attachment 415350
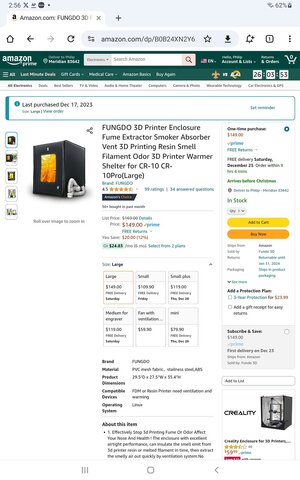
Cannot wait to get mine up and running....waiting for Christmas. I like the drip feature too. I have a printer enclosure coming via Amazon today. Its going to be fun!


Screenshot_20231220-145712_Gmail.jpgScreenshot_20231220-145607_Chrome.jpg
 
The laser setup looks good. I think the cardboard cover is spiffy, too. But I really like the deck. Very impressive!

The enclosure will be handy. I built a box out of scrap MDF, for my FDM printer and little resin. The new printer is too big, and I want a bigger FDM. Sigh. So many toys, er, I want tools to get.
 
The laser deck is looking very good - very good idea with these "overlapping" segments
This will make it mor relastic
 
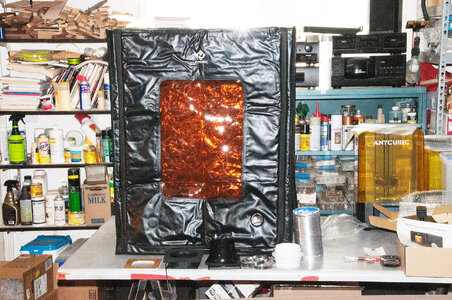
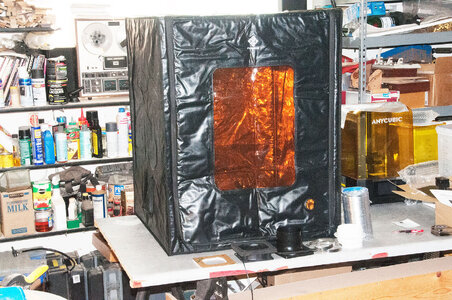
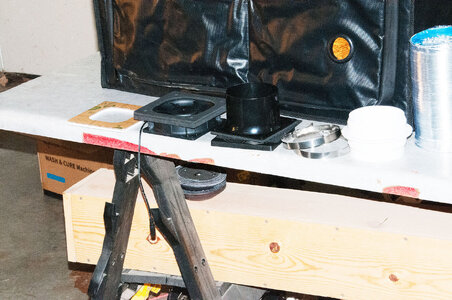
Well it was delivered. I started assembly - no easy task. but everything is snug and tight. I'll add exhaust fan and ducting tomorrow. It is BIG! getting the cover on and off the printer should not be a problem. the walls are insulated and thick, it comes with a thermometer to indicated internal temps. It will shield the resin from UV (mainly from the sun) and will help dissipate any fumes or odors generated. Getting closer to getting my first prints done. I found a lot of sites and places that have fittings, anchors, cannons, rigging pieces ships wheels, windlasses, and of course there is going to be jigs I design to help with planking, etc.
Its going to be fun! Another facet in ship building!

Enclose1.jpgEnclose2.jpgEnclose3.jpgEnclose5.jpg
 
Looks good, have fun.

I think we need a separate topic for 3D printing, lasering and all that, or maybe just carry on in that vein here and I’ll change the title and do a new, ‘clean’ Cutty Sark build log at some point. Looking back over this one it’s gradually become more about kit and how to use it than building the CS and probably isn’t of much interest to a CS builder anymore (that’s assuming it ever was)! Entirely my fault, I’m very easy to draw into sideways conversations!

Either way, as I’m going to work on something different for a while I won’t post any more about the CS here and CS builders, 3D or otherwise, can treat this as the end of log!
 
A while back I posted a log on the Heller HMS Victory I was working on, which I then parked in order to make the Revell Cutty Sark 1:96. The idea was to take a break from Vicrtory and work on something easier, preferably building more or less straight out of the box and being done and dusted in maybe 3 - 6 months. Well, it hasn't turned out quite that way and in the following posts I'll try to give a summary of what I've done and where I'm now at.
Hallo @Kevin the Lubber
we wish you all the BEST and a HAPPY BIRTHDAY
Birthday-Cake
How is your work on the Cutty Sark going? Any updates possible?
 
Thanks Uwe, another year older but probably not wiser. I've switched back to the Victory now and will work on that for a while. At some point I'll post an update on that log.

It could be quite a while until I return to the CS as I don't have any enthusiasm for the rigging right now.
 
As I've just started learning 3D design and printing, and been very enthusiastic about it, I hope I haven't contributed to the accidental steering/hijacking of the build. Please do continue!
 
Back
Top