ROYAL CAROLINE 1:30 by Zhl my version, by Peglegreg

Background information to clinker panels on boats.
G'day all
Following the discussion that my post incurred, I done some research on YouTube and I found these very informative but a bit slow instructions of how to do the traditional clinker planking.
There are at least 5 parts to this, and they continued one by one after they are finished.
I decided to try to follow this information on my ship's boat.
Havagooday everyone
Greg
 
A small update but
an important one
G'day all
I'm following the steps of a traditional clinker planking, as per the above videos, as much as possible.
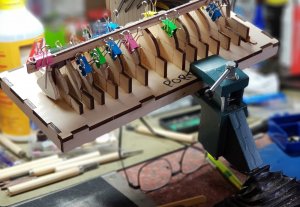
The first step was to put a brace under the base plate so it can be put into my multi-dimensional vice.
20180713_181744.jpg
20180714_145835.jpg
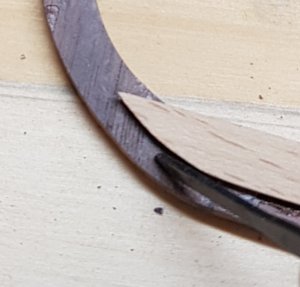
The next thing that has to be done was to grove the tip if plank #1 into the keel, so the outer edge will be flushed to the outer edge of the keel.

20180713_183022.jpg
After marking the keel to insert the plank the the carving was done and the keel was reinserted on the keel.
20180713_183049.jpg
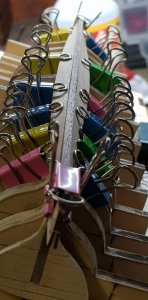
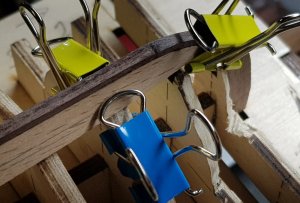
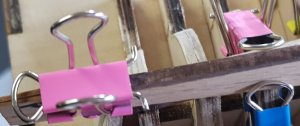
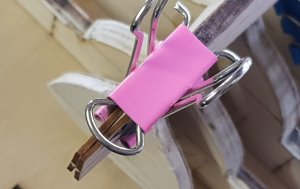
After rough bending the port and starboard sides plank #1, it was placed on the plug and helped down with my Bulldogs clamps.
20180713_181806.jpg
These planks are only dry fit and will be left for a day so the pressure of the clamps will twist ithem into shape.
20180713_181943.jpg
20180713_181909.jpg
20180713_181837.jpg
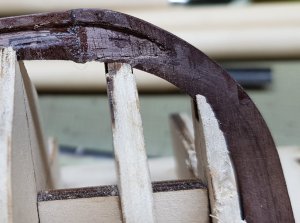
A very important thing, that I must point out, is to align each side of the planks. The above photo shows that the planking tag are flushed to each other.
The rest of the planks, I don't think that I have to bother as much as I did for these. I have to emphasize that laying these planks are very important to get them right, and doing both sides at the same time will help not to carve the keel.
I'll be having tomorrow off and hopefully I'll be back in the shipyard on Sunday.
Happymodeling
Greg
 
Waw, Greg, I only regret that you live on the other side of the globe and do not live next to my door, because otherwise you had to kick me out, I would like to follow everything with my own eyes plank by plank
wonderful work Greg
greetings
willy

G'day Willy
Thanks for your kind words. You're right, it would be great if you were a neighbour and we could share ideas and have fun.
Happymodeling
Greg
 
Hi Greg,

Nice work on the boat, good idea to cut the slot into the keel makes the boat even more realistic.

Even though it was a difficult job to cut into the walnut, it made laying the first planks easier because they were trapped and couldn't move up the keel. Btw....
There is no grooves cut into the transom because the planks will have to be beveled in a way so the will blend into the one before and the one after.
Its going to be a challenge to do this on this scale but I'll try.
Happymodeling
Greg
 
G'day Greg, just a thought, but what we were saying about deviating from the build instructions,
if this kit is designed to have the planks sit on the transom without it being notched, it could be that if you notch the transom you will have to also notch all the other bulkheads as well, or at the very least reduce them in size by the amount of the notches or you will end up trying to bend the plank ends down into the transom, if you know what I mean, as I said just a thought,

best regards john.

What I'm planning to do with the planks at the bow and stern are to beveled the overlap: top and bottom of each plank slowly so each plank at the end, will butt up to each other to a single thickness of a plank. This will be a gradual from a complete plank on plank to a single thickness. It's hard to explain my thoughts, in words.
As they say: a picture is worth a thousand words.
Happymodeling
Greg
 
G'day Zoly
As you know I have been quiet sick with my blood loss. Doctor's orders and most importantly admiral's demands and they both said to take it easy.
Just interesting point, I was going to start doing the ships boat today, if I can get it past my admiral. Lol
Hopefully I'll be posting soon.
Thanks for asking
Greg
 
I wish you well Brother. do what you need to get you back to top shape. I hate to leave things undone so I'd do the opposite. I have nearly paid a dear price for that more then one time. I'm starting to learn that the things I leave will still be waiting for me when I return, but its a difficult thing for me to just take it easy, but I'm trying
 
Hi Greg
I am sorry to hear you are not well my friend.
Hope things go Ok for you and you are back in the shipyard very soon.

Believe me I know what you are going through, been there and done that as they say, but it is still ongoing for me, and for you by the sound of it.
Talk to you soon my friend.

Denis.
 
G'day Denis
Just tried to do something on the model, and my admiral has put a stop to it for today.
I had a slight turn with Parkinson's last night and she told me to take it easy for today. Or I'll be in the Poop with her!
Hopefully I can do it tomorrow Sick.
Happymodeling
Greg
 
The Parkinson's is the worst with trying to build things especially with any level of precision. Mine is severe yet, but I have noticed over the past few years my hands are getting worse I have to lay my hand heel on something to steady my hands or they start shaking pretty bad. I take Tramadol for it but it only helps me sleep otherwise my restless leg syndrome acts up which is a result of Parkinson's and I wont sleep a wink. I used to paint landscape Pictures in oil based paint I can no longer do that. I cant Tattoo anymore and my drawing is pretty bad now as well as a result of the Parkinson's.
 
Back
Top