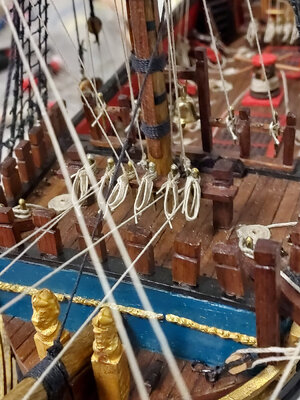
Very good work - so I hope to see more photos of the final work and the finished model
-

Win a Free Custom Engraved Brass Coin!!!
As a way to introduce our brass coins to the community, we will raffle off a free coin during the month of August. Follow link ABOVE for instructions for entering.
-

PRE-ORDER SHIPS IN SCALE TODAY!
The beloved Ships in Scale Magazine is back and charting a new course for 2026!
Discover new skills, new techniques, and new inspirations in every issue.
NOTE THAT OUR FIRST ISSUE WILL BE JAN/FEB 2026
You are using an out of date browser. It may not display this or other websites correctly.
You should upgrade or use an alternative browser.
You should upgrade or use an alternative browser.
- Joined
- Apr 20, 2020
- Messages
- 313
- Points
- 278

Thanks Daniel. I will post pictures of how I secured the ship for transport.Very nice !!! And Welcome back !!! I hope you had a lovely time at LA.
Just a curiosity, how do you packed (boxed) the ship to take it to LA.
Looking forward to see those pictures of your final building steps.
Cheers
Daniel
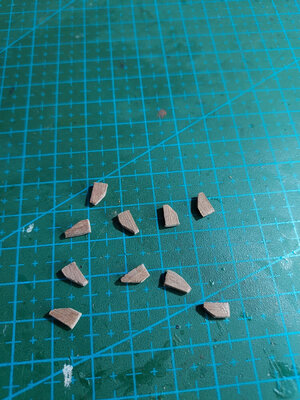
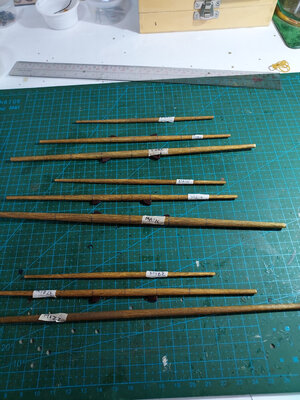
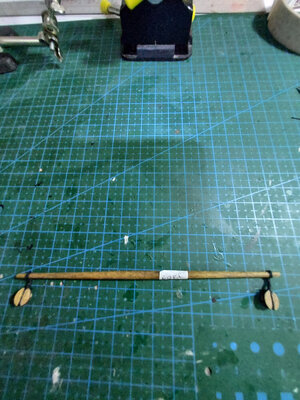
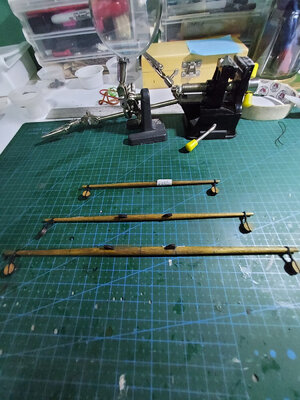
Nice work! Looking forward to seeing more.I apologize it's been over 6 months since my last post. I've been working on my RC on and off, mainly trying to do as much preparatory work as I could, in anticipation of its long journey from the Philippines to Los Angeles. As mentioned earlier, I tried to finish as much assembly and rigging (off-ship) of the masts and yards since the ship will have to travel with the masts and other delicate parts disassembled.
I have since traveled to LA, where I finished the ship and lovingly turned it over to my daughter as my legacy gift. I am now back in the Philippines and will now attempt to keep you up to speed from where I left off.
But first, a sneak peek at the completed work.
View attachment 355250
Will do more posts in the coming days.
- Joined
- Apr 20, 2020
- Messages
- 313
- Points
- 278

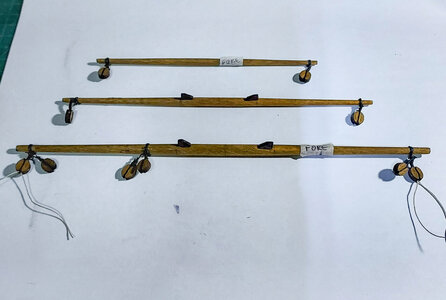
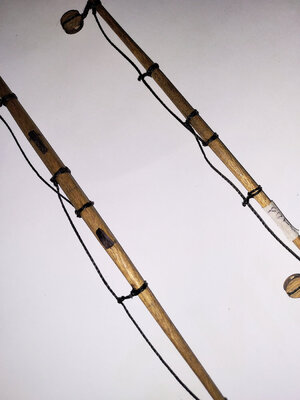
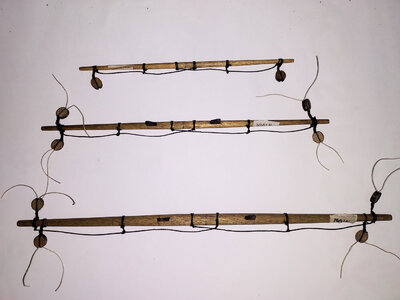
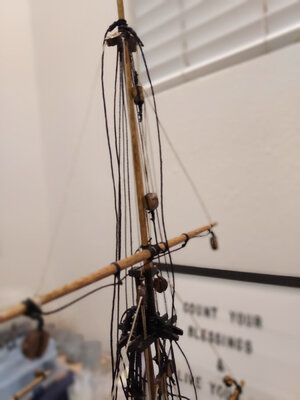
Picking up where I left off. At this stage, most of the work on the deck and hull is finished. The next phase of my build will focus on prepping the masts and yards, and mounting as many of the blocks, pulleys and rope work as possible.
The kit came with round-shaped blocks, a bit oversized in my opinion. They didn't have pre-drilled holes. So I had to drill the holes myself.
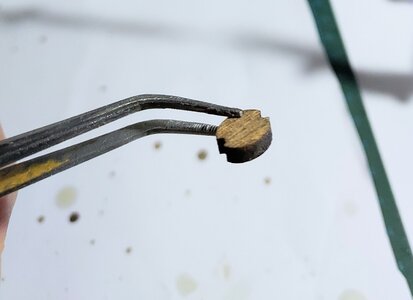
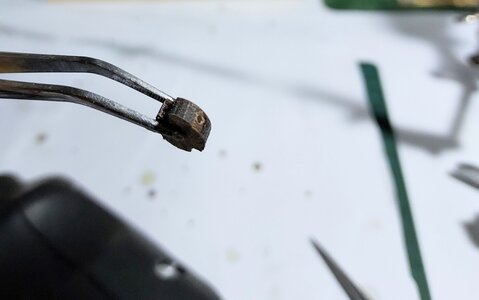
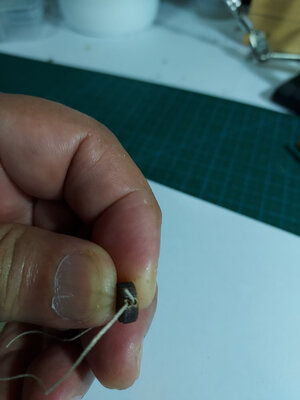
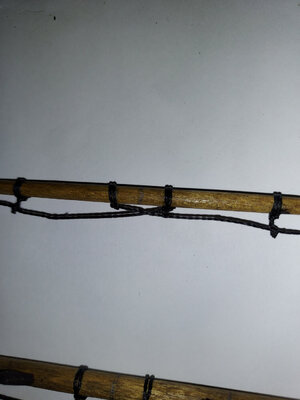
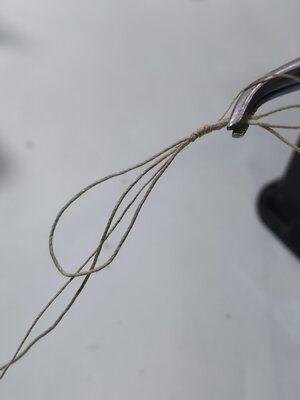
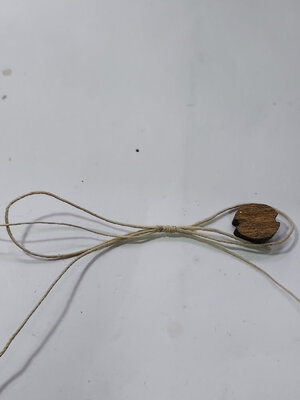
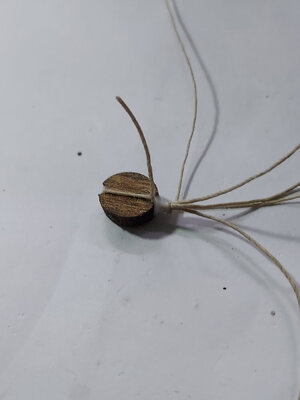
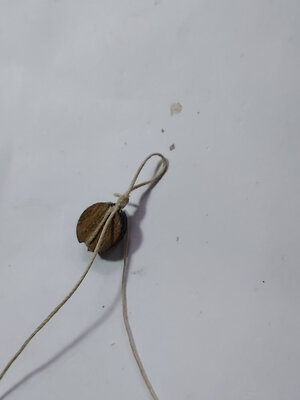
Following the illustrations on the instructions, I attached the blocks to various spots on the masts using the s-shaped technique. This gives the blocks a clean, taut look. Please note...the pictures below show beige colored rope. Later on, I decided to change this to black rope.
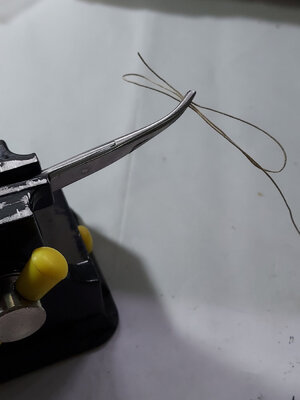
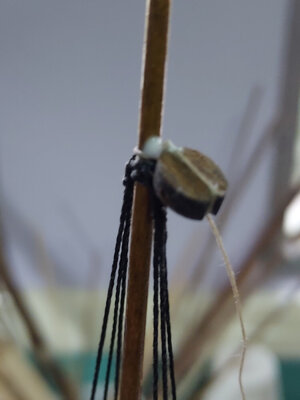
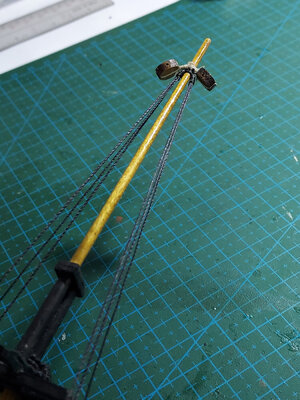
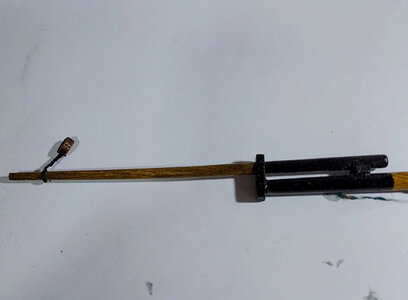
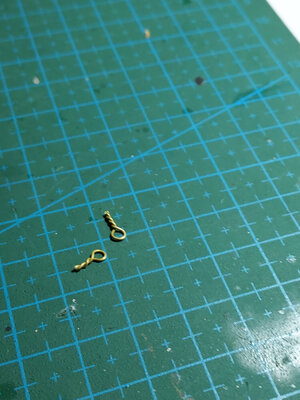
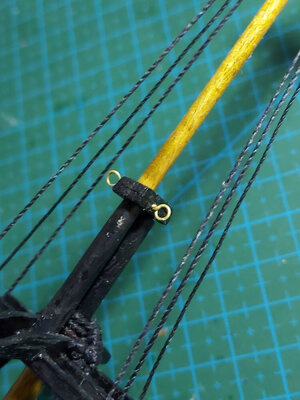
Fashioned some eyebolts for the mast caps.
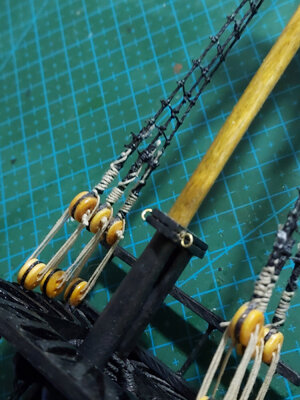
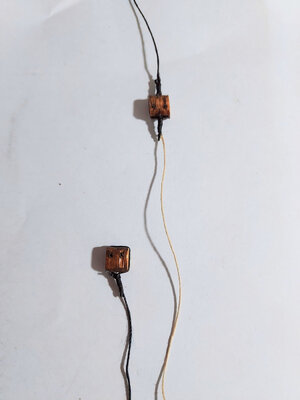
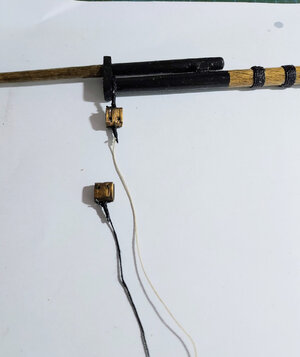
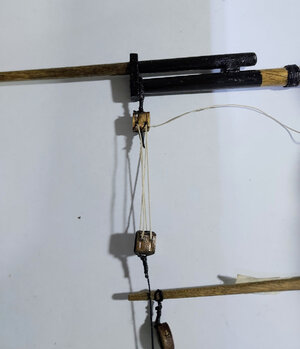
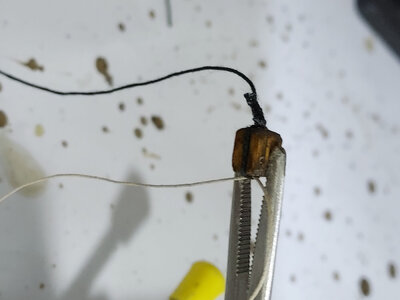
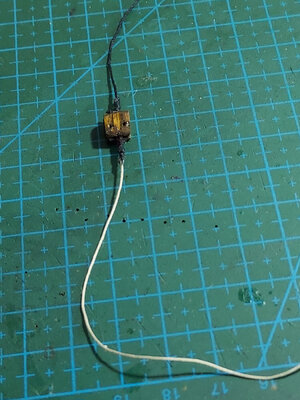
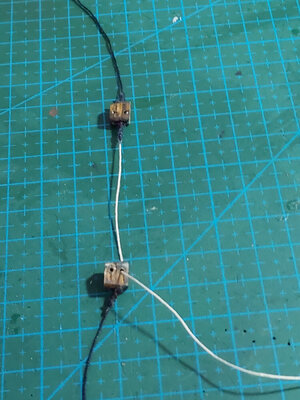
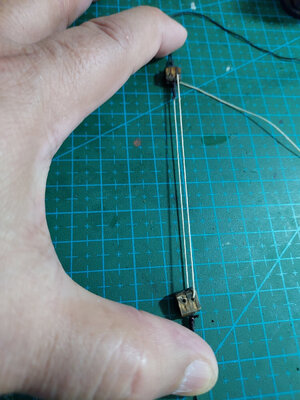
The instructions called for double blocks but the kit does not include them. So i dug into my stash again and found some small single blocks and glued them together to make doubles.
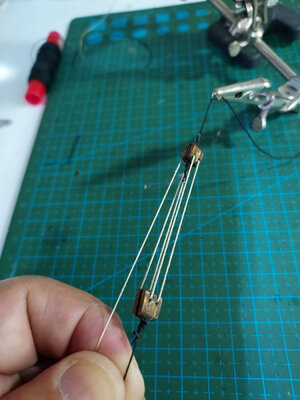
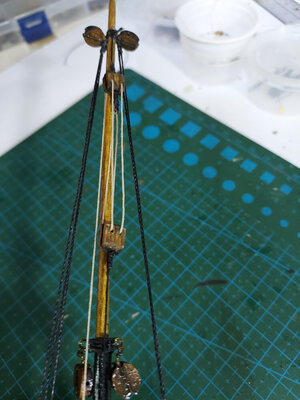
Single blocks were also attached in various spots.
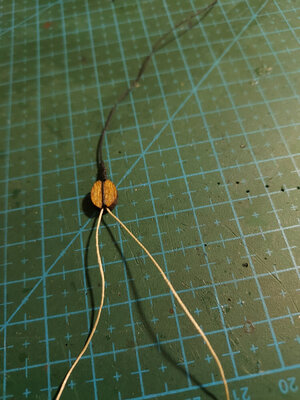
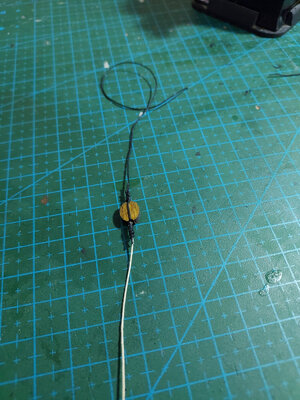
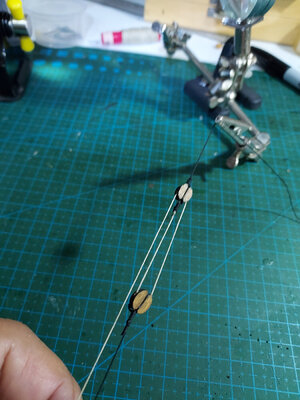
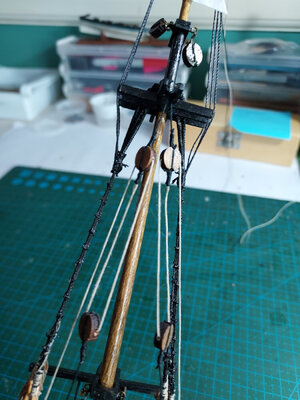
The kit came with round-shaped blocks, a bit oversized in my opinion. They didn't have pre-drilled holes. So I had to drill the holes myself.


Following the illustrations on the instructions, I attached the blocks to various spots on the masts using the s-shaped technique. This gives the blocks a clean, taut look. Please note...the pictures below show beige colored rope. Later on, I decided to change this to black rope.


Fashioned some eyebolts for the mast caps.


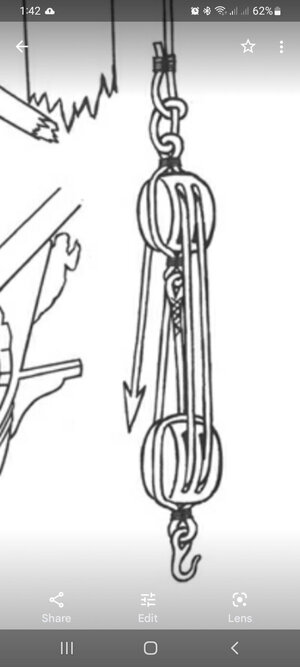
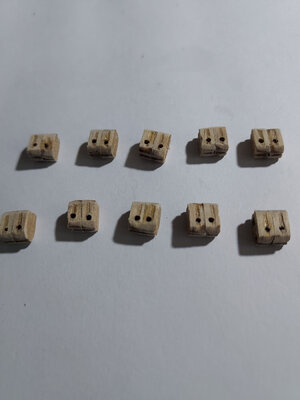
The instructions called for double blocks but the kit does not include them. So i dug into my stash again and found some small single blocks and glued them together to make doubles.


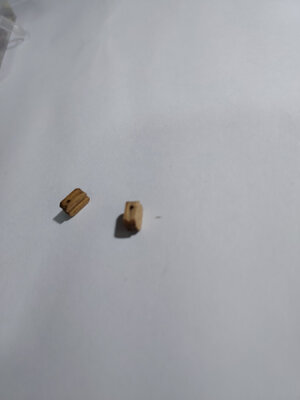
Single blocks were also attached in various spots.


Nicely done, Reggie. Good improvisation!Picking up where I left off. At this stage, most of the work on the deck and hull is finished. The next phase of my build will focus on prepping the masts and yards, and mounting as many of the blocks, pulleys and rope work as possible.
The kit came with round-shaped blocks, a bit oversized in my opinion. They didn't have pre-drilled holes. So I had to drill the holes myself.
View attachment 355464View attachment 355465
Following the illustrations on the instructions, I attached the blocks to various spots on the masts using the s-shaped technique. This gives the blocks a clean, taut look. Please note...the pictures below show beige colored rope. Later on, I decided to change this to black rope.
View attachment 355466View attachment 355467View attachment 355468View attachment 355469View attachment 355470View attachment 355471View attachment 355472
Fashioned some eyebolts for the mast caps.
View attachment 355473View attachment 355474View attachment 355475
The instructions called for double blocks but the kit does not include them. So i dug into my stash again and found some small single blocks and glued them together to make doubles.
View attachment 355575View attachment 355576View attachment 355577View attachment 355578View attachment 355579View attachment 355580View attachment 355581View attachment 355582
View attachment 355583
Single blocks were also attached in various spots.
View attachment 355588View attachment 355589View attachment 355590View attachment 355591
- Joined
- Apr 20, 2020
- Messages
- 313
- Points
- 278

The instructions did not include provisions for the crows feet. So I had to DIY my own euphroes as well as drill the holes on the side of the mast top.
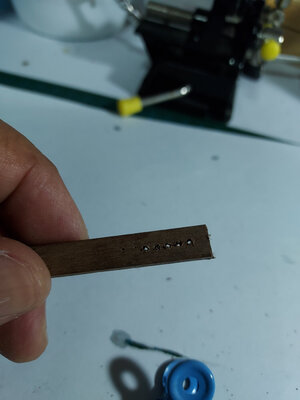
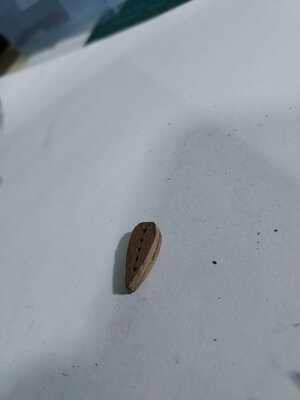
I probably could have done a better job lining up the holes...lol.
The following pictures show how I rigged the crows feet.
First the euphroe is connected to a lower block using the "s-shaped" technique.
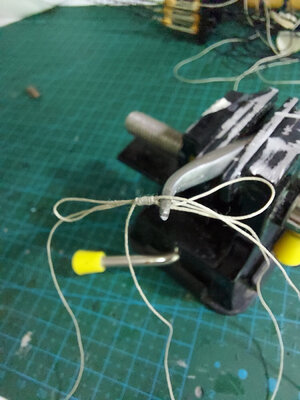
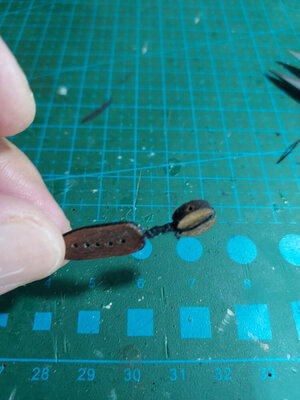
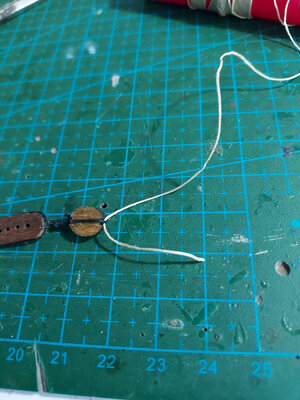
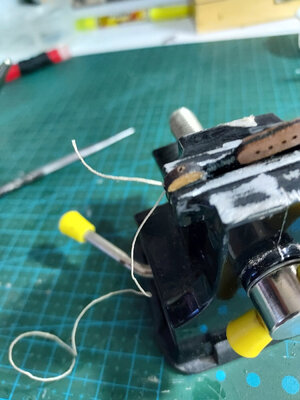
Below the lower block, I threaded a beige colored rope and seized it using black rope. This beige rope will later be run through another block below.
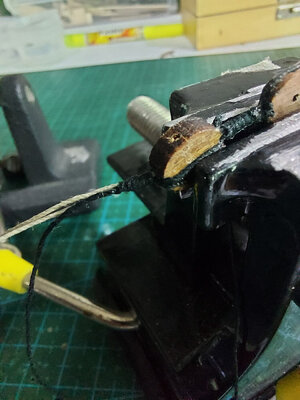
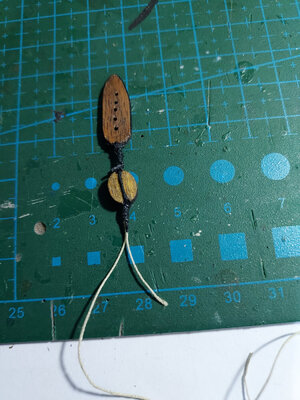
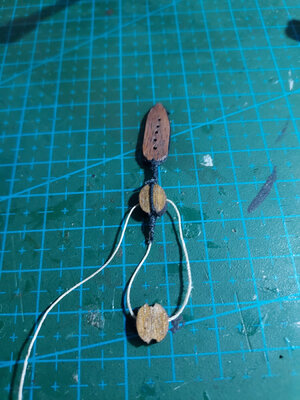
Sorry, I cringe whenever I see the crooked line of holes on the euphroe. Probably should have just redid them.
I then threaded a very long beige rope to the top of the euphroe. This will in turn be threaded through the holes in the mast tops, thus forming the crows feet.
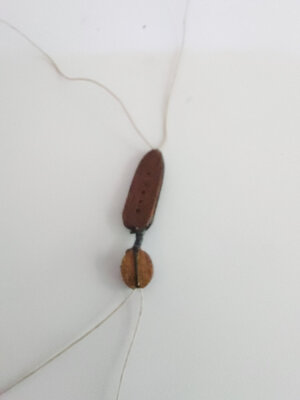
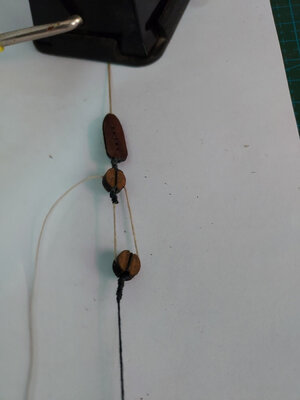
Here are the finished products.
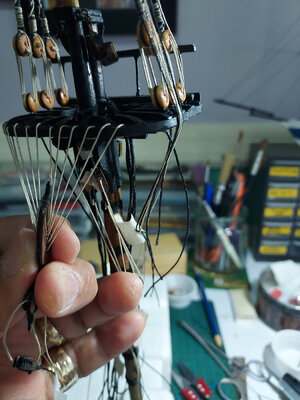
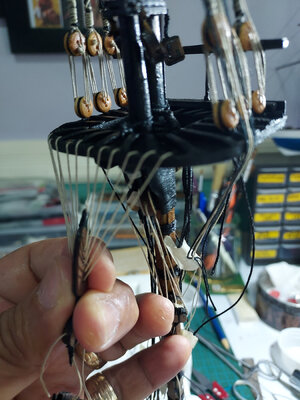
That's it for now....thanks for dropping by.


I probably could have done a better job lining up the holes...lol.
The following pictures show how I rigged the crows feet.
First the euphroe is connected to a lower block using the "s-shaped" technique.


Below the lower block, I threaded a beige colored rope and seized it using black rope. This beige rope will later be run through another block below.


Sorry, I cringe whenever I see the crooked line of holes on the euphroe. Probably should have just redid them.
I then threaded a very long beige rope to the top of the euphroe. This will in turn be threaded through the holes in the mast tops, thus forming the crows feet.


Here are the finished products.


That's it for now....thanks for dropping by.
- Joined
- Apr 20, 2020
- Messages
- 313
- Points
- 278

I forgot to mention...I did a shortcut when I seized the beige rope to the block...I think the correct way of seizing them would be to fashion some kind of loop below the block and run the rope through the loop. But at this scale, it will hardly be noticed. I allowed myself a bit of laziness here.
Nobody will ever know if the holes are straight. Good job of improvisation.The instructions did not include provisions for the crows feet. So I had to DIY my own euphroes as well as drill the holes on the side of the mast top.
View attachment 355874View attachment 355873
I probably could have done a better job lining up the holes...lol.
The following pictures show how I rigged the crows feet.
First the euphroe is connected to a lower block using the "s-shaped" technique.
View attachment 355875View attachment 355876
Below the lower block, I threaded a beige colored rope and seized it using black rope. This beige rope will later be run through another block below.
View attachment 355877View attachment 355878View attachment 355879View attachment 355880View attachment 355881
Sorry, I cringe whenever I see the crooked line of holes on the euphroe. Probably should have just redid them.
I then threaded a very long beige rope to the top of the euphroe. This will in turn be threaded through the holes in the mast tops, thus forming the crows feet.
View attachment 355885View attachment 355886
Here are the finished products.
View attachment 355882View attachment 355883
That's it for now....thanks for dropping by.
- Joined
- Apr 20, 2020
- Messages
- 313
- Points
- 278

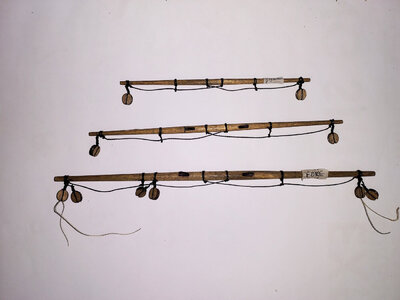
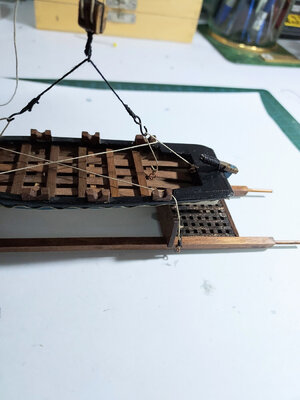
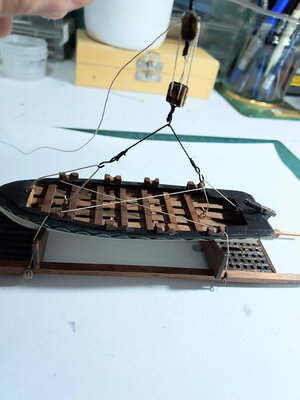
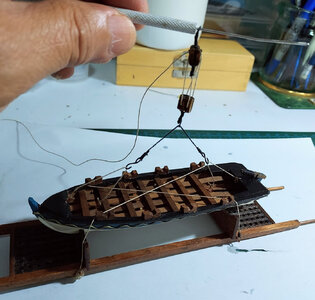
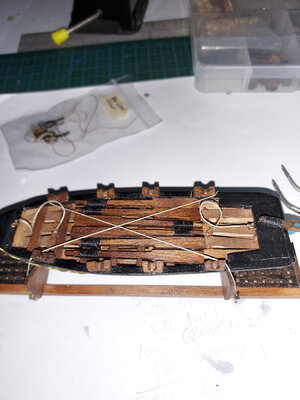
At this point, I think I have done all that I can prior to transporting the ship across the Pacific. By that I mean all the work that I can do without mounting the masts and yards onto the deck.
Substantially all the deck and hull pieces are complete. The blocks and pulleys are prepped. The standing and running rigging are tied, and pre-measured in anticipation of where they will be attached later on.
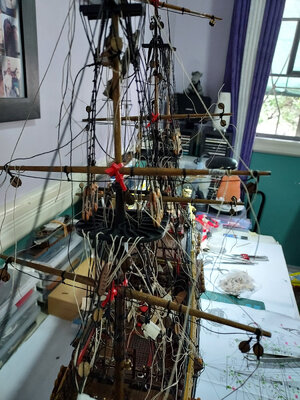
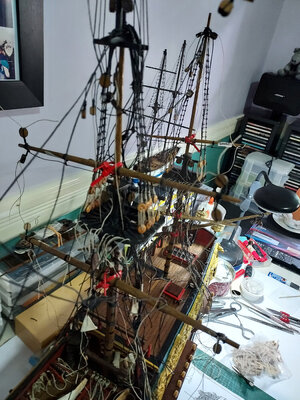
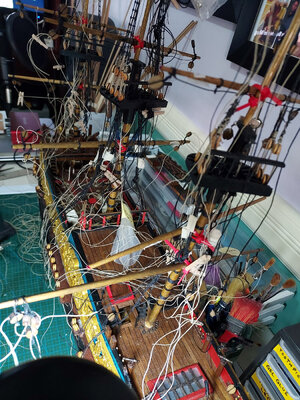
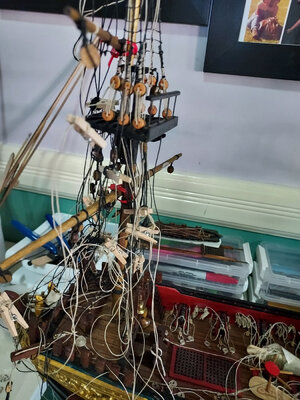
This is what the model looks like at this point, just prior to packing. Lots of rope hanging down. The masts are temporarily mounted on the deck just for illustration(they will be removed prior to shipping). Just a seemingly absolute mess at first glance.But trust me, there's a method to all this madness.
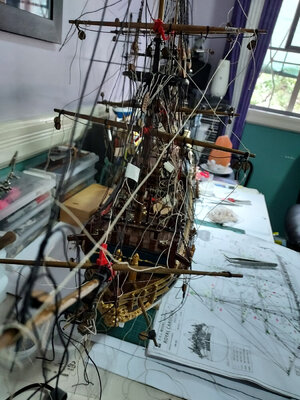
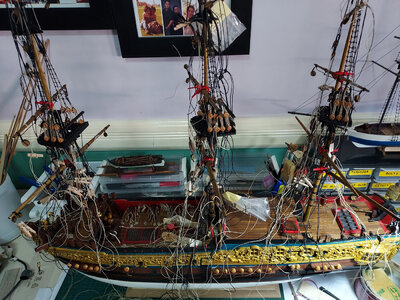
My next post will show how I packed it for transport.
Substantially all the deck and hull pieces are complete. The blocks and pulleys are prepped. The standing and running rigging are tied, and pre-measured in anticipation of where they will be attached later on.
This is what the model looks like at this point, just prior to packing. Lots of rope hanging down. The masts are temporarily mounted on the deck just for illustration(they will be removed prior to shipping). Just a seemingly absolute mess at first glance.But trust me, there's a method to all this madness.


My next post will show how I packed it for transport.
- Joined
- Apr 20, 2020
- Messages
- 313
- Points
- 278

Alright..... time to pack this thing that I've spent 11 months to do. I decided to pack it in a standard sized Samsonite checked-in luggage. It will travel with us from Manila, a layover in Tokyo and then finally to Los Angeles.
Anticipating that it will be tossed around, manhandled, stacked upon and suffer all kinds of abuse in transit, I had to make sure that it's protected from all sides, especially the vulnerable top and bottom soft panels of the suitcase.
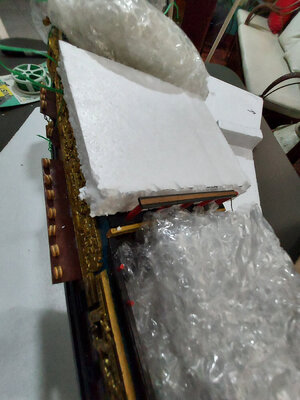
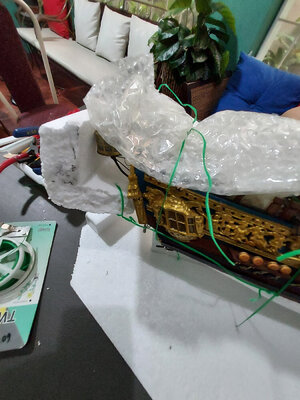
The hull barely fits in the suitcase. The most vulnerable part was the lanterns so I made sure that they had ample protection using Styrofoam.
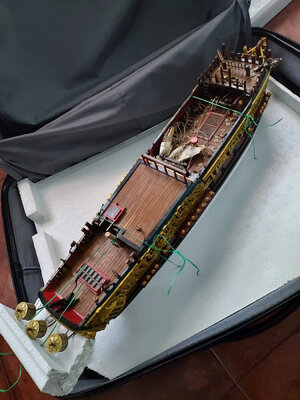
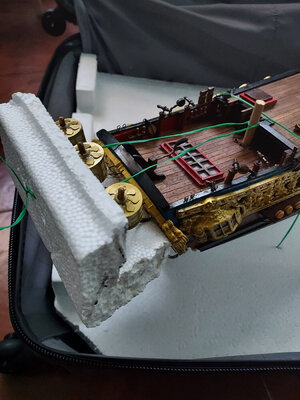
The other deck pieces were similarly reinforced with Styrofoam and bubble wrap.
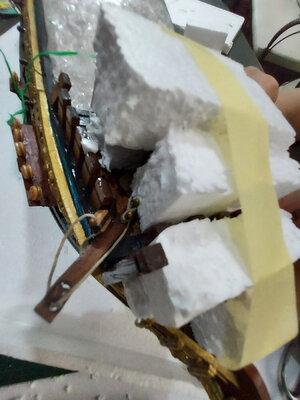
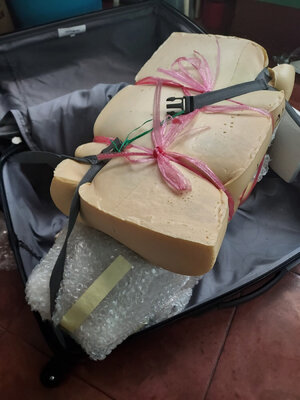
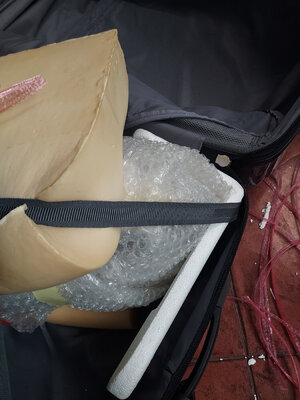
I found some old memory foam pillows that seemed perfect to protect the top and bottom of the ship. The foam provided just the right amount of firmness and give.
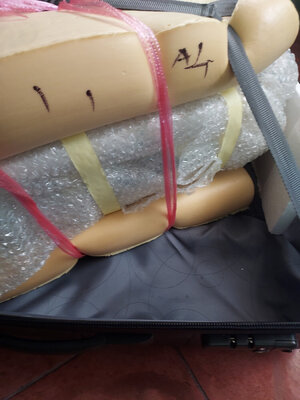
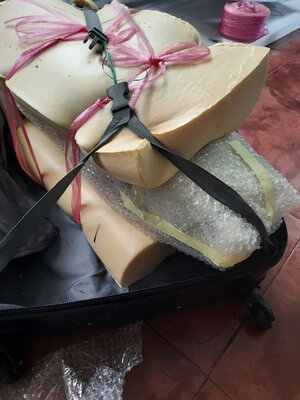
The next part is the most critical. Anticipating that heavy loads can potentially be stacked on top of the suitcase in the plane's cargo hold, I had to make sure that the suitcase can withstand the weight.
I found some very stiff cardboard pieces that was used for packing my new washing machine. I measured and cut them, yielding 4 pieces as shown.
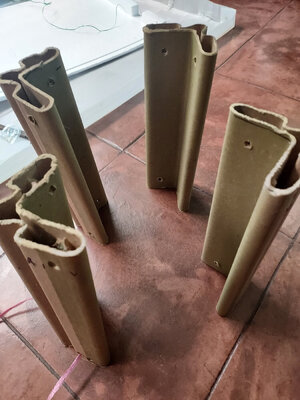
These were positioned around the ship, and were just tall enough to fit inside the suitcase when it's closed. They will provide the necessary counter pressure in case a heavy load is put on top, and will bear the brunt of any force, before it harms the ship.
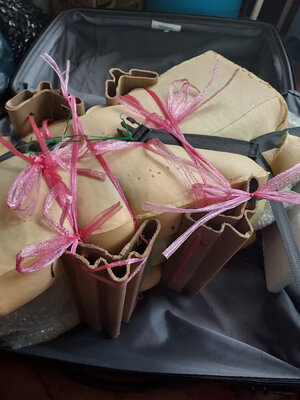
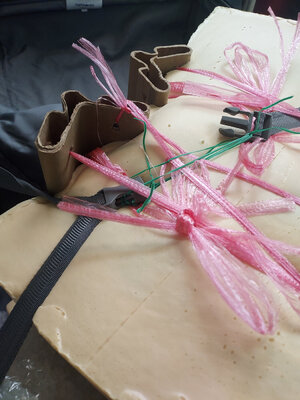
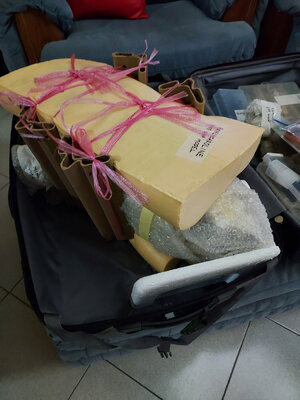
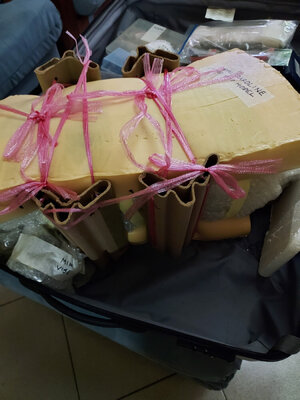
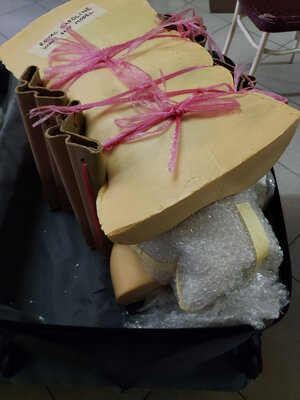
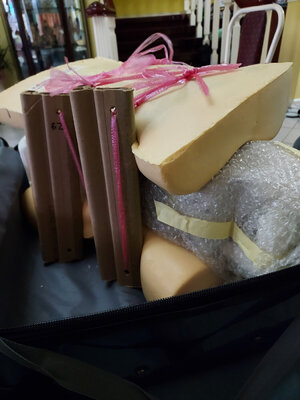
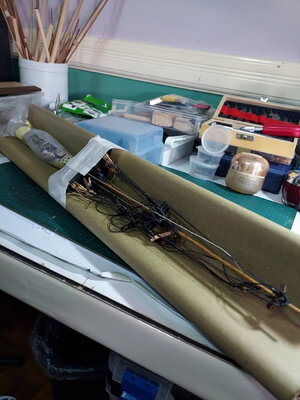
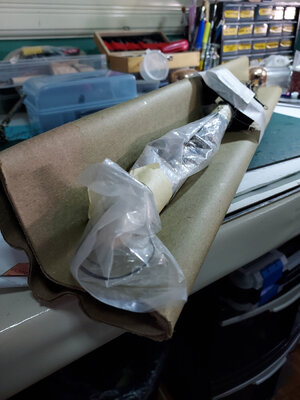
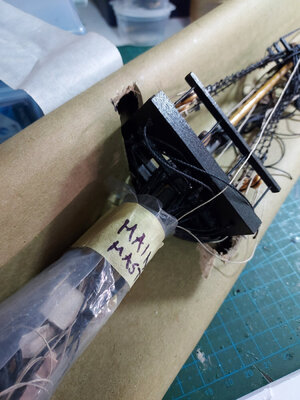
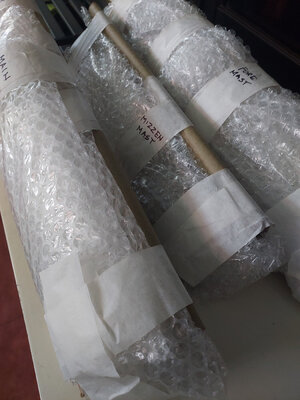
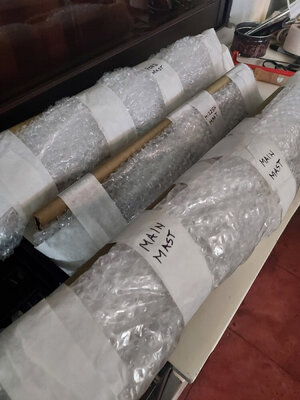
I packed my tools, supplies, materials and other stuff around the ship to prevent it from moving. The masts and yards needed special handling as well. Using the same stiff cardboard material from my washing machine, I packed them as shown below.
And with that, I crossed my fingers and hoped that my RC will survive its journey across the Pacific.
Anticipating that it will be tossed around, manhandled, stacked upon and suffer all kinds of abuse in transit, I had to make sure that it's protected from all sides, especially the vulnerable top and bottom soft panels of the suitcase.
The hull barely fits in the suitcase. The most vulnerable part was the lanterns so I made sure that they had ample protection using Styrofoam.


The other deck pieces were similarly reinforced with Styrofoam and bubble wrap.


I found some old memory foam pillows that seemed perfect to protect the top and bottom of the ship. The foam provided just the right amount of firmness and give.


The next part is the most critical. Anticipating that heavy loads can potentially be stacked on top of the suitcase in the plane's cargo hold, I had to make sure that the suitcase can withstand the weight.
I found some very stiff cardboard pieces that was used for packing my new washing machine. I measured and cut them, yielding 4 pieces as shown.

These were positioned around the ship, and were just tall enough to fit inside the suitcase when it's closed. They will provide the necessary counter pressure in case a heavy load is put on top, and will bear the brunt of any force, before it harms the ship.


I packed my tools, supplies, materials and other stuff around the ship to prevent it from moving. The masts and yards needed special handling as well. Using the same stiff cardboard material from my washing machine, I packed them as shown below.


And with that, I crossed my fingers and hoped that my RC will survive its journey across the Pacific.
- Joined
- Apr 20, 2020
- Messages
- 6,239
- Points
- 738

good luck with the shipping, it's a beautiful modelAlright..... time to pack this thing that I've spent 11 months to do. I decided to pack it in a standard sized Samsonite checked-in luggage. It will travel with us from Manila, a layover in Tokyo and then finally to Los Angeles.
Anticipating that it will be tossed around, manhandled, stacked upon and suffer all kinds of abuse in transit, I had to make sure that it's protected from all sides, especially the vulnerable top and bottom soft panels of the suitcase.
The hull barely fits in the suitcase. The most vulnerable part was the lanterns so I made sure that they had ample protection using Styrofoam.
View attachment 356654View attachment 356655
The other deck pieces were similarly reinforced with Styrofoam and bubble wrap.
View attachment 356656View attachment 356657View attachment 356658
I found some old memory foam pillows that seemed perfect to protect the top and bottom of the ship. The foam provided just the right amount of firmness and give.
View attachment 356659View attachment 356660View attachment 356661View attachment 356662
The next part is the most critical. Anticipating that heavy loads can potentially be stacked on top of the suitcase in the plane's cargo hold, I had to make sure that the suitcase can withstand the weight.
I found some very stiff cardboard pieces that was used for packing my new washing machine. I measured and cut them, yielding 4 pieces as shown.
View attachment 356663
These were positioned around the ship, and were just tall enough to fit inside the suitcase when it's closed. They will provide the necessary counter pressure in case a heavy load is put on top, and will bear the brunt of any force, before it harms the ship.
View attachment 356664View attachment 356665View attachment 356666View attachment 356667View attachment 356668View attachment 356669
I packed my tools, supplies, materials and other stuff around the ship to prevent it from moving. The masts and yards needed special handling as well. Using the same stiff cardboard material from my washing machine, I packed them as shown below.
View attachment 356671View attachment 356672View attachment 356673View attachment 356674View attachment 356675
And with that, I crossed my fingers and hoped that my RC will survive its journey across the Pacific.

Packing the ship was a building project in and of itself! I hope it arrives in LA with no damage.Alright..... time to pack this thing that I've spent 11 months to do. I decided to pack it in a standard sized Samsonite checked-in luggage. It will travel with us from Manila, a layover in Tokyo and then finally to Los Angeles.
Anticipating that it will be tossed around, manhandled, stacked upon and suffer all kinds of abuse in transit, I had to make sure that it's protected from all sides, especially the vulnerable top and bottom soft panels of the suitcase.
The hull barely fits in the suitcase. The most vulnerable part was the lanterns so I made sure that they had ample protection using Styrofoam.
View attachment 356654View attachment 356655
The other deck pieces were similarly reinforced with Styrofoam and bubble wrap.
View attachment 356656View attachment 356657View attachment 356658
I found some old memory foam pillows that seemed perfect to protect the top and bottom of the ship. The foam provided just the right amount of firmness and give.
View attachment 356659View attachment 356660View attachment 356661View attachment 356662
The next part is the most critical. Anticipating that heavy loads can potentially be stacked on top of the suitcase in the plane's cargo hold, I had to make sure that the suitcase can withstand the weight.
I found some very stiff cardboard pieces that was used for packing my new washing machine. I measured and cut them, yielding 4 pieces as shown.
View attachment 356663
These were positioned around the ship, and were just tall enough to fit inside the suitcase when it's closed. They will provide the necessary counter pressure in case a heavy load is put on top, and will bear the brunt of any force, before it harms the ship.
View attachment 356664View attachment 356665View attachment 356666View attachment 356667View attachment 356668View attachment 356669
I packed my tools, supplies, materials and other stuff around the ship to prevent it from moving. The masts and yards needed special handling as well. Using the same stiff cardboard material from my washing machine, I packed them as shown below.
View attachment 356671View attachment 356672View attachment 356673View attachment 356674View attachment 356675
And with that, I crossed my fingers and hoped that my RC will survive its journey across the Pacific.
Reggie, that was more work than building the ship!
The lanterns are the last things I put on anymore. They're just too delicate. I had some break off even before I moved the boat to Omaha. Your lanterns look similar to the ones I had on my Soleil Royale.
- Joined
- Apr 20, 2020
- Messages
- 313
- Points
- 278

Thanks for the comments. I am sorry if I wasn't too clear earlier.... This post was made after I had already successfully made the trip to LA last November-December. I am happy to report that the ship made the voyage without even a scratch. While there, I completed the remaining pieces and will share that journey in my next posts.
- Joined
- Apr 20, 2020
- Messages
- 313
- Points
- 278

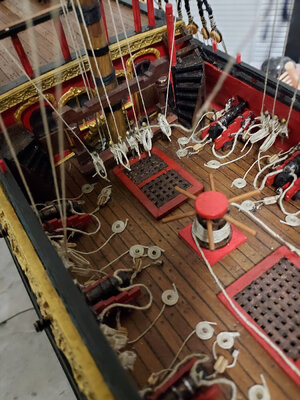
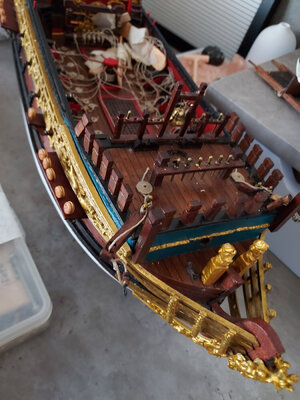
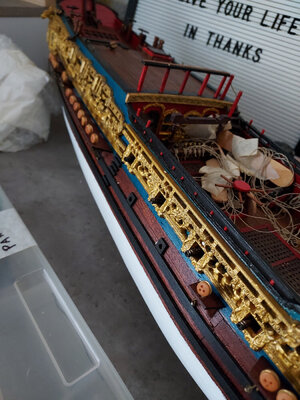
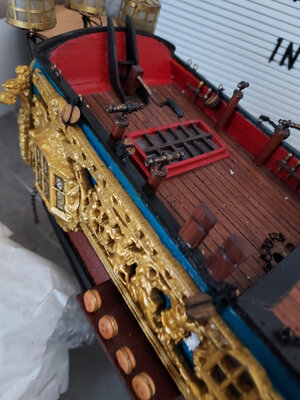
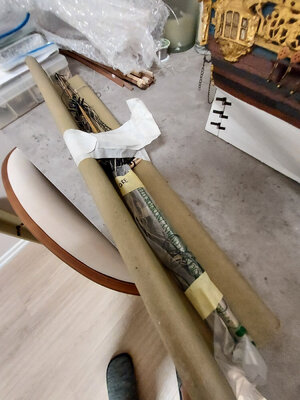
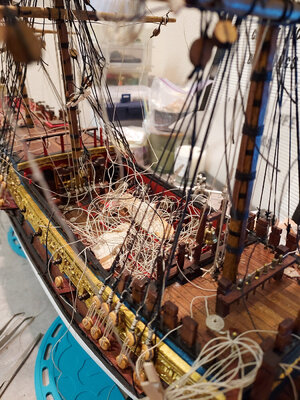
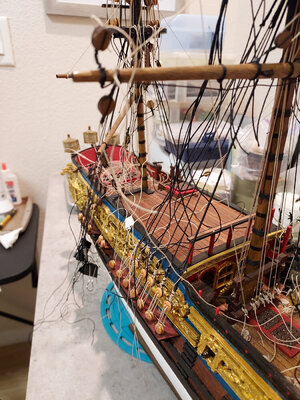
As mentioned previously, my RC survived the journey across the Pacific without any damage. I arrived in Woodland Hills,Calif last November and immediately started the finishing works on the ship. Here's some photos of the ship upon arrival.
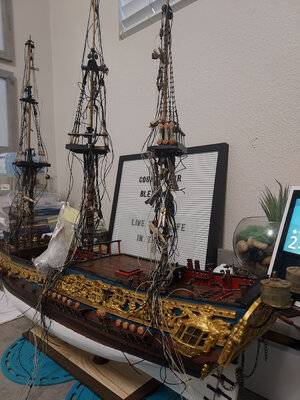
I mounted the masts with all the pre-rigged ropes. A lot of rope hanging down from the masts, but they will be cleared one step at a time.
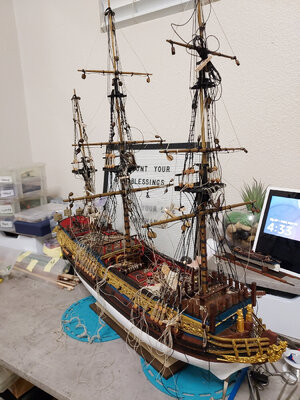
After the masts were stepped, I started working on the lower shrouds.
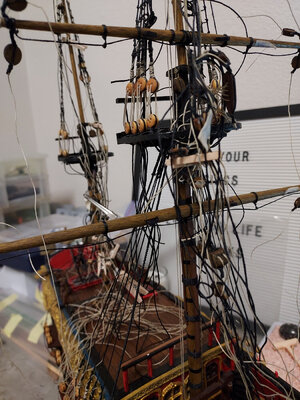
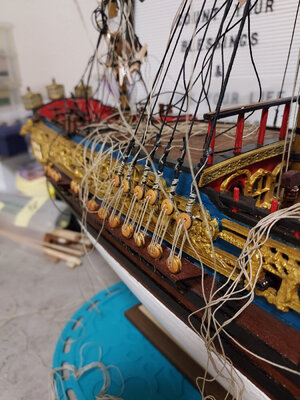
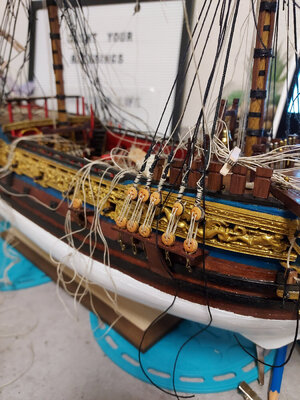
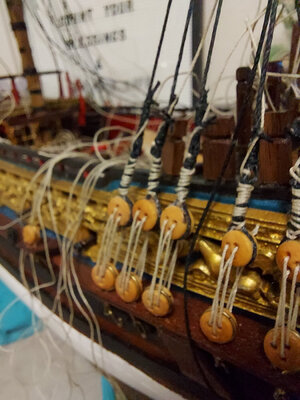
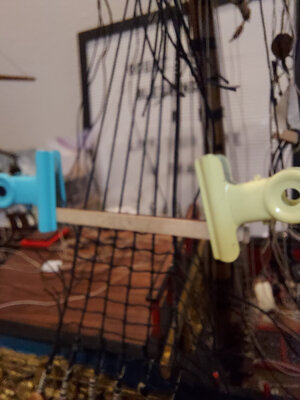
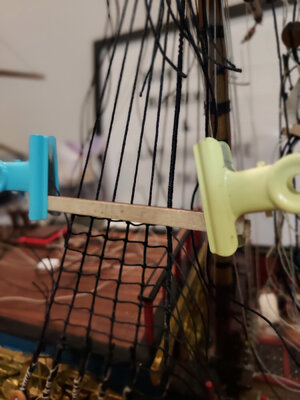
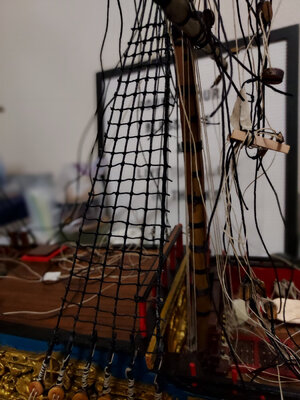
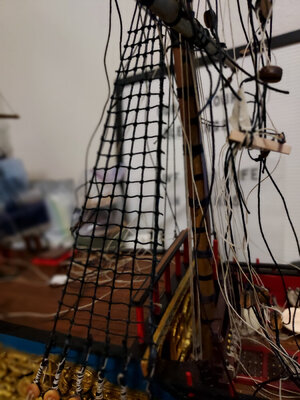
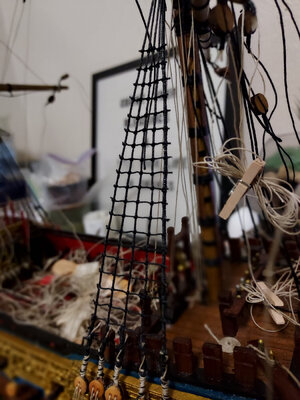
Next were the ratlines. As I did with the upper shrouds, I used my simple jig to help make the spacing consistent.
That's it for now. Thanks again for stopping by.
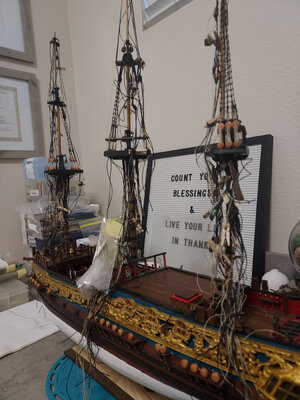
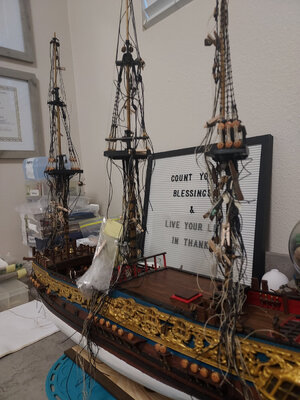
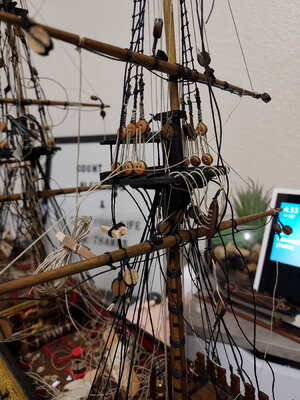
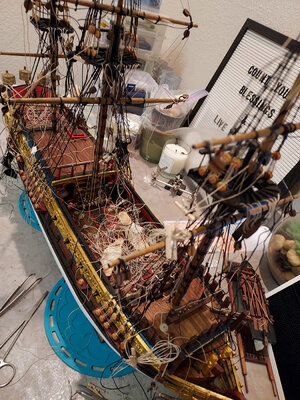
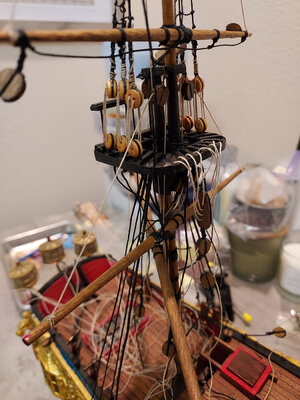


I mounted the masts with all the pre-rigged ropes. A lot of rope hanging down from the masts, but they will be cleared one step at a time.

After the masts were stepped, I started working on the lower shrouds.


Next were the ratlines. As I did with the upper shrouds, I used my simple jig to help make the spacing consistent.


That's it for now. Thanks again for stopping by.


Last edited:
- Joined
- Apr 20, 2020
- Messages
- 313
- Points
- 278

Good morning. I love these WIP pictures of your rigging. Shows a true working build process. She is looking great BTW. Cheers GrantAs mentioned previously, my RC survived the journey across the Pacific without any damage. I arrived in Woodland Hills,Calif last November and immediately started the finishing works on the ship. Here's some photos of the ship upon arrival.
View attachment 357733View attachment 357734View attachment 357735View attachment 357736
I mounted the masts with all the pre-rigged ropes. A lot of rope hanging down from the masts, but they will be cleared one step at a time.
View attachment 357737
After the masts were stepped, I started working on the lower shrouds.
View attachment 357740View attachment 357742View attachment 357743View attachment 357744View attachment 357745View attachment 357747View attachment 357748
Next were the ratlines. As I did with the upper shrouds, I used my simple jig to help make the spacing consistent.
View attachment 357760View attachment 357761View attachment 357762View attachment 357763View attachment 357764
That's it for now. Thanks again for stopping by.
View attachment 357738
View attachment 357739
View attachment 357741
View attachment 357746
View attachment 357749


