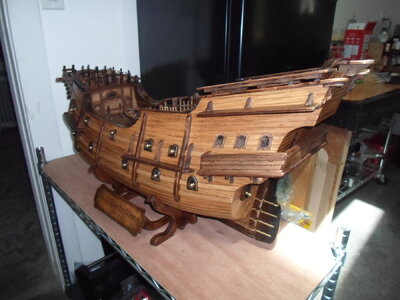
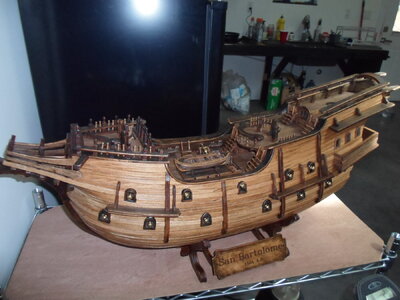
San Bartolome - Pavel Nikitin ship model

If possible only stain the side of wood that will be seen, this helps let the glue on the unstained side absorb into the wood. I also use CA glue and GEL CA for placing deck parts/cannons , barrels etc. This is my first ship using mainly wood glue rather than CA glue and I am liking it alot better for some applications
 
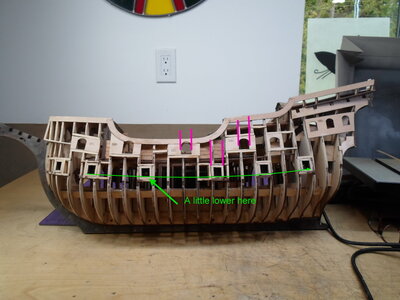
With regards to post #11 ( cannon port placement ) I stayed consistent with part numbers facing up and location to aft as this seems to center the lower port better with the upper ports. I installed my lower ports at this time and rough faired the hull. noticed one port seems to be lower than the natural curve so I may leave the 2 lower side cannons out and just close the cannon port hatches on these. Have to wait for planking to see.
Just about at a stand still waiting for second set of instructions so I may try to sort out the transom and hull planking as I think this will be the next step. See how fast this idea bites me in the butt LOL

port fairing.jpg
 
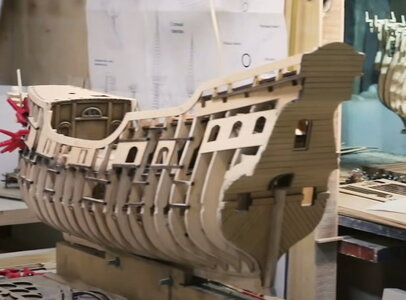
Although I haven't received the second set of plans I was able to capture some good reference images from Olha Batchvarov's video PAVAL NIKITIN'S WORKSHOP Given the dire situation in Ukraine right now I fully understand that paval may have been forced to close up shop temporarily and will get instructions out ASAP. Therefore I have decided to proceed with the build and just see how many mistakes I can recover from LOL.
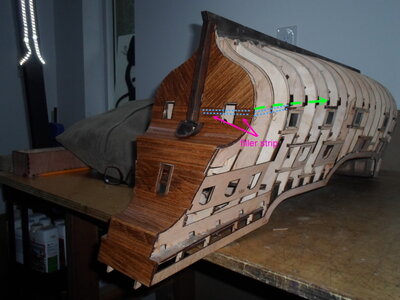
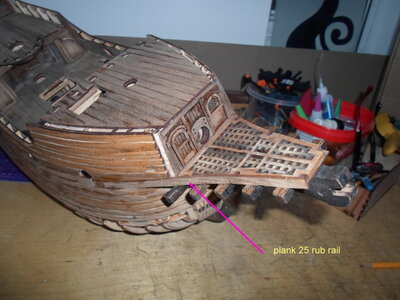
Finished planking the transom and started by installing plank #30 ( arch cut out for transom door) and #50 ( notched ledge) as it was obvious where they fit. Then it was just a matter of installing in numerical order. I installed the lower 45 degree planks starting with #14 ( notch cutout ) first

I made my first mistake by assembling the transom door before the planking and ended up with a gap at the bottom of the door but as dad used to say "just put a molding on it LOL".
trans 2.jpg
 
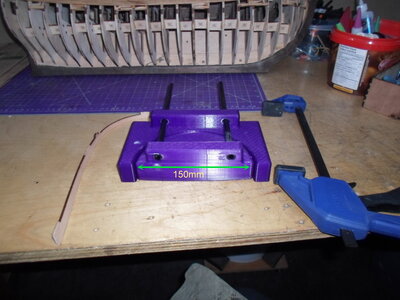
Due to the plank thickness on this kit I made a clamp style bender for bow planks. The black alignment rods are not essential but they do help keep the big D from slipping out while clamping. I made mine with 3D printer but this could easily be cut out of 3/4" plywood. I soaked the test strip in water for at least 20 minutes before bending and then let it sit in clamp over night. I haven't got to use it yet and I may have to re soak pieces if they need a twist while assembling

150mm bender.jpg
 
Last edited:
I only have the top 10 planks on the side but I think I have the part numbering figured out. I started with plank #38 (edge notched for poop deck step out) but I think the better place to start might be along the notch cut out in the bulkheads at middle of hull ( just below the lower cannon ports ) As I haven't got there I wasn't able to figure out what number that plank would be so I started at the top. Will let you know how it turns out. Pathfinder has received the next set of instructions so the hull planking may be in there.
plank numbering.jpg
 
@sleepyfish,

The manual update I got is for pages 106 to 119, pages 108 to 111 show the process for the stern planking, Pages 112 to 119 show some of the other odd assemblies as well as the start of the hull planking. PM me with your e-mail address if you don't have you're PDF from Denis, I'd be glad to forward the copy I have.
 
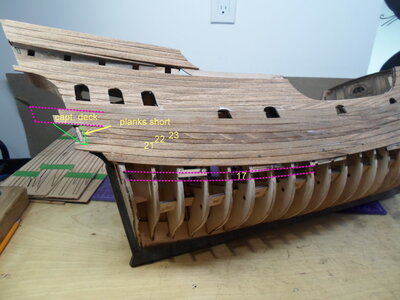
Had a bit of an issue with planking. for some reason planks 21 - 23 came up short. just noticed pathfinders offer for instruction update so will see if I did something wrong in planking. I think I can make a gusset for the captains deck and fill the gap that way. I suspect the first plank to start with will be 17 which runs along the bulkhead notches.

short planks.jpg
 
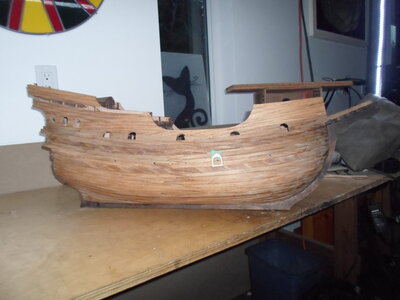
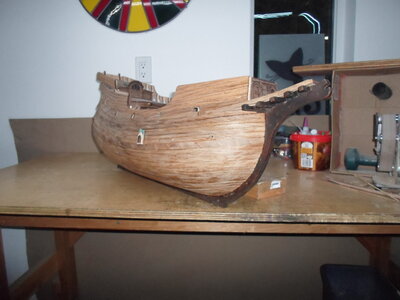
First side planking is on and halfway on second side. I must say these are some pretty big/thick timbers to work with. Definitely have to soak them in the tub for awhile before trying to bend and shape ( wall paper soak tray works great) I have decided to make some window frames for the lower cannon ports rather than the open square cut out with hatch. ( used scraps of bulkhead plywood ) This will change the overall look to a more ornamental ship than an actual replica. When I fist saw this kit featured here on SOS I got the sense of a forest hobbit house look ( Toad Hall, bilbo baggins ) I am going for a post war hand made ( pocket knife, hammer and chisel) / child's toy look rather than a perfect joinery replica. It is certainly tough enough to be bashed around the living room by kid's playing pirate ship
plank 1.jpg

plank 2.jpg
 
Last edited:
First side planking is on and halfway on second side. I must say these are some pretty big/thick timbers to work with. Definitely have to soak them in the tub for awhile before trying to bend and shape ( wall paper soak tray works great) I have decided to make some window frames for the lower cannon ports rather than the open square cut out with hatch. ( used scraps of bulkhead plywood ) This will change the overall look to a more ornamental ship than an actual replica. When I fist saw this kit featured here on SOS I got the sense of a forest hobbit house look ( Toad Hall, bilbo baggins ) I am going for a post war hand made ( pocket knife, hammer and chisel) / child's toy look rather than a perfect joinery replica. It is certainly tough enough to be bashed around the living room by kid's playing pirate ship
View attachment 350476

View attachment 350477
Good morning. The planking is looking good. This is a very interesting ship and kit. I am fully supportive of your decision to deviate from the kit and add in your own “modifications “ if you are not building a historical correct replicas. I think the the window frames will look cool. Cheers Grant
 
Well! She certainly is a chubby little piglet and weighs about as much to. There is a lot of lumber in this build. As this kit comes with all pieces pre cut ( decking and planking ) I would consider this to be an excellent intermediate skill level ship to build. The finish done by pavel however looks to be in the realm of artist. As my paint kit was returned by post in ukraine and I am not a doctor ( no patience - to wait for replacement) Some issues are instruction manual related so I will start a separate thread ( below ) and update it as I progress with the build. I believe the manual issues are from a cross over from version 1 to version 2 of this kit but not sure
The kit itself is of true eastern European construction technique - Big, Heavy Duty, Built to last forever. The decking and planking are 2mm thick PLANKS!! rather than the traditional .5mm in most kits. The style of the ship reminds me of more like a caricature the a replica and that's probably why I like it so much - it's different.
Hallo @sleepyfish
we wish you all the BEST and a HAPPY BIRTHDAY
Birthday-Cake
How is your work on the ship project going? Are you still working on her?
 
Back
Top