-

Win a Free Custom Engraved Brass Coin!!!
As a way to introduce our brass coins to the community, we will raffle off a free coin during the month of August. Follow link ABOVE for instructions for entering.
-

PRE-ORDER SHIPS IN SCALE TODAY!
The beloved Ships in Scale Magazine is back and charting a new course for 2026!
Discover new skills, new techniques, and new inspirations in every issue.
NOTE THAT OUR FIRST ISSUE WILL BE JAN/FEB 2026
You are using an out of date browser. It may not display this or other websites correctly.
You should upgrade or use an alternative browser.
You should upgrade or use an alternative browser.
- Joined
- May 26, 2020
- Messages
- 202
- Points
- 143

That is looking really good
Placing my cannons on the middle deck is like building a ship in a bottle
Placing my cannons on the middle deck is like building a ship in a bottle
I bet that's true. When you get frustrated, I suggest reading your signature line!
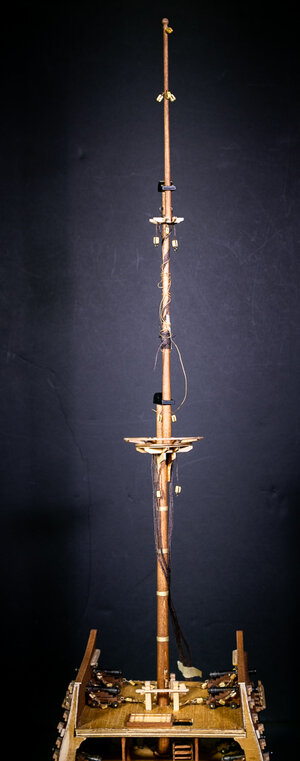
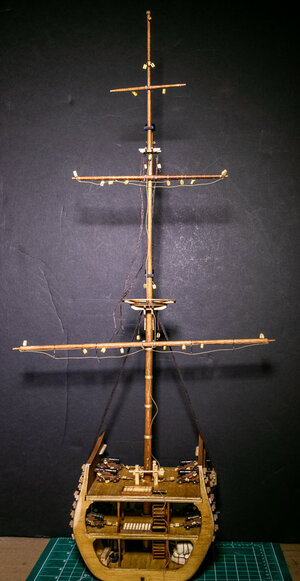
I have the mast stepped. On this model it is a fairly easy task assuming that you check the fit with each deck. Since the mast penetrates three decks and sits in a socket there is not very much side to side or fore and aft adjustment possible. The yards were tied on prior to stepping the mast. They are going to need some adjustment to get them correctly aligned.
Rigging associated with the mast top.
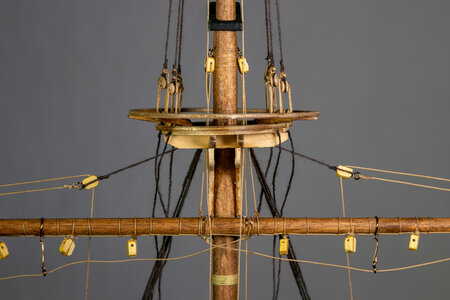
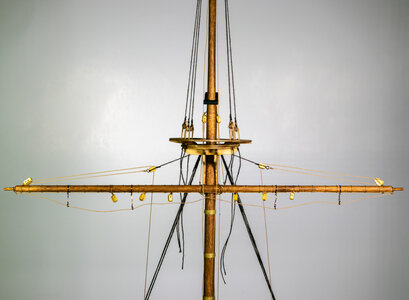
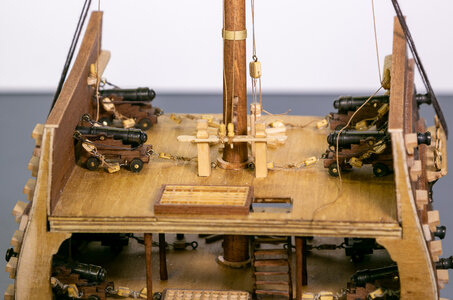

Rigging associated with the mast top.


I have the lower deadeyes as well as the smaller deadeyes at the top rigged. I tried a few different ways to get them to be even horizontally and finally just eyeballed them using the strake as a reference point. Nine out of ten were pretty close, but I have one that was tied a bit long.
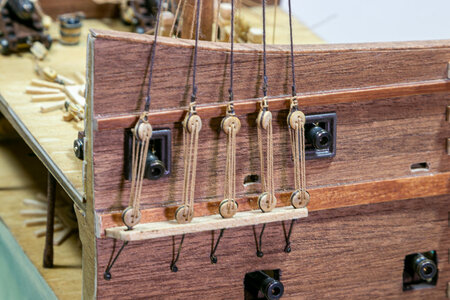
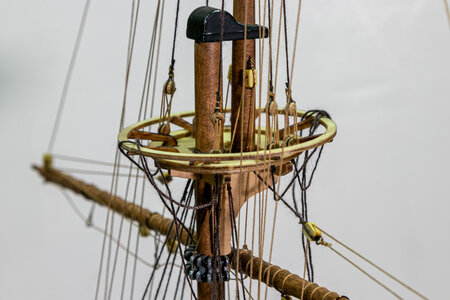
I have the running rigging completed, but at least one end of each line is not permanently installed. Instead of threading trough the top and allowing the rigging to make a change in direction, I have run it from the yards/mast directly to the appropriate pins. This leads the running rigging through the shrouds instead of the top. The running lines would still go through the shrouds at some point, but much closer to the top where it would be less evident. I can still change it, so I am curious how others might have approached this. I suspect on a full model that much of the rigging would have attached further to the stern (or possibly bow) where it would not have been as likely to cross the shrouds. As I think about it more, later ships would likely to have had more pins on rails surrounding the mast so the lines would go more vertically down from the mast.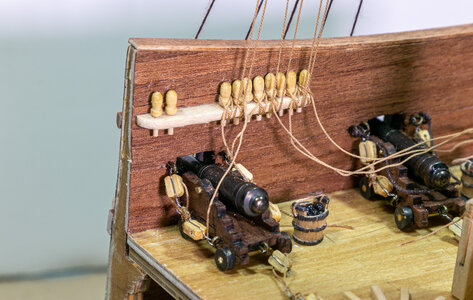
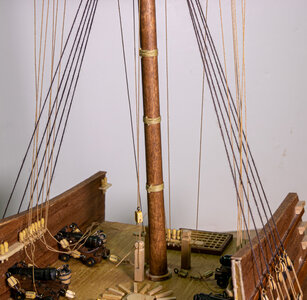

The other small change from the kit plans was to add pieces to the mast to loop the uppermost shrouds over at their highest point. I could have tied off, but I think this looks better.
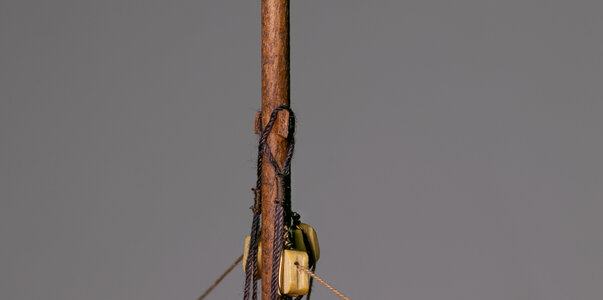
Next - Everyone's favorite activity: ratlines.


I have the running rigging completed, but at least one end of each line is not permanently installed. Instead of threading trough the top and allowing the rigging to make a change in direction, I have run it from the yards/mast directly to the appropriate pins. This leads the running rigging through the shrouds instead of the top. The running lines would still go through the shrouds at some point, but much closer to the top where it would be less evident. I can still change it, so I am curious how others might have approached this. I suspect on a full model that much of the rigging would have attached further to the stern (or possibly bow) where it would not have been as likely to cross the shrouds. As I think about it more, later ships would likely to have had more pins on rails surrounding the mast so the lines would go more vertically down from the mast.


The other small change from the kit plans was to add pieces to the mast to loop the uppermost shrouds over at their highest point. I could have tied off, but I think this looks better.

Next - Everyone's favorite activity: ratlines.
Last edited:
You are doing a very good job on the rigging and with this you are improving the kit model very much
I saw only one small mistake which you could maybe correct easily - it is in the center of the section so directly visible
One block should be turned by 180° - I do not know if this belaying point is a correct one....
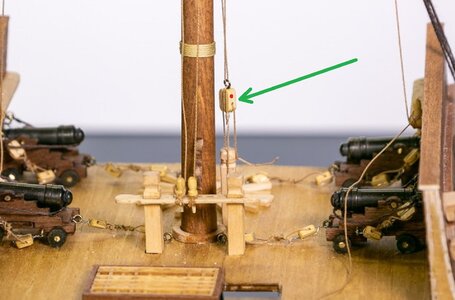
I saw only one small mistake which you could maybe correct easily - it is in the center of the section so directly visible
One block should be turned by 180° - I do not know if this belaying point is a correct one....

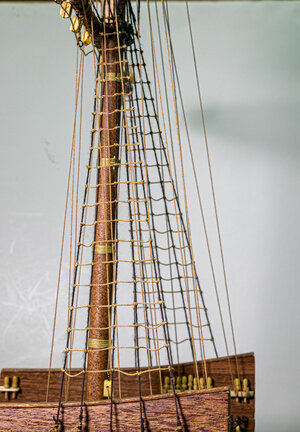
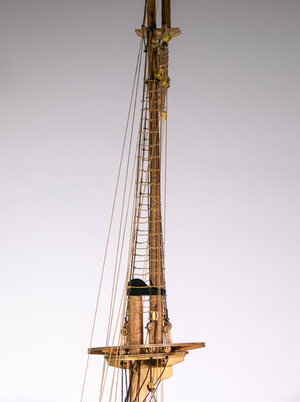
Heading down the home stretch to completion. I completed the ratlines this week. I decided to retie the various running rigging to make it fall better and to remove lines that crossed each other. I decided not to follow the plans and tied the lines so that they look better.
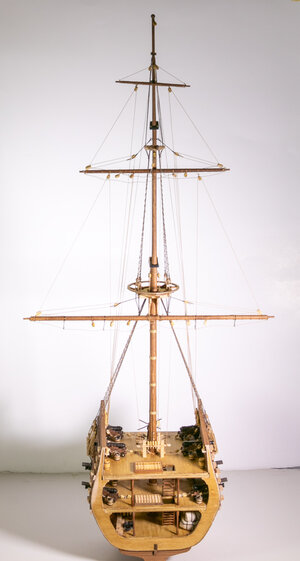
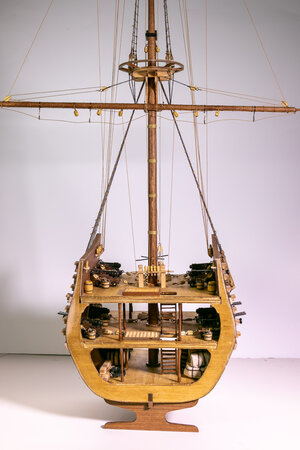
The gun port frames were installed. The keel was glued in place. I waited to do that in order to keep the model sitting flat on the workbench. I place the capstan on the upper deck. I waited on that because I assumed that the handles on the capstan would grab any rope coming close to it.
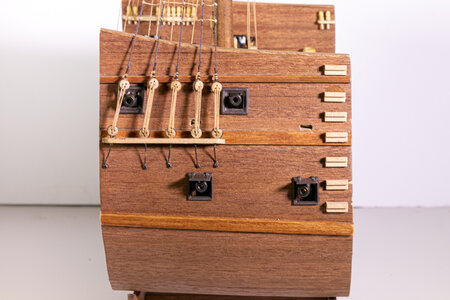
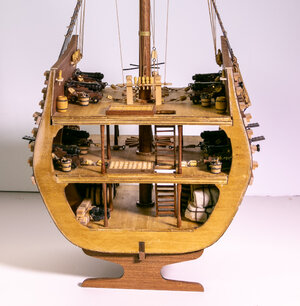
I have a few more things to do before I can call it complete. I have to make some more rope in order to have enough for two of the steps left. I have the flag and its halyard to rig and I have to make rope coils for the belaying pins. Then I have some cleanup work to do to address a couple of issues.


The gun port frames were installed. The keel was glued in place. I waited to do that in order to keep the model sitting flat on the workbench. I place the capstan on the upper deck. I waited on that because I assumed that the handles on the capstan would grab any rope coming close to it.


I have a few more things to do before I can call it complete. I have to make some more rope in order to have enough for two of the steps left. I have the flag and its halyard to rig and I have to make rope coils for the belaying pins. Then I have some cleanup work to do to address a couple of issues.
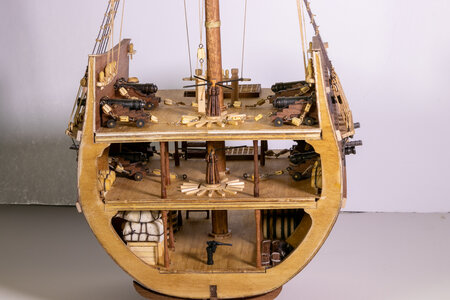
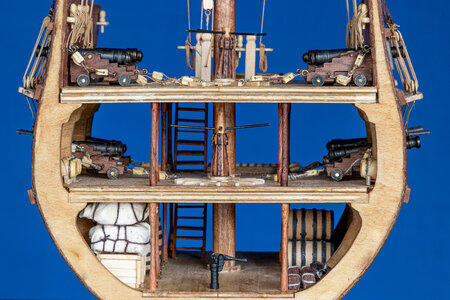
I have completed the build of the San Francisco II Cross Section. As is always true, mistakes were made, but more importantly new things were tried and/or learned. Some examples, seizing/wiping of blocks and ropes instead of just knotting, adding shrouds to masts before mounting higher parts of the mast, etc.
Since the last post, I stained the ends of the inner planking and rubbing strakes and the exposed ends of the bulkheads a second another time.
Thank you to everyone that Liked my posts, offered encouragement and had suggestions throughout the process. It was very helpful and appreciated. Enough words; I hope the following pictures display the final product adequately.
One last question on this build log: Is there anyway to add "Finished" or "Completed" to the build log title?
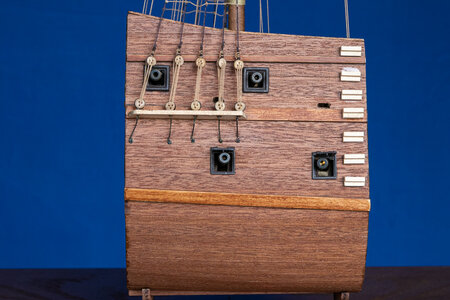
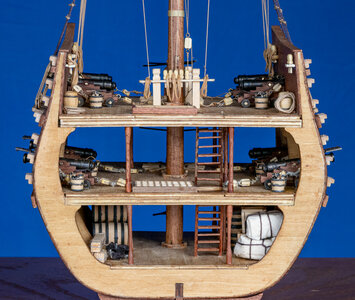
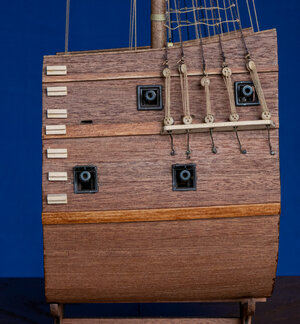
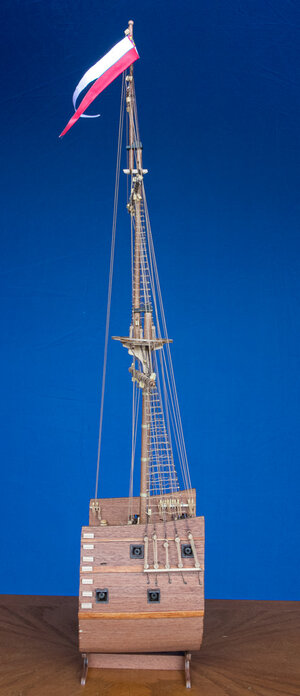
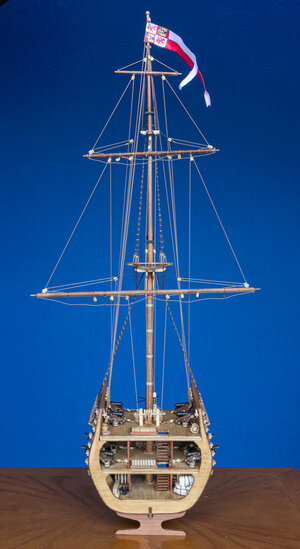
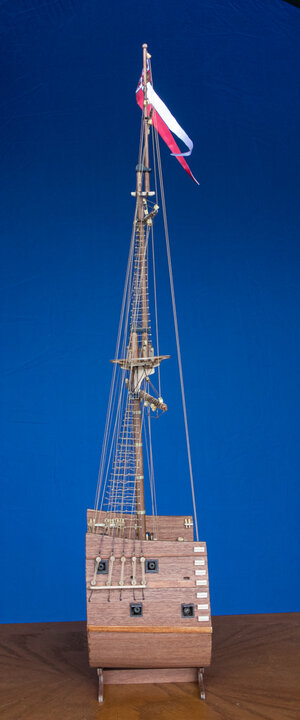
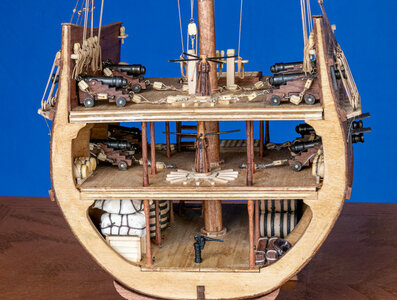
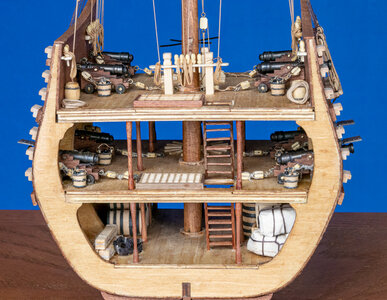


Last edited:
Congratulations, it is a fine looking model. Happy Holidays
Thank you and Happy Holidays to you as well.Congratulations, it is a fine looking model. Happy Holidays
He estado con este modelo durante un mes más o menos. Este blog vale oro. Es muy útil. Es una pena que no lo haya encontrado antes, he cometido algunos errores que han hecho mi trabajo más laborioso.
Su trabajo ha sido maravilloso.
Su trabajo ha sido maravilloso.
Thank you for your generous complements. I am glad you find the log helpful. Good luck with your build.He estado con este modelo durante un mes más o menos. Este blog vale oro. Es muy útil. Es una pena que no lo haya encontrado antes, he cometido algunos errores que han hecho mi trabajo más laborioso.
Su trabajo ha sido maravilloso.
Hi, Jeff, could you tell me how you did the V2 parrels with beads? I know I do V1 and V3, but not the one in the middle of the last picture. Thanks in advance,The mast has all of the blocks attached. The mast is currently not glue in and will be pulled out to attach the yards.
View attachment 197023
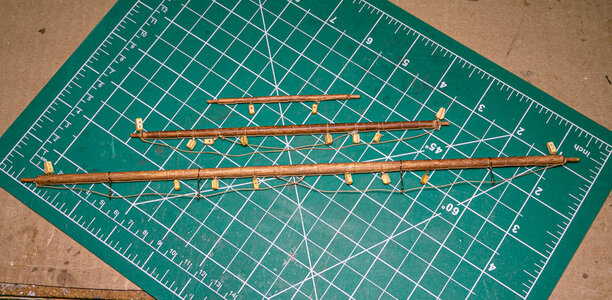
All three yards have been completed with the blocks and ropes attached.
View attachment 197024
Parrels with beads are ready for attaching the yards to the mast. View attachment 197025
Adry
I followed the instructions as per the picture below. Basically use 2 threads through the beads and tie them as close as possible to the beads.Hi, Jeff, could you tell me how you did the V2 parrels with beads? I know I do V1 and V3, but not the one in the middle of the last picture. Thanks in advance,
Adry
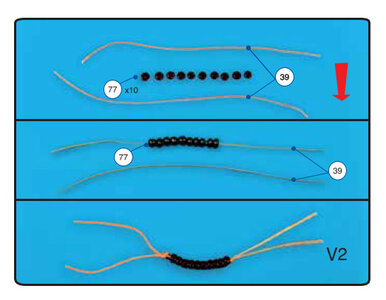
OK, and through inside at the same time, I mean.I followed the instructions as per the picture below. Basically use 2 threads through the beads and tie them as close as possible to the beads.
View attachment 392521
Thank you so much
Last edited:
Just understand, thank you again.
Last edited:


