As always NIGEL it is looking GREAT. Don
-

Win a Free Custom Engraved Brass Coin!!!
As a way to introduce our brass coins to the community, we will raffle off a free coin during the month of August. Follow link ABOVE for instructions for entering.
-

PRE-ORDER SHIPS IN SCALE TODAY!
The beloved Ships in Scale Magazine is back and charting a new course for 2026!
Discover new skills, new techniques, and new inspirations in every issue.
NOTE THAT OUR FIRST ISSUE WILL BE JAN/FEB 2026
You are using an out of date browser. It may not display this or other websites correctly.
You should upgrade or use an alternative browser.
You should upgrade or use an alternative browser.
Thanks Don
A small but nevertheless important update as to the modification process.I marked the tops of the next deck beams ensuring they were all at an equal height (28mm) to the lower deck beams.I then cut these beams to size from some boxwood.This is much easier to determine the lengths now rather than when the upper planking is in place.
Finally I opened up the aft bulkhead and installed the last deck beam.I installed this beam to add a little rigidity to the now fragile last bulkhead.This is the only beam to be fitted now as it will not impede fitting the second gun deck.
I have also placed masking tape on the bulkheads from the next deck upwards.This is to prevent the planks being glued to the bulkheads as these sections will be removed later.
Kind Regards
Nigel
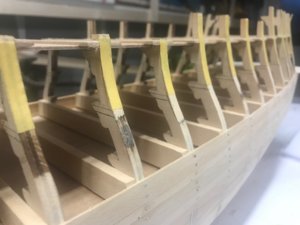
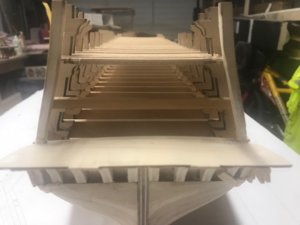
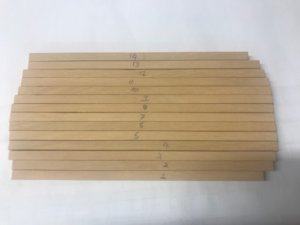


Quite a substantial update as I have been "in the zone" the last few days apart from the usual festive celebrations.
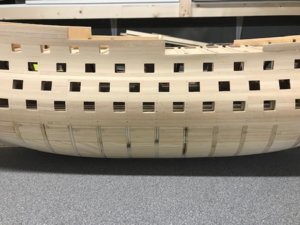
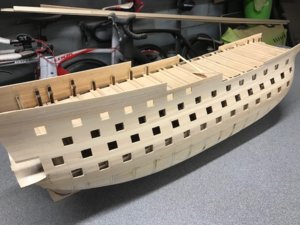
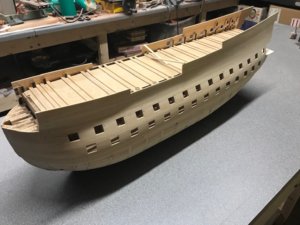
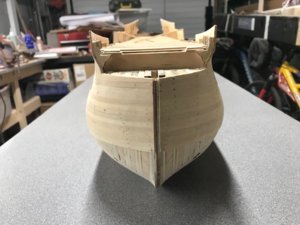
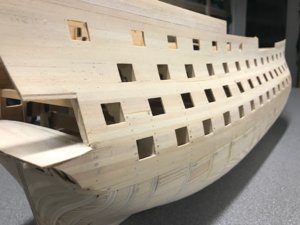
I have planked both sides of the hull from the main wales up using the supplied timber which is good quality.Some basswood is more like Balsa when you try and work with it but this is much firmer.The planking has been extending higher for trimming to the correct shape later
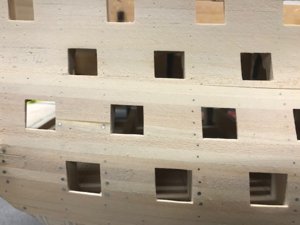
I have made a good start on cutting all the gunports.This has been tweaked to suit the new sheer of the decks and also to reflect the sizes of the original.They are large at the minute as there will be 1.5mm thick linings fitted to all sides.The veneer second planking will overlap by 1mm giving me a 0.5mm rebate for the lips of the gunport lids.
Note also that the gunports are trapezoidal in shape,not square,the cills follow the decks sheer.
Kind Regards
Nigel


I'm just finishing up a Santa Ana. The instructions were absolutely terrible. From the time I started first cutting in the gunports, I knew things were wrong. It actually sat for 6 years. Finally decided either finish it or burn it. Actually came out pretty well. It was definately a learning experience. Will be following you closely to see how you do things. Thank you. Ken
Nice work, Still gotta aways to go with mine yet.
Thankyou
One thing that has come to light,the 6000 brass nails included in the kit aren't all Brass,some are plated Steel.The instructions call for you to insert the pins in the bulkheads and cut the heads off,then sand flush to represent the fixings.That would have been very annoying to end up with a load of bare steel all over the hull!You can make out the Steel ones in the pics and the odd Brass one after sanding.It is a good job there is another layer going over the top.
If anyone is embarking on building this kit and wishes to insert pins as per the instructions,I suggest you use a magnet to sort the pins into which ones are solid Brass.You really cannot tell the difference looking at them,they appear identical.
Kind Regards
Nigel
One way to separate brass from steel pins is to use a magnet. 
Yes Jim that is the only way in this case.The pins all come in a tray and are in six compartments but are not labelled and do look identical in every respect including the colour.No mention of Steel pins in the parts list.I only realised afterwards when I sanded the hull and the plating was removed.Like I say,good job I was planking in veneer over the top because it would have trashed the build otherwise!
Kind Regards
Nigel
Kind Regards
Nigel
I'm just finishing up a Santa Ana. The instructions were absolutely terrible. From the time I started first cutting in the gunports, I knew things were wrong. It actually sat for 6 years. Finally decided either finish it or burn it. Actually came out pretty well. It was definately a learning experience. Will be following you closely to see how you do things. Thank you. Ken
I can't really comment on the instructions Ken,because I am ignoring them now
 The proportions of the ports and positioning is as close as I can get to the plan pictured with a few small compromises.I plan on using as much of the kit parts and materials as possible,just not quite as Artesania intended
I will loosely refer to the instructions when I get to the masting and rigging and do intend on fitting the sails.
Kind Regards
Nigel
NMBROOK: the masts and rigging instructions are also screwy....beware!!!
The problem is the Kit as mentioned is a modified Victory and as such some of the doco is irrelevant or parts are fitted and then not used. The mast rigging & Yard rigging is correct for the kit, just not well documented. I've seen worse. but once I worked out the formast sail line order, the rest I just replicated. You could do without the sails, it would look much better. I'm just doing them for an exercise in completeness and sail rigging. The only good info is the yard rigging that missing from the plans is in the doco if you do a where's walley on the photos.
I hear you on the sails Paul.It is the only model I intend to fit them on.As kit sails go,I don't think they as bad as some and I would like to do just one model with sails.I may change my mind later but for now they are going on.
Kind Regards
Nigel
Kind Regards
Nigel
The Kit Stem is miles away from how it should be even taking into account drawings show two possible configurations.Kit part on the right in the first picture.It is also very thin at only 5mm.Fortuneatly I had a sheet of Sapele 6.5mm thick that I bought years ago thinking it would come in for something It will match the kit supplied Sapele planking for the lower hull.
After a lot of messing around with enlargement percentages on the copier I got a reasonable full size profile to work from.
The replacement Stem has been cut out of the 6.5mm sheet.I wished to have the top half black and rather than messing splicing Ebony and Sapele together for what will be a very small joint,I decided to use some Black Veneer I have had years from when I did Sovereign's hull.
The Veneer was dry and crispy but 30mins soaking in some water sorted that.
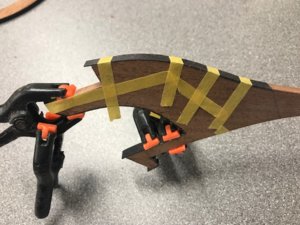
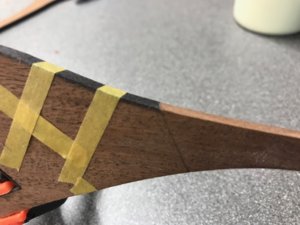
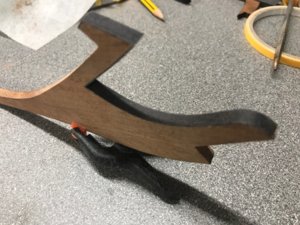
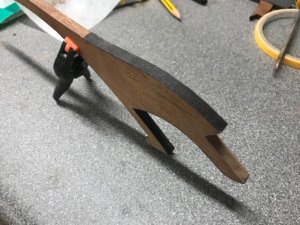
First job is to apply veneer to the outside exposed edges.These edges have been cut 0.5mm smaller to allow for the thickness of the veneer.The parts were prebent with an Amati plank bender(soldering iron type).Finally they were glued in place with PVA.Plenty of taping and clamping as the veneer curls with the moisture from the glue.
Kind Regards
Nigel
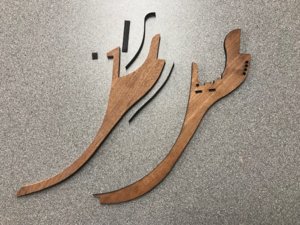
 It will match the kit supplied Sapele planking for the lower hull.
After a lot of messing around with enlargement percentages on the copier I got a reasonable full size profile to work from.
The replacement Stem has been cut out of the 6.5mm sheet.I wished to have the top half black and rather than messing splicing Ebony and Sapele together for what will be a very small joint,I decided to use some Black Veneer I have had years from when I did Sovereign's hull.
The Veneer was dry and crispy but 30mins soaking in some water sorted that.
First job is to apply veneer to the outside exposed edges.These edges have been cut 0.5mm smaller to allow for the thickness of the veneer.The parts were prebent with an Amati plank bender(soldering iron type).Finally they were glued in place with PVA.Plenty of taping and clamping as the veneer curls with the moisture from the glue.
Kind Regards
Nigel


Hi Nigel,
Indeed totaly different, ps why do you build the kit instead of a full scratch?
Indeed totaly different, ps why do you build the kit instead of a full scratch?
Hi Maarten
A good question,I think it is because I just like tinkering with kits.I do get great pleasure from it,different problems to be solved than those with scratchbuilding.I do tend to look at kits and see beyond the box art and think "Hey I can do something special with that".Possibly why I have chosen kits that fall short in some areas,but can be made into something better with a little thought,a few materials and a little extra time.
I think possibly the reason why I have never built Caldercraft's Victory.The kit is SO complete out of the box and to make something that is an individual build,I would spend the same cost of the kit again on timber,trashing so much that is provided,it wouldn't be worth it.
I bought Santa Ana on such a basis,I had a vision of how I wanted the model to look and to get there I wouldn't be throwing half the kit in the bin.I learned my lesson with Sovereign,this ended up virtually full scratch as the partwork was so different than advertised.I will make use of Veneers to great extent on this build,on Royal Caroline I used full thickness Pear planks and solid Ebony,I spent nearly double the cost of the kit just in new wood!
Kind Regards
Nigel
I still have the deagostini sovereign on the shelf, bought it for the same reason as it looked great in the advertisement. So I have to bash this to the max, but thats for later. Your Samta Ana looks great and knowing what you did with the sots she will become a jewel.
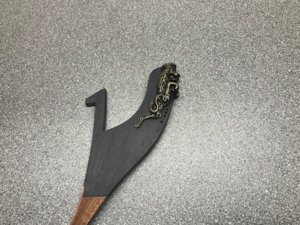
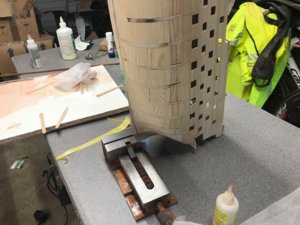
Continuing on with the prow,I milled 0.5mm off the face to let in the 0.5mm black Veneer.Only when this had been fitted,did I turn the prow over and mill the other side and veneer.This avoids issues of packing or milling the prow when it is not truly flat on the mill table.
Four holes were drilled for the rigging and then a Rabbet mas milled for the planking below the Wales.I have designed the Prow around the kit figurehead.It is correct for this vessel.If I choose to carve my own from Boxwood,it will only be a near exact copy of the kit casting.
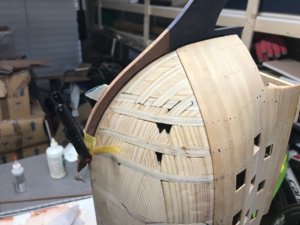
Finally I clamped the hull in a rather worrying position,vertically on end so I could bond the prow on with Epoxy.This has been left a little while to fully harden before I start work on fitting the keel.The keel end of the Prow had been left in the rough so I could shape the joint to the keel on the model to ensure an accurate fit.
Kind Regards
Nigel
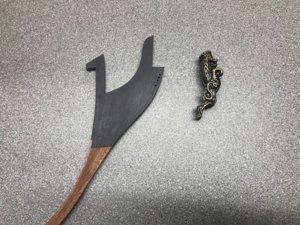
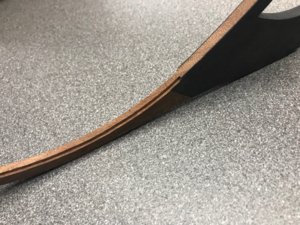
Four holes were drilled for the rigging and then a Rabbet mas milled for the planking below the Wales.I have designed the Prow around the kit figurehead.It is correct for this vessel.If I choose to carve my own from Boxwood,it will only be a near exact copy of the kit casting.
Finally I clamped the hull in a rather worrying position,vertically on end
Kind Regards
Nigel


Well this is the last part to be fitted and update for this decade 
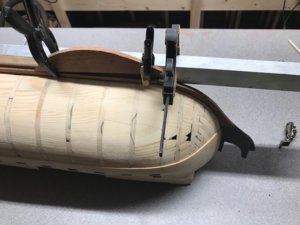
The keel was cut in one piece from the same 6.5mm thick sheet of Sapele.This again had a Rabbet milled on the Proxxon.Two holes were drilled to match the holes in the false keel.There are two M4 captive nuts I fitted into the skeleton to take threaded rods that will later secure the model to the stand.
A rather ramshackle assembly of items were used to secure the keel on the model to ensure straightness while the Epoxy dried.
On that note I am going to pour myself another ,Happy New Year everyone
Nigel
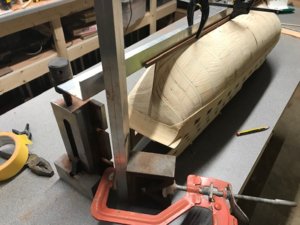
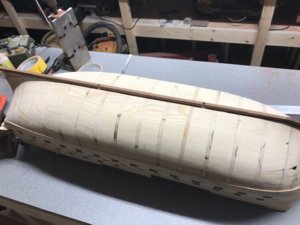
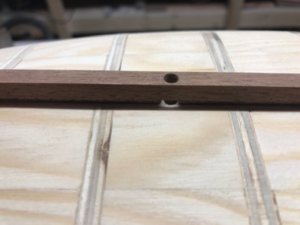

The keel was cut in one piece from the same 6.5mm thick sheet of Sapele.This again had a Rabbet milled on the Proxxon.Two holes were drilled to match the holes in the false keel.There are two M4 captive nuts I fitted into the skeleton to take threaded rods that will later secure the model to the stand.
A rather ramshackle assembly of items were used to secure the keel on the model to ensure straightness while the Epoxy dried.
On that note I am going to pour myself another
 ,Happy New Year everyone
Nigel


What you do to kits is just amazing! Thank you for taking time to share your work and explain the process. Have a beer or two on me bud. Happy New Year!


