• LUCZORAMA SHIPWRECK SCAVENGER HUNT GIVEAWAY. 4 Weeks of Fun • 1 Legendary Prize ((OcCre’s Fram Ship)) • Global Crew Welcome!
    **VIEW THREAD HERE**

Santisima Trinidad Cross-Section 1:90 OcCre - Second Build

Joined
Mar 13, 2025
Messages
336
Points
158

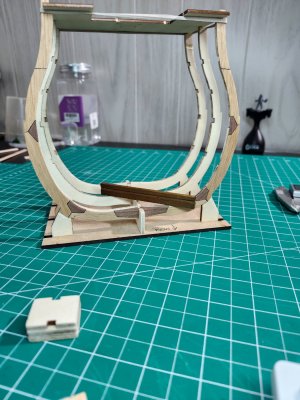
This past weekend began the cross-section. The Admiral bought it for me and would like to display it in the Dining Room. Spent time thinking about what I wanted to do after looking through other build logs. Have decided to veneer the outside frame pieces to give them a more realistic look. After putting the frames together, I have begun working on making template pieces for the veneer.
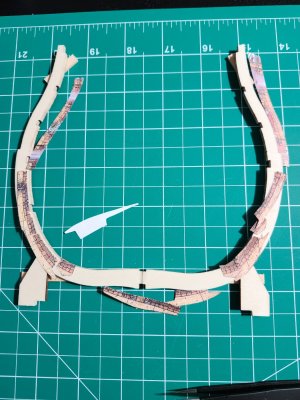
20250515_084443.jpg

At first I was using some basswood to make the templates. Then found it much easier to use some card stock. Would like to get them as close as possible before cutting the veneer pieces.
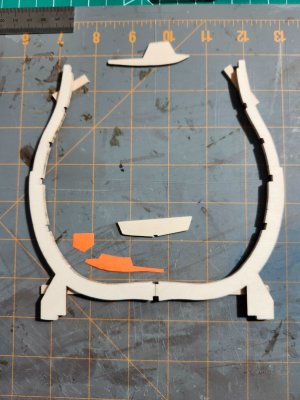
20250515_084431.jpg

So far I have gotten templates done for the bottom four pieces. Hope to continue the remaining pieces tonight. Purchased a veneer variety pack that should be delivered today. I am excited to look through them and pick out which ones to use for this build. The veneer pieces are 1/42 inch thick so I purchased some pinstripe tape, 1/64 inch to use between pieces as the caulking. Hoping over the next couple of days to have the frame veneer pieces cut and ready to assemble.
 
Hey Rebus,

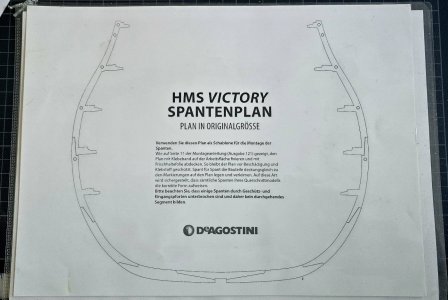
I have the cross-section of the HMS-Victory and still need to build it. Unfortunately no time. But I have a suggestion for you. I simply laminated the module for the frames. This gives you the option of placing the frame on top and then you can lay the frames precisely or place them on the laminate. This has the advantage that you don't always have to cut out paper or paperboard and can always build the frame exactly according to the template. Maybe that will help you.

Best regards
Günther

Spant laminiert.jpg
 
Hey Rebus,

I have the cross-section of the HMS-Victory and still need to build it. Unfortunately no time. But I have a suggestion for you. I simply laminated the module for the frames. This gives you the option of placing the frame on top and then you can lay the frames precisely or place them on the laminate. This has the advantage that you don't always have to cut out paper or paperboard and can always build the frame exactly according to the template. Maybe that will help you.

Best regards
Günther

View attachment 519996
Günther,

Thank you for the wonderful idea. I appreciate you sharing this idea. I am using a page from a cross-section book that I have reduced to the same size as the frames. This is how a few others have done it. Plus the book gives in simple form some of the workings of the whole ship. It is a children's book but I have enjoyed looking it also. That is the pieces of paper on top of the frame in the first picture. There is nothing in the plans for the kit about the frames. Each frame is made of only two pieces. I was able to reduce it to the same basic shape and they have been a good guide. Each piece gives me the shape and I expand it in making the template. Enjoyable to figure it out for me since I like puzzles. Yet it is time consuming to get it right especially since I am new to ship building. Hope by the end of the weekend to have at least some of the veneer glued in place.

Rebus
 
Have fun with this kit, I have working on mine on and off for a few years, getting near the completion.

You can look at my log to see how I did the deck planks, but don't follow my example of getting the cannons aligned wrong on one side.
 
Have fun with this kit, I have working on mine on and off for a few years, getting near the completion.

You can look at my log to see how I did the deck planks, but don't follow my example of getting the cannons aligned wrong on one side.
Kurt,

Thanks for the advice. I will look at your log for tips and hints.
 
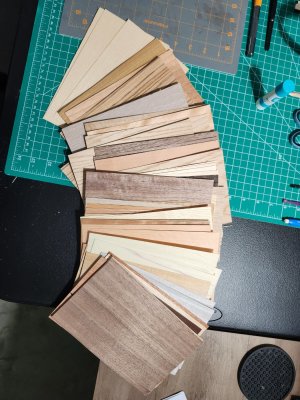
Got the veneer variety pack today. Very happy with the quality and all the different woods.20250515_192949.jpg

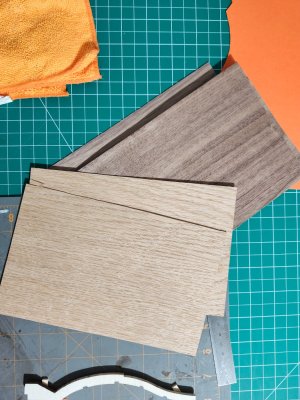
Decided on two contrasting types and will use these. Not sure what wood they are because the pack only came with a list of woods. I think they are oak and walnut.

20250515_193012.jpg

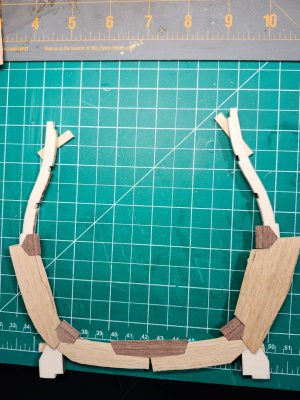
Gave up on the templates and just started putting pieces together from the rough idea of my paper pieces. Very easy to cut the pieces with a pair of scissors. Need to do a little more trimming on the right side piece.

20250515_211646.jpg

Should get my pinstripe tape tomorrow. I will use these for templates for the back side frame. Once I apply the tape and glue them down I will be able to trim them to the frame size.
 
Nice collection of different woods, I would be concerned that the veneer application to kit parts would alter the dimensions of everything. How are you dealing with this.
 
Nice collection of different woods, I would be concerned that the veneer application to kit parts would alter the dimensions of everything. How are you dealing with this.
It only changes the dimensions by 1/42" or 0.61 mm on each end. I'm also going to replace the keel piece from the kit with the one I cut with a rabbet. I did need to open the slot in the supplied keel piece.

20250517_194935.jpg

I think the veneer piece on each end will not effect the over all build. It looks a whole better than the supplied frames. I saw a couple other build logs that did this and I think it is a great improvement to look more like the ship cross-section.
 
Hello Rebus,

Nice progress you are making. It looks very nice. How big is the cut-out and are you going to decorate it with little things like crates, cannonballs and a hammock for the sailors?

Cheers
Günther Ship-1
 
Hello Rebus,

Nice progress you are making. It looks very nice. How big is the cut-out and are you going to decorate it with little things like crates, cannonballs and a hammock for the sailors?

Cheers
Günther Ship-1
1747667576582.png

Günther,

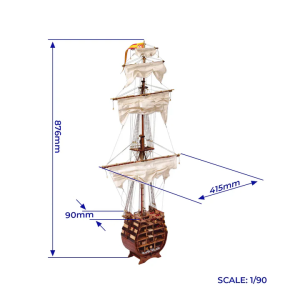
Above is the completed dimensions of this model from the OcCre Site. The kit comes with many of the additional things you asked about. There may be a few others I will add also. Trying to decide about which things I want to add and whether I will copper plate the bottom of the hull.
 
Hey Rebus,

that looks very, very nice. I look forward to your construction progress and stay tuned...

Cheers Günther Ship-1
 
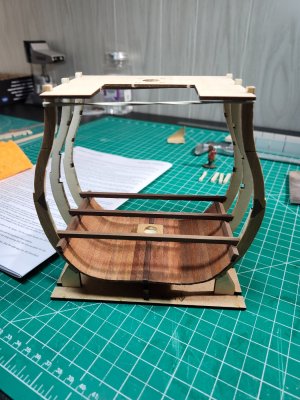
Got the inner hull planking done last night and applied matte finish to it.

20250520_085025.jpg

Then realized I forgot the deck supports. Started work on them was hoping to finish them tonight.

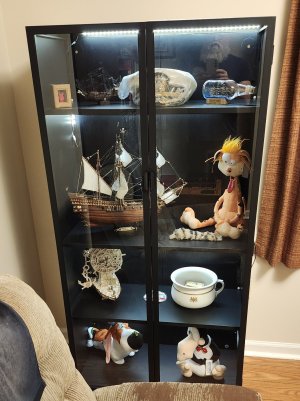
Instead put together a display cabinet for finished ships. Since I do not have enough ships to fill it, I filled it for the moment with some of my other valuable items. Wonder how many can identify some of the other items. Incredible number of points for anyone who can identify the item on the third shelf down on the right. It was my grandfather's favorite possession, that he took many places after acquiring it. Yes, that is his hat on the top shelf.

20250520_203149e.jpg

Hoping in the future to add more ships to the cabinet.
 
Hey Rebus,
that doesn't look bad. Have a look at the picture at the back, your bulkhead looks pretty chopped up. You might want to sand and paint it again. You can see it afterwards. Otherwise, nice work and a nice finish. You have some funny things :Din your showcase.

Best regards
Günther Ship-1
 
Have a look at the picture at the back, your bulkhead looks pretty chopped up. You might want to sand and paint it again. You can see it afterwards.
Günther,

I do not understand what you are referring to.

Rebus
 
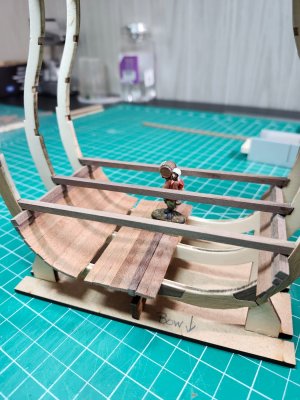
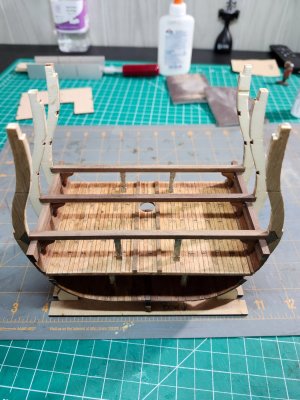
Took a few days of work, but I got the Orlop deck done. Cut individual planks and pieced together the deck. Will continue to do that for the rest of the decks. Time consuming but very happy with the way it came out. My first time to age a model and like the way it ended up.

20250524_142630.jpg

Now on to the first deck. Hoping I can make it look similar.
 
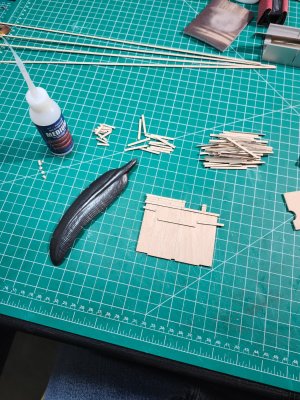
Starting on the first deck planking. Cut a small stack of each size plank needed. Decided to do 15mm, 30mm, and 45mm for the 90mm needed. (Did the same sizes for the Orlop deck.) Each size was cut about 1mm long to allow for sanding and over hang. Took a few minutes to figure out how to start with the deck cut outs to keep the pattern I had on the previous deck. Marked the deck and began planking. The feather is actually a solid piece of graphite. It works great for marking the edge of the planks. Decided to use CA for this deck; PVA on the previous deck made it hard to assemble without waiting for it to set.

20250524_204122.jpg
 
Hello Rebus,

You did a great job with the planking. They look very nice and even. I know it's always a fussy job, but the result is always great to look at. I look forward to seeing your progress and the great pictures.

Cheers
Günther
 
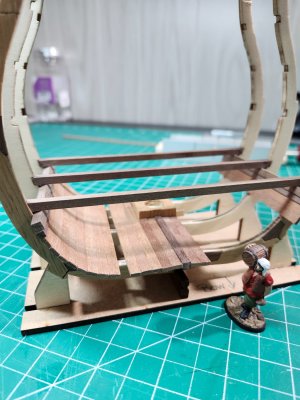
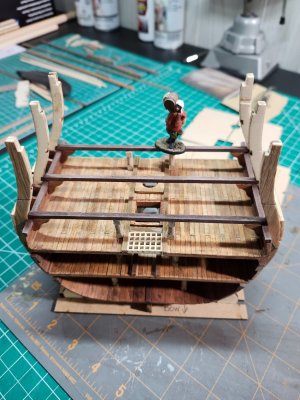
Finished the first deck. Now three more decks to go. Takes me almost two full days of work to finish a deck, planking plus installing everything. Hopefully I can get one more deck done by this weekend working a couple of hours each night.

20250526_205650.jpg

The shipwright is not the right scale for this ship but he is determined to inspect it looking for something to celebrate.

Still researching copper plating and how to weather it. May take some time this week to do some experiments with copper tape to make my own plates. Need to determine the size each plate needs to be for 1:90 scale. If someone can help me with that or point me in the right direction I would appreciate it.
 
Back
Top