-

Win a Free Custom Engraved Brass Coin!!!
As a way to introduce our brass coins to the community, we will raffle off a free coin during the month of August. Follow link ABOVE for instructions for entering.
-

PRE-ORDER SHIPS IN SCALE TODAY!
The beloved Ships in Scale Magazine is back and charting a new course for 2026!
Discover new skills, new techniques, and new inspirations in every issue.
NOTE THAT OUR FIRST ISSUE WILL BE JAN/FEB 2026
You are using an out of date browser. It may not display this or other websites correctly.
You should upgrade or use an alternative browser.
You should upgrade or use an alternative browser.
School for Shipmodel Building School for model ship building
- Thread starter Dave Stevens (Lumberyard)
- Start date
- Watchers 72
- Joined
- Dec 1, 2016
- Messages
- 6,379
- Points
- 728

Thanks, Dave. Picking up so many useful tips from the class here, especially the kerfing method.
Thanks, and appreciate it very much.
Well! thank you Gary for taking part in the school.
- Joined
- Dec 1, 2016
- Messages
- 6,379
- Points
- 728

The Wales part3
Today will be finishing up with the wales, Joinery is an important part of the finish for a wooden ship model. Tight, clean joinery shows an accomplished skill level. You may have heard model ship builders suggesting fine grain hardwoods for tight fitting joinery which is true, but you can accomplish a tight fit with most any wood. Getting back to the wales, they are made up of two strakes which fit together along the entire length. The upper edge of the lower strake has to fit against the lower edge of the upper strake and also sit flat on the face of the frames. This angle is small and often overlooked when installing the wales, but necessary for a proper fit.
Taking a close look at the cross section of the strake you can see the inner edge has a bevel. This bevel is needed at the bow and stern, where the wale sits at midsection the strakes are close to a 90 degree to the face of the frames so the bevel does not have to be as extreme as at the bow.
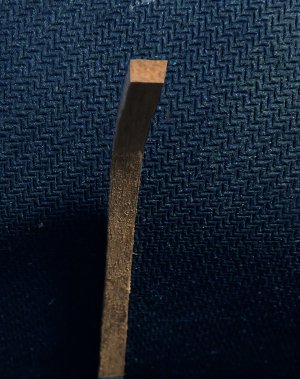
Here i am testing the fit against the upper section of the wale and it looks good to me.
Today will be finishing up with the wales, Joinery is an important part of the finish for a wooden ship model. Tight, clean joinery shows an accomplished skill level. You may have heard model ship builders suggesting fine grain hardwoods for tight fitting joinery which is true, but you can accomplish a tight fit with most any wood. Getting back to the wales, they are made up of two strakes which fit together along the entire length. The upper edge of the lower strake has to fit against the lower edge of the upper strake and also sit flat on the face of the frames. This angle is small and often overlooked when installing the wales, but necessary for a proper fit.
Taking a close look at the cross section of the strake you can see the inner edge has a bevel. This bevel is needed at the bow and stern, where the wale sits at midsection the strakes are close to a 90 degree to the face of the frames so the bevel does not have to be as extreme as at the bow.

Here i am testing the fit against the upper section of the wale and it looks good to me.

- Joined
- Dec 1, 2016
- Messages
- 6,379
- Points
- 728

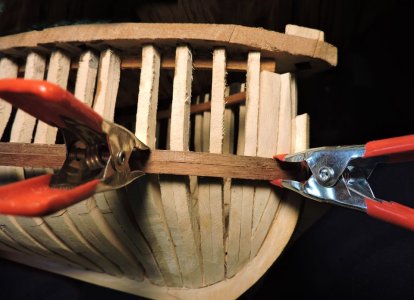
The Walnut strip was first soaked in hot water for 30 minutes then bent and clamped around the hull where it was left to dry. When dry the bevel was added. The strip will have some spring back but the bend will be set and easy to bend around the bow.
To bend the strip is done in sections to avoid the strip from slipping out of place. So, the very end is glued under the upper piece and against the stem and glued to only the first two frames.. I am using Gorilla super glue gel.
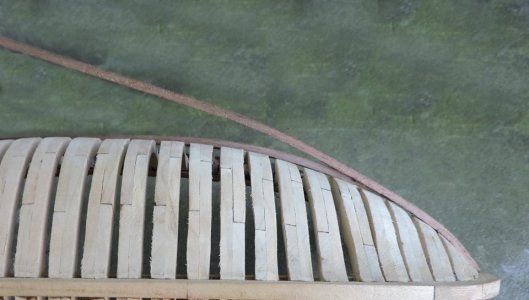
the next section is glued to the next 3 or 4 frames. This is the critical section and if the wale breaks it will break here. I like to bounce the piece into place starting back and moving forward until the wale touches the frames. Once again i am using the super glue.
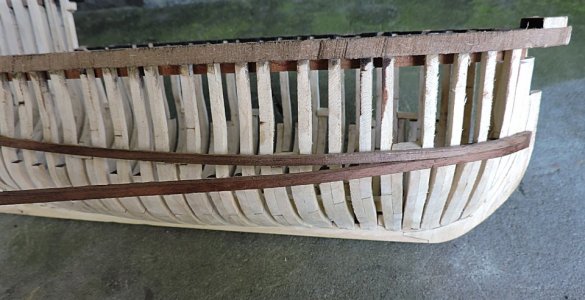
Beyond the critical section and gluing the wale out to frames 8 to 10. Still using the super glue. Note the wale is sitting flat on the face of the frames.
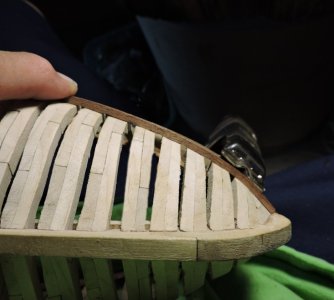
finally all the way to the mid section.
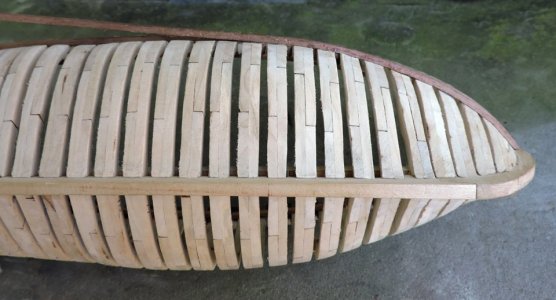
To bend the strip is done in sections to avoid the strip from slipping out of place. So, the very end is glued under the upper piece and against the stem and glued to only the first two frames.. I am using Gorilla super glue gel.

the next section is glued to the next 3 or 4 frames. This is the critical section and if the wale breaks it will break here. I like to bounce the piece into place starting back and moving forward until the wale touches the frames. Once again i am using the super glue.

Beyond the critical section and gluing the wale out to frames 8 to 10. Still using the super glue. Note the wale is sitting flat on the face of the frames.

finally all the way to the mid section.

Last edited:
- Joined
- Dec 1, 2016
- Messages
- 6,379
- Points
- 728

From mid-section to the stern the wale is glued in place in one go. I changed the glue from super glue to Titebond wood glue. The reason it so i have more working time to place the wale. Once the super glue touches the frame it is there to stay and i do not want that to happen. Take note the wale is pinched against the upper strake which was glues in place. This section is pretty flat to the wale does not have to be pulled to the frame face. At the stern the wale takes a slight bend and twist thus the use of the bigger clamps.
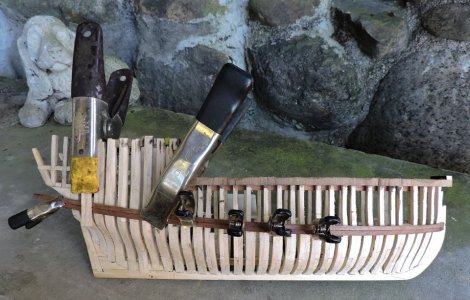
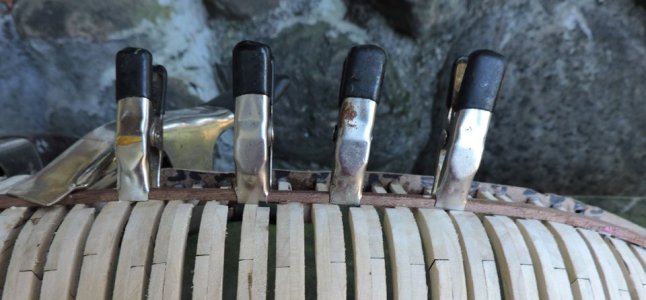


- Joined
- Dec 1, 2016
- Messages
- 6,379
- Points
- 728

The wales on a hull are usually dark colored and stand out so it is critically important you have a sweet arc to the wale. The wales on the Hawke follow the sills of the gun posts the take a gentile curve to the stern where they stop at the wing transom. to get that upward sweep clam the wale at the last gun port and move the end to the transom height. If you did a good job at fairing the hull the wale will take a natural bend and follow the shape of the hull.
A tip on bending wales or any hull planking. You should never have to force a hull plank in place. If you fair the hull and gave proper shape to the plank it will flow naturally to the shape of the hull.
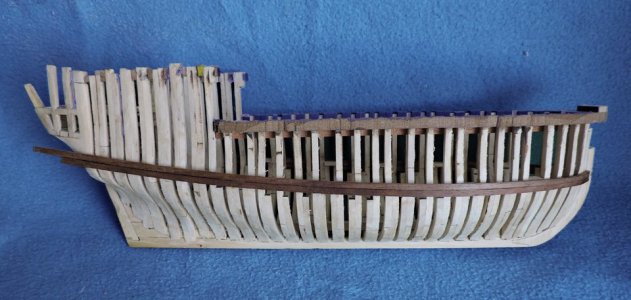
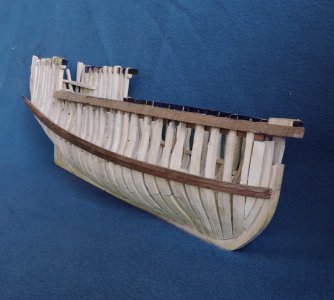
Once the wales are in the hull becomes stable and all the frames are held in place.
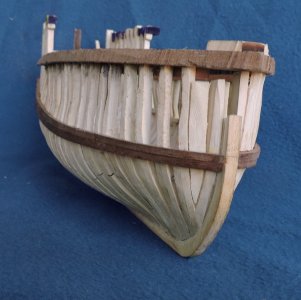
At the bow make sure both wales on either side line up
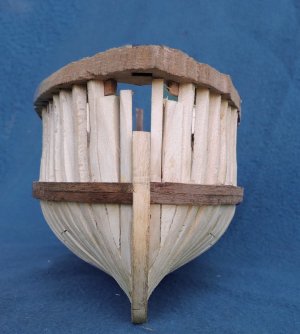
Wales on the plank on frame hull is a belt running from stem to stern which will give shape to the bulwarks to the cap rail and give a hull that added strength.
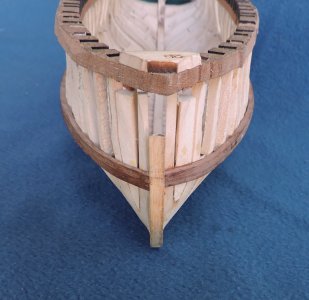
A tip on bending wales or any hull planking. You should never have to force a hull plank in place. If you fair the hull and gave proper shape to the plank it will flow naturally to the shape of the hull.


Once the wales are in the hull becomes stable and all the frames are held in place.

At the bow make sure both wales on either side line up

Wales on the plank on frame hull is a belt running from stem to stern which will give shape to the bulwarks to the cap rail and give a hull that added strength.

Last edited:
- Joined
- Jul 11, 2023
- Messages
- 390
- Points
- 238

greeting @Dave Stevens (Lumberyard), I can't believe I missed your posts until today. Thanks for taking the time to develop this tutorial. I'm going back to page one for some reading.
Last edited:
- Joined
- Dec 1, 2016
- Messages
- 6,379
- Points
- 728

Now that the wales are done it is time to move on to the next step. Here is where plank on frame and plank on bulkhead part ways. A plank on frame hull requires installing the deck clamps which is like a wale on the inside of the hull. a plank on bulkhead hull simplifies construction and includes the clamps and deck beams into the shape of the bulkhead.
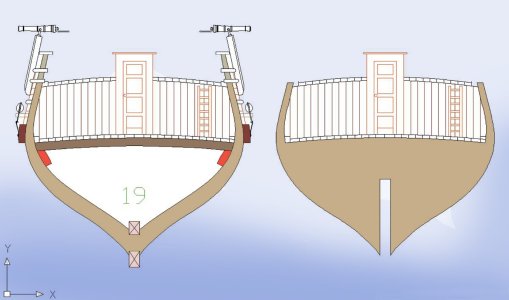
let's take a look at the drawing of the hull. The upper belt is the main wales the lighter belt is the clamp inside the hull. These two timbers give the hull Longitudinal strength. The hull is set and it will not bend or twist and the framing is held in place.
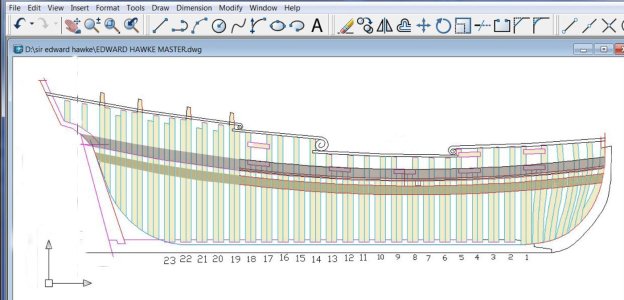
You need to know exactly where the deck clamp is placed. the way to find out where the clamp goes is to measure from the drawings. using the top of the gun post sills measure down to the top of the clamp. On ship plans the heigh of the deck clamp is never drawn.
What is drawn is the height of the deck at the side or sometimes at the center. This line is either the upper red line which is the top of the deck planking or the line could be drawn to the top of the deck beam.
So to find the height of the clamp you need to know if the line on the drawing is "deck at the side", deck at the center" which means you also have to know the deck camber.
Ship term
The concept of camber is also similar to sheer but in a transverse sense. For most ships, the height of the deck is greater near the middle of the center line than the sides.
is the deck line at the top of the deck planking or at the top of the deck beam?
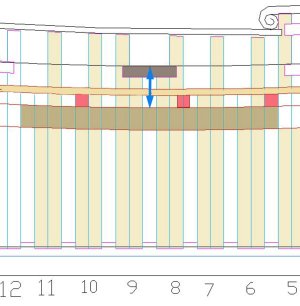
for the Sir Edward Hawke project this information is figured out and all you have to know is the measurement of .170 which is the blue arrow. A Plank on bulkhead hull you do not have to know any if this because it is all included in the shape of the bulkhead. The top of the bulkhead should be the top of the deck beams.
coming up in the next class is the deck clamps

let's take a look at the drawing of the hull. The upper belt is the main wales the lighter belt is the clamp inside the hull. These two timbers give the hull Longitudinal strength. The hull is set and it will not bend or twist and the framing is held in place.

You need to know exactly where the deck clamp is placed. the way to find out where the clamp goes is to measure from the drawings. using the top of the gun post sills measure down to the top of the clamp. On ship plans the heigh of the deck clamp is never drawn.
What is drawn is the height of the deck at the side or sometimes at the center. This line is either the upper red line which is the top of the deck planking or the line could be drawn to the top of the deck beam.
So to find the height of the clamp you need to know if the line on the drawing is "deck at the side", deck at the center" which means you also have to know the deck camber.
Ship term
The concept of camber is also similar to sheer but in a transverse sense. For most ships, the height of the deck is greater near the middle of the center line than the sides.
is the deck line at the top of the deck planking or at the top of the deck beam?
for the Sir Edward Hawke project this information is figured out and all you have to know is the measurement of .170 which is the blue arrow. A Plank on bulkhead hull you do not have to know any if this because it is all included in the shape of the bulkhead. The top of the bulkhead should be the top of the deck beams.

coming up in the next class is the deck clamps
- Joined
- Dec 1, 2016
- Messages
- 6,379
- Points
- 728

greeting @Dave Stevens (Lumberyard), I can't believe I missed your posts until today. Thanks for taking the time to develop this tutorial. I'm going back to pages one for some reading.
thank you Lorace if you find the classes interesting you can save it as a PDF file see instruction on how to do that.
- Joined
- Dec 1, 2016
- Messages
- 6,379
- Points
- 728

Good morning class today we will be taking about clamps not a clamp like a C or spring clamp but a component of a ship's hull.
There are two types of clamps the sheer clamp and the deck clamp
Sheer clamp
If a boat has ever caught your eye, you have probably admired its "sheer". In profile, the sheer line runs from bow to stern where the hull and deck meet. It is one of the most distinctive visual features of a boat. An important structural component of the boat runs along the sheer line - the sheer clamp. In addition to adding strength to the boat in a location where it is susceptible to impacts (the sheer would likely be the first point of contact if the boat were to hit a piling or a larger boat), the sheer clamp is used to make a strong connection between the hull and the deck of a boat
Deck clamp
Deck clamps are crucial components in shipbuilding, serving as a structural member that runs on the inside of the frames, just under the deck beams. They are essential for providing strength and stability to the hull, especially at points of impact. The clamps are typically made from materials like Douglas fir, which is known for its good rot-resistance and strength. The construction of deck clamps involves steam bending and is a critical part of the boat's design and construction process
i cannot tell you if the two terms are interchangeable or if they are separate component in a hull. I found conflicting information. a sheer clamp runs under the cap rail and a deck clamp runs under the deck beams. Maybe, i don't know for sure.
Todays class is about the deck clamp and how to install it.
- Joined
- Dec 1, 2016
- Messages
- 6,379
- Points
- 728

Before working on the inside of the hull i cut down the extension's above the frames that fit into the jig. The biggest issue with framing a hull is keeping the frames in place and adding support to the framing so the hull can be sanded without breaking frames. Once the wales are added the frames are kept in place and the hull is much stronger so cutting it away from the jig can be done.
The height of the cap rail gives a sheer to the hull and its exact location is important. What Harold Hahn did was to take measurements off the drawings and transfer them to the hull.
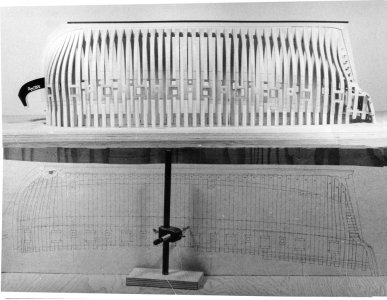
At some point he discovered using a template is a good idea.
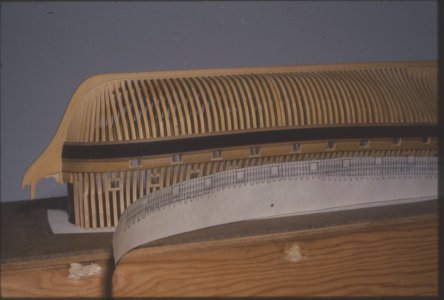
What i did was cut a template from the top of the wale to the cap rail and set it against the hull
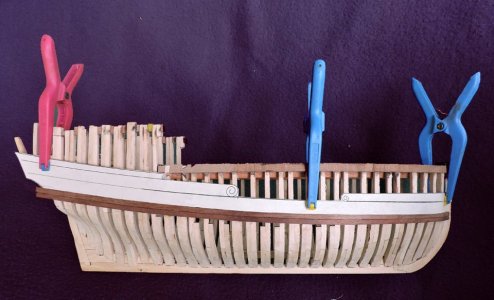
now i know exactly where the sap rails are and cut the hull down but not to the template but a little higher up. This will give me a little room later on when i plank the upper works of the hull.
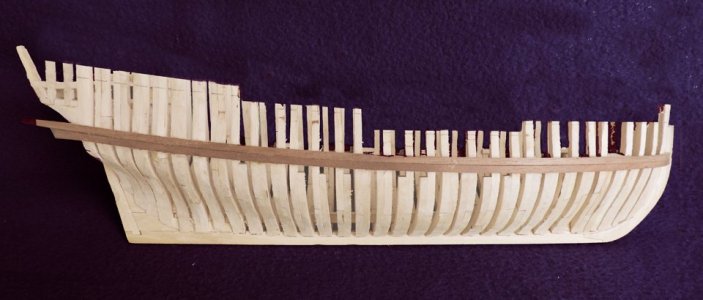
The height of the cap rail gives a sheer to the hull and its exact location is important. What Harold Hahn did was to take measurements off the drawings and transfer them to the hull.

At some point he discovered using a template is a good idea.

What i did was cut a template from the top of the wale to the cap rail and set it against the hull

now i know exactly where the sap rails are and cut the hull down but not to the template but a little higher up. This will give me a little room later on when i plank the upper works of the hull.

- Joined
- Dec 1, 2016
- Messages
- 6,379
- Points
- 728

Looking at the inside of the hull at the bow and stern you can see there are no bevels to the frames. They are stepping from one to the other. Like the outside of the hull the faces of the frames have to flow into one another so the clamps can rest against the frames. There are other ways to approach beveling the inside of the frames. One way is to build the bow back to the full frames leaving an open space so you can get into the hull and sand them. Another method is to bevel the frames before you install them into the hull. Same idea applies to the stern, some builders will build the stern and bevel the frames inside and out before continuing to frame the rest of the hull. Looking at the photos obviously i built the hull first without beveling the frames.
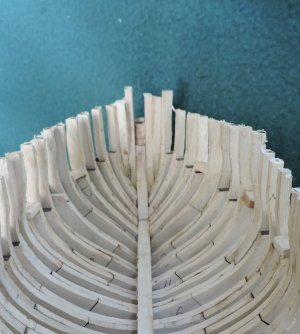
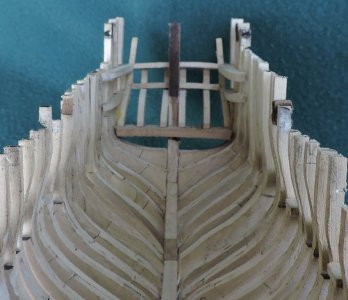


- Joined
- Dec 1, 2016
- Messages
- 6,379
- Points
- 728

Over the years i have noticed model builders tend to make their own tools for certain needs. Sanding the inside of the hull required i get a little creative in sanding tools.
You can purchase felt polishing wheels which make perfect sanding disks. I use E6000 glue because it is flexible and it holds tight to the felt and the sanding strip. Do not buy sandpaper it is to thin and will wrinkle when used. but sanding belts they are much thicker and stronger.
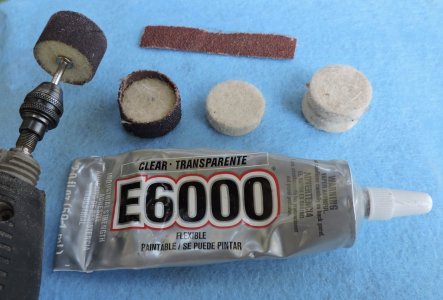
i have wrapped sanding strips around bottle caps. They usually have a dimple in the center great for drilling a hole in the exact center. Also, if you need a longer reach use a screw and if you cannot find one small enough to fit the Dremel grind the end. Using a hard bottle cap acts more like a grinding wheel and cuts fast.
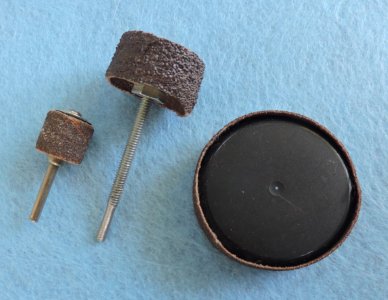
in the other direction gluing sanding belt disks to the flat side you have sanding disks. The felt wheels come with a screw shaft and they really hold tight. The sanding disk on the small felt wheel is larger so it can bend to the curved shape of the frames.
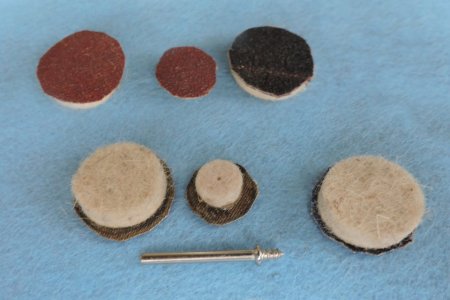
you can get creative and make disks out of a lot of different things
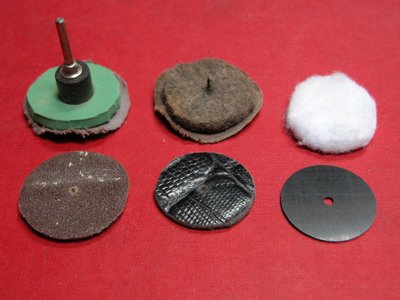
soft flexible disks will conform to any shape
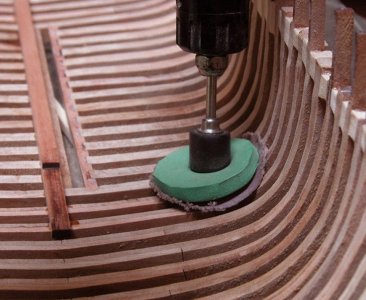
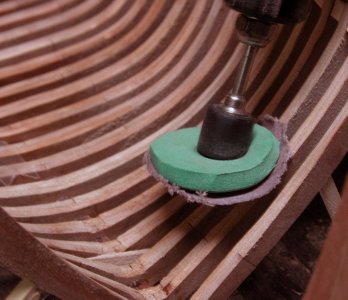
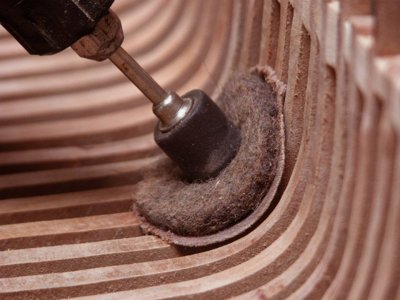
Armed with a selection of disks sand away. I use a 90 degree attachment as well as just inserting a disk in the Dremel.
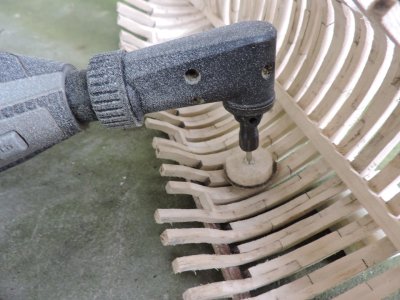
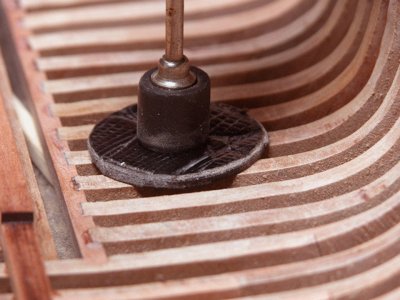
You can purchase felt polishing wheels which make perfect sanding disks. I use E6000 glue because it is flexible and it holds tight to the felt and the sanding strip. Do not buy sandpaper it is to thin and will wrinkle when used. but sanding belts they are much thicker and stronger.

i have wrapped sanding strips around bottle caps. They usually have a dimple in the center great for drilling a hole in the exact center. Also, if you need a longer reach use a screw and if you cannot find one small enough to fit the Dremel grind the end. Using a hard bottle cap acts more like a grinding wheel and cuts fast.

in the other direction gluing sanding belt disks to the flat side you have sanding disks. The felt wheels come with a screw shaft and they really hold tight. The sanding disk on the small felt wheel is larger so it can bend to the curved shape of the frames.

you can get creative and make disks out of a lot of different things

soft flexible disks will conform to any shape


Armed with a selection of disks sand away. I use a 90 degree attachment as well as just inserting a disk in the Dremel.


- Joined
- Dec 1, 2016
- Messages
- 6,379
- Points
- 728

the deck clamps are like the wales just inside the hull so we have to know exactly where they go. If the deck is too high or too low the cannons will not line up in the gunports, so how do we do that? Take a measurement from the drawings. From the top of the gun port sill to the top of the clamp.
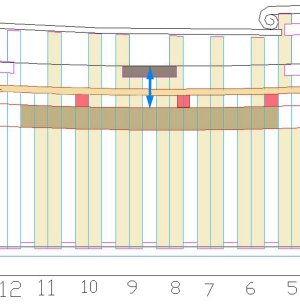
cut little blocks to the measurement
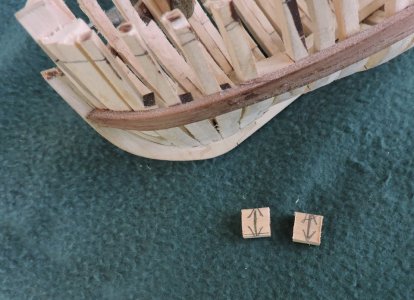
now line up the blocks to the top of the sills and C clamp them to the hull. What you are doing is making a stop so you can locate the top of the deck clamp and pull the deck clamp to the block.
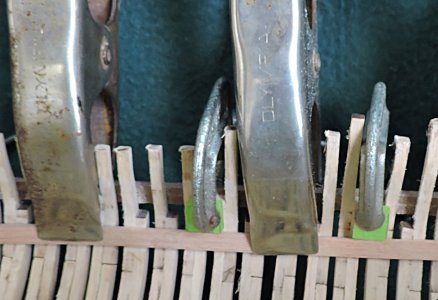
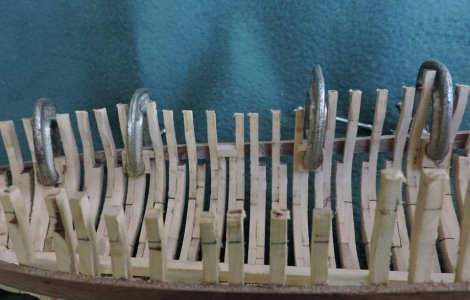
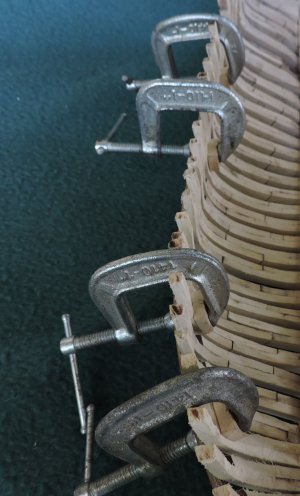

cut little blocks to the measurement

now line up the blocks to the top of the sills and C clamp them to the hull. What you are doing is making a stop so you can locate the top of the deck clamp and pull the deck clamp to the block.


- Joined
- Dec 1, 2016
- Messages
- 6,379
- Points
- 728

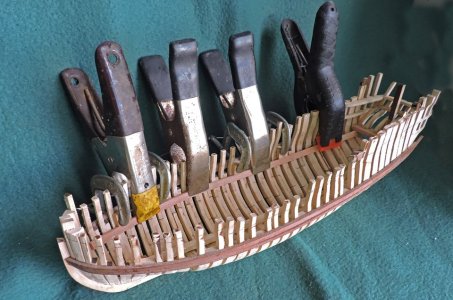
install the clamp cut to the length from bow to stern, pull it against the hull with spring clamps making sure it is up tight to the little blocks. Use a wood glue because you need a little time to make sure the clamps are in the right place. Believe me you do not want to use super glue or any fast-setting glue. you heed that time to fiddle and adjust the deck clamp and the clamps to hold it in place.

- Joined
- Dec 1, 2016
- Messages
- 6,379
- Points
- 728

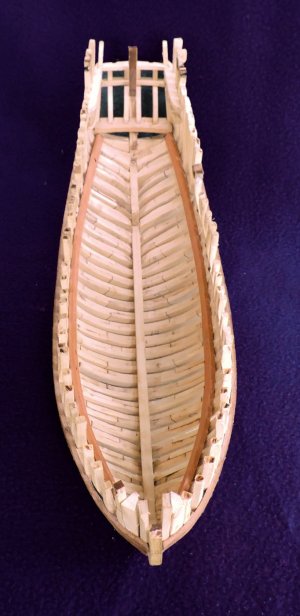
The deck clamps are now in the hull and you can see how they add strength. At this point the frames are sandwiched between the outer wales and the inner clamps. The frames will not move nor will the hull twist, bend or frames break that is below the clamps. The top timbers are still prone to breakage.
The wood used for the clamps is Beech a wood that likes to be bent. The clamps were bent dry no soaking in water or heat.
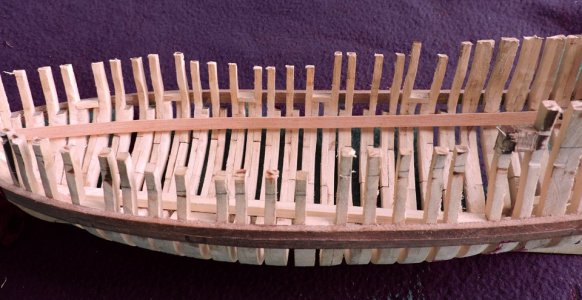
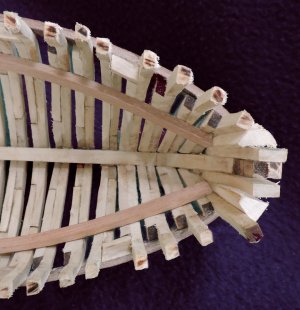
getting back to those inner bevels you can see the clamp rests against the frames at the bow and stern
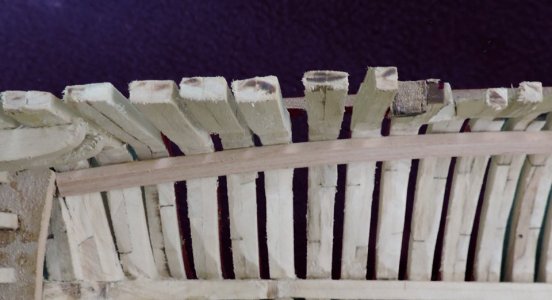
The wood used for the clamps is Beech a wood that likes to be bent. The clamps were bent dry no soaking in water or heat.


getting back to those inner bevels you can see the clamp rests against the frames at the bow and stern


- Joined
- Dec 1, 2016
- Messages
- 6,379
- Points
- 728

In closing here are a few tips and ideas
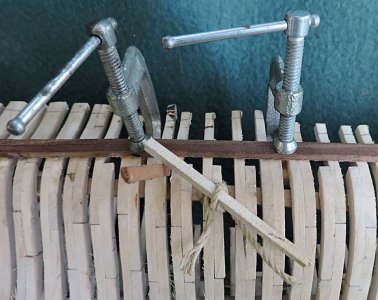
you may of notice the use of large spring clamps to hold the clamps in place and you thought hum? i don't have big clamps like that. Well! no worry you do not have to run out and buy clamps. Just use a piece of string and a scrap piece of wood. Wrap the string around the clamp
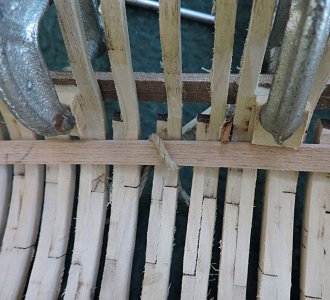
on the outside tie a knot, insert a piece of wood and twist. You need to wedge the twist and that is what the piece between the frames is doing, preventing the string from untwisting.
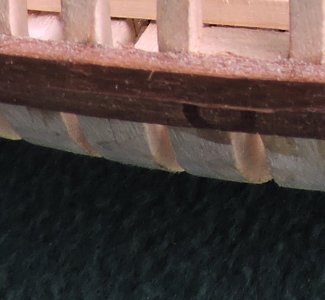
another thing to consider is the wood you select for your build. Here you see a mark left by the C clamp used to hold those blocks. Walnut was hard enough the dent is shallow and easily sanded out. So, if you select a softer wood that will need clamping there is a danger the clamp will leave a mark that cannot be sanded out.
you may of notice the use of large spring clamps to hold the clamps in place and you thought hum? i don't have big clamps like that. Well! no worry you do not have to run out and buy clamps. Just use a piece of string and a scrap piece of wood. Wrap the string around the clamp

on the outside tie a knot, insert a piece of wood and twist. You need to wedge the twist and that is what the piece between the frames is doing, preventing the string from untwisting.

another thing to consider is the wood you select for your build. Here you see a mark left by the C clamp used to hold those blocks. Walnut was hard enough the dent is shallow and easily sanded out. So, if you select a softer wood that will need clamping there is a danger the clamp will leave a mark that cannot be sanded out.

- Joined
- Dec 1, 2016
- Messages
- 6,379
- Points
- 728

As you build your model it is a process of refinement. Some master builders will finish each part then add it to the model, some builders like me will build a rough model and refine it as i go along. Two different approaches to a build.
next class we will be starting the upper works. Planking the outside bulwarks and refining the sheer.
thank you all for the 27,000+ views and those who support the school.
next class we will be starting the upper works. Planking the outside bulwarks and refining the sheer.
thank you all for the 27,000+ views and those who support the school.
Last edited:
Sorry to backtrack, but I have a question about wales. I'm beginning a model on which I'd like to make them from several pieces, and connect the pieces using scarf joints. Not only is this historically accurate, but my model will be rather large, so it might be difficult to find a piece long enough to make the wales from a single piece. So, what's the best way to go about this? Cut the scarfs, glue the pieces together, and then bend the wales? Try and cut a scarf into wood that's already been bent? Something else?
Sorry to backtrack, but I have a question about wales. I'm beginning a model on which I'd like to make them from several pieces, and connect the pieces using scarf joints. Not only is this historically accurate, but my model will be rather large, so it might be difficult to find a piece long enough to make the wales from a single piece. So, what's the best way to go about this? Cut the scarfs, glue the pieces together, and then bend the wales? Try and cut a scarf into wood that's already been bent? Something else?
Somebody else may have a better way of doing this, but, if I were you, and I needed a longer piece of wood for a wale, I'd be inclined to scarf two pieces together with a 12:1 glued flat scarf and install the full-length scarfed wale in one piece. If I then wanted to show "full-size as built" scarfs, I would draw them in or incise them with a scribe after the wale was installed. The reason I would do it this way is because it would seem that an "as built" scarf in miniature would be highly prone to creating a "hard spot" at the scarf which would be likely to produce an unfairness when the wale was installed on the frames. Wales are tricky to begin with because they are compound curves in both the vertical and horizontal planes. A 12:1 flat scarf should bend fairly as if a single grown length of wood.


