SHIP'S WHEEL

i fully understand scale and printing from the gothic steam enging i am designing. Most of the detail was to small for 1:48 scale so i am doing the diorama of the engine room in 1:32 scale which will allow more detail. An advantage to working from your own original CAD design allows you to tweak various areas or parts as apposed to using an existing design and just scaling it.
As for printing i will go with a resin printer so larger scale and a finer resin printer is at about the best you can do. Lucky there are thousands of resin printing services so that will be no problem
Also keep in mind that resin usually requires a primer coat prior to painting, or the paint will chip off easily. You can however carefully hit it with some steel wool to help with adhesion, prior to paint. If it is molded, then the release agent has to be cleaned off with soap and water using a toothbrush or equivalent.
Plastic will take paint well without any primer. Also resin requires using CA to be glued. A few more differences worth noting. ;)

safety tip - resin is highly toxic when inhaled...so always wear a mask when sanding.
 
Last edited:
thank you for the tips Dean
There is a lot to consider when it comes to printing i found someone who does super high resolution printing. i was also considering printing th engine in clear so all the interior parts can be seen.
but then again the way you finished that anchor is so good i may go with painting. The engine is iron and the boilers are copper.
You’re welcome! I think painting is fun. To simulate a cast iron, I typically paint black first and dry brush an antique silver on it. It’s good for bringing out detail too.
You can find a lot of nice colors in the small water based hobby paints. I got away from oil based. I even use water based stains now. Less fumes and clean up with water! ;)
 
Last edited:
scale printing and detail depends on the artist as well as resolution of the print and type of print.

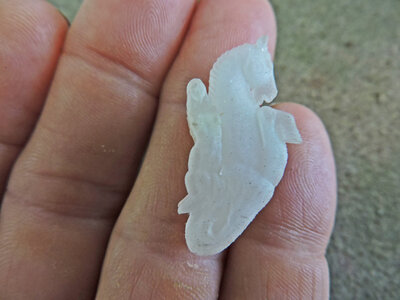
here is an example print of the figurehead for the Halifax in 1:48 scale, every last detail in the STL file is in the print. when this is painted and dry bruched all the detail will pop out.

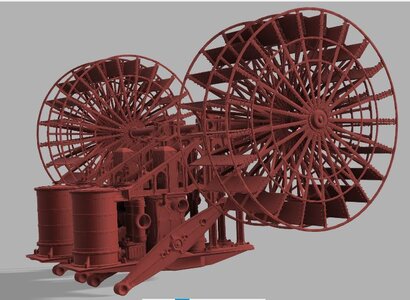
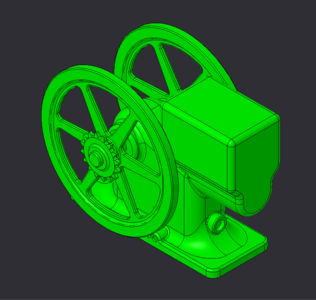
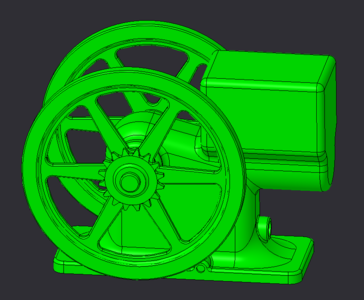
looking at the CAD drawing of your wheel i think you can get a top notch resin print.


DSCN3212.jpg
 
Dean not to many model builders have your skill sets to take a fitting like the wheel, do your own CAD and modeling work and then print a replacement for a kit part.
However you are ushering in a new era of model building. As this becomes more common the detail and accuracy is becoming more acute and the finer details can be achieved

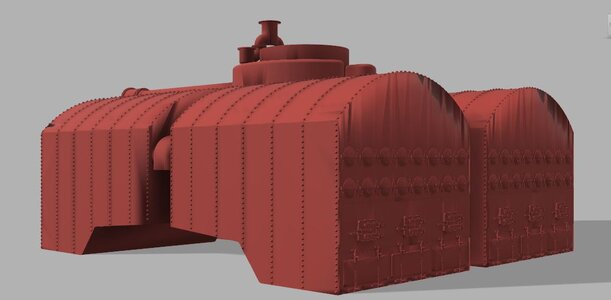
take the boilers for example
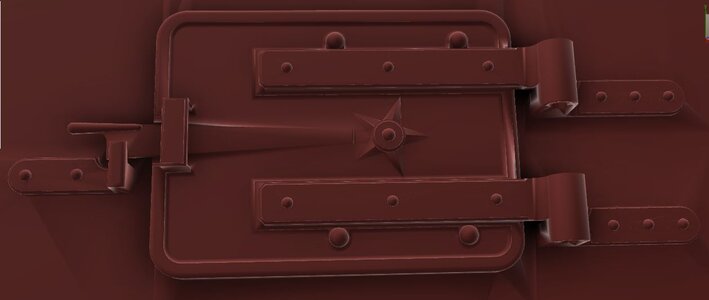
all the rivits are shown and as you liook closer at the fire dooes every detail is there which even at 1:32 scale the door will fit on the tip of your little finger.

maybe going as far as making working hinges so the doors open and close (extreme model engineering)


boilera12.JPGboiler5.JPG
 
Dean not to many model builders have your skill sets to take a fitting like the wheel, do your own CAD and modeling work and then print a replacement for a kit part.
However you are ushering in a new era of model building. As this becomes more common the detail and accuracy is becoming more acute and the finer details can be achieved

take the boilers for example
all the rivits are shown and as you liook closer at the fire dooes every detail is there which even at 1:32 scale the door will fit on the tip of your little finger.

maybe going as far as making working hinges so the doors open and close (extreme model engineering)


View attachment 239176View attachment 239177
Very nice detail! This will look fantastic painted and dry brushed! I am very interested to see your final product, it looks like something I would want to build! :)

You can always print the doors as separate items and use pins to attach. But as you know, the tolerance at full scale will end up being drastically reduced at model scale. So if you had a 1/16 or .0625” clearance at full scale…this would end up being .001” or most likely an interference at 1:32 scale! At 1:72 scale you loose all your tolerance and most definitely have an interference! So you have to open up tolerance on the full scale part in order to maintain clearance at printed scale. Plus you have to factor in the ability of the printer to hold tolerance. So if the printer it is off by even .005", then you have an interference! ;)
So making moving parts at printed scale, requires opening up clearance on the full scale model. All comes with the territory.

Often we making working models for prototypes in R&D, in which case I have to reverse Engineer the tolerance by figuring out what clearances I want in the working printed model, and then factor in the scale, and go back and change the full scale models to have the appropriate tolerance. That will always differ from actual tolerance.
For instance, if the actual part has a .005" diametrical clearance for a tight sliding fit, even a 1:4 scale, the part would end up with no tolerance to move, as it would have an interference due to printer tolerance. So if on the working model I want a .015" clearance, I would have to open it up to .060” clearance on the full scale model. This is far different than the actual manufactured part!
So I make a different part for printing models. I can’t just scale an actual part using the manufacturing tolerances and feature sizes (holes, shafts, etc.). So moving models at scale, require you factor all that in. Hope I am being clear in my explanation....lol
 
Last edited:
scale printing and detail depends on the artist as well as resolution of the print and type of print.

here is an example print of the figurehead for the Halifax in 1:48 scale, every last detail in the STL file is in the print. when this is painted and dry bruched all the detail will pop out.

looking at the CAD drawing of your wheel i think you can get a top notch resin print.


View attachment 239175
Very nice! Agreed on the resin quality. I am contemplating buying a resin printer. :p
 
This is far different than the actual manufactured part!
So I make a different part for printing models. I can’t just scale an actual part using the manufacturing tolerance. So moving models at scale requires you factor all that in. Hope I am being clear in my explanation....lol


actualy it quite clear this goes from model building to model engineering so to make this model move the connectiong arms, the lever arm and turn the water wheels comes down to engineering at a small scale.

as you said resin printing has its limits in size but if the parts can be glued together than size would not matter that much. I wonder if resin casted parts can be machined to work in a model?

engine wheels5.JPG
 
This is far different than the actual manufactured part!
So I make a different part for printing models. I can’t just scale an actual part using the manufacturing tolerance. So moving models at scale requires you factor all that in. Hope I am being clear in my explanation....lol


actualy it quite clear this goes from model building to model engineering so to make this model move the connectiong arms, the lever arm and turn the water wheels comes down to engineering at a small scale.

as you said resin printing has its limits in size but if the parts can be glued together than size would not matter that much. I wonder if resin casted parts can be machined to work in a model?

View attachment 239183
As far as I know, resin is more brittle than plastic and breaks easier. But I think fixturing is the biggest problem with machining small parts, and sometimes tool access depending on part geometry. So if you plan to machine any surfaces, you may consider how it will be held or fixtured to be machined. This may even require you add additional material just for machining, that will be removed afterwards, further complicating part design.

But I have heard of good results machining resin once fully cured. You just can't create too much heat. So with the right cutters and cooling the part while machining, it can be done. Usually CNC is the best method, and would be easier to fixture verse turning a part.

Also you may find this interesting...metal printing, not sure how cost effective it is. You can get some quotes to compare. I am sure the type material you choose would be the biggest factor in cost.
 
Last edited:
As far as I know, resin is more brittle than plastic and breaks easier. But I think fixturing is the biggest problem with machining small parts, and sometimes tool access depending on part geometry. So if you plan to machine any surfaces, you may consider how it will be held or fixtured to be machined. This may even require you add additional material just for machining, that will be removed afterwards, further complicating part design.

But I have heard of good results machining resin once fully cured. You just can't create too much heat. So with the right cutters and cooling the part while machining, it can be done. Usually CNC is the best method, and would be easier to fixture verse turning a part.

Also you may find this interesting...metal printing, not sure how cost effective it is. You can get some quotes to compare. I am sure the type material you choose would be the biggest factor in cost.
This is all in a galaxy far, far away from my own sandy beach harbor. It is rewarding to see what the new technologies and skill sets using those bring forth. Very well done. Rich (PT-2)
 
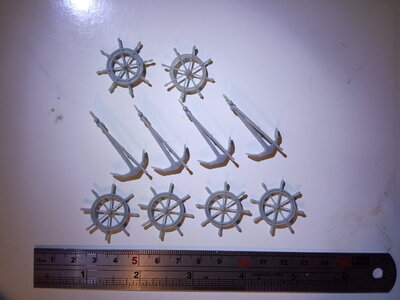
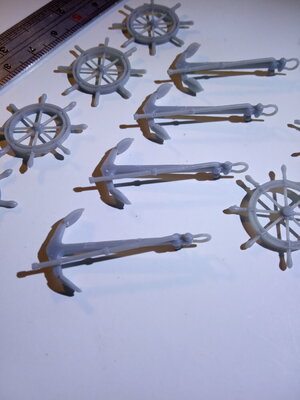
The first results in resin
3 different wheels based on the latest adjustments by Dean

In the photo it still looks so visible, but that will come when I bring the Airbrusch along

I will spray 1 with Alclad bronze and Alclad chrome, the third gets a old weathered wooden look
IMG_20210615_202720.jpg
 

Attachments

  • IMG_20210615_202710.jpg
    IMG_20210615_202710.jpg
    134.7 KB · Views: 12
  • IMG_20210615_181418.jpg
    IMG_20210615_181418.jpg
    146.9 KB · Views: 12
Agreed! Now that all that submarine experience will stand you in good stead! :)
 
The first results in resin
3 different wheels based on the latest adjustments by Dean

In the photo it still looks so visible, but that will come when I bring the Airbrusch along

I will spray 1 with Alclad bronze and Alclad chrome, the third gets a old weathered wooden look
View attachment 239339

Do you have Alclad Bronze ? On the other thread you mentioned you have Polished Brass.

Do you have a link ? I would like to buy it.

Thank you !!!
Daniel
 
The first results in resin
3 different wheels based on the latest adjustments by Dean

In the photo it still looks so visible, but that will come when I bring the Airbrusch along

I will spray 1 with Alclad bronze and Alclad chrome, the third gets a old weathered wooden look
View attachment 239339
The wheel that is top right is actual scale, without modifications for printing. That one looks very nice!
 
i too agree that wheel top right looks the best and comes the closest to the actual wheel.

this is exactly what the hobby needs and that is feedback from the builders to the kit manufactures, not only giving suggestions to a manufacture but provide an actual piece, printing files etc.

cooperation at it best

good job everyone
Thank you Dave! Unfortunately the pic of that wheel, is of the back side with the shaft, and not the front with center hub and hex. But I am sure Henk will produce a well painted version for our viewing!
 
Last edited:
one of the areas CAD, 3D modeling and printing will really shine is in the age of steam to modern vessels where machinery is used.

in the age of sail the difficult part of modeling is the carving of a figurehead and all the stern carvings. Most builders do not have the skills to pull that off. I think the same applied to ships 1830s forward like tug boats work boats steam etc. Creating the machinery like carvings is difficult. Now we have the ways and means to create in fine detail machines ,but the skill to do it is very limited to a select few.
You saw a need for a better wheel so you created one from scratch and someone printed it, out of the over 7,000 members on the forum how many can do that?

i am a fan of steam punk and that is what drew me to doing the engine room diorama. The age of sail is great in its own right but from the 1830s forward adds so much more.

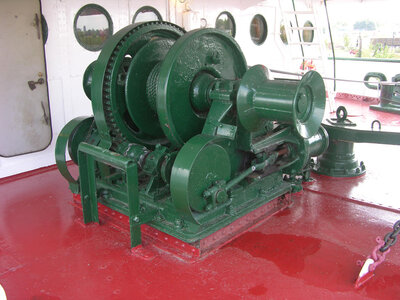
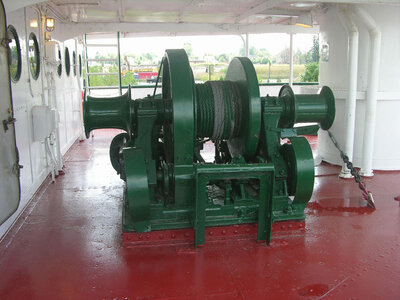
DSCN9670.jpgDSCN9671.jpgDSCN9672.jpg
 
one of the areas CAD, 3D modeling and printing will really shine is in the age of steam to modern vessels where machinery is used.

in the age of sail the difficult part of modeling is the carving of a figurehead and all the stern carvings. Most builders do not have the skills to pull that off. I think the same applied to ships 1830s forward like tug boats work boats steam etc. Creating the machinery like carvings is difficult. Now we have the ways and means to create in fine detail machines ,but the skill to do it is very limited to a select few.
You saw a need for a better wheel so you created one from scratch and someone printed it, out of the over 7,000 members on the forum how many can do that?

i am a fan of steam punk and that is what drew me to doing the engine room diorama. The age of sail is great in its own right but from the 1830s forward adds so much more.

View attachment 239398View attachment 239399View attachment 239400
That is where I shine, because I design Oilfield equipment that involves mechanical, structural, hydraulic, etc.
So all of the elements that you see in your pictures, I work with... like the structural frame, motor, valves, etc. and of course all of the hardware that goes with it.
I have worked on Top Drives for rigs, Mud motors, Subsea stacks with Blow Out Preventers and Connectors, Riser Equipment, etc., too many products too list!
So when it came time to scratch build something mechanical for the ship, I realized I had a unique advantage of creating my own parts if I chose. Funny it is only recently that I have chosen to use my CAD skills in model building. I could have designed and printed my own custom model. And perhaps one day I will do that. ;)
 
Back
Top