Signet's Bonhomme Richard Cross Section [COMPLETED BUILD]

One thing I have learned about ships pumps is there were two types, and uses.

The bilge pumps were to pump water overboard from the keel of the ship, from normal leaks, and rough seas, or damage in battle.

They were bigger pumps with multi persons to operate them for speed and efficiency.

Then there were the smaller pumps, often called Elm Pumps, which actually pumped fresh sea water up to the upper decks.

This clean fresh water was used to clean the ship and decks, and help put out fires if needed. They usually has a small opening in lower hull to pull in this water.

Hopefully Uwe or other master builder can expand more on this.
 
No, sto chiedendo dei pezzi più grandi a cui si attaccano le frecce rosse. In realtà vedo solo la piccola area in giallo sulla build di Stan e ho pensato che fosse un piccolo errore, che sarà comunque coperto in seguito. Il post di Ewek, e altri post che ho controllato, non hanno il piccolo riempitivo che hai mostrato in giallo.

Il post di Ewek lo mostra prima dell'installazione delle parti in questione:
[ALLEGARE=completo]281968[/ALLEGARE]
E poi con le parti installate:
[ALLEGARE=completo]281969[/ALLEGARE]

Ho tutte le altre parti, mi mancano solo le informazioni su quelle precedentemente identificate con le frecce rosse.
Buongiorno Sigillo, spero di farti cosa gradita con questi allega
 
Last edited:
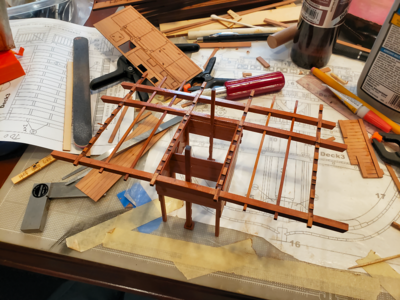
To clarify some of my questions concerning the Pump Well: As those familiar with the BH kit with optional inside structure and the construction of similar 74s, there are two structures, buildings, really, that go from the keel to the top of the lower gun deck, and are enclosed in the hold and on the orlop deck:

View attachment 284282View attachment 284283
Item 7 is the Pump Well, and item 8 the Shot Locker. Each are approximately 16' high and 8' wide, while the shot locker is about 5' long (longitudinal to the ship) and the pump well 6' long.

The Pump Well then is 5' x 8' x 16' high, spanning the hold and orlop deck, and encloses the main mast, the 4 royal (elm-wood) pumps and near the keel, most of the mast step. he pumps themselves are long double-cylindric-shaped apparatus the start either side of the keel, and end above the middle gun deck (Deck 1 on the model). The suction for the pumps lies just above the bottom hull outer planking:

View attachment 284328

When the pumps are operated, water is brought up through them to the middle gun deck, where it is pushed out on deck and, hopefully, overboard. So that normal seepage into the ship will seek the low point, past the limber boards where bilge water normally accumulates.

This next part is an assumption by me: I feel that unless the ship has a major leak, that the water level at the bottom of the pumps will be lower than the planking of the hold (about the top of the keel). If water were to only partially fill the pump well, it would cover the mast step, contributing to rot etc. The Pump Wells, along with the royal pumps, were often added to ships, and were not a part of the original structure of many ships. Therefore, they would tend to be constructed basically as "rooms", as shown on the model and elsewhere. I would definitely NOT think these rooms, including the Pump Well, would be waterproof, and with sufficient leakage, tend to fill up this "well". The weight of water filling an 5' x 8' x 16' well would amount to 20 tons! Therefore, I don't think that under normal conditions the pump well would have any water in it to speak of, other than due to sloshing, rough seas, pump leakage, etc. If it started filling up, it would leak into adjacent areas, like the shot locker.

IF my assumption is true, then my question above follows: Why enclose it, limiting storage and access to the pumps, main mast, mast step, etc.?

It doesn't matter to the model; the structure is there and I'm going to model it. I was just curious about its purpose, and if others want to argue that as it's a well, it's normally half full with 10 tons of water or whatever, I'm not going to argue as I don't know the facts.

Perhaps I should just stick to the model, rather than the ship's operation, which is complex enough in itself. :)

For those with less than 300 years of sailing experience, any thoughts on the pump size question above? Are they undersize because it was different than a standard 74, or because the model-designer didn't have wood thick enough, so it was simplified?
Hallo my friend,
now I understand - many thanks for the additional informations and clarifications.
My problem was really here the difference in understanding what is the "well" - in my mind it was only the lower part of this area where the lowest part of the pump sits between the frames - where the bilge water stands and is collected, because it is the lowest part of the ships hull.
In Boudriot skecth is the complete room / area mentioned as "well", so my use of the wodring was wrong.
The room inside these walls up to the gun deck was never watertight, so if much more water came into the ship (because of bigger damages during action) the complete hold was getting under water.
The only reason for these walls was to separate the important structures from the storage areas in the hold.
The entire pump structure with all elements had to be permanently accessable for possible repair works - and it was necessary, that they can be also monitored at any time - with a damage or leak the ship could get in danger.
Also the inspection of the mast with mastfoot was important, so also because of this free access was important

Small additional info to Kurts post:
cleaning water for the decks etc. was not pumped from the bilge - here usually the ships had another pump, which had a connection through the planking to the seawater under the ship - this detail in form of a small hole is very rarely shown in any models
Such a seawter pump was also necessary and mainly necessary for fire fighting - the biggest risk for these wooden ships
To get an impression in addition a view into the pumps well room of my model
55k.jpg
 
Ciao amico mio,
ora ho capito - molte grazie per le ulteriori informazioni e chiarimenti.
Il mio problema era proprio qui la differenza nel capire cos'è il "pozzo" - nella mia mente era solo la parte inferiore di quest'area dove si trova la parte più bassa della pompa tra i telai - dove sta e viene raccolta l' acqua di sentina, perché è la parte più bassa dello scafo della nave.
In Boudriot skecth è l'intera stanza / area menzionata come "bene", quindi il mio uso del wodring era sbagliato.
La stanza all'interno di queste pareti fino al ponte dei cannoni non era mai a tenuta stagna, quindi se più acqua entrava nella nave (a causa dei maggiori danni durante l'azione) l'intera stiva andava sott'acqua.
L'unico motivo di queste mura era quello di separare le strutture importanti dai depositi nella stiva.
L'intera struttura della pompa con tutti gli elementi doveva essere permanentemente accessibile per eventuali interventi di riparazione - ed era necessario, che potessero anche essere monitorati in qualsiasi momento - in caso di danneggiamento o perdita la nave potrebbe essere in pericolo.
Anche l'ispezione dell'albero con piede d'albero era importante, quindi anche per questo era importante il libero accesso

Piccole informazioni aggiuntive al post di Kurts:
l'acqua di pulizia per i ponti ecc. non veniva pompata dalla sentina - qui di solito le navi avevano un'altra pompa, che aveva un collegamento attraverso il fasciame all'acqua di mare sotto la nave - questo dettaglio a forma di piccolo foro è mostrato molto raramente in qualsiasi Modelli
Una tale pompa per acqua marina era anche necessaria e principale necessaria per la lotta antincendio, il rischio maggiore per queste navi di l
 
Last edited:
Can Uwe or anyone remember if the plank with these slots is simply an expertly-pierced cut stripwood plank, or if it is/was in fact a laser-cut piece with the slots already in? If the latter, I've got to find them somehow, as there are no doubt other parts missing. If they were made, then I'm simply going crazy, but have everything I need.
These planks are thin beams where later on the deck planking is layed on top - this type of deck structure was often used by the french.

IMG_5468.JPG IMG_5470.JPG

IMG_5471.JPG

These planks are not part of the interior wall package, but are part of the "normal" section kit - they are made out of strip wood
I am not 100% sure, but I think, that they are these marked with red arrow

IMG_3501.JPG
 
To your question about the plywood templates of the interior walls, which I used at this time for a sandwhich with the planking.
Now, with more experience f.e. with my Le Coureur build, I would not use these templates fixed to the planking any more.
Maybe you want to take a look at the Coureur building log - here I showed the "making of" the walls in detail - post #263 ff
 
These planks are thin beams where later on the deck planking is layed on top - this type of deck structure was often used by the french.

View attachment 284378 View attachment 284379

View attachment 284380

These planks are not part of the interior wall package, but are part of the "normal" section kit - they are made out of strip wood
I am not 100% sure, but I think, that they are these marked with red arrow
Yes, those are the planks I am talking about. My question on this kit is whether there are laser-cut holes for them in the well and shot locker already in a plank of pear, or if the laser cut templates were used to cut those holes. As I said, I thought I saw a plank with such holes, but can't find it now and am not sure.
 
Hallo my friend,
now I understand - many thanks for the additional informations and clarifications.
My problem was really here the difference in understanding what is the "well" - in my mind it was only the lower part of this area where the lowest part of the pump sits between the frames - where the bilge water stands and is collected, because it is the lowest part of the ships hull.
In Boudriot skecth is the complete room / area mentioned as "well", so my use of the wodring was wrong.
The English word WELL has several meanings, of course:

1a: an issue of water from the earth : a pool fed by a spring
b: Source, origin
2a: a pit or hole sunk into the earth to reach a supply of water
b: a shaft or hole sunk to obtain oil, brine, or gas
3a: an enclosure in the middle of a ship's hold to protect from damage and facilitate the inspection of the pumps
b: a compartment in the hold of a fishing boat in which fish are kept alive
4: an open space extending vertically through floors of a structure
5a: a space having a construction or shape suggesting a well for water
b: the area behind a bar in which items used most frequently by a bartender are kept

So even a standard well in the ground doesn't have to be filled with water to be a well. Any amount of water would work.

But I see that 3a is exactly what we have here, and it's purpose is to protect from damage and facilitate the inspection of the pumps. Pretty much exactly as you suggested. And answers my question as to why it's there

Thanks all for their valuable information!
 
Yes, those are the planks I am talking about. My question on this kit is whether there are laser-cut holes for them in the well and shot locker already in a plank of pear, or if the laser cut templates were used to cut those holes. As I said, I thought I saw a plank with such holes, but can't find it now and am not sure.
you can check the easily in my post #158 of my building log

IMG_51961.jpg IMG_51941.jpg

 
cleaning water for the decks etc. was not pumped from the bilge - here usually the ships had another pump, which had a connection through the planking to the seawater under the ship - this detail in form of a small hole is very rarely shown in any models
Such a seawter pump was also necessary and mainly necessary for fire fighting - the biggest risk for these wooden ships

just to complete this information I would like to show the difference of a bilge pump and the fire-fighting pumps
sketches taken from the Anatomy of SHips book about the HMS Granado, which I build in moment


Bilge pump - usually close to the main mast

IMG-8912.jpg IMG-8913.jpg

Domestic and fire fighting pump - close to mizzenmast

IMG-8910.jpg IMG-8911.jpg

BTW: here you can see, that the "well" is only a smaller box in the hold protecting the main equipment of the pump structure
 
Thanks for that. Good to know. I will add that sometimes the bilge pumps were also called elm-tree pumps, as that was what they were usually made of.
 
Continuing some progress, placed a 1/16" brass pin to locate the mast, drilling mating holes in the center of the mast and in the matching location in the hull into the keel Added wedges/shims with eyes on either side to locate the mast per the original. Fits pretty well, is easily located, and once held by the master partners and wedges, should be held well.
1642888854088.png

I'm building the pump well and shot locker structure a bit differently than others: I'm building the structural members, hanging down from the beams and braces of the orlop deck. As often done in normal framing construction, and to help the rigidity of the structure, but also because it makes sense that would have been on the original, I've included diagonal and other braces to maintain the structure size and position before adding any planking.1642889089969.png

This picture shows the orlop deck and attached structure being continued, with some planking in place. I'm working from the top down, then will leave off some planking as I feel is appropriate to allow a view of the inside components.
1642889324056.png

You can see here how the pump well and shot locker structures hang from the orlop deck toward the bottom of the hull.
1642889632192.png
I'm building the upper structures separately, after doing the bottom part. Since they're built up, there's no reason for them to have to be continuous.

Applied a single coat of Danish oil to the structure so far to help get hard-to-get places. Per my glue test, the glues I'm using hold sufficiently to add on to this structure over the oil, once dry.

I like this technique of building the deck and detailing outside of the hull, then installing it, especially in this case due to all the fit conditions over the mast step. The lower gun deck, and especially those higher than it, probably won't be able to be done this way, due to other members being in the way, and the fact that the hull is the same width or narrower above the deck position, so there's no room to fit it. We'll have to se how that goes.
 

Attachments

  • 1642889542288.png
    1642889542288.png
    1.4 MB · Views: 15
BARREL QUESTION:
Since I wasn't sure what to do next, and since I was waiting for glue and/or oil to dry, I put together two of each size of barrel. The center supports were sloppy with Titebond Quick & Thick, which was fine. While I was trying to figure a way to hold all the staves in place, I glued the thin planked ends on. Ten minutes later I looked, and my perfectly flat and centered barrel ends had curled up along the grain, no longer attached. Seems the moisture in the glue causes the thin stuff to warp, outward. I used regular white glue on another, and immediately put a weight on top, but after 5 minutes or so, found it had shifted a bit, and had to relocate it. I tried some Titebond Instant Bond gel on another barrel, but still had to put weights on it.

Do others doing this kit, or similar barrels, have problems warping? If so, how did you fix it? Of course it could be placed in a small vise, but with so many of these I was hoping there was an easier way.

Likewise, what about the staves? How do I glue like 25 or so in place, held tightly at one or both ends. If they aren't even and neat, they'll look like crap of course.

Forum Question: Oh, I have like 8 or so threads of BR builds bookmarked for reference, but with some over 20 pages in size, is there a way to search for a word, like "barrel", just within that thread, to look for hints on the above or other topics?
 
FASSFRAGE:
Da ich nicht sicher war, was ich als nächstes tun sollte, und da ich darauf wartete, dass Klebstoff und / oder Öl trockneten, stellte ich zwei von jeder Fassgröße zusammen. Die mittleren Stützen waren mit Titebond Quick & Thick schlampig, was in Ordnung war. Während ich versuchte, einen Weg zu finden, alle Dauben an Ort und Stelle zu halten, klebte ich die dünnen Bretterenden an. Zehn Minuten später sah ich nach, und meine perfekt flachen und zentrierten Laufenden hatten sich entlang der Maserung zusammengerollt und waren nicht mehr befestigt. Scheint, dass die Feuchtigkeit im Kleber dazu führt, dass sich das dünne Material nach außen verzieht. Ich benutzte normalen Weißleim auf einem anderen und legte sofort ein Gewicht darauf, aber nach ungefähr 5 Minuten stellte ich fest, dass es sich ein wenig verschoben hatte und musste es verschieben. Ich habe etwas Titebond Instant Bond Gel auf einem anderen Fass ausprobiert, musste es aber trotzdem beschweren.

Haben andere, die dieses Kit oder ähnliche Läufe herstellen, Probleme beim Verziehen? Wenn ja, wie hast du es behoben? Natürlich könnte es in einen kleinen Schraubstock gesteckt werden, aber bei so vielen davon hatte ich gehofft, dass es einen einfacheren Weg gibt.

Ebenso, was ist mit den Dauben? Wie klebe ich etwa 25 oder so an Ort und Stelle, fest an einem oder beiden Enden gehalten. Wenn sie nicht gleichmäßig und ordentlich sind, sehen sie natürlich scheiße aus.

Forumsfrage: Oh, ich habe ungefähr 8 Threads von BR-Builds als Referenz markiert, aber mit einigen über 20 Seiten Größe, gibt es eine Möglichkeit, nach einem Wort wie "Fass" nur innerhalb dieses Threads zu suchen für Hinweise zu den oben genannten oder anderen Themen?
Hello Signet, I don't know what options and machines you have, but look at Patrik's report, that would be another way of making barrels. I did the same with my Le Coureur. My options were also limited (just a pillar drill).

Post in thread 'La Renommée - French Frigate 1744 (1/48) - Based on Monographie from J. BOUDRIOT'
https://shipsofscale.com/sosforums/...n-monographie-from-j-boudriot.2677/post-45969
 
Back
Top