Happy Birthday!
-

Win a Free Custom Engraved Brass Coin!!!
As a way to introduce our brass coins to the community, we will raffle off a free coin during the month of August. Follow link ABOVE for instructions for entering.
-

PRE-ORDER SHIPS IN SCALE TODAY!
The beloved Ships in Scale Magazine is back and charting a new course for 2026!
Discover new skills, new techniques, and new inspirations in every issue.
NOTE THAT OUR FIRST ISSUE WILL BE JAN/FEB 2026
You are using an out of date browser. It may not display this or other websites correctly.
You should upgrade or use an alternative browser.
You should upgrade or use an alternative browser.
- Joined
- Jun 28, 2020
- Messages
- 544
- Points
- 353

Hi Philski,Happy Birthday!
Sorry for the late reply.
Thank you for your birthday wishes.
- Joined
- Jun 28, 2020
- Messages
- 544
- Points
- 353

Production of the Silent Mary is back on track.
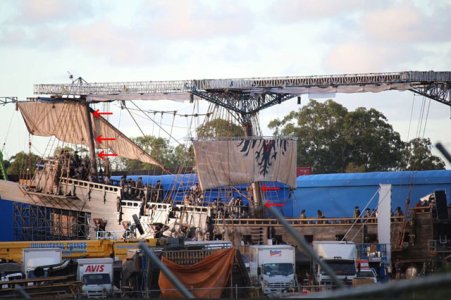
This is the construction of each lower mast on the Silent Mary. I have no idea from the materials I've found online whether each lower mast has a rope wrapped around it or is tightened with an iron hoop.
It is the red arrow part, but I don't know the details.
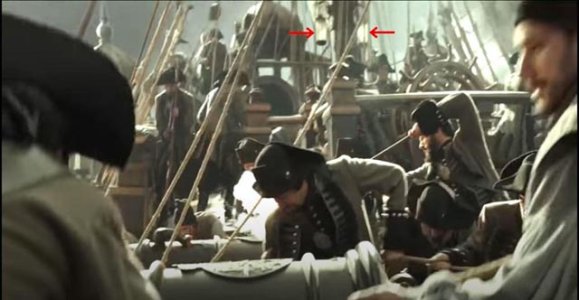
The mizzen lower mast seems to come with a lantern. It's quite a stylish lantern.
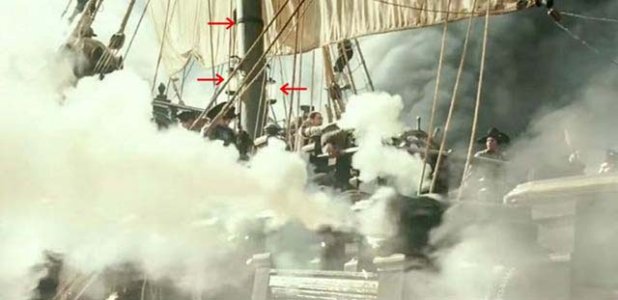
I am not sure if the red arrow part above is the rope or the iron hoop.
You can also see the lantern in this image. The bottom arrow part.
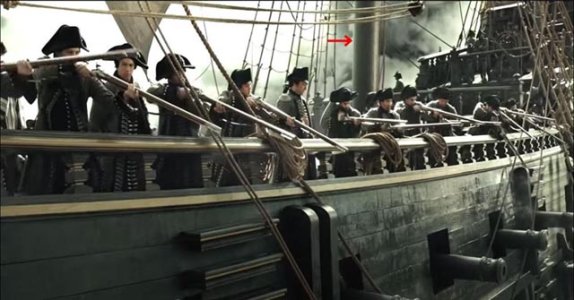
The red arrow is the main lower mast, but it looks like it doesn't have a rope or iron hoop attached.
It is sad that each lower mast has nothing attached to it, so I decided to at least attach an iron hoop. No cheeks or rubbing punches will be attached.
It looks like the main lower mast in the movie doesn't have anything attached to it.
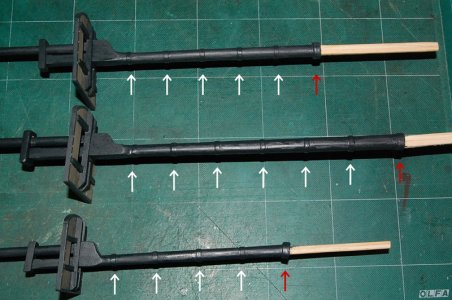
White arrow part, I cut a piece of notepaper 3mm wide and wrapped it around to make it look like an iron hoop.
The red arrow is intended to be a mast wedge.
I might repaint it light gray to make it look like a mast coat.
All the masts are painted in German gray.
Only the bottom plate and battens of each top platform were painted with a thinned oil stain (oak color).
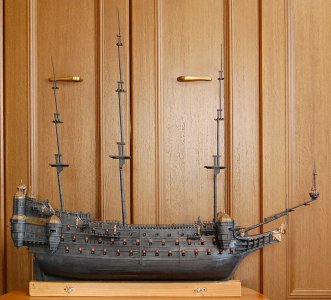
This is what it currently looks like. See photo above.
I'll start the standing rigging after I build the mizzen lower mast lantern.

This is the construction of each lower mast on the Silent Mary. I have no idea from the materials I've found online whether each lower mast has a rope wrapped around it or is tightened with an iron hoop.
It is the red arrow part, but I don't know the details.

The mizzen lower mast seems to come with a lantern. It's quite a stylish lantern.

I am not sure if the red arrow part above is the rope or the iron hoop.
You can also see the lantern in this image. The bottom arrow part.

The red arrow is the main lower mast, but it looks like it doesn't have a rope or iron hoop attached.
It is sad that each lower mast has nothing attached to it, so I decided to at least attach an iron hoop. No cheeks or rubbing punches will be attached.
It looks like the main lower mast in the movie doesn't have anything attached to it.

White arrow part, I cut a piece of notepaper 3mm wide and wrapped it around to make it look like an iron hoop.
The red arrow is intended to be a mast wedge.
I might repaint it light gray to make it look like a mast coat.
All the masts are painted in German gray.
Only the bottom plate and battens of each top platform were painted with a thinned oil stain (oak color).

This is what it currently looks like. See photo above.
I'll start the standing rigging after I build the mizzen lower mast lantern.
So gad to see you back at this, Mellpapa!
- Joined
- Jun 28, 2020
- Messages
- 544
- Points
- 353

Hi Namabiiru,So gad to see you back at this, Mellpapa!
Finally, I can get back to crafting the Silent Mary.
I made a total of 134 pieces of mellpapa choppers, or “straight angle cutters,” which you asked me to make for you. It took a long time because it was done by hand.
There may be more requests in the future, but I will continue to work on the Silent Mary.

Good to see you back working on the Silent Mary

- Joined
- Jun 28, 2020
- Messages
- 544
- Points
- 353

Hello Mr. Herman.Good to see you back working on the Silent Mary
We are resuming the crafting of the Silent Mary.
I'm sure I'll be uploading irregularly, but thanks for your patience.

- Joined
- Jun 28, 2020
- Messages
- 544
- Points
- 353

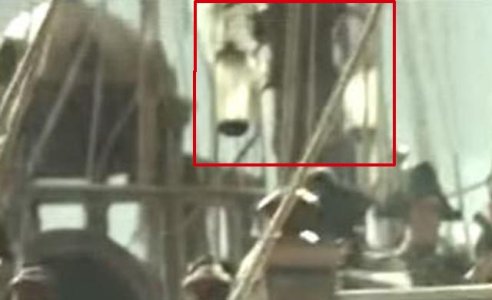
Enlarged view of the lantern portion of the mizzen lower mast in the reference image.
]
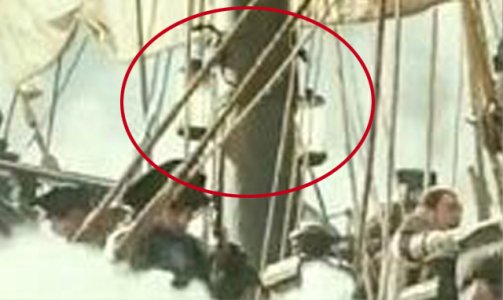
Here is another enlargement of the lantern portion of the mizzen lower mast from the reference image.
There are not enough images of the area around the mizzen lower mast, so I can't really make out the shape of the lantern.
I have to make it from my own imagination and prejudice.
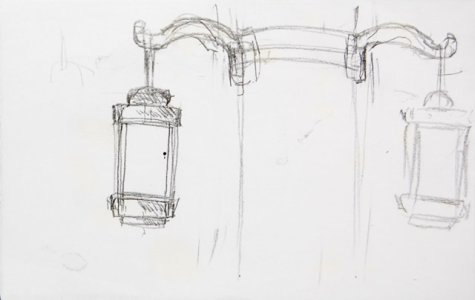
I drew a simple illustration.
Let's make it like this!
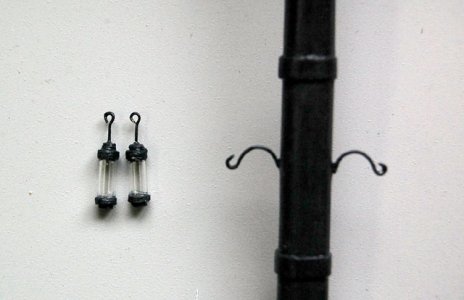
The lantern was made from Tamiya's transparent plastic material 3mm pipe and plastic board.
I used 0.5mm brass wire for the part to hook the lantern on the mizzen lower mast.
At any rate, I hope it's OK as long as it looks somewhat similar.
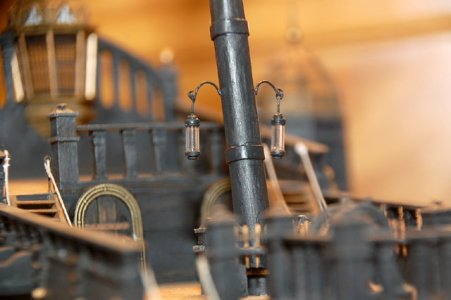
I hooked the lantern to the mizzen lower mast and fixed it with superglue and set it on the hull.
I should move the lantern closer to the mizzen mast. It is a little too far away from the mizzen mast.
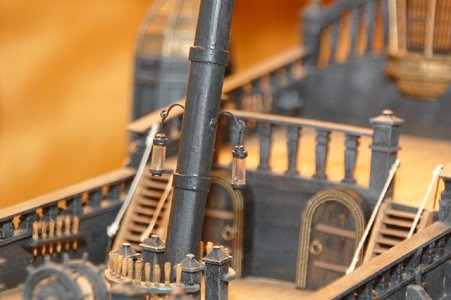
Here is an image from the port side.
I'll fix the hardware on the mizzen mast side tomorrow.
That's all for today.

Very nice lanterns!
- Joined
- Jun 28, 2020
- Messages
- 544
- Points
- 353

Hello, Namabiiru.Very nice lanterns!
It's very small and very cumbersome.
- Joined
- Jun 28, 2020
- Messages
- 544
- Points
- 353

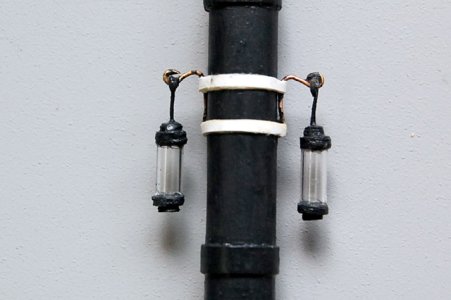
I fixed the hardware on the mizzen mast side. It is not symmetrical, but I don't care.
I wrapped some shredded notepaper around it to make it look like an iron hoop.
I thought, “Isn't the width of the hoop not quite right?” Don't say, "Isn't it too wide?
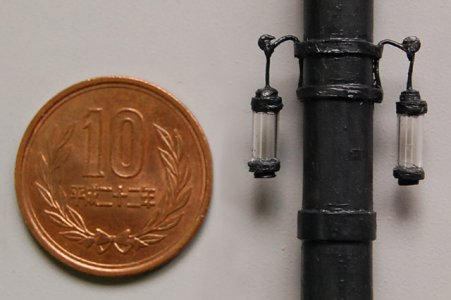
It is a brush painting in Jamanese gray.
I took this picture with a 10 yen coin on it to show the size of the lantern.
If you zoom in, you can see the roughness.
It's hard for me to do small crafts because of my old eyes.
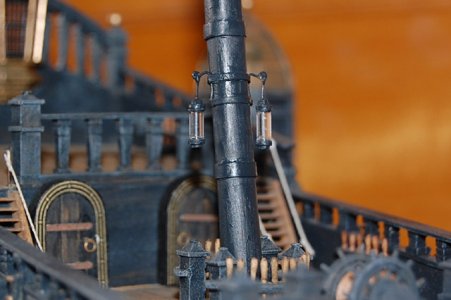
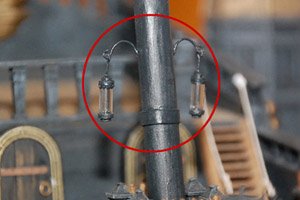
This is about the right position for the lantern that I installed the mizzenmast on the hull.
Compared to the lantern position before the repair, the repaired position is better.
The image on the right shows the lantern position before the repair. The area circled in red.
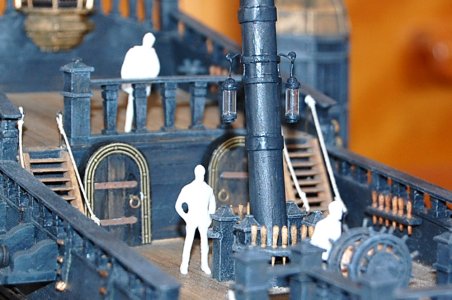
I placed a 1/72 - 1/75 sized architectural model figure on it and took a picture.
The purpose was to compare it with the lantern, but the size of the lantern seems to be comfortable even when combined with the figure, so this is "OK! I'm OK with it.
If it somehow resembles the lantern of the Silent Mary, it is OK!

Both before and after look great! I can’t call it a repair myself, because it already looked パーフェクト to me.
- Joined
- Jun 28, 2020
- Messages
- 544
- Points
- 353

Thank you, Namabiiru.Both before and after look great! I can’t call it a repair myself, because it already looked パーフェクト to me.
This is the part that is not clear from the image in the document.
If it looks a little like it, it's OK.

If I can be self-satisfied with the result of the craft, it's OK.

- Joined
- Jun 28, 2020
- Messages
- 544
- Points
- 353

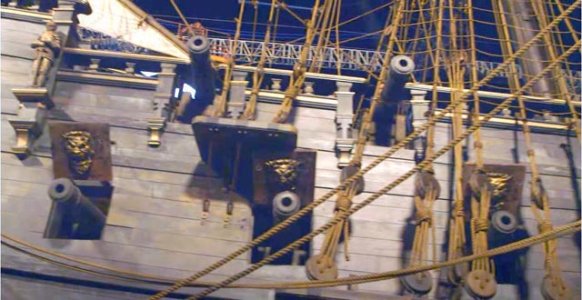
It's the main lower mast shroud in this image (the set for the photo shoot), but it's not black.
Normally it's black with tar, but it looks like they're not trying to replicate that much.
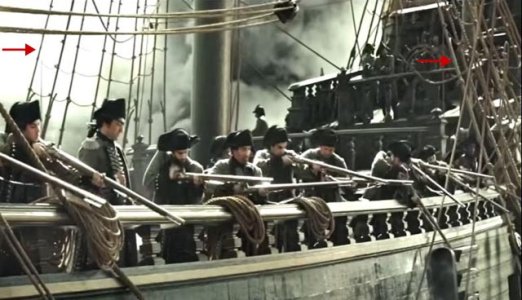
The shrouds on the main lower mast are not black here either. The shrouds at the front of the red arrow are entirely served, but the filming set does not reproduce them to that extent.
The model is not serviced in the same way.

I don't have a serving machine.
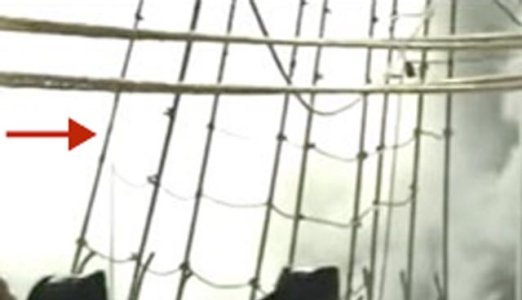
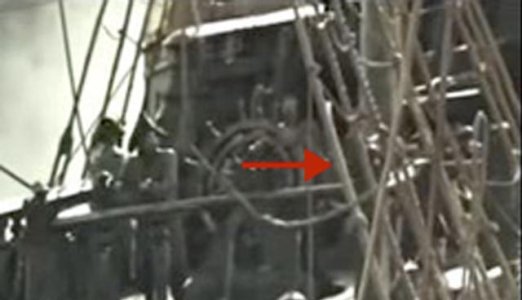
This is a magnified image of the red arrow area on the left side of the above image.
It does not appear to be circled.
This is an enlarged image of the right side image and the red arrow area on the right side.
This area also does not appear to be Serving.
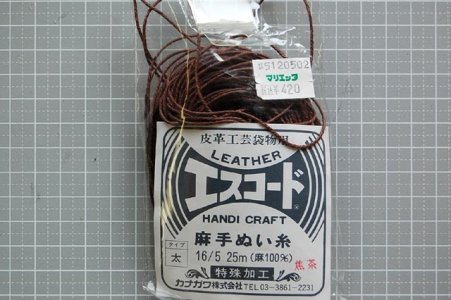
This thread is used for model shrouds.
The thickness is about 0.9mm to 1mm.
I found this thread at a handicraft store many years ago.
I bought it because it looked good for shroud ropes.
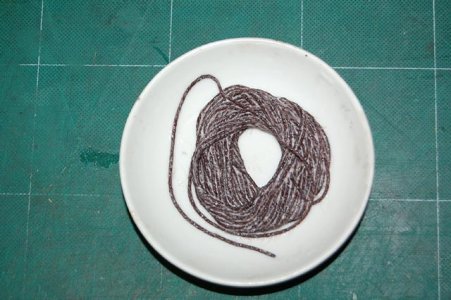
Thin the woodworking bond with water and dip the top thread into it.
After this, wring it out and roll it up.
The fluff is hardened with diluted woodworking bond.
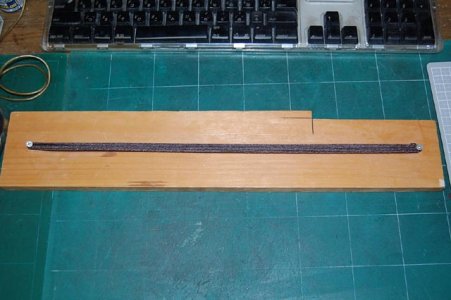
I just wind it up like this and let it dry.
Leave it overnight.
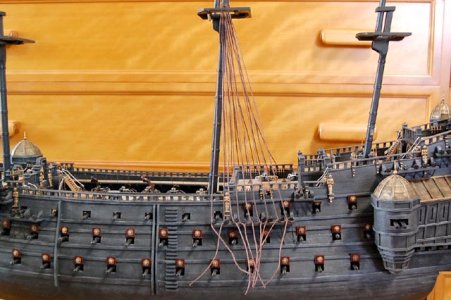
I soaked the rope in diluted wood bond and let it dry, then temporarily placed it on the hull.
It looks a bit silly, or maybe dark brown doesn't suit it. Black would be better.
I searched for a black yarn that would fit this thickness and found ......
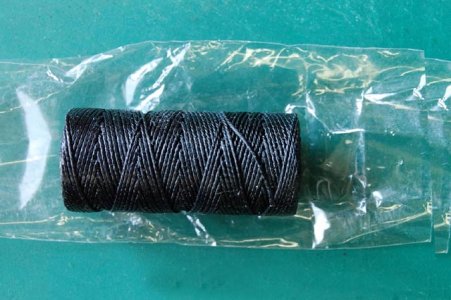
I found a piece of waxed black thread of the same thickness.
I think I bought it at a craft store several years ago.
Let's try using it.
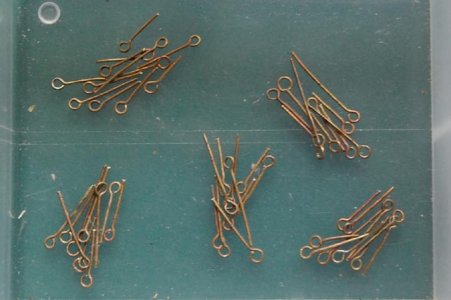
I ran out of ring pins to make, so I made about 52 of them. I will do the black dye treatment later.
I will make the second and third pulleys since I have run out of them.
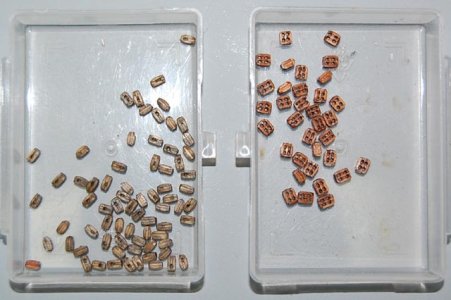
The first pulley had been made about 72 pieces before the production was suspended, and they were dyed with wood oil.
This time, I made about 34 second pulleys and dyed them with wood oil of a different color from that of the first pulley.
It would be nice to have an accent.
- Joined
- Jun 28, 2020
- Messages
- 544
- Points
- 353

Main lower mast standing rigging.
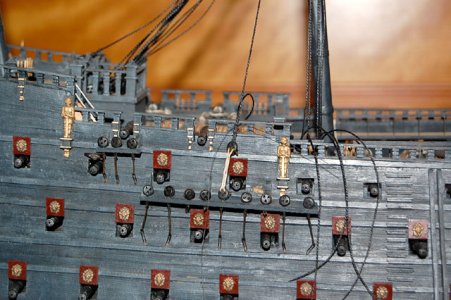
The length of the shroud is determined.
The height position of the shroud's deadeye is determined.
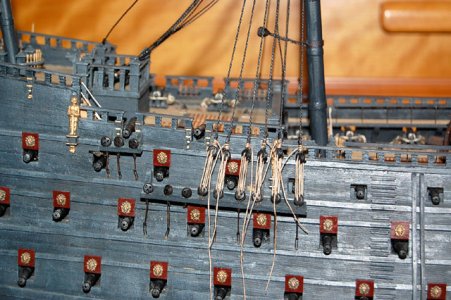
We'll use a lanyard to tighten the shroud.
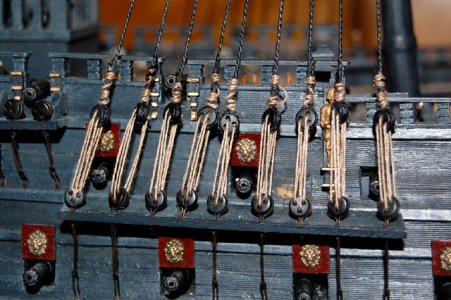
I managed to lanyard the main lower mast shrouds on the starboard side.
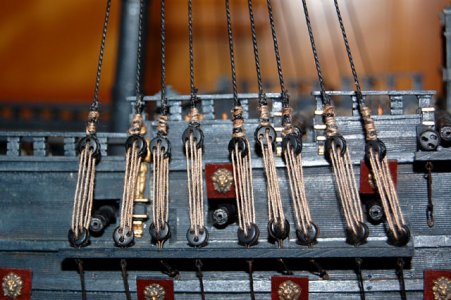
This is the shroud on the port side.
Some of the shrouds' deadeyes are not the same height, but I don't care.
I heard that S-twisted rope is generally used for shrouds.
Since it is a model, I don't care and use thicker yarn as appropriate.
I don't have a serving machine, so I don't do any serving.
By the way, the way of binding is appropriate. It has no historical value. Please don't copy it.
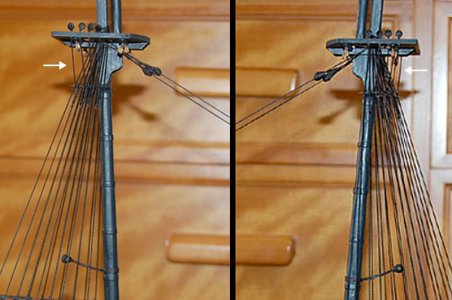
White arrow portion, footock shroud of the main lower mast.
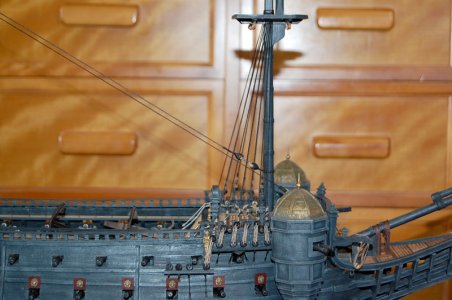
This is the shroud of the starboard side foreroar mast.
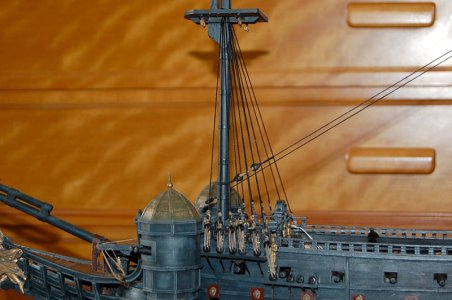
This is the shroud of the port side foreroar mast.
I'm sorry to say that the dead eye height was not aligned or something, but let's not worry about that.

The length of the shroud is determined.
The height position of the shroud's deadeye is determined.

We'll use a lanyard to tighten the shroud.

I managed to lanyard the main lower mast shrouds on the starboard side.

This is the shroud on the port side.
Some of the shrouds' deadeyes are not the same height, but I don't care.
I heard that S-twisted rope is generally used for shrouds.
Since it is a model, I don't care and use thicker yarn as appropriate.
I don't have a serving machine, so I don't do any serving.
By the way, the way of binding is appropriate. It has no historical value. Please don't copy it.

White arrow portion, footock shroud of the main lower mast.

This is the shroud of the starboard side foreroar mast.

This is the shroud of the port side foreroar mast.
I'm sorry to say that the dead eye height was not aligned or something, but let's not worry about that.
Great-looking shrouds, Mellpapa!
- Joined
- Jun 28, 2020
- Messages
- 544
- Points
- 353

Hi Namabiiru,Great-looking shrouds, Mellpapa!
Rigging is tiring to the eyes.


- Joined
- Jun 28, 2020
- Messages
- 544
- Points
- 353

Hi GIG1810,Melpapa,
wonderful work. I am a Fan of your Silent Mary....
cheers Günther
Thank you.

- Joined
- Jun 28, 2020
- Messages
- 544
- Points
- 353

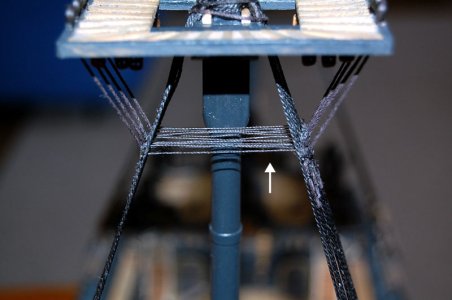
I also added what appear to be Cat harpins to the shrouds on the main lower mast, the white arrow part.
Cat harpins are supposed to prevent the shrouds from being pulled outward by the footock shrouds.
If it is a model, it may be omitted.
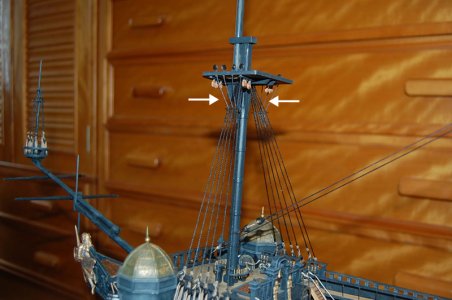
White arrowhead section, fore-rower mast shroud with phtoc steve and phtoc shroud.
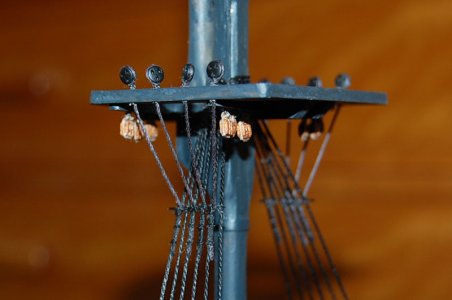
If you zoom in, it looks like this.
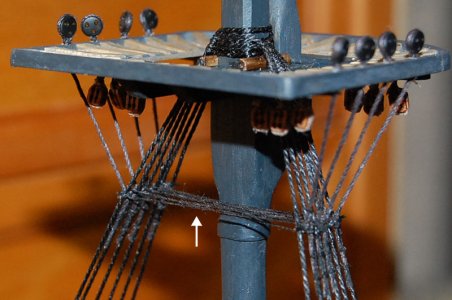
White arrow part, I added what looks like Cat harpins to the shroud of the fore-rower mast.
The Cat harpins I am making are not the exact shape.
I'm simplifying it.
Don't say, "They're not the right shape! I'm not sure if I'm making the right shape or not.
------------------------------------------------------------------------------------------------------
■ Making open hearts ■
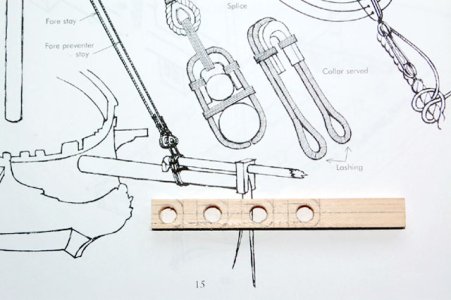
1. draw an open heart on a 5mm-thick 10mm-wide piece of cypress wood and drill a 6mm-diameter hole.
Two holes are enough, but considering the possibility of failure when making it, drill four holes.
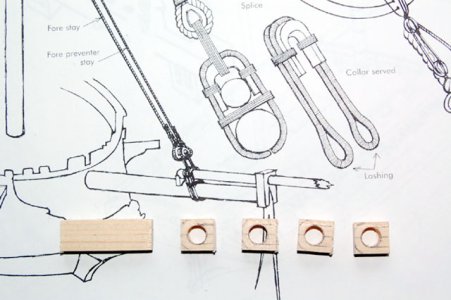
2. cut each piece into pieces.
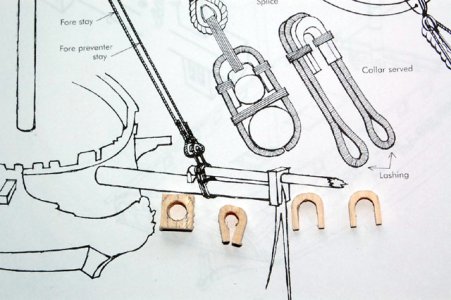
3. shave it into the shape of an open heart. I failed at one because it cracked when I was shaving it.
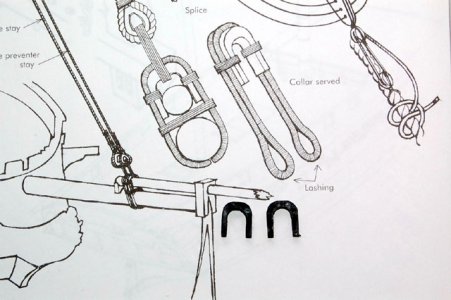
4. paint in black.
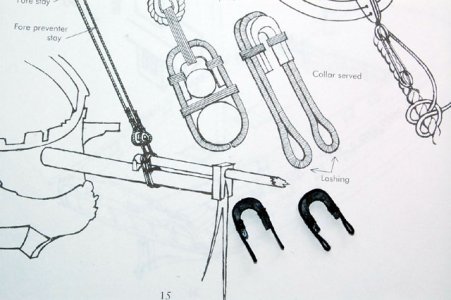
5. set the rope.
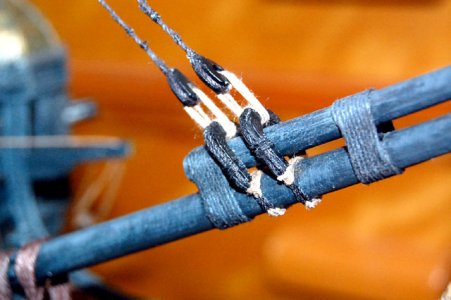
6. install an open heart in the bowsprit and put up a fore-rower-mast stay and a fore-rower-mast preventer stay.
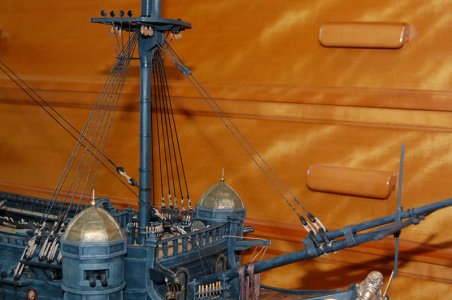
It's like this.
Well, tomorrow we'll be shrouding the mizzen mast.
That's all for today.


