■ Create a backing box ■
View attachment 284619
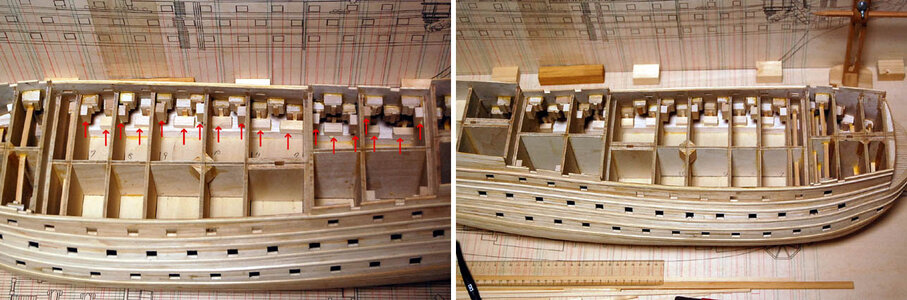
After opening the gun ports in the hull, we need a box for the backing.
As I did when I made the FD, I cut out many 2mm thick plates of 13mm length and width and 15mm length and width to make the boxes.
The number needed is 64 for both sides.
View attachment 284620
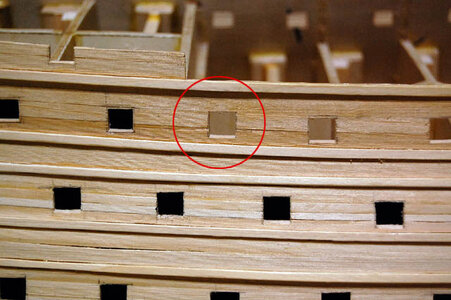
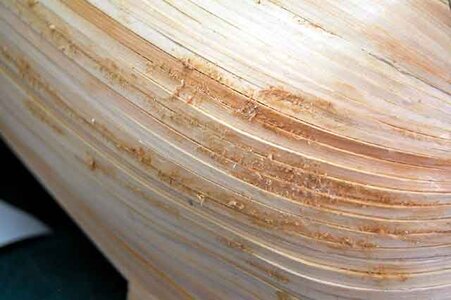
Here is a close-up photo.
They are quite distorted, but there is no problem.
It's for the backing, so it doesn't matter how it looks. It's not something you can see from the outside.
As long as it doesn't break, it's fine.
When the glue is completely dry, I paint the inside black, but it's not completely dry yet.
View attachment 284621
The tight bond isn't completely dry, so I put it in a McDonald's paper cup and let it dry for storage.
The McDonald's paper cups can be washed, cleaned, and kept for various uses.
You can use them to make mazes of silicon main material and hardener, mazes of resin A and B, mazes of plaster, and so on...they are very useful.
View attachment 284629
I bought some Tamiya Color XF-1 Flat Black acrylic paint.
I will paint the inside of the gun port backing box with this.
Start with the gun on the port side. ......
Tamiya Color's acrylic paint has a weaker smell than lacquer-based paints, which is a big help.
(´・ω・`)b
View attachment 284630
When the port side is finished, put away the Mcdonalds paper cup, and now paint the starboard side.
View attachment 284631
The lined boxes on both sides are stored in paper cups until they are ready to be used.
ーーーーーーーーーーーーーーーーーーーーーーーーーーーーーーーーーーーーーーーーーーーーーーーーーーーーーーーーーーーーーーーー
■ Drill a hole in the gun port ■
View attachment 284622
Drill a hole in the gun port.
Use a needle to mark the inside of the area where you inserted the sharpie.
View attachment 284623
It looks like this.
View attachment 284624
Ora, perfora l'area in cui è stato inserito l'ago con una fresa da 1 mm.
View attachment 284625
Sembra questo.
View attachment 284626
Successivamente, ritaglialo con un coltello da disegno.
Sul lato di dritta, ho praticato tre fori, quindi sono rimasti solo 34 fori.
Dovrò prendermi il mio tempo e cercare di non commettere errori.
View attachment 284627
Ho lavorato duramente per aprire la terza fila di porte della pistola su entrambi i lati con il mio coltello di design.
View attachment 284628
Anche se è stato aperto con un coltello di design, come puoi vedere, è stato aperto in modo approssimativo.
Sembra questo. Ora ho messo della carta vetrata sulla barra quadrata per finirla.
ー ー ー ー ー ー ー ー ー ー ー ー ー ー ー ー ー ー ー ー ー ー ー ー ー ー ー ー ー ー ー ー ー ー ー ー ー ー ー ー ー ー ー ー ー ー ー ー ー ー ー ー ー ー ー ー
■ Dare il tocco finale alle porte della pistola ■
View attachment 284633 View attachment 284634
Questi sono gli strumenti che sono stati utilizzati per tagliare e limare in modo pulito le porte della pistola. Dall'alto, una barra quadrata da 5 mm con carta vetrata attaccata, una lima e un Tamiya Modeler's Knife Pro.
Per inciso, quando ho cambiato la lama del coltello da modellista con una nuova, mi sono fatto male. Quando ho cambiato la lama del coltello da modellista con una nuova, ho esercitato troppa pressione su di essa, come se stessi usando una lama che non era più affilata. E finisco per tagliare la mano destra che mi sostiene...
Sono un tirapiedi, quindi la mia mano destra si fa molto male. La mano destra è usata per tenere il materiale in posizione. Mi dispiace un po' per la sua mano destra.
View attachment 284637 View attachment 284638
Alla fine ho terminato la sagomatura della porta della pistola.
La posizione della porta della pistola è un po 'fuori luogo, ma non mi dispiace, è solo un errore da 0,5 mm a 1 mm, quindi non preoccuparti.
Tutti, fate attenzione quando usate un coltello di design.
(;^ω^)b


")