Silent Mary by Mellpapa

■ Production of emblems ■

SilentMary27-34.jpg
I've been thinking a lot about how to make the emblem, but I think I'll have to make it in sections.
I don't think I can sculpt the whole thing as one solid piece.
SilentMary27-35.jpg
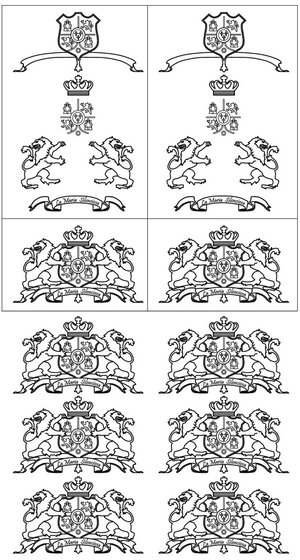
So, I divided the emblem.
If I print this on a piece of wood, cut it out, and paste it together, it will look like an emblem.
Finally, I hope they can be combined to form an emblem!

SilentMary27-36.jpg
Using the data above, I created the data for printing. This will be printed by Alps printer MD-1000.
(´・ω・`)b

SilentMary27-37.jpg
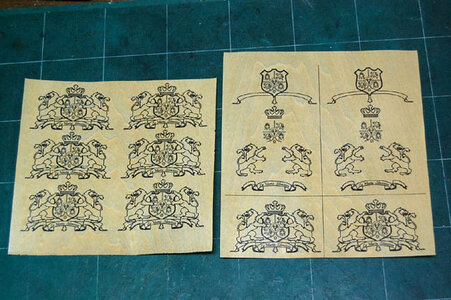
I printed it on a piece of wood (about 0.3 mm thick).

SilentMary27-38.jpg
It's OK if it becomes a relief.

SilentMary27-39.jpg
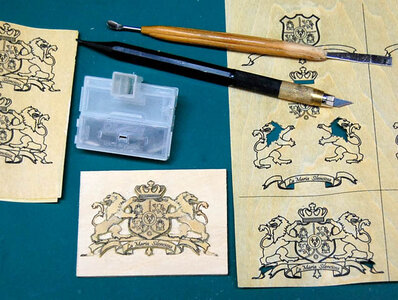
I cut out the parts I need and paste them on.

SilentMary27-40.jpg
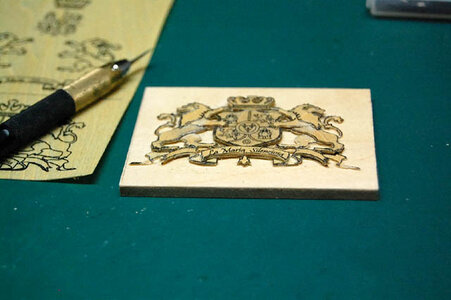
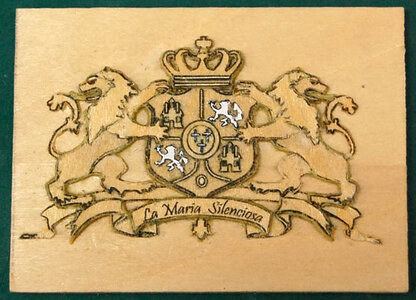
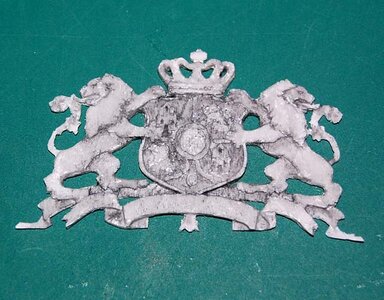
So, I managed to make the original shape of the emblem.
For the white part, I cut out a piece of paper and pasted it on, because the sapwood would crack.
It was too fine to insert the blade of a design knife, so I had to cut out a piece of paper and paste it.
I'm going to make a silicone mold of this and replicate it with resin.

SilentMary27-41.jpg
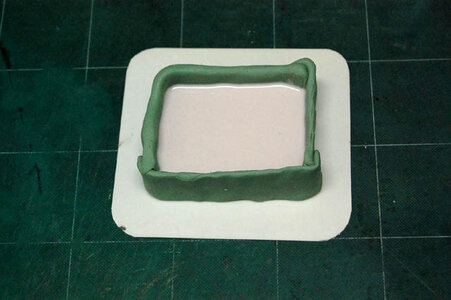
The mold is being made with silicone.
Let's wait until the silicone hardens.

SilentMary27-42.jpg
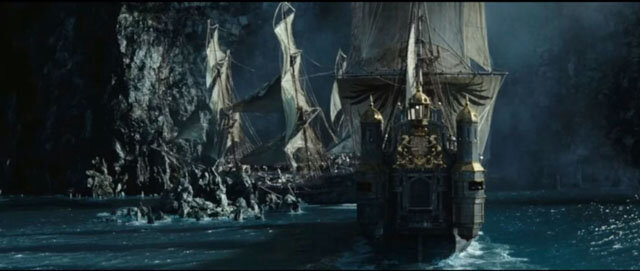
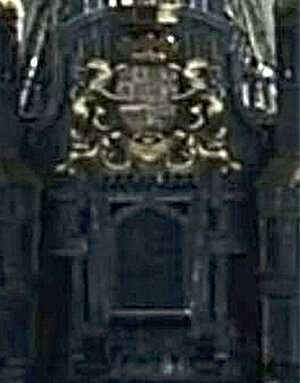
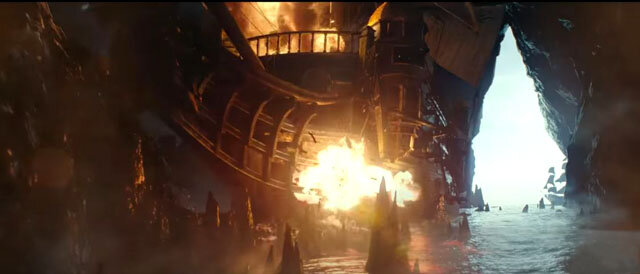
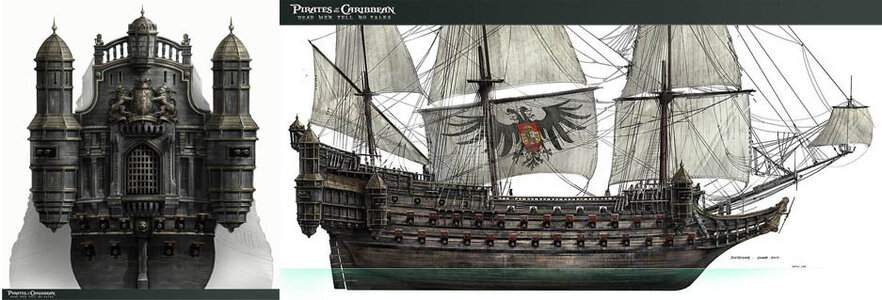
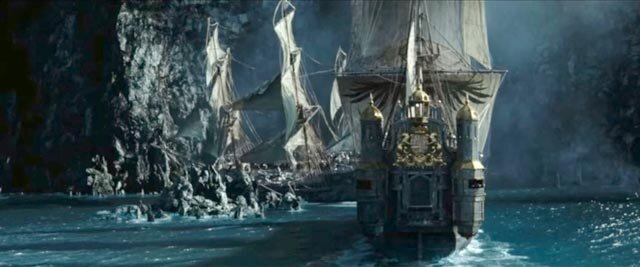
This is an image of the CG Silent Mary from the movie.
Look at the stern.
The emblem part is quite different from the design drawing, isn't it?

SilentMary27-43.jpg
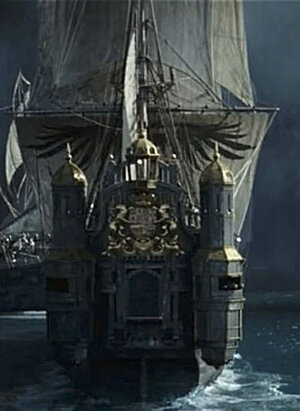
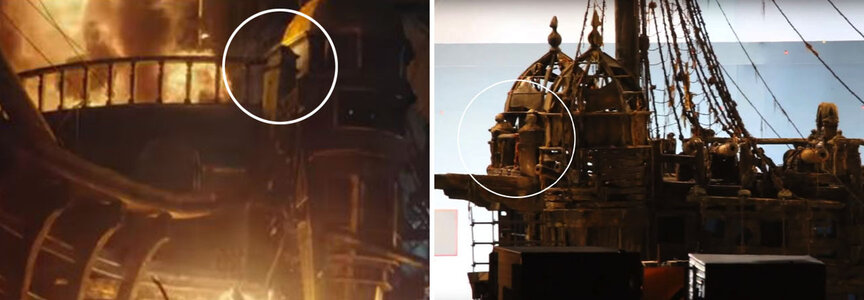
Here's a closer look at the Silent Mary.
The lower part of the emblem is different.

SilentMary27-44.jpg
I enlarged the image further.
The design of the shield supported by the two lions is also different.
The image is blurry, so I can't make out the exact shape.
There's no way to make it look like this.
It doesn't have to be similar.
It just has to look like the design drawing.
I'll go with the pattern of the design drawing here.

SilentMary27-45.jpg
After the silicone hardened, I peeled it off the original shape.
The original shape was made from wood with the grain of the wood, so I didn't apply any suffesser to the original shape.
The wood grain is clearly visible in the silicone.

SilentMary27-46.jpg
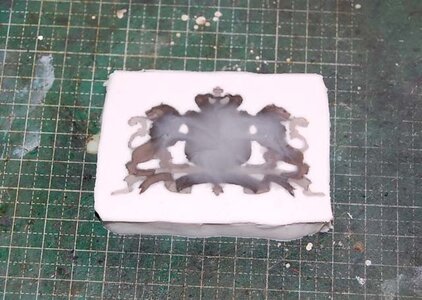
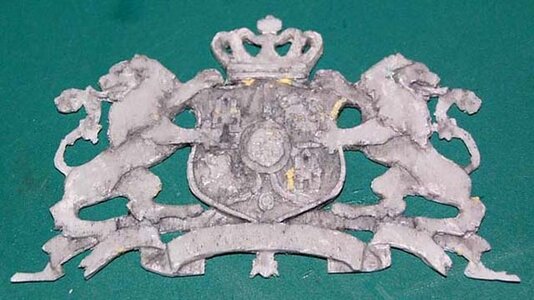
I quickly poured the resin into the molded silicone.   Here is a picture of the resin curing.

SilentMary27-47.jpg
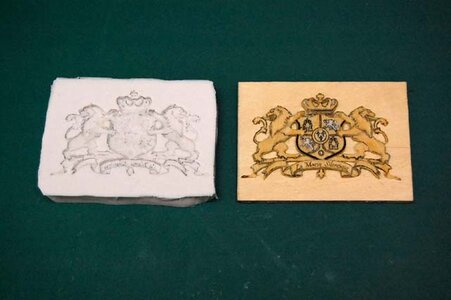
This is a comparison of a resin reproduction and the original.

SilentMary27-48.jpg
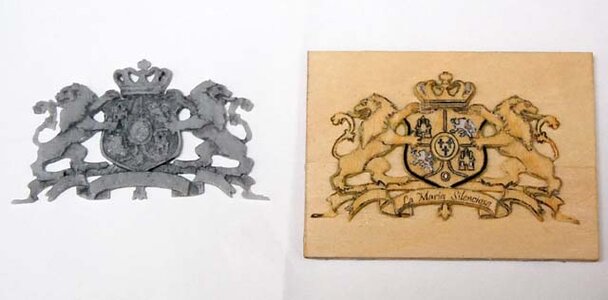
Enlarged view of the resin reproduction. Here it is with the smudging paint applied and wiped off.
Well, that's about right.
The left and right lions are symmetrical, but there is a slight difference, which is a bit disappointing.
It's okay, though.

SilentMary27-49.jpg
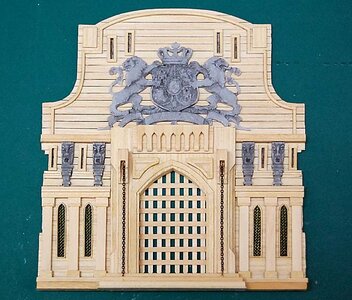
I merged it into the Stern Gallery.  It's good, I think.  It's good for me.
I'm pleased with myself.

SilentMary27-50.jpg
I used epoxy putty to fix any air bubbles or missing parts of the emblem that I found.

SilentMary27-51.jpg
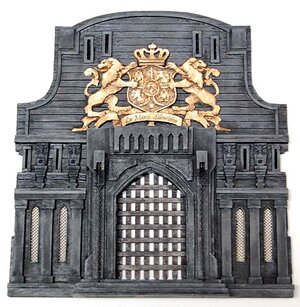
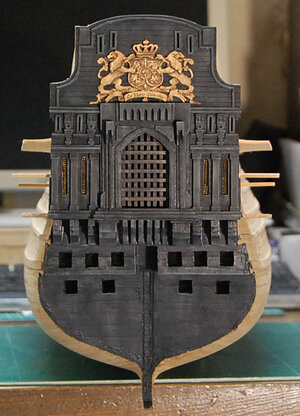
I painted the Starn Gallery.
I dry brushed on a base coat of German Gray, then gradually added Light Gray.
The edges were drybrushed with a brighter finish.
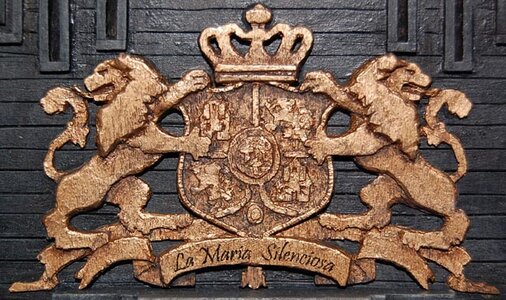
The emblem was painted with gold paint, then smudged with brown and gray, and glued on.
It turned out to be a bit of a mess, but when I paint, I can't stop myself from applying dirt and fading.
Maybe it's because I'm a former AFV modeler?

SilentMary27-52.jpg
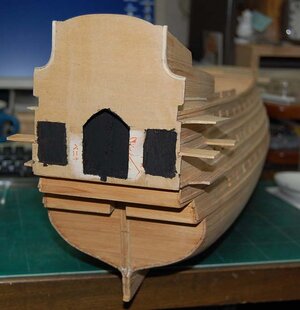
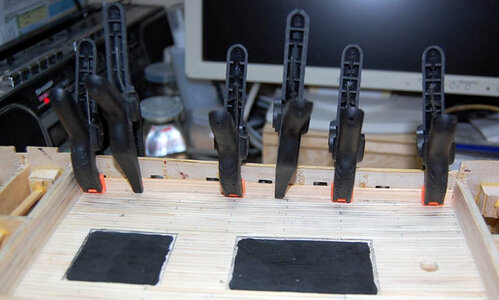
The stern gate was drilled and painted black.
For the windows, I peeled off a piece of plywood and painted it black.

SilentMary27-53.jpg
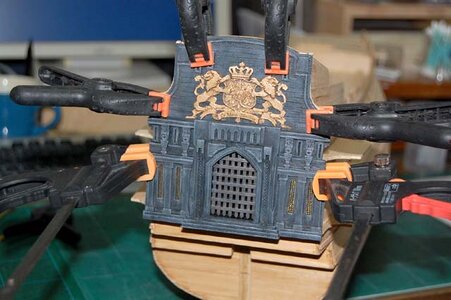
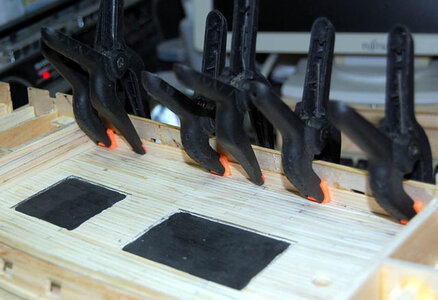
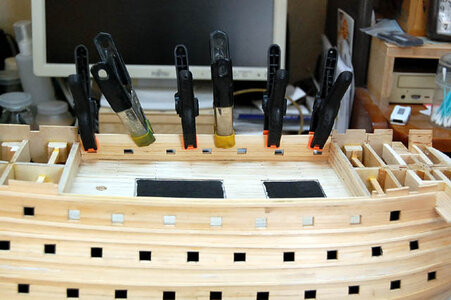
The colored stern gallery is glued together with titebond and fixed with clips and left for a while.

SilentMary27-54.jpg
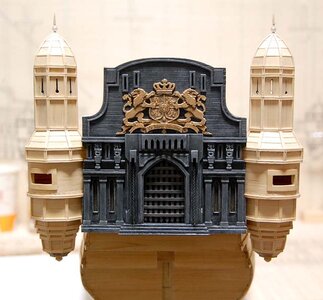
It's like this.
I'm completely satisfied with myself.

SilentMary27-55.jpg
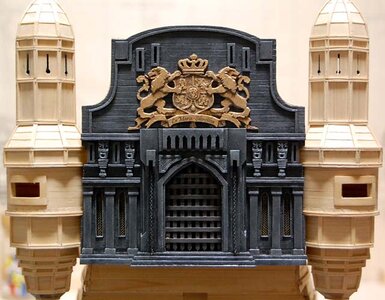
I'm self-satisfied, so I'll post another, slightly larger image.
The Stern Gallery still needs a lot of parts to be made.
I'm tired of the stern gallery though.  ROTFwwww

SilentMary27-56.jpg
Incidentally, the emblem "La Maria Silenciosa" was applied after printing the decal with an Alps MD-1000 printer.
The base was bumpy and the wood grain was visible, but I was able to apply it beautifully using the mark softener.
 
Last edited:
What a beautiful and incredibly interesting build! If this ship could be brought out in kit form, it will be highly successful!
 
What a beautiful and incredibly interesting build! If this ship could be brought out in kit form, it will be highly successful!
Dear Heinrich.
Thank you for reading my crafting article.
The crafting technique is a common crafting technique from ancient times.
This is a full scratch build, so it will be impossible to make it into a kit.
The drawings themselves are not very good.
This is a CG sailing ship that appeared in a movie.
Only a part of the hull was made for the filming set.
The parts I don't understand are based on my imagination.
So it is impossible to make a kit.
 
Your way of working is highly interesting - and shows us your accuracy in the execution
and also your way of presenting us your research is extremely interesting
Many Thanks my friend - it is pleasure to follow your log
 
Your way of working is highly interesting - and shows us your accuracy in the execution
and also your way of presenting us your research is extremely interesting
Many Thanks my friend - it is pleasure to follow your log
Dear Uwek
Thank you for your interest in my crafting skills.
My craftsmanship is very traditional and ordinary.
All my techniques are imitations of the pioneers.
It is said that "imitation is the art of making things better".
I like the old technique of working with my hands.
 
Ships of Scale...
Ships of Scale has some of the best builders from all over the world, and when you look at each page, it's just amazing.
There are so many pieces of work that make you wonder how they do it.
What tools do they use? What kind of production
How do they make it?
I'm really impressed and I'm learning a lot.
It makes me wonder if it's OK for me to be writing about crafting for Ships of Scale.
It makes me feel ashamed of my craft articles.
I am very grateful to all of you who read my poor craft articles.
we are all learning from each other - friends are sharing their common hobby and share their knowledge and experience.
Sp we are all able to build better models and have also more fun, either in our work on the models or also here in the communication inside the forum
Great to have you on board
 
we are all learning from each other - friends are sharing their common hobby and share their knowledge and experience.
Sp we are all able to build better models and have also more fun, either in our work on the models or also here in the communication inside the forum
Great to have you on board
Mr. Uwek.
My heart is a little softer now.
Thank you very much.
 
I agree with Uwe. What you are doing - creating and building something from scratch (actually without plans) is something I could never do. I think it is brilliant and I enjoy your work very much. So please ... keep the updates coming! :)
 
I agree with Uwe. What you are doing - creating and building something from scratch (actually without plans) is something I could never do. I think it is brilliant and I enjoy your work very much. So please ... keep the updates coming! :)
Mr. Heinrich.
Thank you very much.
I guess I was a little nervous.
I'll start updating again tomorrow.
I'm sorry for worrying you.
 
SilentMary-28-01.jpg
We have started to put up the bulwark on the inner walls of the hull, which are made of 1 mm thick cypress wood.

SilentMary-28-02.jpg
Taken from an angle.

SilentMary-28-03.jpg
The uppermost part is attached.

SilentMary-28-04.jpg
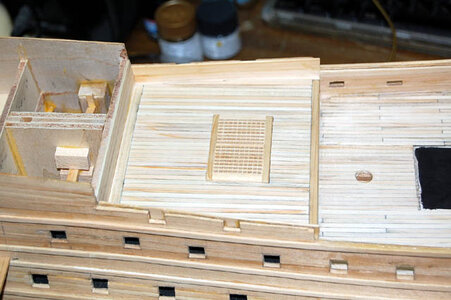
The deck has also been partially covered.

SilentMary-28-19.jpg
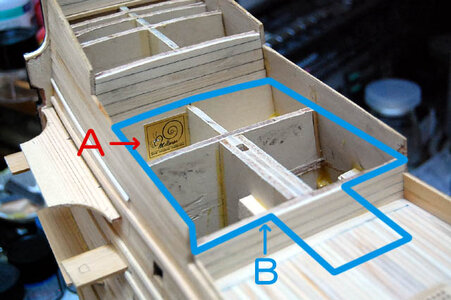
I put a "made by mellpapa" sticker on the place of It's my footprint. You can't see them when I put the deck. I am satisfied with myself.
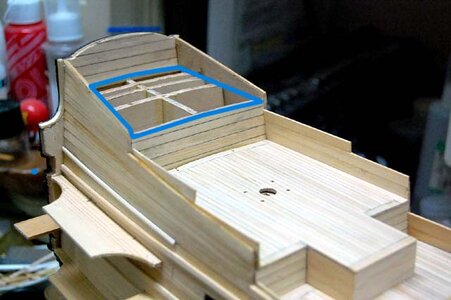
I put the deck on the B line.

SilentMary-28-20.jpg
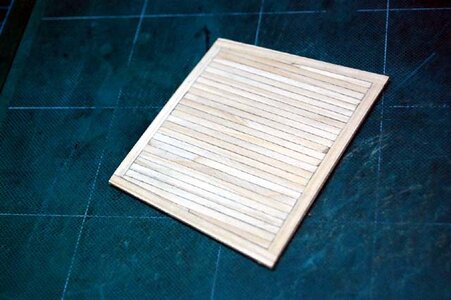
This is the front and back of the deck plate to be applied to the B-line section.
The back side is It is not well made.

SilentMary-28-22.jpg
After attaching the deck, 1mm-thick cypress wood is attached to the walls of the left and right bulwarks.
The photo on the right shows the bulwark on the starboard side, but it's blurry.
I'm sorry, I'm not very good at photography.

SilentMary-28-24.jpg
Paste the deck of the stern blue line.

SilentMary-28-25.jpg
This is the deck that we are going to put up, it's a poorly made deck.

SilentMary-28-26.jpg
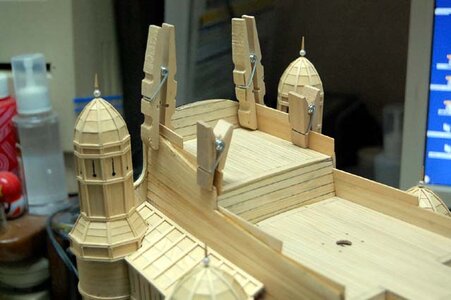
I put up the deck and also the bulwark wall with 1mm thick cypress wood.
After this, I put the deck of the bow side, but I forgot to take a picture.

-----------------------------------------------------------------------------------------------------

SilentMary-28-05.jpg
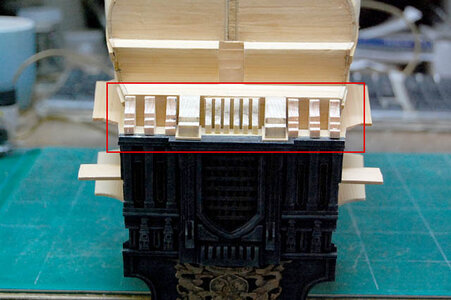
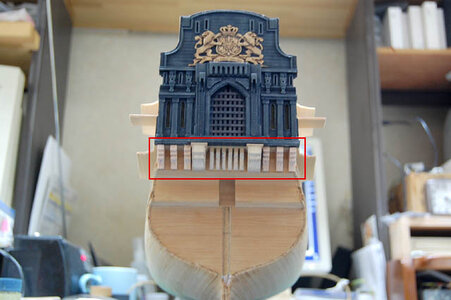
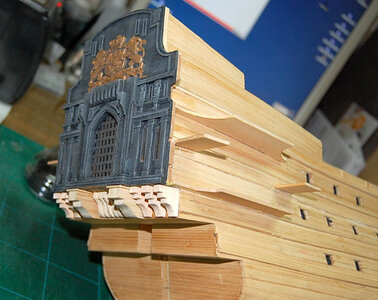
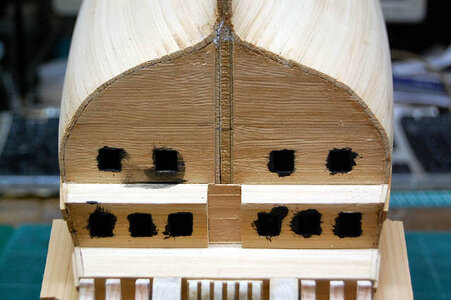
I built and glued the base to support the stern gallery.
Hmm? You can't really see it because it's upside down?
Well, let's see the next picture!

SilentMary-28-06.jpg
It's like this.

SilentMary-28-07.jpg
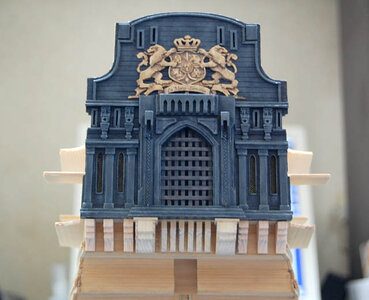
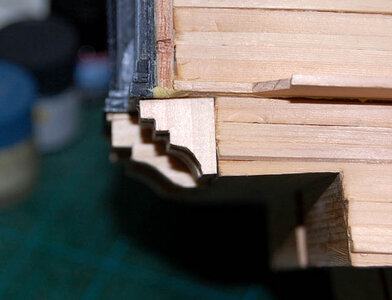
I've zoomed in.

SilentMary-28-08.jpg
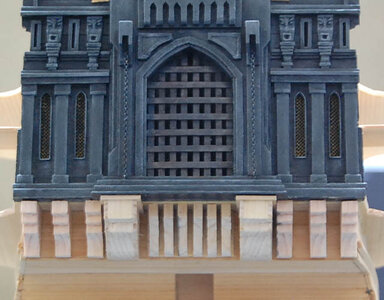
I've expanded it further.

SilentMary-28-09.jpg
This is a picture from an angle.
I didn't know what I was doing here, so I just made it up as I went along. It's not a practical base, but a decoration for the stern gallery like the castle above.

SilentMary-28-10.jpg
Photo from the side.

-------------------------------------------------------------------------------------------------------

SilentMary-28-11.jpg
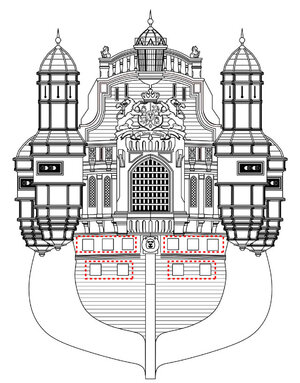
Note the red dotted line!
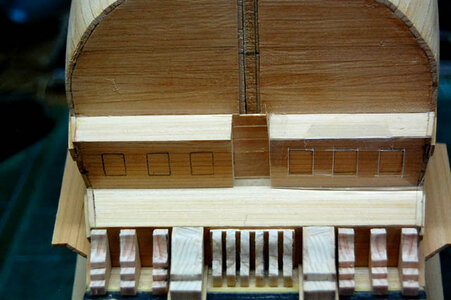
The design drawing of the Silent Mary showed a gun port.
It was equipped with 10 cannons on the stern.
So we will reproduce this in the model.

SilentMary-28-12.jpg
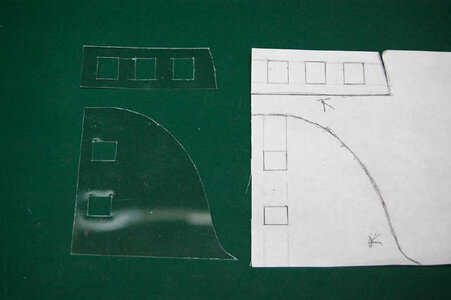
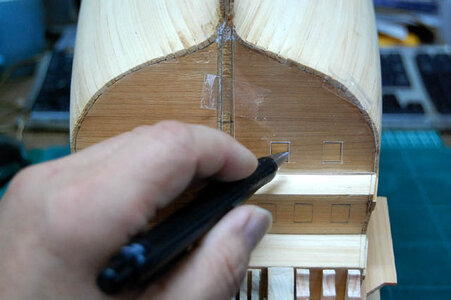
I made a paper pattern from the stern of the ship, drew the gun ports, and then transferred it to a transparent plastic board and cut out the gun ports.
I will use this to draw the gun ports on the stern

SilentMary-28-13.jpg
I taped the transparent plastic board with sellotape and drew the gun ports. First of all, the upper gun port.

SilentMary-28-14.jpg
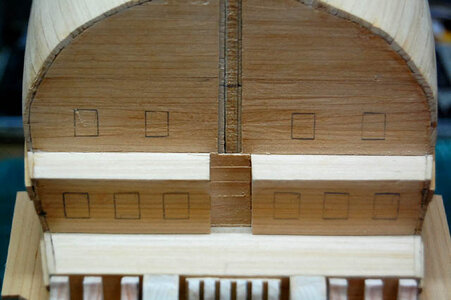
The next step is to draw in the gun ports on the lower section.

SilentMary-28-15.jpg
This way you can draw neatly and easily.

SilentMary-28-16.jpg
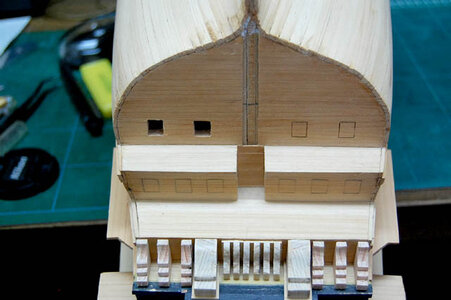
Drilling of the two gun ports.

SilentMary-28-17.jpg
10 gun port holes were drilled.
The holes were filled in with matt black paint.

SilentMary-28-18.jpg
The transom was also painted in German Grey and then drybrushed with German Grey mixed with Light Grey, gradually increasing the lightness.
The gun ports are all different sizes.
I'll fix that later.
I can't see them very well anyway, as they are covered with gun port rids.
 
Great work and a very interesting model. I cannot see how practical the real ship would be in heavy seas, it looks top heavy with all the stern galley structure.
 
・Crafting of the stem and beakhead section・

SilentMary-28-27-01.jpg
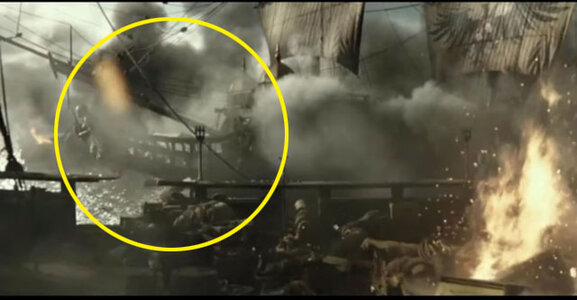
This is the yellow circle part, but there is almost no data.  I don't know what to do.

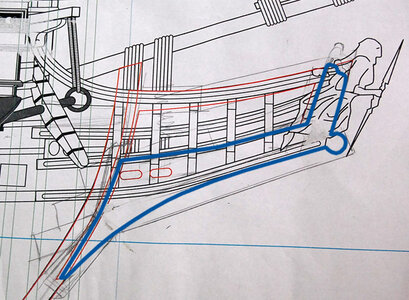
SilentMary-28-27.jpg
There is so little material on the stem and beakhead that I have no idea.
So I've decided to make it from my imagination.
The blue line in the drawing is the original part of the beak head.

SilentMary-28-28.jpg
The beak head is made of 3mm thick cypress sticks, which are laminated together in an appropriate manner.
The beak head is made of marquetry.

The stem, as you can see, looks like this.
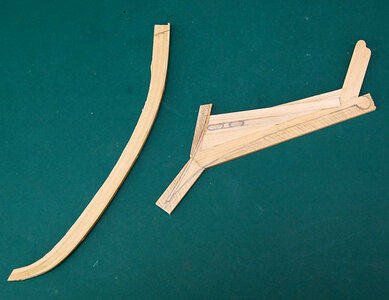
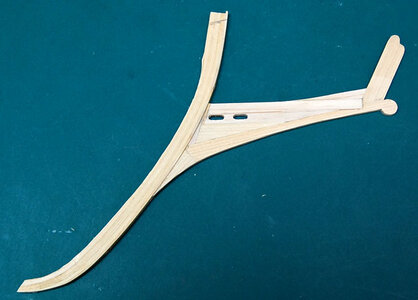
The stems are made from two pieces of 3mm thick, 5mm wide cypress, soaked in water, placed in a plywood mould cut out in the shape of the stem, left to dry, glued together, then placed in the mould again and fixed. When the glue is dry, remove the stem from the mould.
This is how I made the stem.

SilentMary-28-29.jpg
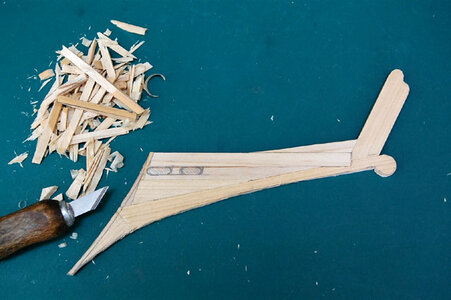
The parquet state is cut down to form the shape of a beak head.

SilentMary-28-30.jpg
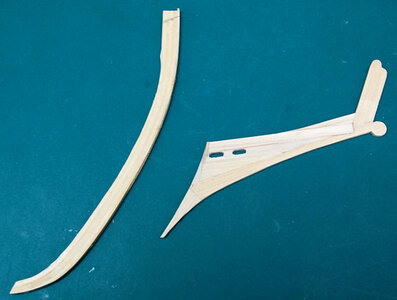
The final step is to drill a hole for the gammoning

SilentMary-28-31.jpg
The stem has a groove for the beak head to fit into. The round holes are for the screws.

SilentMary-28-32.jpg
This is how the beak head fits on the stem.
This is where the head timbers, upper rails, middle rails, lower rails etc are attached.
Let's see if it works: ????

SilentMary-28-33.jpg
Anyway, I made a temporary assembly.
I haven't made the bowsprit yet, so I used a ramin rod instead.

SilentMary-28-34.jpg
I put a turret on it, just for fun.
Is it starting to look like that?
(´・ω・`)b

SilentMary-28-33.jpg
 
Last edited:
Great work and a very interesting model. I cannot see how practical the real ship would be in heavy seas, it looks top heavy with all the stern galley structure.
Dear Brian
This boat is a sailing boat from the movie.

SilentMary01-05.jpg
This is the concept illustration that has been released.
It is very top-heavy.

SilentMary01-02.jpg
It's floating normally.
It's a rough trick that CG can do.

But when you compare it to reality, it's so full of contradictions it's funny!
It's a sailing ship in a movie, so it's OK.
 
I found some photos which are not very informative.
SilentMary-28-35.jpg
SilentMary-28-36.jpg
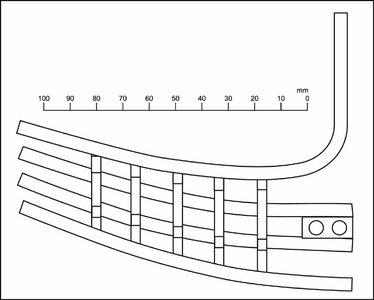
I drew a drawing of each rail and used this as a basis to build the beakhead.
These drawings are my imagination. They have no documentary value at all.

SilentMary-28-37.jpg
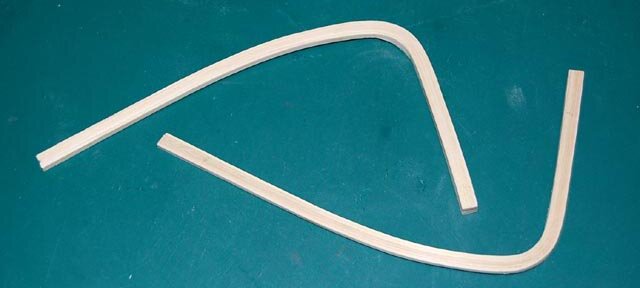
Make a jig for the top rail: trace down the top rail on 12 mm thick lumber core material.
Cut out the rail with an electric thread saw.
SilentMary-28-39.jpg
Cut out the rails to a width of 9 mm. Insert the 9mm wide rail into the board.  The jig is now 3 mm lower.

SilentMary-28-41.jpg
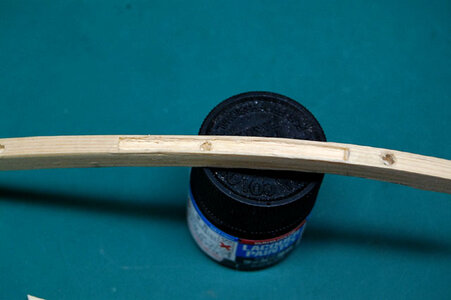
Five pieces of 1 mm thick and 3 mm wide cypress wood are soaked in water and then pressed into the mould of the jig to dry.
The dry cypress wood is then taken out, glued and pressed back into the mould, tied with string and pressurised, waiting for the glue to dry.

SilentMary-28-43.jpg
I've made two of them.
The other six are just slightly bent, so no jig is needed.

SilentMary-28-45.jpg
The top of the upper rail is supposed to look like the white circle, so I added a little detail to it.

SilentMary-28-44.jpg
Here's how it turned out.
It looks like there is a groove too, so I did the same.
----------------------------------------------------------------------------------------------------

SilentMary-28-45-01.jpg
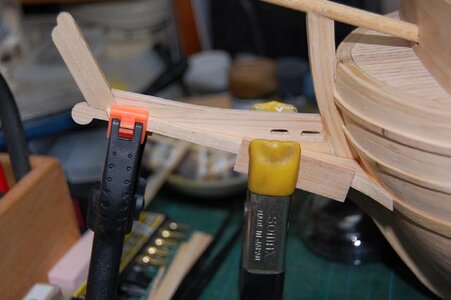
The stem and beakhead made earlier are glued to the left and right sides of the bow.
The stem is glued with screws and glue, and the gaps are corrected with wood putty.
The support board for the teakney part is made and glued.
I'll say it again, I'm making it up as I go along, so it has no documentary value.
I don't know, so I'm making it up in my imagination.

SilentMary-28-46.jpg
Temporary assembly of the upper rail.
It looks about right. I'm pleased with myself!
I have to make the middle rail, lower rail and cheeky rail. And the head timbers. I'm sure I'll get around to it if I keep my hands busy.

SilentMary-28-49.jpg
This is a picture from the side.

SilentMary-28-51.jpg
The teakney part and the veneer parts are made.

SilentMary-28-52.jpg
The left and right teakney veneers are now ready to be glued together.
It takes a lot of time, soaking in water, bending and drying.

The grooves are not dug with a carving knife, but are made by adding wood around the grooves.

SilentMary-28-54.jpg
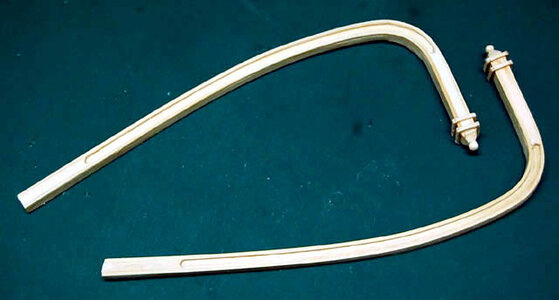
The middle and lower rails on the beakhead side are cut from cypress wood according to the diagram, soaked in water and bent.
After drying, two middle and two lower rails are made, one on each side.

SilentMary-28-55.jpg
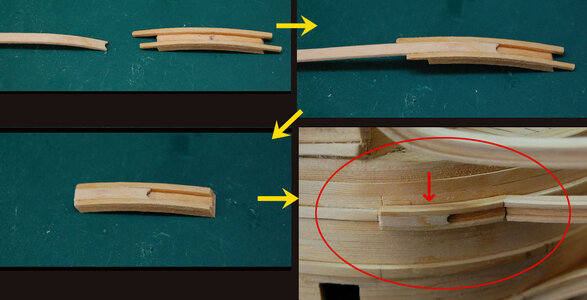
How to make a groove
This is the hull side part of the middle rail, where the grooves are made.
The top and bottom are made of 1x1mm bars.
Half of the middle part is made of 1mm thick board.
Cut off the protruding wood, and the bow part of the middle rail is finished.
The groove in the middle rail on the beakhead side is made in the same way.
This part is attached to the red circle in the picture.

SilentMary-28-56.jpg
The second one from the top of the left and right side is the middle rail.
You have to make it in two parts, one on the beakhead side and one on the hull side, and stick them together.
Now it's time for the lower rail.

SilentMary-28-58.jpg
I made the left and right lower rails and glued them together...
The loose curve is almost straight.
I can't have that.

SilentMary-28-60.jpg
I've decided to rework it because I want a loose curve, like the red line.

SilentMary-28-62.jpg
We have reworked the lower rail with a gentle curve.
It looks like this.
It's the same as I had imagined, a gentle curve.
 
Back
Top