-

Win a Free Custom Engraved Brass Coin!!!
As a way to introduce our brass coins to the community, we will raffle off a free coin during the month of August. Follow link ABOVE for instructions for entering.
-

PRE-ORDER SHIPS IN SCALE TODAY!
The beloved Ships in Scale Magazine is back and charting a new course for 2026!
Discover new skills, new techniques, and new inspirations in every issue.
NOTE THAT OUR FIRST ISSUE WILL BE JAN/FEB 2026
You are using an out of date browser. It may not display this or other websites correctly.
You should upgrade or use an alternative browser.
You should upgrade or use an alternative browser.
Mellpapa,
Your work is splendid. I agree that since this is an artistic representation of a fictional ship you have great flexibility to do it the way you like. I think having the hawse holes on the lower deck provides some visual balance. For what my opinion is worth, I like them where you have them.
Your work is splendid. I agree that since this is an artistic representation of a fictional ship you have great flexibility to do it the way you like. I think having the hawse holes on the lower deck provides some visual balance. For what my opinion is worth, I like them where you have them.
- Joined
- Oct 17, 2020
- Messages
- 1,691
- Points
- 488

Good evening Mellpapa, I have never questioned Your choice of creativityI want to create a movie ship, the Silent Mary.
It is not a real ship that has existed in the past.
If you have any detailed information about the Silent Mary from the movie, please let me know.
- Joined
- Jun 28, 2020
- Messages
- 544
- Points
- 353

Dear NamabiiruMellpapa,
Your work is splendid. I agree that since this is an artistic representation of a fictional ship you have great flexibility to do it the way you like. I think having the hawse holes on the lower deck provides some visual balance. For what my opinion is worth, I like them where you have them.
Thank you very much.
Please take a look at the crafting article when I upload it.
- Joined
- Jun 28, 2020
- Messages
- 544
- Points
- 353

Dear Frank48Good evening Mellpapa, I have never questioned Your choice of creativity
Thank you very much for all your help.
Please check back when I upload the article on the crafting of the Silent Mary in the movie.
It's a ship that has very little documentation and there are many things we don't know about what's going on.
Where I don't know, I refer to HMS Victory and other 100-gun ships.
- Joined
- Jun 28, 2020
- Messages
- 544
- Points
- 353

Crafting the rudder
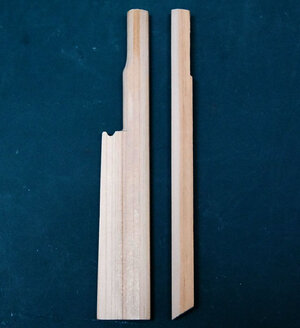
The rudder and stern post were carved out of cypress wood.
The stern post is a temporary part that was assembled when the outer board of the transom part was put on, but I cut it out to fit the rudder.
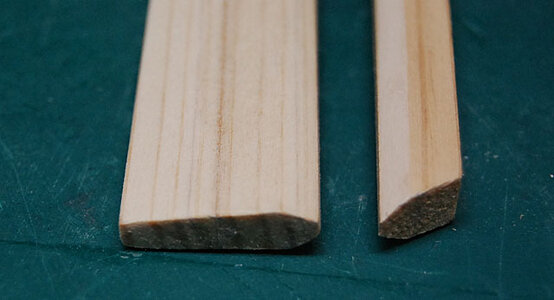
I made the cross section of the rudder and stern post like this.
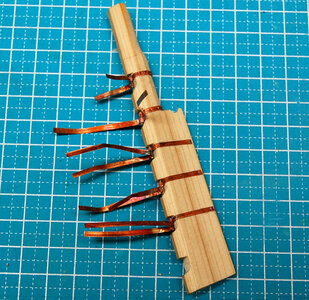
I made a pintle and a gashon using 0.2mm thick copper plate, brass wire and brass pipe, and attached them to the rudder.
I didn't have enough pintles and gashons.
After this, I quickly made the missing pintles and gashons and attached them to the rudder.
The method of making the gashon and pintle is the same as the one I made for the BP and FD issues.
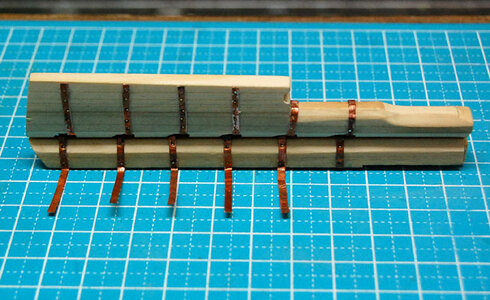
With all the pintles and gashons in place, the rudder and stern post parts are ready to go.
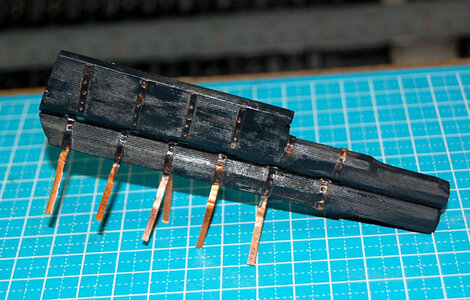
Painted in German Grey. It's not dry yet. I'm going to dry brush it and stain it, so I'll paint the pintle and gashon later.
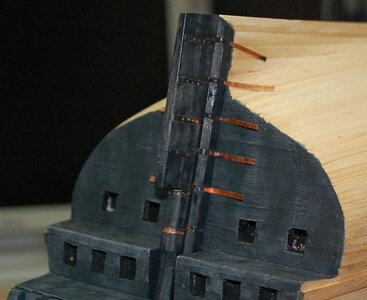
For now, I temporarily assembled it on the hull.
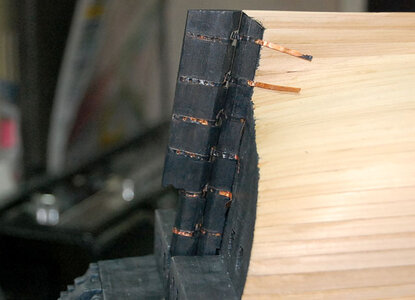
I don't know if it's like this.
------------------------------------------------------------------------------------------------------------
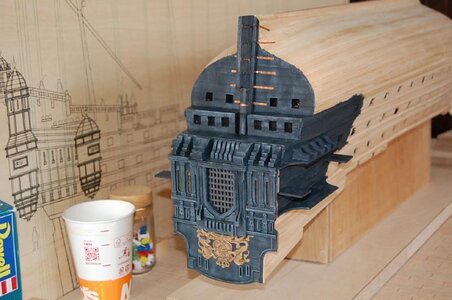
When assembling and painting, there are some parts that the brush cannot reach, so I painted those parts first.
The color is German gray.
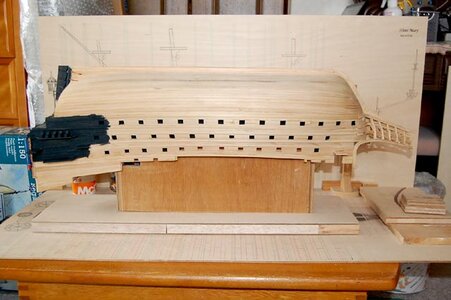
It's drying out a bit.

The bow part of the ship, especially the beak head part, would be full of unpaintable areas if I added a bow spit or grating.
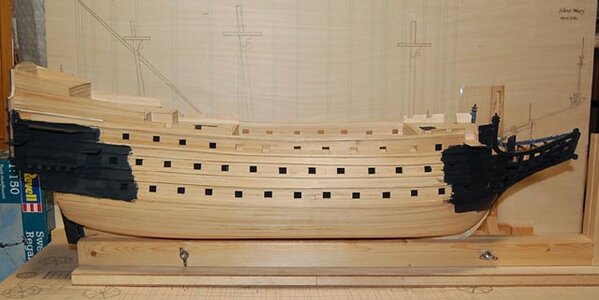
The bow part of the ship, especially the beak head part, is made of bow spirit and
For now, I'll leave it like this overnight.

The rudder and stern post were carved out of cypress wood.
The stern post is a temporary part that was assembled when the outer board of the transom part was put on, but I cut it out to fit the rudder.

I made the cross section of the rudder and stern post like this.

I made a pintle and a gashon using 0.2mm thick copper plate, brass wire and brass pipe, and attached them to the rudder.
I didn't have enough pintles and gashons.
After this, I quickly made the missing pintles and gashons and attached them to the rudder.
The method of making the gashon and pintle is the same as the one I made for the BP and FD issues.

With all the pintles and gashons in place, the rudder and stern post parts are ready to go.

Painted in German Grey. It's not dry yet. I'm going to dry brush it and stain it, so I'll paint the pintle and gashon later.

For now, I temporarily assembled it on the hull.

I don't know if it's like this.
------------------------------------------------------------------------------------------------------------

When assembling and painting, there are some parts that the brush cannot reach, so I painted those parts first.
The color is German gray.

It's drying out a bit.

The bow part of the ship, especially the beak head part, would be full of unpaintable areas if I added a bow spit or grating.

The bow part of the ship, especially the beak head part, is made of bow spirit and
For now, I'll leave it like this overnight.
Last edited by a moderator:
- Joined
- Jun 28, 2020
- Messages
- 544
- Points
- 353

About the color of the Silent Mary
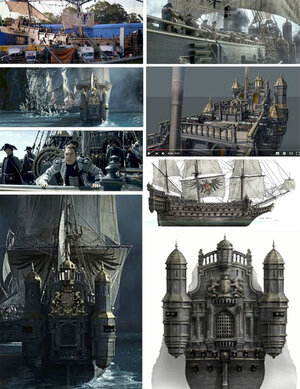
The color of the Silent Mary is apparently black for the exterior of the hull. Since it is black, I would paint it black, but since this is a model, I will not paint it black. Paint a gray that is close to black. German gray is just right. It is my favorite color. I think a little neutral gray mixed in and Dry Brushes would be nice.
The roofs of the turrets are gold.
I'm going to drybrush the gold on these after the olive drab has dried.
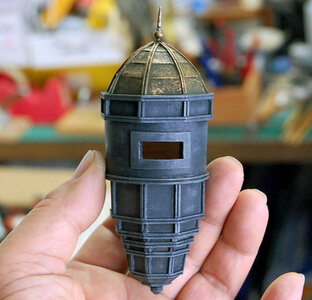
I painted the turret on the bow side of the ship as a test.
The turret was painted with German Grey all over, and when it was dry, I dry brush Neutral Grey with a bit of German Grey.
The roof was painted with olive drab, allowed to dry, and then dry brush with gold. It looks really nice.
I love this paint job.
I'm going to paint the other one the same way and do a temporary build.
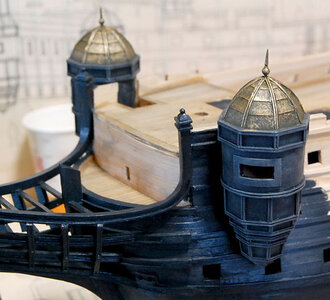
This is what it looks like.
I only painted part of the hull in German gray, and I didn't drybrush it.
I think it looks good!

The entire exterior was painted in German gray.
The impression is quite different.
German gray is interesting because its color changes depending on the lighting. It can look black or gray, which is nice. I think dry brushing with neutral gray will give a different impression.
For now, I'll let it dry for a day or two.
------------------------------------------------------------------------------------------------------------------------------------------------------------------------------
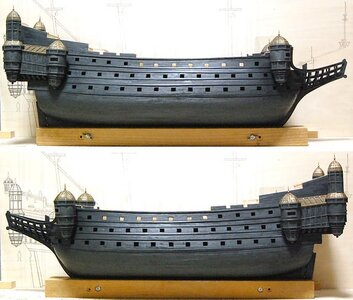
I painted all the turrets and the quarter galleries, so I made a temporary assembly.
The color changes a lot depending on how the lighting is done.
The color looks like black.
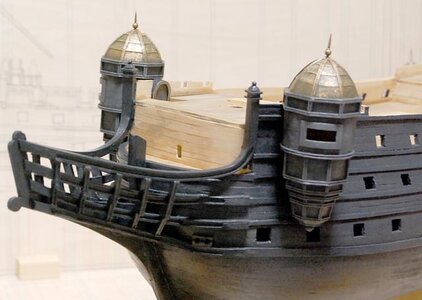
The bow side of the ship.
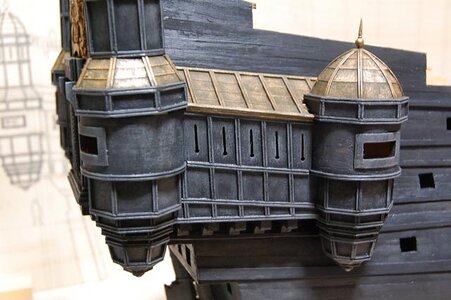
Quarter Gallery.
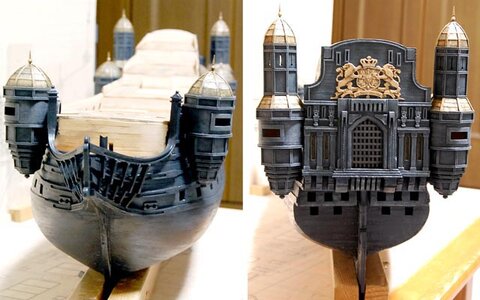
Bow and stern.

The color of the Silent Mary is apparently black for the exterior of the hull. Since it is black, I would paint it black, but since this is a model, I will not paint it black. Paint a gray that is close to black. German gray is just right. It is my favorite color. I think a little neutral gray mixed in and Dry Brushes would be nice.
The roofs of the turrets are gold.
I'm going to drybrush the gold on these after the olive drab has dried.

I painted the turret on the bow side of the ship as a test.
The turret was painted with German Grey all over, and when it was dry, I dry brush Neutral Grey with a bit of German Grey.
The roof was painted with olive drab, allowed to dry, and then dry brush with gold. It looks really nice.
I love this paint job.
I'm going to paint the other one the same way and do a temporary build.

This is what it looks like.
I only painted part of the hull in German gray, and I didn't drybrush it.
I think it looks good!

The entire exterior was painted in German gray.
The impression is quite different.
German gray is interesting because its color changes depending on the lighting. It can look black or gray, which is nice. I think dry brushing with neutral gray will give a different impression.
For now, I'll let it dry for a day or two.
------------------------------------------------------------------------------------------------------------------------------------------------------------------------------

I painted all the turrets and the quarter galleries, so I made a temporary assembly.
The color changes a lot depending on how the lighting is done.
The color looks like black.

The bow side of the ship.

Quarter Gallery.

Bow and stern.
- Joined
- Jun 28, 2020
- Messages
- 544
- Points
- 353

Mr. Heinrich.You are delivering beautiful work Mellpapa. To me this ship just oozes character!
Thank you for your praise.
I don't think it's that beautiful myself.
If anything, I'm happy with the dirty finish (laughs).


Great work! Really starting to look like a ghost ship.
- Joined
- Oct 17, 2020
- Messages
- 1,691
- Points
- 488

Hi, I like more and more, BRAVOHi Namabiiru!
Thank you for taking a look.
I hope to make a diorama like this in the future.
It's a scene from a movie.
View attachment 288084
I wonder how many years it will take (laughs).
- Joined
- Jun 28, 2020
- Messages
- 544
- Points
- 353

Crafting lanterns
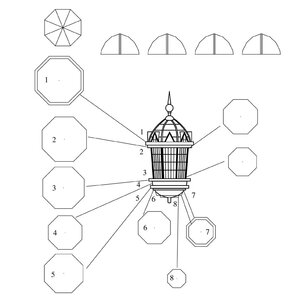
As I did when I made the turret, I drew a drawing that would be good if I knew what I was doing.
I used 1mm thick, 2mm thick, and 3mm thick cypress wood.
Number 4 is 2mm thick and number 7 is 3mmn thick.
All the other pieces are 1mm thick.
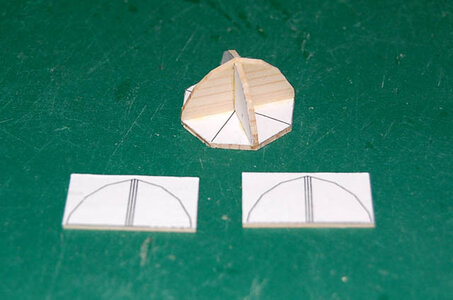
The roof of the lantern is made the same way as the roof of the turret.
All are made of 1 mm thick cypress wood.
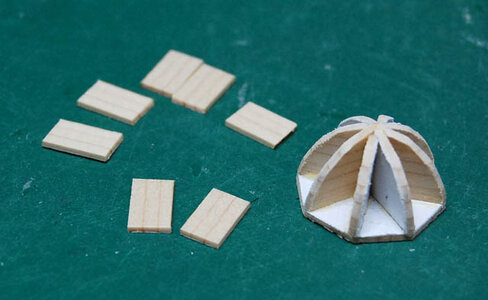
Glue the walls of the roof frame together: ......
I don't need to explain how to make this.
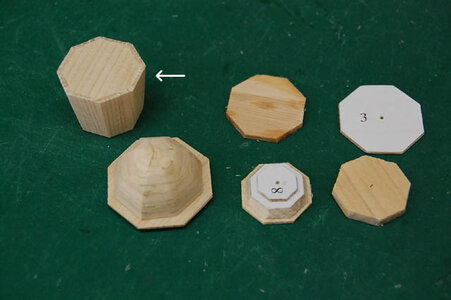
The white arrow is the glass part of the lantern.
The glass of the lantern is made from a clear plastic plate, so this is the jig for it.
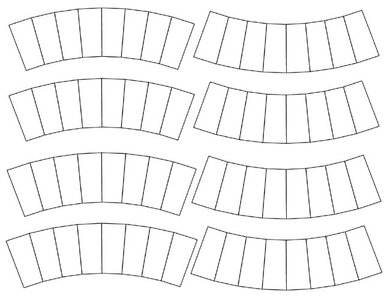
Here is a drawing of the lantern glass.
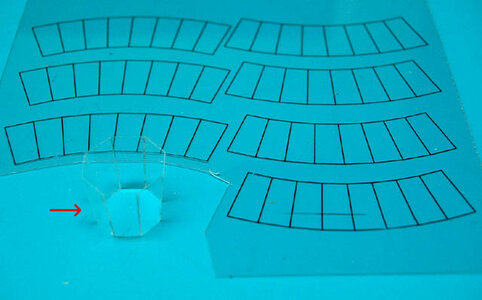
Printing on a 0.2mm thick transparent plastic board.
I printed a full imposition on a spare.
Notice the red arrow!
I assembled one of them, but you can't really see it because it's transparent.
I just folded and glued it together.
I used a jig to shape it.
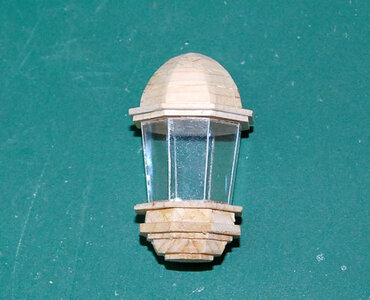
I've done some preliminary assembly.
The details aren't perfect yet, though.
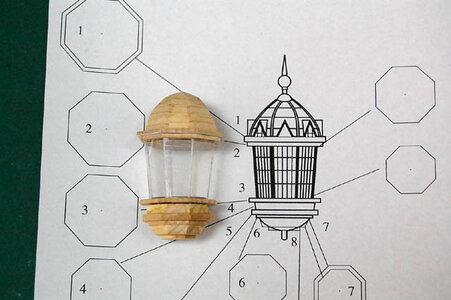
It turned out to be about the same size as the drawing.
More work will be done tomorrow.
I'm tired today.

As I did when I made the turret, I drew a drawing that would be good if I knew what I was doing.
I used 1mm thick, 2mm thick, and 3mm thick cypress wood.
Number 4 is 2mm thick and number 7 is 3mmn thick.
All the other pieces are 1mm thick.

The roof of the lantern is made the same way as the roof of the turret.
All are made of 1 mm thick cypress wood.

Glue the walls of the roof frame together: ......
I don't need to explain how to make this.

The white arrow is the glass part of the lantern.
The glass of the lantern is made from a clear plastic plate, so this is the jig for it.

Here is a drawing of the lantern glass.

Printing on a 0.2mm thick transparent plastic board.
I printed a full imposition on a spare.
Notice the red arrow!
I assembled one of them, but you can't really see it because it's transparent.
I just folded and glued it together.
I used a jig to shape it.

I've done some preliminary assembly.
The details aren't perfect yet, though.

It turned out to be about the same size as the drawing.
More work will be done tomorrow.
I'm tired today.
- Joined
- Jun 28, 2020
- Messages
- 544
- Points
- 353

Lantern construction continued
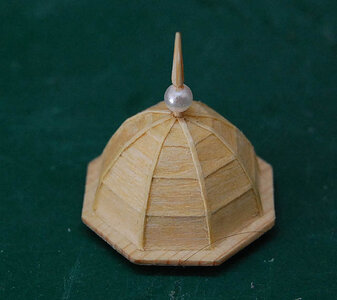
The roof of the lantern was made to look like it was made of wood.
The lightning rod-like thing was something I made as a spare when I built the turret.
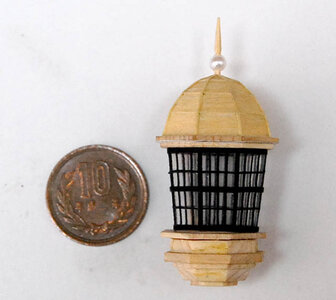
I also put black tape on the glass part.
I can't do much more than that.
I think that's enough.
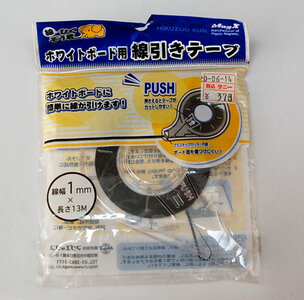
The black tape on the glass is line drawing tape for whiteboards.
The line width is 1mm.
For the thin one, I cut this in half and stuck it on.
I must have bought this tape two years ago.
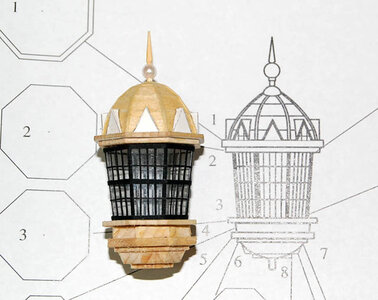
For the small roof part, I printed out a development drawing of the small roof on cardboard, cut it out, assembled it, and pasted it on.
There were eight of them, so it was a pain in the ass.
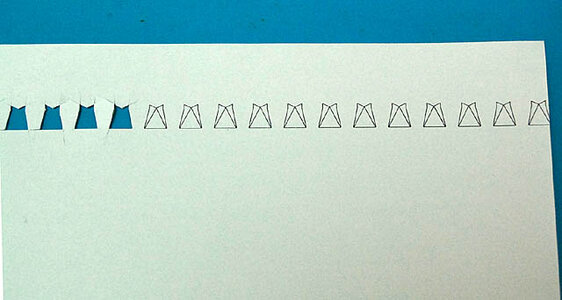
This is the printout of the development.
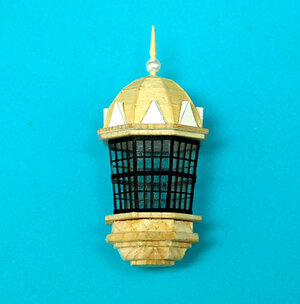
The usual resemblance is all that is needed.
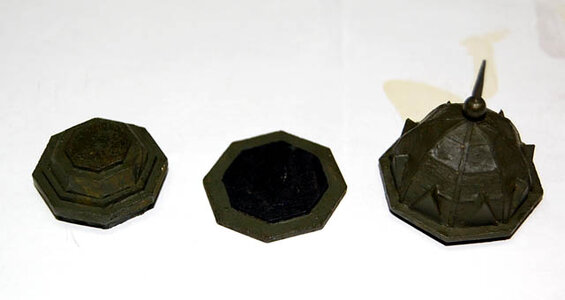
Painting.
Olive drab is applied as a primer coat.
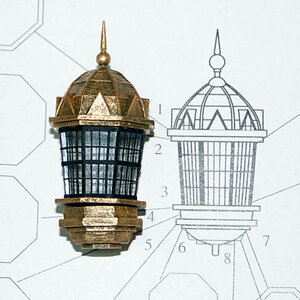
I dry brushed on some gold and that was it.
This is what it looks like.
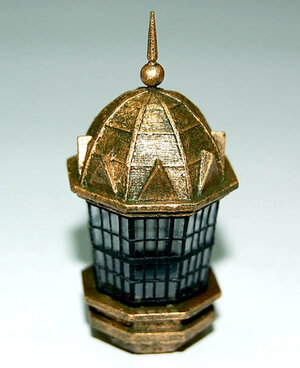
I wonder if there should be a window or a door in front of the small roof.
Maybe I should draw an illustration of a door.
I'll think about it later.

The roof of the lantern was made to look like it was made of wood.
The lightning rod-like thing was something I made as a spare when I built the turret.

I also put black tape on the glass part.
I can't do much more than that.
I think that's enough.

The black tape on the glass is line drawing tape for whiteboards.
The line width is 1mm.
For the thin one, I cut this in half and stuck it on.
I must have bought this tape two years ago.

For the small roof part, I printed out a development drawing of the small roof on cardboard, cut it out, assembled it, and pasted it on.
There were eight of them, so it was a pain in the ass.

This is the printout of the development.

The usual resemblance is all that is needed.

Painting.
Olive drab is applied as a primer coat.

I dry brushed on some gold and that was it.
This is what it looks like.

I wonder if there should be a window or a door in front of the small roof.
Maybe I should draw an illustration of a door.
I'll think about it later.
- Joined
- Jul 22, 2017
- Messages
- 331
- Points
- 268

Hello Mellpapa,
I have been following your build log in silence enjoying everything you have been doing. Outstanding results so far. I do believe that the lantern does need a door so that sailors were able to have access to the interior in order to light it and/or refuel it.
I have been following your build log in silence enjoying everything you have been doing. Outstanding results so far. I do believe that the lantern does need a door so that sailors were able to have access to the interior in order to light it and/or refuel it.
- Joined
- Jun 28, 2020
- Messages
- 544
- Points
- 353

Hello, ziled68.Hello Mellpapa,
I have been following your build log in silence enjoying everything you have been doing. Outstanding results so far. I do believe that the lantern does need a door so that sailors were able to have access to the interior in order to light it and/or refuel it.
Thank you for your interest.
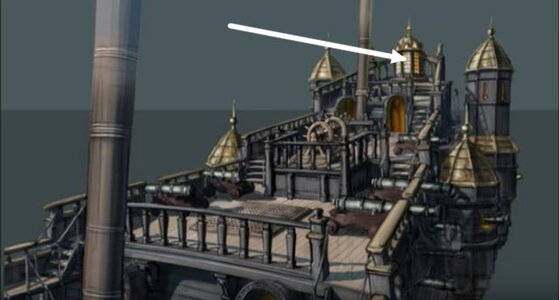
I guess the door of the lantern is the window part of the arrow that is the door.
I don't like the glass part of the lantern I crafted, so I'll have to rework it.
- Joined
- Jun 28, 2020
- Messages
- 544
- Points
- 353

I don't like the blue arrows, so I'll fix them.
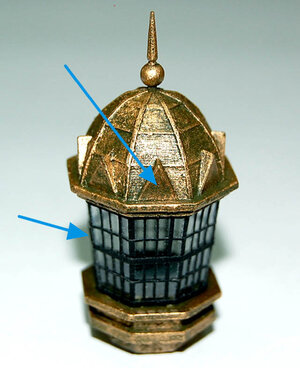
The small roof part will have a window.
How to do it?
As long as it looks like that, it's OK, so I make decals for the windows and stick them on.
All the glass parts have to be redone.
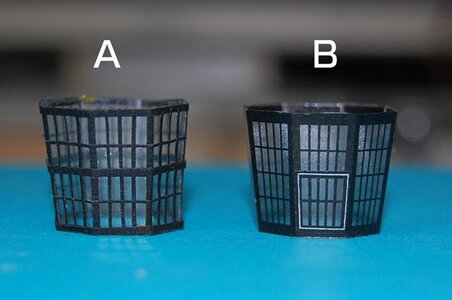
A is the glass part I made last time and B is the glass part I re-made.
The part marked in silver is the door.
It's a glass door to light the lantern. (Laughs)
The Silent Mary in the film. No one knows if this is how it was.
I'm making this up in my imagination.
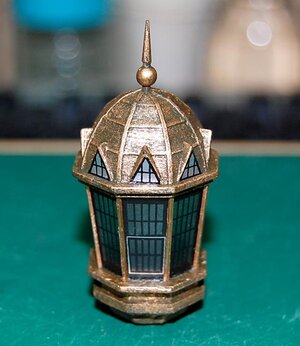
This is how it turned out. I also put a pillar on the outside of the glass.
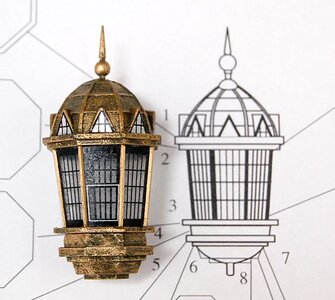
I think it's fine like this.
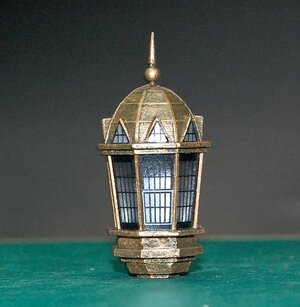
Hmm, I'm self-satisfied.

The small roof part will have a window.
How to do it?
As long as it looks like that, it's OK, so I make decals for the windows and stick them on.
All the glass parts have to be redone.

A is the glass part I made last time and B is the glass part I re-made.
The part marked in silver is the door.
It's a glass door to light the lantern. (Laughs)
The Silent Mary in the film. No one knows if this is how it was.
I'm making this up in my imagination.

This is how it turned out. I also put a pillar on the outside of the glass.

I think it's fine like this.

Hmm, I'm self-satisfied.

