Skonnert Bluenose POF

I use BISON Professional Houtlijm (=woodglue). It is cat. D2, superstrong.
Regards, Peter
Thanks for another datapoint.
I see lijm, meaning glue in Dutch? (Lim in Norwegian)
Probably not available in the US?
Cat D2 must mean something. What?
Regards, Finn
 
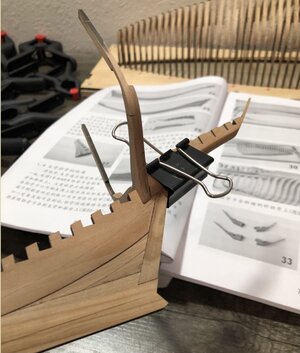
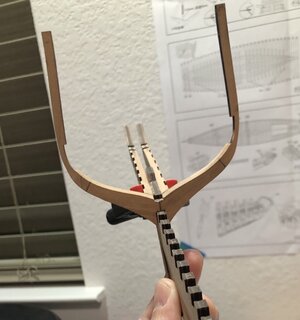
I saw somebody had a concern about getting the stern at the right angle.
I plan to assemble 19, 65, 63, 65, 19 first.
When the time comes, I will glue this to the keel, using frames 55 to guide the aft and and 49 to guide the fore of the above assembly.
Frames 50 to 54 should then align themselves.
Comments?

Finn
 
Thanks for another datapoint.
I see lijm, meaning glue in Dutch? (Lim in Norwegian)
Probably not available in the US?
Cat D2 must mean something. What?
Regards, Finn
Hi Finn,
Correct: glue in Dutch is ‘lijm’.
For PVAC woodglue, we have D1, D2, D3 and D4.
From D1 for inside with a wood humidity less then 15% till D4 for outside with high humidity.
Regards, Peter
 
I saw somebody had a concern about getting the stern at the right angle.
I plan to assemble 19, 65, 63, 65, 19 first.
When the time comes, I will glue this to the keel, using frames 55 to guide the aft and and 49 to guide the fore of the above assembly.
Frames 50 to 54 should then align themselves.
Comments?

Finn
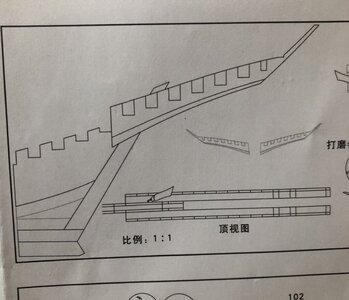
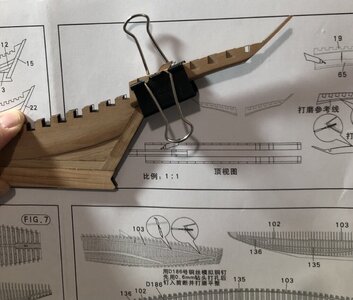
There is a 1:1 scale plan of the tail of the keel. I just held mine up to that and verified the angle. Then I matched the other side to the first one. When the first side was installed, I verified it with frame 49. Then once I glued the keel, and frame 1 and 49, to the jig, I verified the split frames fit correctly. Everything lined up very well.
 
There is a 1:1 scale plan of the tail of the keel. I just held mine up to that and verified the angle. Then I matched the other side to the first one. When the first side was installed, I verified it with frame 49. Then once I glued the keel, and frame 1 and 49, to the jig, I verified the split frames fit correctly. Everything lined up very well.
Dean,
That works too. Many ways to skin a cat-o-nine-tails! Thanks for the comments.

Finn
 
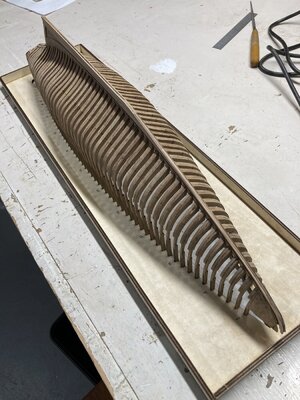
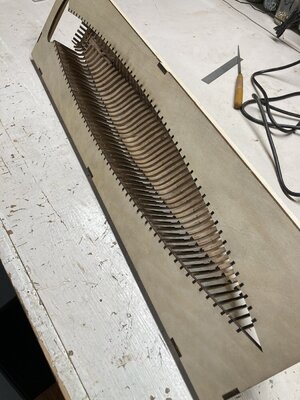
Took the hull dry assembly apart and did the de-carboning, beveling, final notch trimming. Now the hull is back together and looking pretty good.
I found my trusty Dremel to do a good job de-carboning and beveling after some scalpel roughing.
I lightly glued the frames to the jig, so I could do a fine tuning of the hull shape to minimize the final sanding. Bow and stern in place.
On to the keelson, and deck beams with supports. Beautiful lines!!!!
Pondering when to do some linseed oiling. I have a notion to avoid the gluing surfaces.

B56A4EF2-1FA5-4F32-8C48-9101D161038C.jpeg

C36BEFE9-B00D-427E-94C7-3491F58AD22D.jpeg
 
Last edited by a moderator:
Took the hull dry assembly apart and did the de-carboning, beveling, final notch trimming. Now the hull is back together and looking pretty good.
I found my trusty Dremel to do a good job de-carboning and beveling after some scalpel roughing.
I lightly glued the frames to the jig, so I could do a fine tuning of the hull shape to minimize the final sanding. Bow and stern in place.
On to the keelson, and deck beams with supports. Beautiful lines!!!!
Pondering when to do some linseed oiling. I have a notion to avoid the gluing surfaces.
I waited to clear coat mine until I had inner beams done and was about to start on the lower cross beams. After that I did each piece individually. But it’s up to you in the end. I just made sure everything below the deck was done prior to installing the deck beams. After that you will never get to it!
 
I waited to clear coat mine until I had inner beams done and was about to start on the lower cross beams. After that I did each piece individually. But it’s up to you in the end. I just made sure everything below the deck was done prior to installing the deck beams. After that you will never get to it!
I appreciate all pathfinders advice!
Thanx.
Finn
 
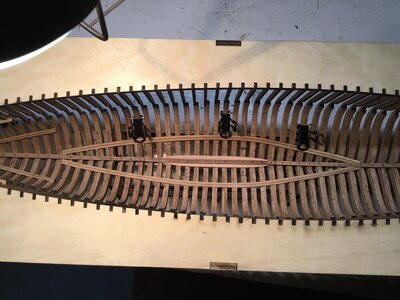
Keelson and deck support in place.
Got confused by Fig8.
It seems to call for a pair of B052 planks along the keel, the length of 135. Full width.
The frames 23 through 33 seem to accommodate flat, tapered, planks spanning just those frames.
Am I missing something?

Finn

A9164DA1-E520-4D98-8F51-0B0EB732D43C.jpeg
 
Last edited:
They should run the entire length,. The reason only those frames have that cut out is to create a ridge to help support the main mast foot, which is notched out for this purpose. You will notice when you put the full length planks in they are flush with the keelson at either end but in the middle they are a bit lower to allow for the mast foot. If left as is you will not have any, or as much support for the forward mast foot. Which by the way has no notch but sits flat on the keelson and these two strips.
Don,
I appreciate your help.
Good point about the forward mast!
Still seems the planks will not seat well halfway out from center.
Or are they beveled?
Also, fig8 and 9 show the planks not tapered, while fig 10 does!
Confused me.

Again thanks,
Finn
 
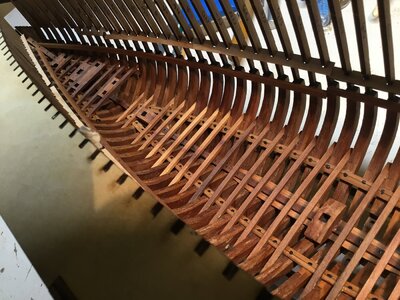
Lower deck beams now in place.
Ready for the main deck.
l linseed oiled the keel and frames, found the oil wicks into glue areas.
So I let it dry, then filed the beam contact points to expose dry wood, and then glued the beams.
Seems to hold fine.
Pre assembled 66, 118 and 67 can’t be maneuvered in. Dry fit.
Opted to use a metallic black acrylic instead of brass wire. Looks nice. Toothpick applied.
inspired by Dean. Thanx.
Worried about the delicate 24 to 29.
 

Attachments

  • A0DBC5E7-3AC0-4C79-ABA7-93C6F6CEC222.jpeg
    A0DBC5E7-3AC0-4C79-ABA7-93C6F6CEC222.jpeg
    295.9 KB · Views: 32
Lower deck beams now in place.
Ready for the main deck.
l linseed oiled the keel and frames, found the oil wicks into glue areas.
So I let it dry, then filed the beam contact points to expose dry wood, and then glued the beams.
Seems to hold fine.
Pre assembled 66, 118 and 67 can’t be maneuvered in. Dry fit.
Opted to use a metallic black acrylic instead of brass wire. Looks nice. Toothpick applied.
inspired by Dean. Thanx.
Worried about the delicate 24 to 29.
An impression from my seat on the dock is that true to hobby ship building the pleasure is in the progress of the model with each part and step along the way. . . more so possibly than the finished model which when completed is done. Then the builder has to consider where to next turn. Like the admonition to "not retire from something but to something." My return with this group build is watching and reading of the tacks and progress of the members on their own YQ BN while me active return is in continuing on my 64 scale MS2130. Fair winds, careful filing, and smooth seas progress to all. Rich
 
Lower deck beams now in place.
Ready for the main deck.
l linseed oiled the keel and frames, found the oil wicks into glue areas.
So I let it dry, then filed the beam contact points to expose dry wood, and then glued the beams.
Seems to hold fine.
Pre assembled 66, 118 and 67 can’t be maneuvered in. Dry fit.
Opted to use a metallic black acrylic instead of brass wire. Looks nice. Toothpick applied.
inspired by Dean. Thanx.
Worried about the delicate 24 to 29.
Looking great! Good job!
 
Back
Top