• Ships of Scale has incorportated an extra level of security when you log In. Please follow on-screen prompts to acknowledge that you are not a robot via a "Check Box" or a "Pictorial Check Box Puzzle". This is needed due to higher level of AI Activity Security.
  • SUBSCRIBE TO SHIPS IN SCALE TODAY!

    The beloved Ships in Scale Magazine is back and charting a new course for 2026!
    Discover new skills, new techniques, and new inspirations in every issue.

    NOTE THAT OUR NEXT ISSUE WILL BE July/August 2026
  • Win a Free Custom Engraved Brass Coin!!!
    As a way to introduce our brass coins to the community, we will raffle off a free coin during the month of August. Follow link ABOVE for instructions for entering.

Soleil Royal 1671 by EDub (Heller 1/100)

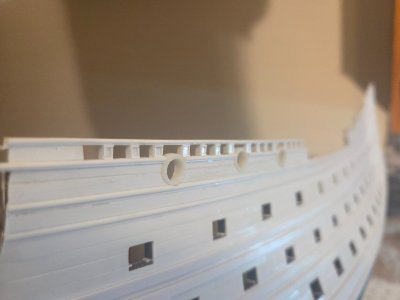
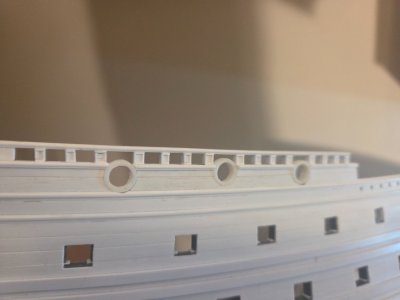
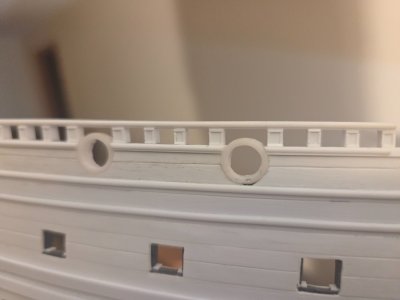
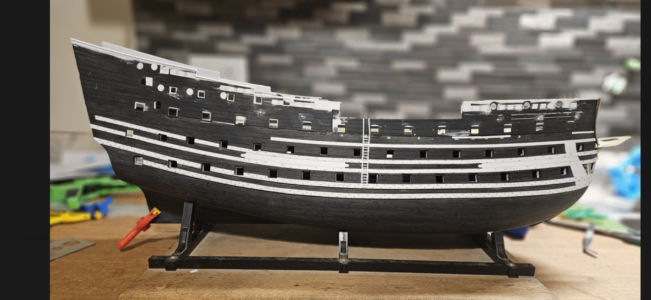
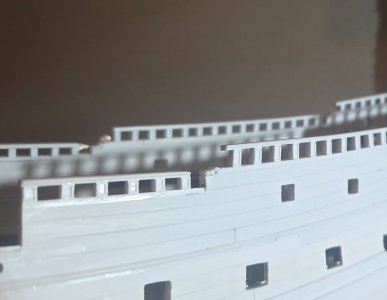
A very brief update... the timberhead framing on both port/starboard sides of the forecastle are roughed in. I will save a bit of light sanding and filing until all of the timberheads are framed. The remaining 70+ timberheads are essentially the same size, so things should go smoothly.

Maybe I will be ready for painting the hull by Christmas (that would mark one year since I started on version #3.... or as I call it, SR1671.2). I have the fenders and ladders to apply, and then the drilling of about 800 various sized holes (for gun tackle, gun port lid lanyard, etc, etc.) that I have templates already constructed.

20260909_060201.jpg

20260909_060212.jpg

20260909_060221.jpg
.
 
Awesome project, I see a lot of similarities to my Vanguard/Superbe kit bash project — I’m so jealous of your 1:100 scale though :) fantastic detail, craftsmanship and paint techniques, really look forward to following your build!
 
Awesome project, I see a lot of similarities to my Vanguard/Superbe kit bash project — I’m so jealous of your 1:100 scale though :) fantastic detail, craftsmanship and paint techniques, really look forward to following your build!
Thank you for the kind comments... I looked at your build log, and all I can say is "WOW"!!! Very impressive....
 
I actually finished the (rough) framing almost 2 weeks ago... but zero work has been done on SR1671.2 in that time, as my focus has been on updating a laundry room; drywall, electrical, baseboard and window/door casings, etc. Fun, but in a completely different way. Having a bevy of handy tools, I sometimes wondered "how did they build these massive, gorgeous ships with the simple tools that they had 350 years ago!?".

All that is left is some minor sanding and filing, and then the effort now to take care of any glue smears - you can see the sheen in some spots. And then a good wash before we proceed to the ladder and fenders. That is... after I finish painting the "new" laundry room!

20261003_063604.jpg

20261003_063644.jpg
 
Last edited:
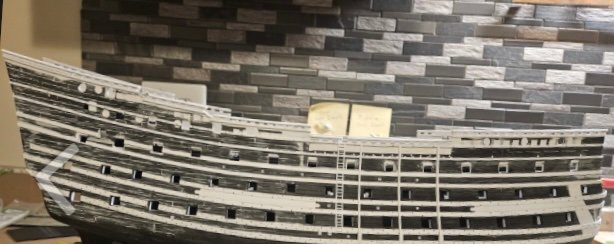
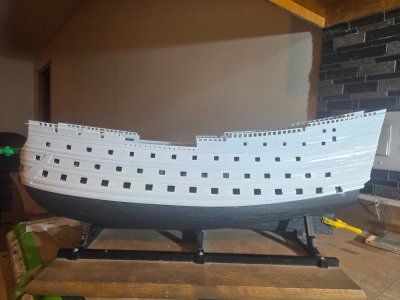
I have finished planking the interior of the starboard side. i.e. planking the inside of the bulwarks where the eye can peer into. Looking at the black deck ledge for the forecastle, you can get an idea how the sheer line diverges from the deck line.

View attachment 607378

I am happy with the planking. You may notice above the square QD gun ports, I had to do... not sure of the carpentry term... a series of planks that were cut halfway in width to seat the next plank above without having to taper a tiny, sharp point. It was the only way I could think of that might be hostorically plausible.

View attachment 607379

View attachment 607377

This photo shows the standard kit rear bulwark with four (five?) sheer steps compared to mt SR1671.2 with three sheer steps.

View attachment 607380

And this last photo shows the kit bulwark positioned exactly where it would go, albeit mostly hidden behind my modifications...

View attachment 607381
Hi:) You did a very beautiful work in re-creating the planking....
This kit has two main issues, and it isn't the fact that it only has 14 lower gunports .....It'is about its hull curve, its depth and its overall shape length wise; You fixed the rear part, but it needs a front curve (much smaller) too; the depth of the hull can be fixed by simply cutting off the part under the lower wale off.....As for the number of gunports......Can you read French? I can send you a document which will give you the details about the ships history that I reshearched for a couple of years and with many headaches; its 125 pages apprx.
 
Hi:) You did a very beautiful work in re-creating the planking....
This kit has two main issues, and it isn't the fact that it only has 14 lower gunports .....It'is about its hull curve, its depth and its overall shape length wise; You fixed the rear part, but it needs a front curve (much smaller) too; the depth of the hull can be fixed by simply cutting off the part under the lower wale off.....As for the number of gunports......Can you read French? I can send you a document which will give you the details about the ships history that I reshearched for a couple of years and with many headaches; its 125 pages apprx.
Guy, thank you for the comments! I have your document, and it has been an exceptional resource for me to refer back to over the last several years.

I have closely followed your build logs, as well as that of @Hubacs Historian. The combined expertise/knowledge - as well as the sheer ambition! - have been an incredible aid to me.

This will eventually be a waterline model, so I will be able to "hide" the lower hull
 
Finally... after 3+ weeks of most of my attention - and time - going into gutting and remodeling the laundry room, I can get back to SR1671.2.

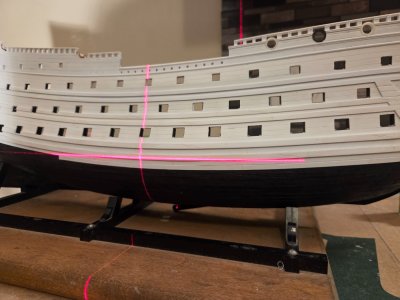
After some light and precise sanding to remove any glue spots/squeeze out, I was able to finish the planking below the bottommost wale. Evenually, this will be a waterline model, so I only need to add three courses of planking below the wale, as the waterline was moved up from the standard kit line. Without digging into my specifications spreadsheet, I think - based on Hubac's Historian suggestion - I placed the new waterline approximately 5 feet below the lowest Lower Deck gun port opening (which is #8). Now, the lowest wale is submerged as it dips to its lowest curve in the middle of the hull.

20261017_065944.jpg

Because I pierced 108 eight new gun ports in the hull, I absolutely had to plank, as the hull was in full Frankenstein mode.

20260206_112609.jpg

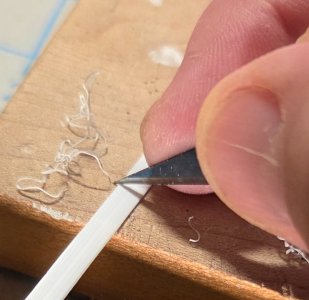
Regarding the planking, one thing tht really helped was to bevel the sides and butt ends of the planks. I simply placed the tip of a #11 blade in a screw hole, held it at a 45 degree angle, and then pulled the strip past the blade to cut off a little curl of plastic. Now I can finally start on adding the ladder steps and the three fenders to each side.

20260215_062934.jpg
 
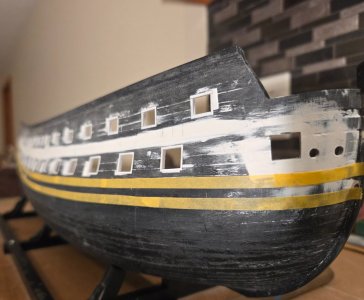
That waterline looks good to me. Whenever you do get around to taping-off for painting the waterline, you will want to ensure that you position the waterline for proper trim along the hull’s length. I like to reference this earlier iteration of your build:

IMG_6469.png
IMG_7242.jpeg

I can’t overemphasize enough how important it is that the bow, not appear to be riding too high out of the water:

IMG_3781.jpeg
IMG_3746.jpeg
IMG_0700.jpeg
IMG_3742.jpeg

Exciting stuff ahead!
 
That waterline looks good to me. Whenever you do get around to taping-off for painting the waterline, you will want to ensure that you position the waterline for proper trim along the hull’s length. I like to reference this earlier iteration of your build:

View attachment 644146
View attachment 644147

I can’t overemphasize enough how important it is that the bow, not appear to be riding too high out of the water:

View attachment 644149
View attachment 644151
View attachment 644150
View attachment 644152

Exciting stuff ahead!
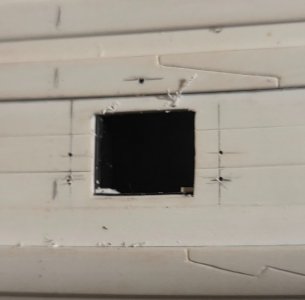
Thank you for the observations, Marc! I never cease to be amazed by that treasure trove of knowledge that you have developed..
 
I have decided to drill all of the gun port holes before I: 1) drill the holes for the wale bolts and 2) affix the fenders and ladder, simply because I have to drill over 700 small holes and would likely bump a fender, etc.

Every gun port - with a lid - will have seven holes. I made some simple jigs where I can trace pencil lines. The single hole above the gun port is for the gun port lid laynard (this will obviously be a single rope, not a double rope). The two tiny holes just above the top of the gun port will be where the gun port lid is inserted and held in place by two bits if copper wire (each wire will have one end inserted into a hole drilled into the gun port lid, the other end inserted into the hole just above the gun port).

Finally, that leaves the four holes for the gun port tackle. I am very happy with the gun port tackle that Kris (Skutznik, in Poland) made for me last year.

20261024_104643.jpg
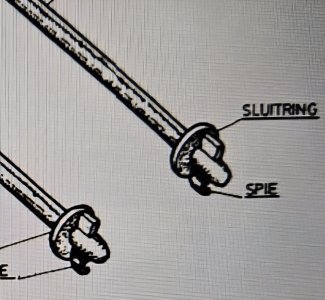
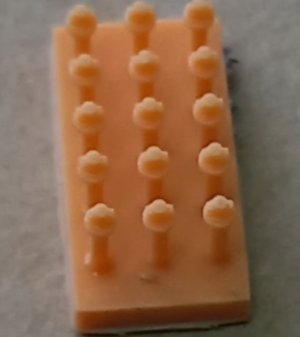
I sent Kris this picture of a Dutch gun tackle, with the wedge in the end of the rod as it protrudes from a washer. He came back with the orange pieces seen below. The shaft is 0.4mm in diameter, and the washer itself is 0.6mm in diameter... very tiny and will certainly take a lot of patience to paint and apply them, but I am pleased with the scale. I really wanted to see if I could get gun port tackle that suggested the wedge in the rod, and there was no possible way that I could create them myself (unless I invested in a 3D resin printer!)

Dutch gun tackle.jpg
1 (1).jpg
 
Yeah, that Kris sure does amazing things! Are you planning to apply those gunport through-bolts before paint? I would recommend that you do so. You'll have to use C/A because of the mixed media bond of styrene to resin.

I can tell you from experience that dripping C/A onto your already painted and weathered surfaces is a real drag, as touching up that area is very tricky. If you're concerned about painting these small details, then I suggest you just spend some time learning dry-brushing techniques. There is no shortage of good tutorials on YouTube.

Now, that being said, I would recommend that you not glue your trophies of war to the hull until after the initial painting and weathering. Because they are high relief, you will not be able to wipe away the excess weathering medium, without damaging the trophies.

Typically, when I have to add a detail like this after painting, I will hold the part precisely in-place and make a light tracing in pencil, as close to the trophy as I can get, Then, I will scrape away paint, well within that tracing line so that I am assured of a good bond. You can simply erase the pencil lines, after you have scraped your paint.

If you are using artists' oils to do your weathering (recommended), you definitely want to give it a good long time to cure (a few weeks) before you start messing around with it. Those paints are linseed oil-based, and even though there's only residual pigment left on the surface, it can still be manipulated/altered days after the fact.

We can get more into this, as you actually get closer to painting, but I have found that cheap, coarse bristled "chip" brushes are great for pulling excess pigment out of tight corners, and for generally blending the effect. I don't throw the brushes away after use, either, because the paint that stays on the bristles (I don't clean them) is useful for later stages of painting. For example, I'm using the same chip brushes that I used for the hull, to weather my decks.

To be clear, though, most of the oil paint is first wiped off using a Q-tip wrapped in a scrap of cotton T-shirt. This is a technique that was popularized by several of the renowned Dutch modelers, like Ab Hoving and Herbert Tomesan. It is so simple, and produces a result that gives the model tremendous depth and interest.

Kind of like a cast-iron pan, they become "seasoned".
 
Last edited:
Yeah, that Kris sure does amazing things! Are you planning to apply those gunport through-bolts before paint? I would recommend that you do so. You'll have to use C/A because of the mixed media bond of styrene to resin.

I can tell you from experience that dripping C/A onto your already painted and weathered surfaces is a real drag, as touching up that area is very tricky. If you're concerned about painting these small details, then I suggest you just spend some time learning dry-brushing techniques. There is no shortage of good tutorials on YouTube.

Now, that being said, I would recommend that you not glue your trophies of war to the hull until after the initial painting and weathering. Because they are high relief, you will not be able to wipe away the excess weathering medium, without damaging the trophies.

Typically, when I have to add a detail like this after painting, I will hold the part precisely in-place and make a light tracing in pencil, as close to the trophy as I can get, Then, I will scrape away paint, well within that tracing line so that I am assured of a good bond. You can simply erase the pencil lines, after you have scraped your paint.

If you are using artists' oils to do your weathering (recommended), you definitely want to give it a good long time to cure (a few weeks) before you start messing around with it. Those paints are linseed oil-based, and even though there's only residual pigment left on the surface, it can still be manipulated/altered days after the fact.

We can get more into this, as you actually get closer to painting, but I have found that cheap, coarse bristled "chip" brushes are great for pulling excess pigment out of tight corners, and for generally blending the effect. I don't throw the brushes away after use, either, because the paint that stays on the bristles (I don't clean them) is useful for later stages of painting. For example, I'm using the same chip brushes that I used for the hull, to weather my decks.

To be clear, though, most of the oil paint is first wiped off using a Q-tip wrapped in a scrap of cotton T-shirt. This is a technique that was popularized by several of the renowned Dutch modelers, like Ab Hoving and Herbert Tomesan. It is so simple, and produces a result that gives the model tremendous depth and interest.

Kind of like a cast-iron pan, they become "seasoned".
Marc, thanks for the comments. Frankly, I will be a complete neophyte when it comes to painting. I will definitely have a steep - bit hopefully short - learning curve.

I see why the gun tackle should be attached before the hull painting. The blasted things are so tiny, that I wonder how I will be able to paint them! But that time will come.

I will have to take a deep dive into your build log again, as I definitely want to mimic your techniques, especially the weathering techniques that you learned from Herbert Comes an.

Since the gun tackle bolts from across are so fine, I am thinking I should do the wale bolts, add the fenders/ladders, and then add the gun tackle bolts.

Ohhh... and I just thought of this... I think I need to make sure my channels will fit in advance, due to the many hull modifications.

And finally, regarding the Trophies Of War... I am thinking (hoping?) that I could apply a small disc of tape before the painting at every spot where a T.O.W. would be attached. Then peel off the disc and half a good surface to bond the T.O.W. on. Perhaps I could even affix a small peg/wire/stud to the back of the T.O.W.s that would seat into a predrilled hole? I have some thinking to do!
 
Have you tried using dye instead of paint? Resin prints absorb Fiebings Pro dyes quite well and a small bottle of black is not very expensive.
I haven't attempted to paint or decorate a model in 47 years! It is a Brave New World for me...
 
I haven't attempted to paint or decorate a model in 47 years! It is a Brave New World for me...

Then we have much in common! The advantage of dye is that, in the round, it doesn’t add any thickness to parts. Something else I’ve used is acrylic art pens. The blacks are particularly good for getting a blackened iron look.
 
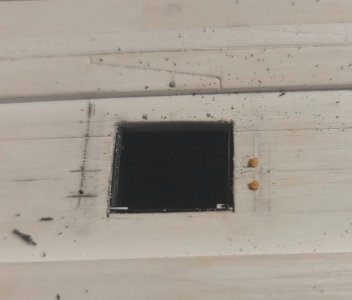
@Hubac’s Historian Marc, I just dropped in two of the gun tackle bolts. I am very pleased with the scale and the hint of a wedge, but.... is it really possible to paint these little buggers after they are nserted into the hull, and then the hull is primed and painted?

Now, if you tell me "absolutely!". I will believe you 100%, as you have been 100% correct in your observations regarding the development of the modeling skills that have gotten me to this point. Practice and patience over the last three years have paid great dividends; if painting is just a natural extension of those skills, then there isn't anything to worry about!

20261025_083104.jpg
 
Back
Top