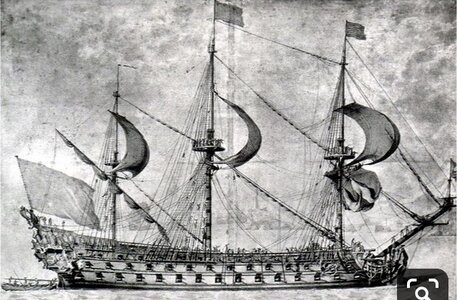
Soleil Royal by Heller - an Extensive Modification and Partial Scratch-Build by Hubac’s Historian

Waldemar, yes, all sources of information are welcome. I will say, though, that while I am aware of the Heller trunnion issue, it is not one that I am likely to correct. I haven’t 100% ruled it out, but I suppose I will revisit that in the near future. I will fit breaching ropes and haul-out tackles, but I will omit the haul-in tackle at the rear of the carriage because I think it makes the decks look very busy. I will position the ring bolts in the binding strakes, though.

Nigel, I may indeed have to shift a few deadeye locations. That forward deadeye is partially the angle of the shot, but it is close to where the barrel will be. There’s a definite conflict on the main channel, though.

As for channel locations of three- deckers in 1693, I can’t say for certain, but by this point it seems the French had shifted the channels to below the main deck guns.

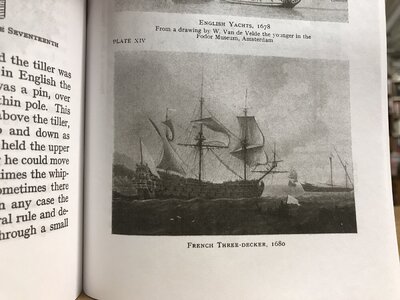
Early RL or SR, circa 1680:
IMG_0878.jpeg

Monarque around 1668:

IMG_1582.jpeg

RL, circa 1692:
IMG_2353.jpeg

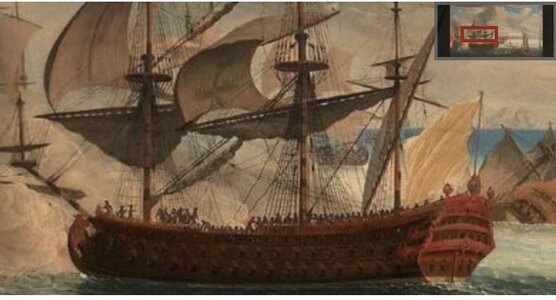
Possibly a 2nd marine battle scene with an un-identified French vessel:
IMG_3298.jpeg

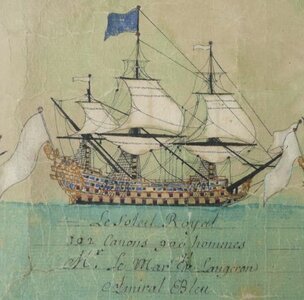
SR as depicted on the Velez Malaga scroll:
IMG_5090.jpeg

I have a few other examples that seem to corroborate this, but it is admittedly not much to go on.
 
Waldemar, yes, all sources of information are welcome. I will say, though, that while I am aware of the Heller trunnion issue, it is not one that I am likely to correct. I haven’t 100% ruled it out, but I suppose I will revisit that in the near future. I will fit breaching ropes and haul-out tackles, but I will omit the haul-in tackle at the rear of the carriage because I think it makes the decks look very busy. I will position the ring bolts in the binding strakes, though.

Nigel, I may indeed have to shift a few deadeye locations. That forward deadeye is partially the angle of the shot, but it is close to where the barrel will be. There’s a definite conflict on the main channel, though.

As for channel locations of three- deckers in 1693, I can’t say for certain, but by this point it seems the French had shifted the channels to below the main deck guns.

Early RL or SR, circa 1680:

View attachment 397829

Monarque around 1668:

View attachment 397833

RL, circa 1692:
View attachment 397828

Possibly a 2nd marine battle scene with an un-identified French vessel:

View attachment 397831

SR as depicted on the Velez Malaga scroll:

View attachment 397830

I have a few other examples that seem to corroborate this, but it is admittedly not much to go on.

Mmm you have me thinking now, Micheal Saunier had them running above the round ports, I ran the trim full length so I could shift downward if I so desired
 
.​

Marc, not a word about the gun barrels (which you probably already have all made). And not a word about the gun tackles or gun utensils (by the way, you quite sensibly chose their configuration to show, in my opinion at least). Here merely about the proportions of the gun carriages themselves. And just to be on the safe side, I guess, because sometimes one can see masterful models of sailing ships, spoiled only by gun carriages of quite awkward proportions. A bit like some of the early Navy Board models where the gun models symbolise the presence of the artillery rather than represent its appearance. :)

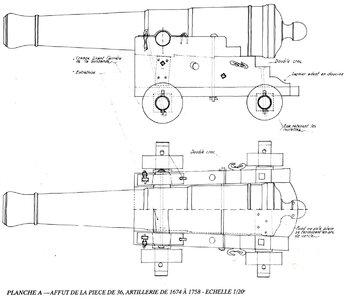
But to the point. Jean Boudriot's reconstruction of a French carriage from the second half of the 17th century can be regarded a very good starting point, as it can serve as a kind of template for possible/necessary adaptations as well (to a specific gun barrel dimensions and/or to a specific gun port height). My point is basically that you may have to make such adjustments to the original carriages from the kit for these very reasons.


French early naval ciarriage.jpg


There are even detailed, ‘fixed’ dimensional data for French carriages for all calibres from the late 17th century, but indeed, it would be pointless to bore you with these tables, if only because they are not at all necessarily appropriate for all cannon barrels actually used (including yours).

However, here are some hints for possible corrections, more or less obvious/applicable/visible, etc., for you to decide. These (generally applicable) rules and proportions were apparently observed even earlier in the 17th century, and their application could make your carriages more realistic and – so to speak again – 'elegant':

– trunnion socket, transom and front axle (at least approximately) one below the other,
– the distance between the cheeks exactly equal to the thickness of the barrel (which usually gives a slight wedge in top view),
– placement of the hind axle exactly where the base ring of the barrel would fall (in an arc, not vertically),
– cheeks thickness, axletrees cross sections and transom thickness equal to calibre, bed thickness about 3/4 of calibre,
– levelling the axis of the gun barrel to the centre of the gun port primarily by adopting the appropriate diameter of the front trucks, and only as a last resort by adjusting the height of the cheeks.

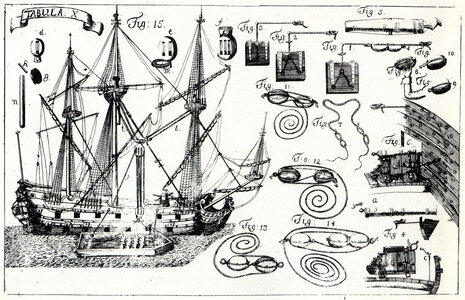
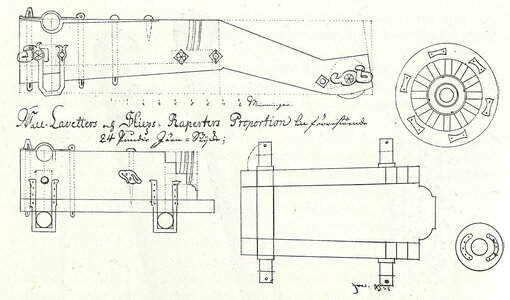
As a sort of appendix also two period graphics below. The first shows, among other things, the levelling of the gun barrel by measuring/selecting the proper diameter of the front trucks (in the right lower corner), and the other, from the manuscript on artillery of ca. 1720, the correct placement of hind axletree, just below the falling base ring of the gun barrel (depicted on both fortress and naval carriages).

From D. Grundell, Nödige underrättelse om Artilleriet till Lands och Siös så väl till Theoriam, som praxin beskrifwen och med nödige kopparstycken förklarad, Stockholm 1705:

Grundell 1705.jpg


From T. Jakobsson, Artilleriet under Karl XII:s-tiden, Stockholm 1943:

Jakobsson 1943.jpg

.​
 
Last edited:
Thank you for this highly detailed information Waldemar. As time goes on, I am becoming more amenable to fixing the trunnion problem for the carriages of the visible deck guns.

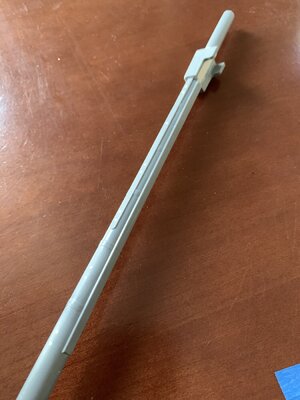
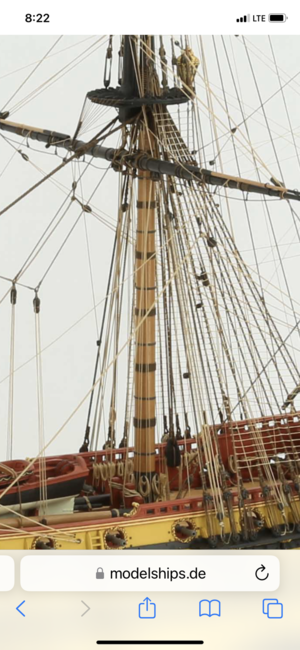
I can’t remember who, exactly, but a while back someone very astute pointed out that a 17th C. lower mast of this time period would not have been equipped with either front or side “fish,” or re-enforcements. It is a Hellerism for them to be moulded into the fore and main masts:

IMG_5368.jpeg

They are nowhere to be found in the work of leading authorities like Boudriot or Lemineur:

IMG_5369.png

And so, for a long time I debated whether to shave away these details. My main argument against it was a concern that doing so would make the lower masts appear too spindly - this, especially, because I had raised each mast footing by about 1/2” for better scale.

The primary argument FOR doing this was that it would enable me to properly represent the wooldings with their top and bottom retaining mouldings. To apply these mouldings over and across all three fish would just look completely wrong and weird.

Now that at least one big holiday is out of the way, I was looking for something to jumpstart the project again, so I decided this was a good task to finally tackle. I started with the coarse Dremel drum sander to remove the bulk of the material:

IMG_5370.jpeg

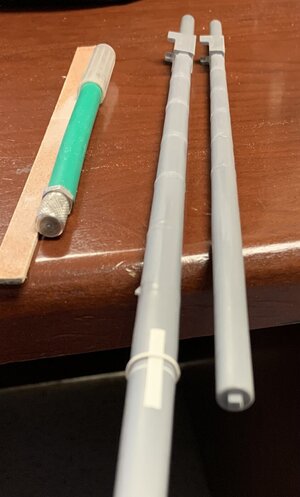
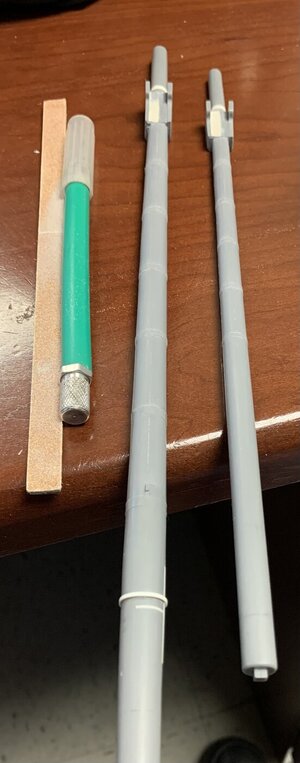
The challenges with this little project are two-fold. The first is to carve-in the missing segments of the iron bands (between wooldings. The other is to maintain a smooth continuous mast taper between the bands. The pictures basically tell the story:

IMG_5385.jpeg
IMG_5386.jpeg
IMG_5387.jpeg

I think this was a success, primarily because the masts do not appear spindly. Going forward, I will try to be somewhat more present with this project. Our CYO basketball schedule kicks off this weekend, and there are a lot of games in the first few weeks. Then, of course, there is Christmas to contend with. Who was it that said “life is just one G’damn thing after another!”?

Anyway, I think that’s me saying that. Thank you for looking in and for your continued interest in this project.
 
Thank you for this highly detailed information Waldemar. As time goes on, I am becoming more amenable to fixing the trunnion problem for the carriages of the visible deck guns.

I can’t remember who, exactly, but a while back someone very astute pointed out that a 17th C. lower mast of this time period would not have been equipped with either front or side “fish,” or re-enforcements. It is a Hellerism for them to be moulded into the fore and main masts:

View attachment 410995

They are nowhere to be found in the work of leading authorities like Boudriot or Lemineur:

View attachment 410996

And so, for a long time I debated whether to shave away these details. My main argument against it was a concern that doing so would make the lower masts appear too spindly - this, especially, because I had raised each mast footing by about 1/2” for better scale.

The primary argument FOR doing this was that it would enable me to properly represent the wooldings with their top and bottom retaining mouldings. To apply these mouldings over and across all three fish would just look completely wrong and weird.

Now that at least one big holiday is out of the way, I was looking for something to jumpstart the project again, so I decided this was a good task to finally tackle. I started with the coarse Dremel drum sander to remove the bulk of the material:

View attachment 410994

The challenges with this little project are two-fold. The first is to carve-in the missing segments of the iron bands (between wooldings. The other is to maintain a smooth continuous mast taper between the bands. The pictures basically tell the story:

View attachment 410993
View attachment 410992
View attachment 410991

I think this was a success, primarily because the masts do not appear spindly. Going forward, I will try to be somewhat more present with this project. Our CYO basketball schedule kicks off this weekend, and there are a lot of games in the first few weeks. Then, of course, there is Christmas to contend with. Who was it that said “life is just one G’damn thing after another!”?

Anyway, I think that’s me saying that. Thank you for looking in and for your continued interest in this project.
Nice to see you back at the workbench my friend!
 
Thank you for this highly detailed information Waldemar. As time goes on, I am becoming more amenable to fixing the trunnion problem for the carriages of the visible deck guns.

I can’t remember who, exactly, but a while back someone very astute pointed out that a 17th C. lower mast of this time period would not have been equipped with either front or side “fish,” or re-enforcements. It is a Hellerism for them to be moulded into the fore and main masts:

View attachment 410995

They are nowhere to be found in the work of leading authorities like Boudriot or Lemineur:

View attachment 410996

And so, for a long time I debated whether to shave away these details. My main argument against it was a concern that doing so would make the lower masts appear too spindly - this, especially, because I had raised each mast footing by about 1/2” for better scale.

The primary argument FOR doing this was that it would enable me to properly represent the wooldings with their top and bottom retaining mouldings. To apply these mouldings over and across all three fish would just look completely wrong and weird.

Now that at least one big holiday is out of the way, I was looking for something to jumpstart the project again, so I decided this was a good task to finally tackle. I started with the coarse Dremel drum sander to remove the bulk of the material:

View attachment 410994

The challenges with this little project are two-fold. The first is to carve-in the missing segments of the iron bands (between wooldings. The other is to maintain a smooth continuous mast taper between the bands. The pictures basically tell the story:

View attachment 410993
View attachment 410992
View attachment 410991

I think this was a success, primarily because the masts do not appear spindly. Going forward, I will try to be somewhat more present with this project. (...)
Dear Marc, great to see this step foreward - you may remember my work onto the original kit's stand becoming a "wooden" one? I simply used sandpapier and a cutter blade N°11 in my knife to imitate the grooves and

download (3).jpeg
Citardel's Sepia ink to solidify their visibility in a unique tan-coloured inviroement.

Hope this helps a bit with the masts - for the very fashionable white masts a thinned down Sepia for the warm way and a thinned down
download.png
Revell Acrylics N°36 Matt "Light Grey" may be right for the cold blueish way to go?

Best wishes from Berlin, Christian
 
Last edited:
Hi Paul - I appreciate the thought. Unfortunately, I just haven’t had much to post. I’ve been fiddling around with making the chains. Most recently, I was making preventer plates out of .28 gauge brass wire, but my solder joints were failing and I made the plates a little too long, anyway. Nigel gave me some good solder advice, so I’m tinkering away with that. I’m tempted to start detailing guns or doing something that I’m already good at, but I’ll stick to the ship chandlery for the moment and develop my skills there. Hopefully, I’ll have something worth showing soon.

In the meantime, I have certainly enjoyed looking through all if your logs with all the lovely progress you have made.
I know the feeling. I'm stuck one my ship too, with work interrupting the progress, and still wrestling with how to make the decorations.
 
I’ve become somewhat stymied in my chain-making experiments, lately, as one of the tips of my Xuron PE snips snapped off, while cutting soft annealed wire (28 gauge). Maybe I’m using the wrong tool here, but should the tip really snap off after such relatively light use? Is there a better tool in the Xuron range for 1:96 chain making?

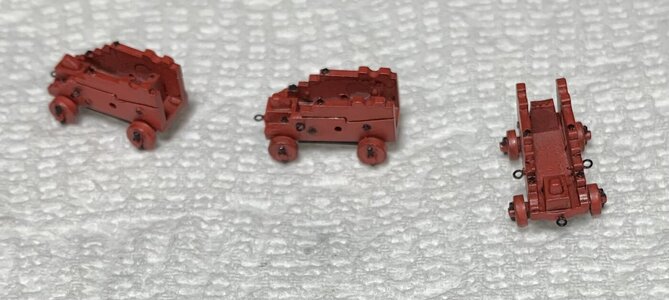
Anyhow, that’s all on hold until I buy better/more appropriate tools. In the meantime, I just wanted to make some progress doing anything, so I finished detail painting the main deck gun carriages.

IMG_5600.jpeg

I appreciate all reasonable advice to correct the implausible/impossible carriage trunnion mounts. After much hemming and hawing, during my phase of no progress, I have decided to let this one go in the interest of keeping things moving onward and upward. I am satisfied enough that I spread the trucks, and I will re-position the barrel trunnions themselves, so that the cascabels don’t overhang the back of the carriage to an unreasonable degree. Good enough for this go-around the May-Pole.

IMG_5601.jpeg

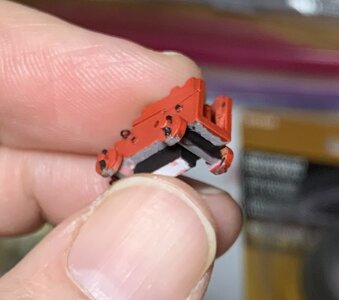
I have blacked-out the truck axles and the glue blocks underneath all visible carriages.

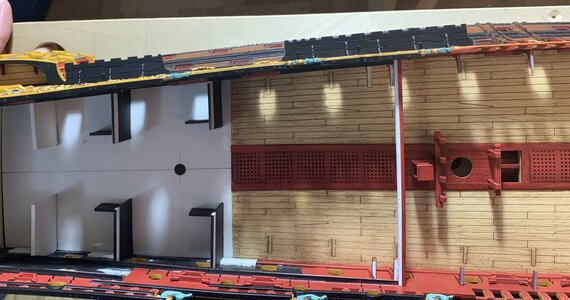
One other incorrect detail of my model that I would like to better understand the “why for,” is the rake of the channels. I have chosen to back-sweep the forward and aft edges of my channels:

IMG_5599.jpeg

This just feels intuitively correct to me. To the contrary, though, all credible monographs show a slight forward-sweep to the fore and aft edges of the channels. What is the logic behind the design?
 
Back
Top