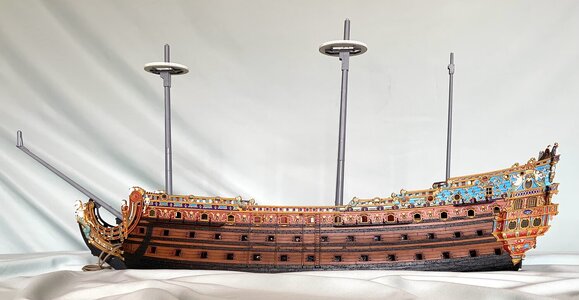
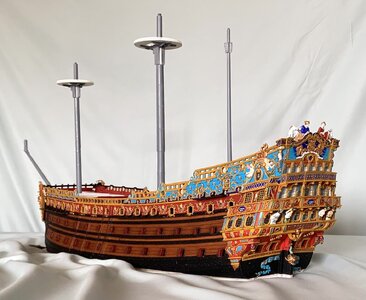
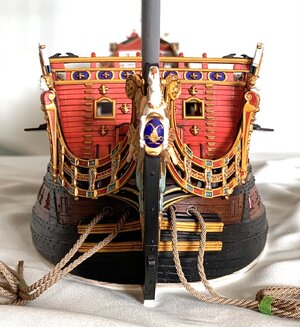
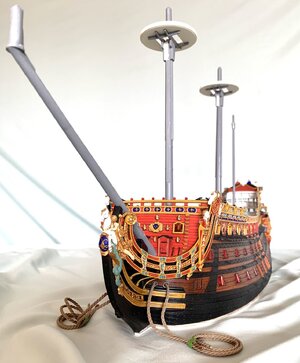
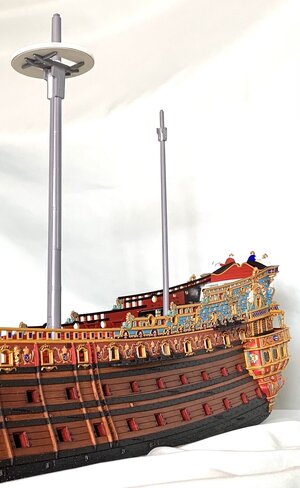
Soleil Royal by Heller - an Extensive Modification and Partial Scratch-Build by Hubac’s Historian

Hi Kurt - I actually use a pair of hemostats to lock-in my wire ends. They work pretty well for this. I appreciate the tip, though.

Duarte, yes, in real life these links would have been iron. I took a short-cut, though, because I didn’t feel like doing all of the extra work to make incrementally longer links as the chains fan out, aft-wards. There are some clever fixtures one can make to achieve this, but I was just kind of fed-up with the chain-making exercise and wanted to get past this stage of the build.

I learned a lot, though, and will take those lessons to the next project.

Hi Mark,

Now that you mentioned it, making those chain links with variable lengths should be no joke!

Do you know where I can see those clever fixtures that you referred?
 
Hi Mark,

Now that you mentioned it, making those chain links with variable lengths should be no joke!

Do you know where I can see those clever fixtures that you referred?
I was taking all of my cues on chain-making from Andre Kudin’s incredible YouTube video series of his Fleuron build. Somewhere around videos 13-15, if memory serves, he shows in detail how he makes his chains. I find his work to be impeccable.
 
I was taking all of my cues on chain-making from Andre Kudin’s incredible YouTube video series of his Fleuron build. Somewhere around videos 13-15, if memory serves, he shows in detail how he makes his chains. I find his work to be impeccable.

Thank you very much for the information Marc! I am delighted with Kudin videos…

The one with the chain links is number 16, truly wonderful, this is so much better than Netflix :)
 
Thank you very much for the information Marc! I am delighted with Kudin videos…

The one with the chain links is number 16, truly wonderful, this is so much better than Netflix :)

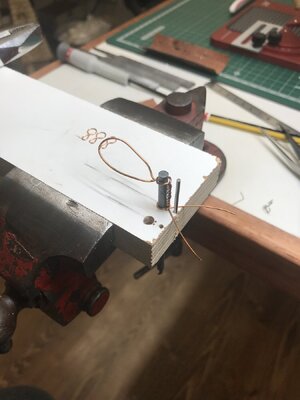
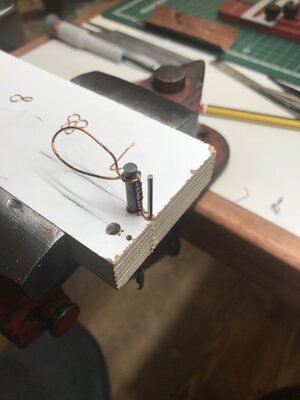
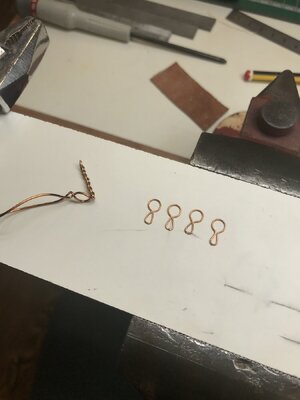
Incredible videos Marc, I just couldn’t resist to try it…

Very rudimentary still, but I think I’m getting the idea:

FA34E644-2678-4E12-9AEE-C244145482FA.jpeg
A382F251-54A8-47D3-A037-7C33F3C86E83.jpeg
CD76214B-069A-4B0F-9879-3DCAC56D88E1.jpeg

I’m just overwhelmed, this opened ideas that I would never had by my own, not in a million years :)

I will improve the jigs for sure, but wonderful technique, that’s all I can say!!

Thanks a lot Marc, for showing the way!
 
I can’t escape the fact that I continue to fail at this chain-making exercise. As the old maxim goes, though, every failure is one step closer to success.

I’ve now thrown away two whole batches of chain preventer plates. While I was quite right to follow Andre Kudin’s example, for the process of their manufacture, I eventually discovered that that process is not entirely transferable from 1:48 to 1:96 scale.

After forming his basic links, Andre solders them closed at one end, and then places the closed link back onto the two pins so that he can crimp an eye on each end with his round pliers.

Well, the 28 gauge brass wire I’m using does not provide enough surface area for a strong enough bond to survive the crimping. My success to failure ratio was pretty poor:

View attachment 443656

So, my lesson from that exercise was that I needed to do the crimping before soldering one end closed:

View attachment 443657

These soldered loops will be the lowest end of the chains, bolted into the wales. That way, I could induce a series of bends into the upper half of each preventer plate, so that they could overlay the next small link:

View attachment 443655

Above I’m just using another preventer plate to check that the bends I’m making are sufficient.

So, I spent a good chunk of time cleaning up the solder and inducing bends into the remainder of the preventer plates. The solder joint will be re-enforced with the CA glue that fixes the pin-bolt in place:

View attachment 443654

With that out of the way, I could make a new, slightly closer-spaced pin jig for the next small link, which is only crimped on one end, where it seats beneath the preventer plate.

Now that I have a process that I know will work, and now that I’ve had all of this practice, these next links should go fairly quickly:

View attachment 443653
View attachment 443652

I have a lot of these to make, solder and bend - about 70 to ensure I can use the best. This has all been a colossal PITA, but it was really important to me that all of this look very clean and uniformly shaped. In the process, I have acquired some very valuable metal skills that will only enhance this and future projects.

That said, I am going to experiment with using black nylon thread of an appropriate diameter to connect the deadeye strop loops to the small links. This would essentially be a variation on the way that the stock kit represents these links, but I will do individual chain loops that draw tight with some form of slip-knot that I can pull up and hide behind the deadeye strop.

Andre had a great method for producing these variances, but it is all just that much more tedious in the smaller scale.

The advantages of doing this are several. So long as there is not a jarring difference in appearance between the black thread and the blackened metal, it will save me tremendous amounts of time. It also simplifies the difficulty of accurately measuring and keeping track of a series of increasingly longer links as the shroud angle increases from fore to aft. Lastly, it greatly simplifies the placement of the deadeyes because I can add the retaining strip, in advance, and it also makes it much easier to locate and properly secure the bottom two links. Hopefully, that will work out.

Well, I keep saying that I’m going to get back in the swing of the project, and then I get sucked into coaching another basketball team - now my son’s Spring rec team. Meanwhile, the Rangers and Knicks are just too compelling to ignore this post-season. At least for now, I can see the end of the tunnel for these chains, which is tremendously motivating, and then I can return to the more immediately gratifying work of outfitting and arming the main deck.

Thank you all for taking the time to look back in on This Old Build. More to come!

Hello Marc,

I’m also trying to follow Andre’s method to make the chain links, and I’m not sure as well if it can be done at 1:100 scale…

You refered that you are using 28 gauge brass wire, this corresponds to a diameter of 0,3 mm, is this correct? If yes, aren’t this very small for the main and fore channels links? My estimated diameters are about 0,7 mm for the main mast channel and 0,6 mm for fore channel.

The brass wire that you use is medium hard or soft?

Sorry to bother you with this, but it is very nice to share ideas with someone that is doing the exact same thing, based on the same sources…

Thanks and have a nice weekend!

Duarte
 
Hi Guys! My apologies for not keeping up with my own log. I will go through each of your queries, in turn.

Nigel - thank you, and I certainly know that you know ;)

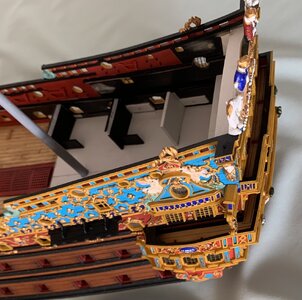
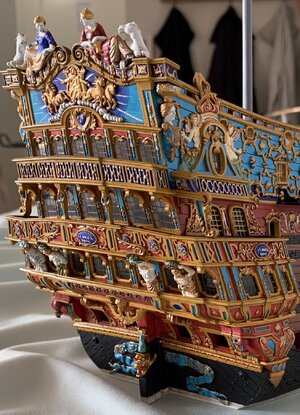
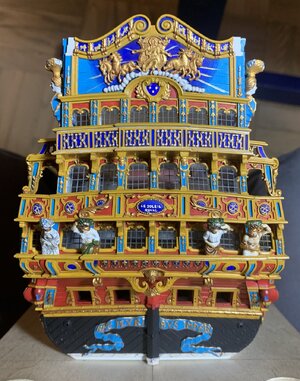
Kurt - it is fair to say that I have chosen to paint the model in what could be described as the Mannerist tradition from earlier in the 17th Century (ie the Vasa). While the exuberance of these color combinations is unlikely for the late 1680’s, I chose this path for several specific reasons.

Firstly, the effort of making almost the entire ornamental program from scratch is so time consuming that I did not want the very deliberate layering of the allegoric elements to blur away into a sea of gold leaf and aqua-marine.

I am making an argument, though, that as the 17th C. progressed, the French Crown would certainly have greatly reduced the amount of gilding, as well as restricting the use of aquamarine to carvings that are directly symbolic of the crown. My thought is that the ships MIGHT have been vividly painted for the same reason that I chose to paint the model in this fashion - to draw attention to and highlight various elements of the ornamental program.

I chose colors that worked harmoniously together and then integrated those colors up through the quarters and into the upper bulwarks in a way that provided a reasonable transition from yellow and red ochers to gold and cerulean blue. The particular blue I am using is not really reflective of the subtilely greenish/grey blue that would likely have been more common at this time. I simply liked the way a brighter cerulean blue interacted with yellow ocher. These colors, by the way, look significantly more vivid in my close-up photographs than they actually do in-person. In other words, the model is not quite so BRIGHT seeming, in-person.

I certainly did take some artistic license with the painting, especially with regard to the figure carvings. I used metallic inflected greens for the mermaids’ tails, silver highlights and even purple washes for their wings, simply because I liked the Faberge aesthetic of highlighting these small details in this way.

The back-board, or tafferal carving of Apollo is also painted in a stylized way to create the impression of Apollo riding just along the periphery between our earthly atmosphere, and the darker heavens of the galaxy beyond.

At the end of the day, mine is really an impressionistic model that I hope is somewhat successful at capturing a sense of the grandeur of the original ship. Without any sufficiently detailed descriptions and/or portraits, though, we will never truly know.

Here are some pictures I took for a chapter in an up-coming book by Kerry Jang, to be released sometime later this summer:

IMG_4999.jpeg
IMG_4995.jpeg
IMG_5006.jpeg
IMG_5005.jpeg
IMG_5003.jpeg
IMG_5008.jpeg
IMG_4993.jpeg
IMG_4992.jpeg
IMG_4630.jpeg

I haven’t yet seen final proofs of the chapter, so I have no idea what pictures have been actually used.

Here is a cover shot of the book from Seaforth Publishing:

IMG_5942.jpeg

The book is an exploration of the degree to which various builders kit-bash and add detail to their plastic projects, and details some of the specific techniques they employ. To say that I am grateful for the platform and opportunity to showcase the project is an understatement for all time.

Thank you, Kerry Jang!
 
Duarte - thanks are truly in order to Andre Kudin. That guy is a true master of the craft!

So, I’m about to disappoint you a little, here. At 1:96, I am not so strong a proponent for rigorously scaling rigging and iron work. My secret? I know there needs to be a graduation of line weights from the lower rig to the upper rig. Main deck guns to upper deck guns, etc.

I simply bought a collection of line in all available weights, and I make these scale decisions by eye; if it looks right, at this scale, it is close enough. That is my philosophy, anyway, and I trust my eye for scale because I am constantly collecting images of models and ship portraits for my archives.

I will pay more specific attention to the stays and shrouds because these lines are so prominent, and one really needs to get as close to scale as possible. I won’t make myself crazy, though, splitting hairs over the smallest fractions. Doing so takes the fun out of the hobby for me. At least on this project.

Already though, Duarte, I can see that you are quickly mastering Andre’s techniques.
 
Hello Marc,

Not disappointed at all, it is your choice, and might be a good one! I tend to complicate a lot and then get stuck and then have to stop for a couple of years… so, any choice is a good choice to get the job done!

Andre Kudin is a very, very talented person! I don’t know how he can figure all those methods from his head alone… maybe he also learn somethings from other model makers, there are many talents in Ukraine and Russia. I think he is from Ukraine, but I’m not sure. I can’t understand one word of what he’s saying, unfortunately…

Regarding his method for the chain links, my conclusion for now is that at 1:100 it is almost impossible to do it with medium hard wire, I tried with the 5 mm deadeyes, which are the bigger, and the wire is to hard to be workable, and more important you need to make a lot of force to bend it and if you must do this after soldering, it will not hold up.

I’m now trying with soft cooper, the wire rigidity is not so important at this scale and for being softer is much easier to work using Kudin’s jigs.

The right one is made from soft cooper:

5B6B2A12-3F99-4324-B384-CFA5BDF8836F.jpeg

Everything here requires a lot of repetitive work and it’s difficult to keep the motivation high, but I guess this is the reason why this hobby is so exciting :)
 
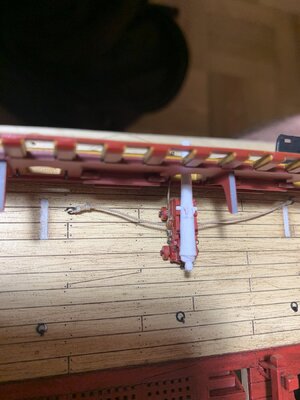
I spent the better part of yesterday’s free time digging through Dafi’s Victory log for better insight into how to convincingly rig carriage tackles in 1:96. As usual, Daniel did not disappoint! I modified some of his approach to suit my objective.

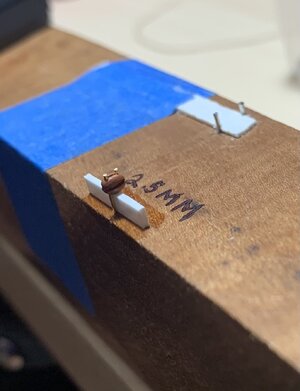
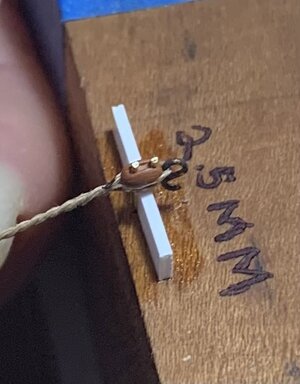
I had made up a bunch of hooks that are as small as I can muster at just about 2.5 MM, matching the single and double blocks that I’m using for these 16 visible main deck guns. I used the brass wire again, but this time I both stripped the coating and abraded the surface with a grey Scotch-Brite pad.

I was hoping to not have to paint these hooks, and this time the JAX blackened the lot fairly immediately:

IMG_6437.jpeg

Nevertheless, the oxidation does not seem very resilient to handling. It looks like I’ll be swiping these with a little black paint before installation, anyway. I wonder whether the Birchwood Casey brass black is just a better product for this application. I see a lot of guys using it with great and instantaneous results.

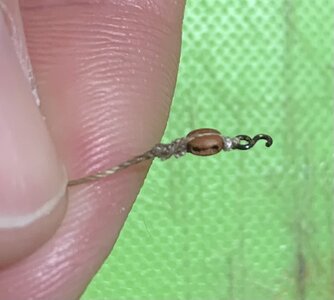
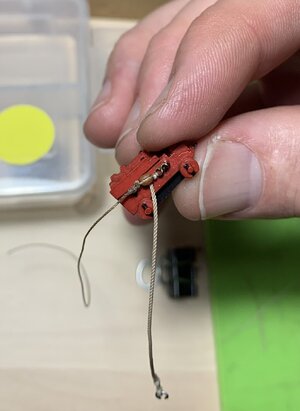
Later in the evening, I set to work designing a process to strap the single blocks with a hook, while also attaching the lanyard to the block strap with an eyelet. I was aiming to minimize any unnecessary bulk from overhand knots.

For the sake of experimentation, I used some common polyester line that pretty closely matches the .35 mm laid line that I will use for the block straps. I only bought a little of this line from Ropes of Scale, for the time being, to get me started. I’ll have to see what it looks like, but I think I will use the common thread for the lanyards and their flaked coils, and the laid line on the straps where that difference is more apparent.

IMG_6435.jpeg

I made a simple pin jig that will elevate and hold both the single and double blocks for strapping.

IMG_6436.jpeg

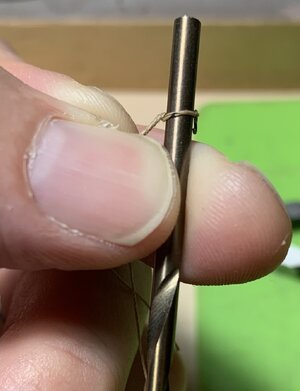
I wanted to get a sense for the circumference around the single blocks, so that I would know what size drill bit to use as a mandrel for pre-setting the strap opening. I marked the test line with a pen:

IMG_6438.jpeg

It turns out that an 1/8” drill bit leaves enough slack that I can do a short seizing close to the base of the hook:

IMG_6441.jpeg

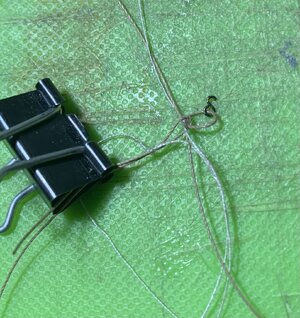
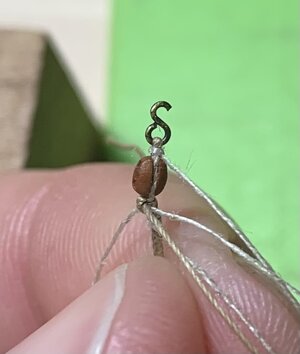
After thinking this process through a little further, it dawned on me that the way to approach this is to simply create that short seizing around the hook, first, with my .007 linen line. Then, make an oversize throat seizing of a single-overhand knot X2, on the backside of the strap. Before placing the strap back over the mandrel, make a loose eyelet for the lanyard, around the back end of the strap. With the strap over the mandrel, you can now pull the strap ends taught around the mandrel. After slipping your strap/lanyard assembly off the mandrel, you can now tack the hook end onto the “out” end of the block with a dot of CA.

Once that sets, you can now cinch the strap tight into the groove of the block. Following that you can push the simple seize of the lanyard into a tight eyelet around the “in” end of the block. I use Kirrill’s technique of alternating, single overhand knots to walk out a 4-wrap simple seizing. All of this will be fixed with dilute white glue before snipping off the loose ends.

A photo montage of my process:

IMG_6442.jpeg
IMG_6443.jpeg
IMG_6444.jpeg
IMG_6445.jpeg
IMG_6446.jpeg

Now, my argument for not using expensive laid line for the lanyard is that there will be so little visible space between the single and double blocks. I did a few visual checks to see how far in-board I could place the carriages before the outboard portion of the gun barrels looked too short, relative to the middle and lower batteries:

IMG_6447.jpeg

This is about the limit of what’s reasonable:

IMG_6448.jpeg

The depth of these two lower batteries is pretty well fixed as these barrels plug into pre-established dummy blocks on the lower decks. This looks reasonable to me.

As I embark on this process of gun rigging, it is immediately apparent to me why builders shy away from these huge 100-gunners, and I’m only rigging a small fraction if those guns!

Thank you for looking in. More to follow..

Best,

Marc
 
Well, I’m happy to report that I finally found success with the JAX. Across both forums, I’ve gotten a lot of really good advice. One friend recommended rinsing with common white vinegar, then water.

I had that laying around, so I first used an old toothbrush to scale off any loose oxidation into a paper towel. I water rinsed to get rid of debris. Then, I let them sit in full-strength vinegar for about 10 minutes. I swirled the container for good measure. Then, a final water rinse X2.

According to one friend, the key to success whether it is Birchwood or JAX is to dilute the solution; Paul suggested a 1:10 solution of blackening agent to water.

With a medicine dropper, I measured out 10 drops of tap water, followed by 1, then 2, and finally 3 drops of the JAX. The color change was gradual over a five minute period. I left it for 10 minutes, and the color wasn’t seeming to get any darker, but it was plenty dark enough.

Unlike before, there was no accumulation of oxidative debris in the solution. The parts didn’t look crusty. I rinsed with water and left them out on a paper towel to dry.

Voila! I can handle them. The color doesn’t rub off. It seems as though the key difference is that full-strength solution attacks the metal too aggressively, producing this loose, scaley oxidation.
 
Hi Guys! My apologies for not keeping up with my own log. I will go through each of your queries, in turn.

Nigel - thank you, and I certainly know that you know ;)

Kurt - it is fair to say that I have chosen to paint the model in what could be described as the Mannerist tradition from earlier in the 17th Century (ie the Vasa). While the exuberance of these color combinations is unlikely for the late 1680’s, I chose this path for several specific reasons.

Firstly, the effort of making almost the entire ornamental program from scratch is so time consuming that I did not want the very deliberate layering of the allegoric elements to blur away into a sea of gold leaf and aqua-marine.

I am making an argument, though, that as the 17th C. progressed, the French Crown would certainly have greatly reduced the amount of gilding, as well as restricting the use of aquamarine to carvings that are directly symbolic of the crown. My thought is that the ships MIGHT have been vividly painted for the same reason that I chose to paint the model in this fashion - to draw attention to and highlight various elements of the ornamental program.

I chose colors that worked harmoniously together and then integrated those colors up through the quarters and into the upper bulwarks in a way that provided a reasonable transition from yellow and red ochers to gold and cerulean blue. The particular blue I am using is not really reflective of the subtilely greenish/grey blue that would likely have been more common at this time. I simply liked the way a brighter cerulean blue interacted with yellow ocher. These colors, by the way, look significantly more vivid in my close-up photographs than they actually do in-person. In other words, the model is not quite so BRIGHT seeming, in-person.

I certainly did take some artistic license with the painting, especially with regard to the figure carvings. I used metallic inflected greens for the mermaids’ tails, silver highlights and even purple washes for their wings, simply because I liked the Faberge aesthetic of highlighting these small details in this way.

The back-board, or tafferal carving of Apollo is also painted in a stylized way to create the impression of Apollo riding just along the periphery between our earthly atmosphere, and the darker heavens of the galaxy beyond.

At the end of the day, mine is really an impressionistic model that I hope is somewhat successful at capturing a sense of the grandeur of the original ship. Without any sufficiently detailed descriptions and/or portraits, though, we will never truly know.

Here are some pictures I took for a chapter in an up-coming book by Kerry Jang, to be released sometime later this summer:

View attachment 457619
View attachment 457607
View attachment 457617
View attachment 457616
View attachment 457615
View attachment 457618
View attachment 457608
View attachment 457610
View attachment 457613

I haven’t yet seen final proofs of the chapter, so I have no idea what pictures have been actually used.

Here is a cover shot of the book from Seaforth Publishing:

View attachment 457629

The book is an exploration of the degree to which various builders kit-bash and add detail to their plastic projects, and details some of the specific techniques they employ. To say that I am grateful for the platform and opportunity to showcase the project is an understatement for all time.

Thank you, Kerry Jang!
Marc,

Thank you for the reference! Where can we find the book by Jang? And your model is outstanding!!

Bill
 
Hi William,

The book won’t be released until late August, however, you can find listings for it on Amazon. Just search by title. I’m not sure whether sellers are taking pre-orders.

And, thank you for the kind compliment!

Best,

M
 
Back
Top