I hate it when the wiring gets messed up or broken. And the LEDs only last for about 200 hours.Lighting and stern updates
Finished up this section of the project - not without its it's "7 words that you can't say on TV" - used only three hahaha
Images do the talking - PS: need to record a quick video that highlight the great subtle flickering effect of these LED's
50 all together all purchased at Evan's Design along with battery packs, remote sensors and its control. Will start another youtube channel - the one that I now have is only related to aviation - don't want to mix that one up. Once the video is up I will copy/paste the link for those who may be interested....
Now onto the weather deck gun carriages - received two orders from Drydock - Awesome single and double blocks !!!! along with other bits....
Thanks for dropping by much appreciated.
View attachment 375214View attachment 375215View attachment 375216View attachment 375217View attachment 375218View attachment 375219View attachment 375220View attachment 375221View attachment 375222View attachment 375223View attachment 375224View attachment 375225View attachment 375226View attachment 375227
-

Win a Free Custom Engraved Brass Coin!!!
As a way to introduce our brass coins to the community, we will raffle off a free coin during the month of August. Follow link ABOVE for instructions for entering.
-

PRE-ORDER SHIPS IN SCALE TODAY!
The beloved Ships in Scale Magazine is back and charting a new course for 2026!
Discover new skills, new techniques, and new inspirations in every issue.
NOTE THAT OUR FIRST ISSUE WILL BE JAN/FEB 2026
You are using an out of date browser. It may not display this or other websites correctly.
You should upgrade or use an alternative browser.
You should upgrade or use an alternative browser.
Sovereign of the Seas - Sergal 1:78 (with hopefully many added details)
What? LED's last for at least 12 years. If you don't have the proper resistors to keep the current down, they could last only minutes.I hate it when the wiring gets messed up or broken. And the LEDs only last for about 200 hours.
- Joined
- Oct 9, 2020
- Messages
- 2,229
- Points
- 488

very impressive and clever.Lighting and stern updates
Finished up this section of the project - not without its it's "7 words that you can't say on TV" - used only three hahaha
Images do the talking - PS: need to record a quick video that highlight the great subtle flickering effect of these LED's
50 all together all purchased at Evan's Design along with battery packs, remote sensors and its control. Will start another youtube channel - the one that I now have is only related to aviation - don't want to mix that one up. Once the video is up I will copy/paste the link for those who may be interested....Now onto the weather deck gun carriages -
Thanks for dropping by much appreciated.
View attachment 375214View attachment 375215View attachment 375216View attachment 375217View attachment 375218View attachment 375219View attachment 375220View attachment 375221View attachment 375222View attachment 375223View attachment 375224View attachment 375225View attachment 375226View attachment 375227
Beautiful work John, your perseverance with this is going to produce a magnificent ship.
Paul, Kurt, Nigel, Grant, Peter, “@jack Sparrow, Daniel,
Thanks so much for all your very encouraging and kind posts. In retrospect I am indeed satisfied with the lighting results. And thanks to members who clicked “like”
Also, per Nigel’s earlier suggestion I also prefer how the outer lower gallery larger window frames came out.
Vic – Kurt is right about LED’s -- also the ones that I used are specifically for 3-volt power sources. You might want to consider taking a look at Evan Design's site – all very well explained. Great source for members interested in adding lighting to their projects. But you are right it is a real "pain" when wiring goes south...
Last edited:
Darivs is right bout the LEDS lasting a very long time. You need to check the amps and volts per light and put resistors wherever they are needed to keep the power right. Maybe what you are refering to is the short life of the batteries when running all those lights. That would make a more sense to me. The lights look teriffic on the model. Good work.
Last edited:
I can't even find a simple short in my train set. Imagine trying to track down a short in that mess.Daniel20 – looks can be deceiving – It’s all basic segregating all the + red wires to each other then all the blacks together. Though I’m segregating the flickering from the non into separate black/red harnesses. Though I cannot exceed thirty lights to a single battery pack, so may have to do some last-minute rearranging for the two AAA packs.
Hoss6262 thanks for your always very encouraging post. Hopefully the results will be worth the extra time, the removing of pre-installed sections, as well as the extra costs involved adding lights. I am enjoying the challenge that this has created - so far..
And Daniel to your liked comparison here are some images of 747s partial wiring hahaha….
images 1 and 2 – flight deck
images 3 and 4 are from under the flight deck.
Adding the fuselage and wings in the aggregate 747s have 171 (275km) miles of wiring, weighing 3,500 lbs. (1,587 kilos) (aluminum wiring predominant for weight reduction compared to copper) 5 miles of tubing (8km) and 100s of wiring harnesses as well.
747-400 has six million parts half of which are fasteners.
PS: Airbus A350 has 330 miles of wiring (531 km)
PS2: the absolute genius of all of this are the engineers that have such superlative and esoteric skill sets, as to be able to understand how to create these machines.
Driving them by comparison, is sort of child's play IMO - as for anything - once one knows how to - its an easy accomplishment. Especially today with the massive onboard computer backups that tell crews what to do throughout the operation of these machines from cold start (what is known as a dark cockpit), to later landings, and if crews make mistakes flightdeck computers won't allow most mistakes to occur during flight operations .....
Cheers,
View attachment 367255View attachment 367256View attachment 367257View attachment 367258
Norgale,
Thanks for your nice comment….and,
Indeed, comments regarding resistors are indeed correct. Especially if LEDs are to be wired directly to household current without a transformer.
knowing nothing about these electrical necessities, I was please to find Evans Design who’s company supplies 3, 6. And 9v LEDs….
Yea – all those wires were a real mess – got lucky that the requires “electrical” work was within my basic understanding of “how to”…AND all lights actually lit when powered – such luck…..
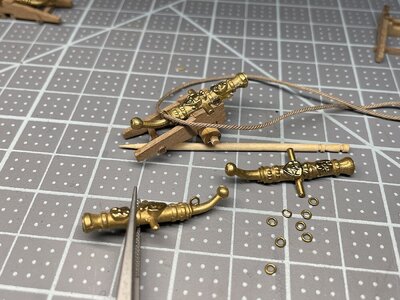
Now moving forward with work detailing carriages and guns.. just noticed the cannon molding seams – may need to address that as well.
PS: I have been a huge fan of model railroading for most of my life some home/private sets are SO amazing - and of course the most amazing one on this planet
including the stunning airport...
Link below would not open - but, if interested, copy phrase just below then paste that on youtube - It will open to a 4K visit to the museum...
Thanks for your nice comment….and,
Indeed, comments regarding resistors are indeed correct. Especially if LEDs are to be wired directly to household current without a transformer.
knowing nothing about these electrical necessities, I was please to find Evans Design who’s company supplies 3, 6. And 9v LEDs….
Yea – all those wires were a real mess – got lucky that the requires “electrical” work was within my basic understanding of “how to”…AND all lights actually lit when powered – such luck…..
Now moving forward with work detailing carriages and guns.. just noticed the cannon molding seams – may need to address that as well.


PS: I have been a huge fan of model railroading for most of my life some home/private sets are SO amazing - and of course the most amazing one on this planet
including the stunning airport...
Link below would not open - but, if interested, copy phrase just below then paste that on youtube - It will open to a 4K visit to the museum...
A trip to Miniatur Wunderland (Miniature Wonderland) 4K HDR --
- Joined
- Nov 15, 2022
- Messages
- 418
- Points
- 278

Lighting and stern updates
Finished up this section of the project - not without its it's "7 words that you can't say on TV" - used only three hahaha
Images do the talking - PS: need to record a quick video that highlight the great subtle flickering effect of these LED's
50 all together all purchased at Evan's Design along with battery packs, remote sensors and its control. Will start another youtube channel - the one that I now have is only related to aviation - don't want to mix that one up. Once the video is up I will copy/paste the link for those who may be interested....Now onto the weather deck gun carriages -
Thanks for dropping by much appreciated.
View attachment 375214View attachment 375215View attachment 375216View attachment 375217View attachment 375218View attachment 375219View attachment 375220View attachment 375221View attachment 375222View attachment 375223View attachment 375224View attachment 375225View attachment 375226View attachment 375227
WOW
Amazing build.
Beautiful work indeed. If it is of any comfort I am building the Americano Vespucci with lighting and I managed to drill though some wires whilst making portholes!! I hade to do some replacing as well!! Oh the joys of model making and sometimes we ask 'why make life so difficult for ourselves? Why nor build it by the instructions and forget the lighting!
Good morning John. I am always in awe of guys like yourself, Paul, Marteen etc etc who get the wood work for each tiny part (like your carriages) so neat as you build. Cheers GrantNorgale,
Thanks for your nice comment….and,
Indeed, comments regarding resistors are indeed correct. Especially if LEDs are to be wired directly to household current without a transformer.
knowing nothing about these electrical necessities, I was please to find Evans Design who’s company supplies 3, 6. And 9v LEDs….
Yea – all those wires were a real mess – got lucky that the requires “electrical” work was within my basic understanding of “how to”…AND all lights actually lit when powered – such luck…..
Now moving forward with work detailing carriages and guns.. just noticed the cannon molding seams – may need to address that as well.
View attachment 376201View attachment 376202
PS: I have been a huge fan of model railroading for most of my life some home/private sets are SO amazing - and of course the most amazing one on this planet
including the stunning airport...
Link below would not open - but, if interested, copy phrase just below then paste that on youtube - It will open to a 4K visit to the museum...
A trip to Miniatur Wunderland (Miniature Wonderland) 4K HDR --
Excellent work on the lighting! Ship is going to be gorgeous, especially at night! 
Wow John, your cabin lighting looks fantastic.
Not only the lighting but also the window frames with the glass leaded windows.
Ps if you are ever in Hamburg go the miniature wunder welt, it is amazing and you can spend a whole day there.
Not only the lighting but also the window frames with the glass leaded windows.
Ps if you are ever in Hamburg go the miniature wunder welt, it is amazing and you can spend a whole day there.
sevish: So kind – thanks so much…
Mike Dowling: Thanks for your post – need to find your log! - indeed, out of the box versions sure save a lot of time and frustrations – but the fun is also in the challenges are they not?
Grant: As always so nice – thanks…
Dean62: The lighting did come out very nicely – DO need to make a video link – thanks for the support…
Maarten: The stern did come out nicely – did have members who offered great suggestions during that stage.. PS: Hamburg is on my “to visit” list..
===============
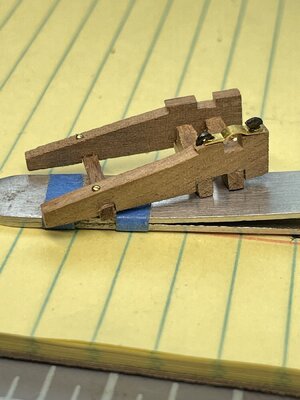
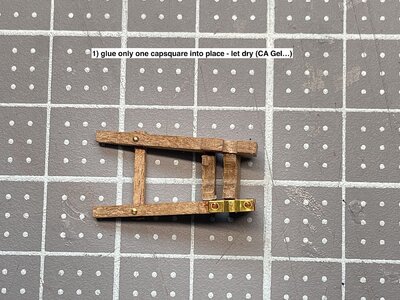
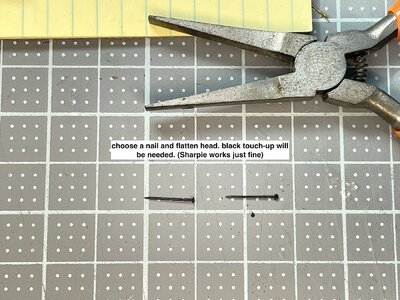
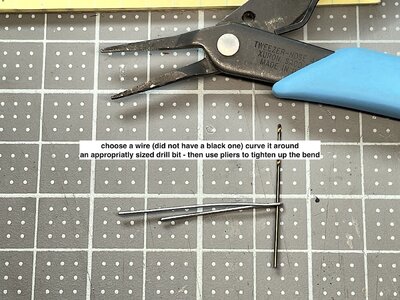
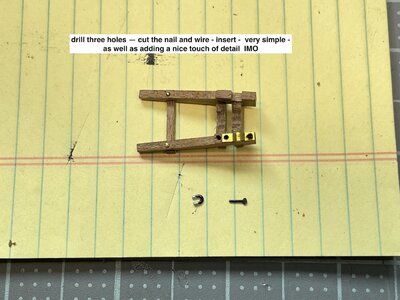
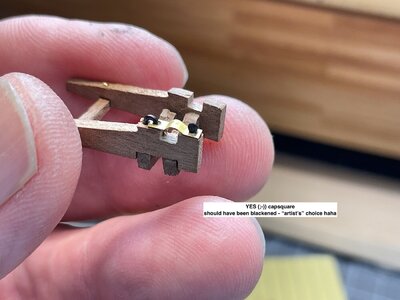
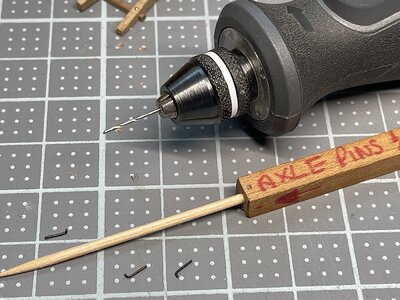
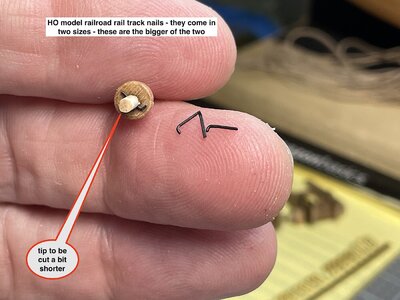
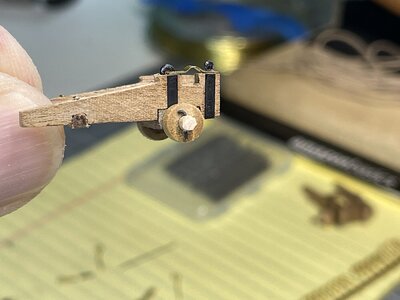
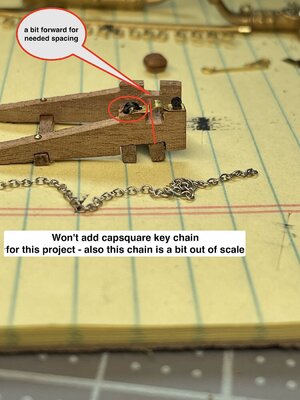
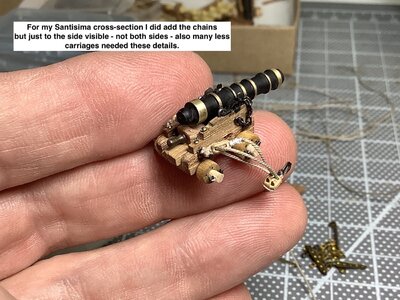
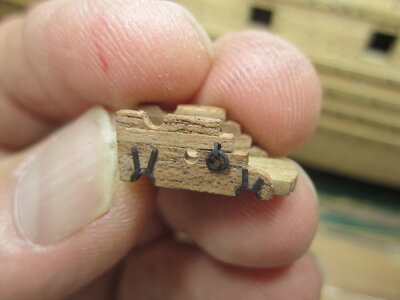
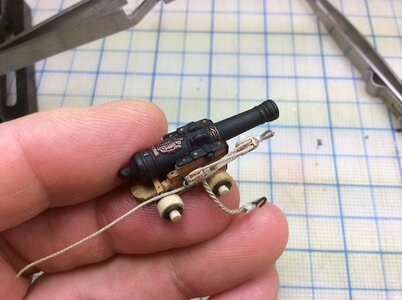
If you might be interested here is how I added the capsquare eyebolts as well as their forward keys. Simple enough though each a bit time-consuming.
Only one side is done during this sequence – need to install all rigging, blocks, wheels, etc… before “locking” guns into place with other side’s capsquare work. Ease of manipulation is of basic importance at this stage.
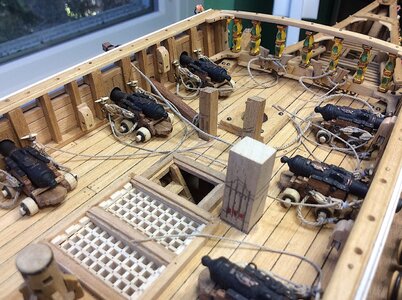
In total there will be twenty-four deck guns added to this project. About eight less than Sergal’s out-of-the-box kit suggests in their manual.
Thanks for your likes, comments and/or just visiting...


Nice detailing John!
Paul as always thanks - PS: your quality of work product is now beyond my reach 

Good morning John. Shouldn’t the capsquare be black…sevish: So kind – thanks so much…
Mike Dowling: Thanks for your post – need to find your log! - indeed, out of the box versions sure save a lot of time and frustrations – but the fun is also in the challenges are they not?
Grant: As always so nice – thanks…
Dean62: The lighting did come out very nicely – DO need to make a video link – thanks for the support…
Maarten: The stern did come out nicely – did have members who offered great suggestions during that stage.. PS: Hamburg is on my “to visit” list..
===============
If you might be interested here is how I added the capsquare eyebolts as well as their forward keys. Simple enough though each a bit time-consuming.
Only one side is done during this sequence – need to install all rigging, blocks, wheels, etc… before “locking” guns into place with other side’s capsquare work. Ease of manipulation is of basic importance at this stage.
In total there will be twenty-four deck guns added to this project. About eight less than Sergal’s out-of-the-box kit suggests in their manual.
Thanks for your likes, comments and/or just visiting...
View attachment 377322View attachment 377323View attachment 377324View attachment 377325View attachment 377326View attachment 377327View attachment 377328View attachment 377329View attachment 377330View attachment 377331
Grant - YES indeedGood morning John. Shouldn’t the capsquare be black…. Jokes aside brilliant detail. I am make my canons off and on and it impresses me how you get so much detail so small. Each time I attempt those tiny details it just looks like a dog’s breakfast. You have skills. Cheers Grant
I did spend a lot of time scratch building the Corel Vasa carriages ( missing capsquare details however). That was a lot of fun..Here are some images....FYI
PS: Your HMS Victory is WAY beyond my skill level - I would not even consider attempting an example - I would refer to, for me, your last sentence from above if I
even tried building that ship... So like the work that you've done with that ship.
 -
-Next project will be a 1,500+ years before - a Viking ship - I intend to leave many deck planks off - so as to show how the internal sub-deck framing bits were built adding proper individual bits of wood, as well as scale nailing all of the outer planks (each nail will need to be made to look "off" square) - Hmmmm- or so I hope...Many images from the Museums in Norway are already in my files
Regards,
Beautiful details on the cannon assemblies John! 


