-

Win a Free Custom Engraved Brass Coin!!!
As a way to introduce our brass coins to the community, we will raffle off a free coin during the month of August. Follow link ABOVE for instructions for entering.
-

PRE-ORDER SHIPS IN SCALE TODAY!
The beloved Ships in Scale Magazine is back and charting a new course for 2026!
Discover new skills, new techniques, and new inspirations in every issue.
NOTE THAT OUR FIRST ISSUE WILL BE JAN/FEB 2026
You are using an out of date browser. It may not display this or other websites correctly.
You should upgrade or use an alternative browser.
You should upgrade or use an alternative browser.
Steam powered wooden Drifter trawler, Formidable LT100, 1/20 scale by neptune
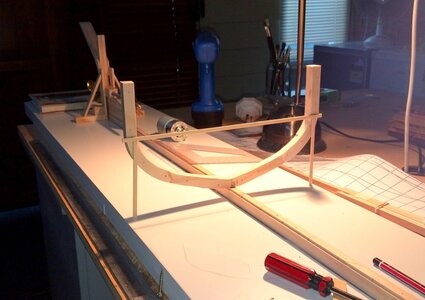
Managed to get another few frames built and started erecting them on the keel, I fixed a cross piece with the centre
marked on it and also a couple of side supports, this is frame 25 spot glued in place, tomorow when the glue is dry
I will put a couple of dowells through into the keel,
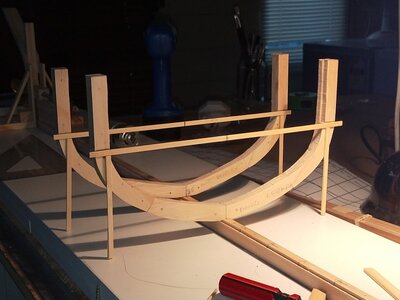
So thats frames 25 and 21 in place, I might put another frame between, or I might wait and steam a frame to go
in between,
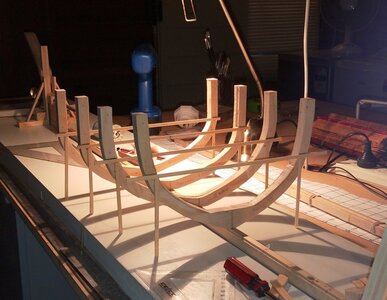
Four frames up now,
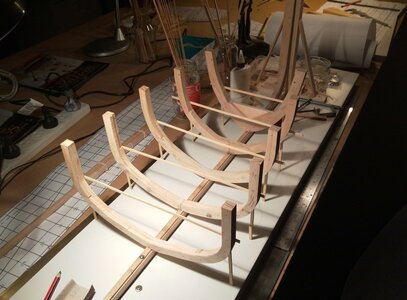
and a fifth added, thats all for today, thank you for looking in,
best regards john,
.
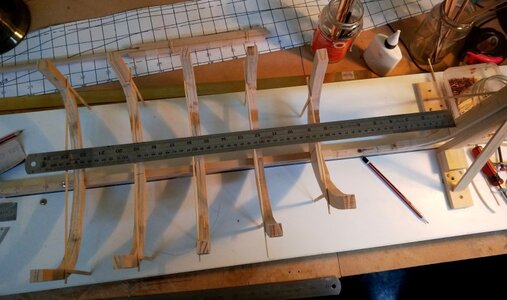
in this pic you can see the reason for the temporary cross timbers, they really help with the setting up and
centralizing of the frames,
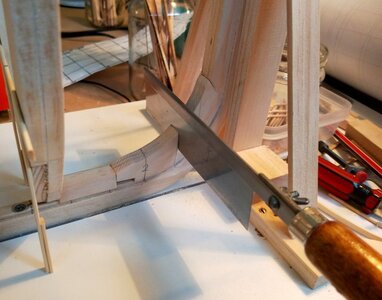
cutting the rebate for the No 1 frame to sit in, on the real boat I think it was sitting on top of the knee, I cut a
rebate for extra strength,
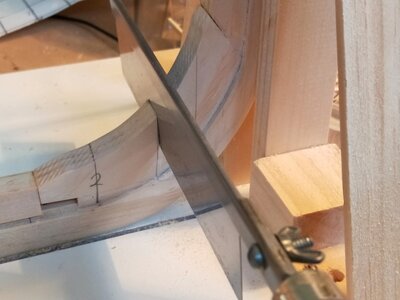
close up,
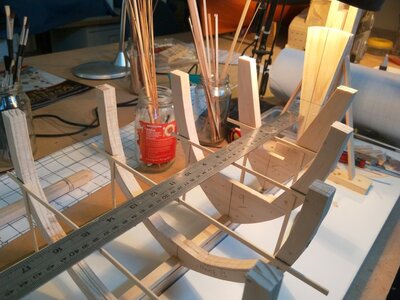
now this where the cross timbers come in real handy, the pencil mark across the solid front frame is at the same
height as the cross timbers,
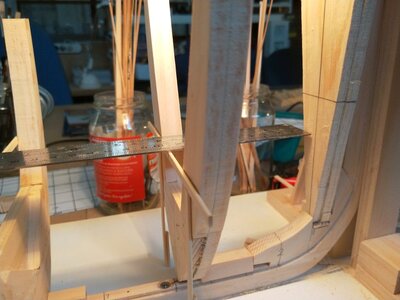
so I know how much I will have to cut from the bottom of the frame to get it to sit where it should,
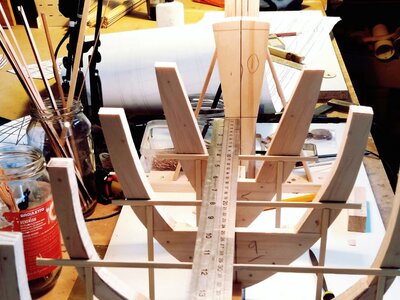
after trimming the bottom of frame No 1, once I have these frames set up I will decide whether to add extra
frames between them, I think that I probably will especially in the bow and stern area's,
.
Last edited:
- Joined
- Apr 10, 2020
- Messages
- 654
- Points
- 353

Looking good !


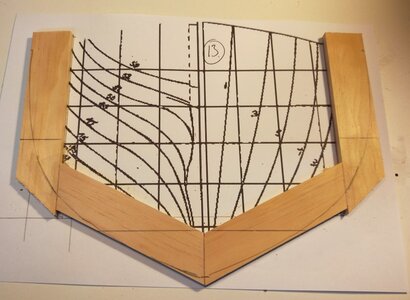
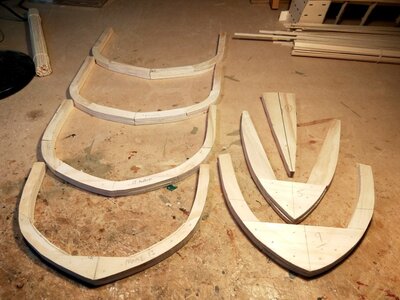
I have managed to do a bit more to the steam drifter after having a bit of time off, got a few more frames cut out,
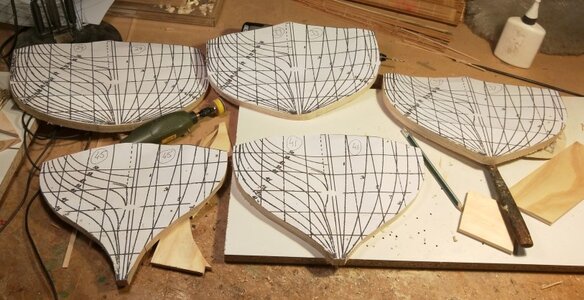
another five frames cut to the outside dimensions,
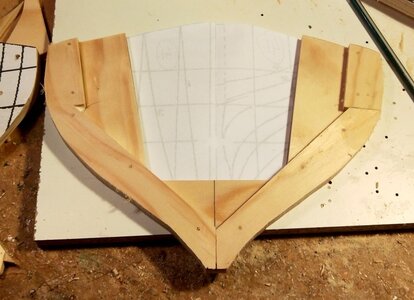
just have to mark and cut to the inside dimensions now, just have to be careful because of the bevel of the frames,
I will probably leave more wood than needed and trim it down later on.
thanks for looking in,
best regards john.
.

another five frames cut to the outside dimensions,

just have to mark and cut to the inside dimensions now, just have to be careful because of the bevel of the frames,
I will probably leave more wood than needed and trim it down later on.
thanks for looking in,
best regards john.
.
I have also bought some fittings for the ship, see following pics,
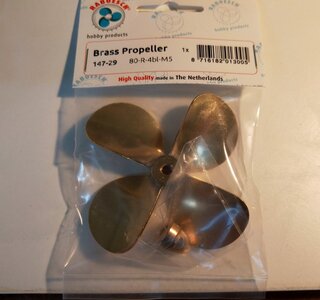
The right handed brass prop,
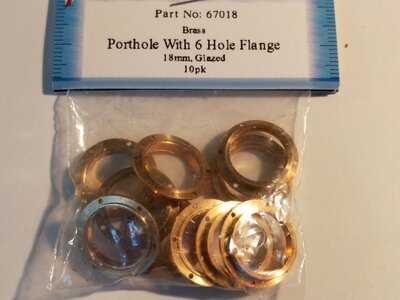
some 18mm port holes,
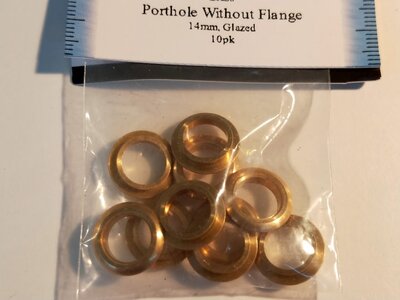
and some 14mm port holes,
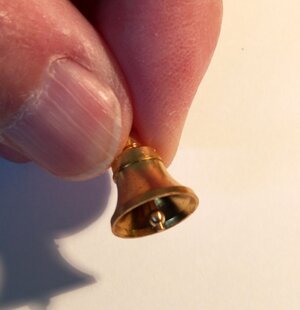
a nice brass bell,
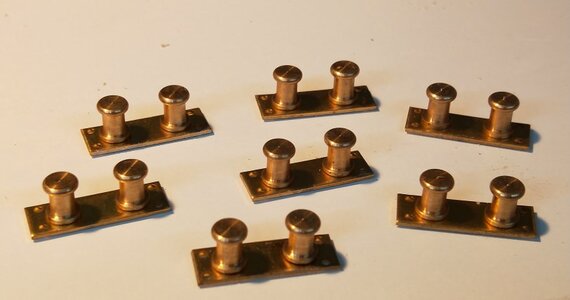
and some brass bollards,
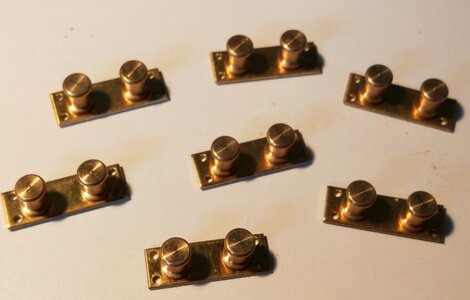
close up of the bollards,

stainless steel shaft and tube,
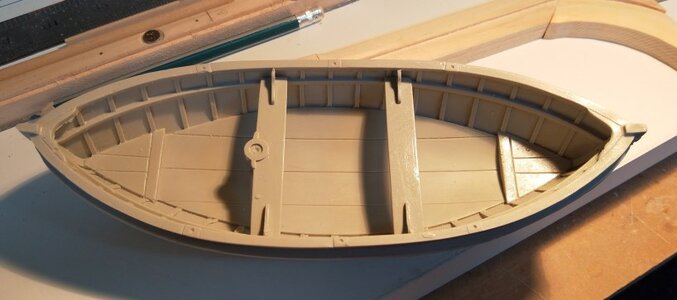
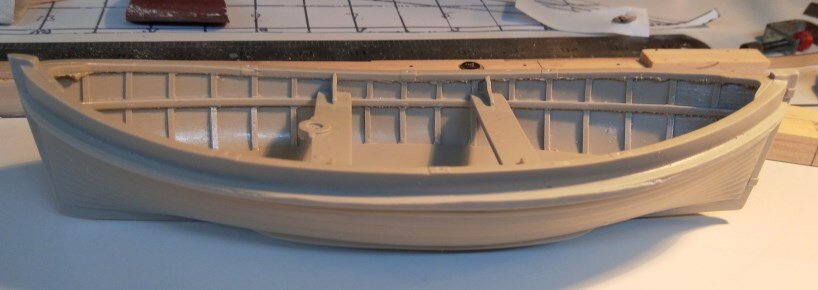
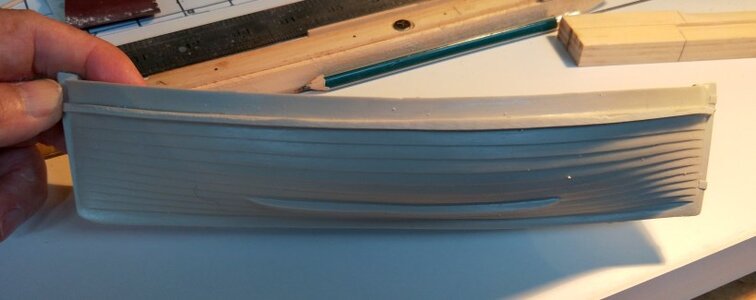
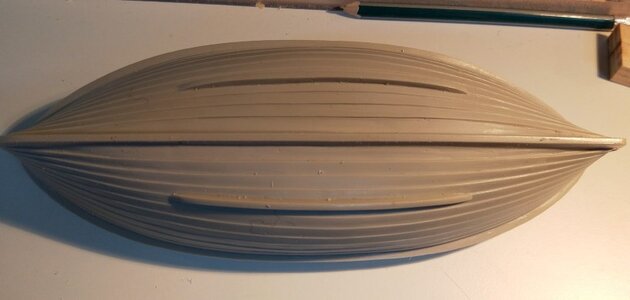
I also have a ships boat which is the right size but it is double ended, I am wondering if I can convert it a transom
ended boat, or just leave it like it is, more pics below, any thoughts,
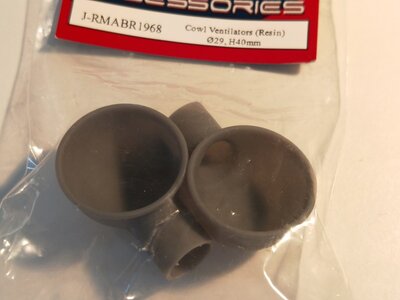
a couple of vents,
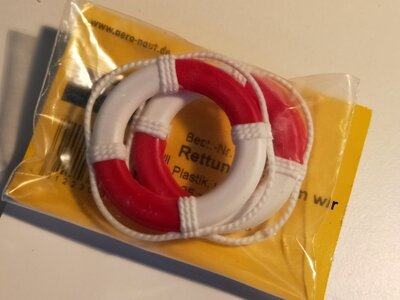
a couple of life belts,
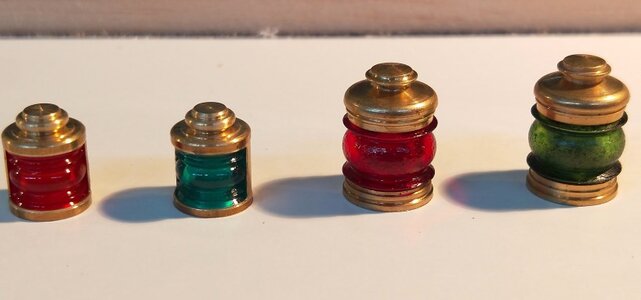
and some lights,
.
.

The right handed brass prop,

some 18mm port holes,

and some 14mm port holes,

a nice brass bell,

and some brass bollards,

close up of the bollards,

stainless steel shaft and tube,

I also have a ships boat which is the right size but it is double ended, I am wondering if I can convert it a transom
ended boat, or just leave it like it is, more pics below, any thoughts,


a couple of vents,

a couple of life belts,

and some lights,
.
.
Last edited:
Very nice additions, John! It is a nice looking clinker-build boat, I would leave it as is, You may add some small details like rudder, oars, anchor, also substitute the plastic thwarts with wooden and would add more. Maybe knees...
Very nice additions, John! It is a nice looking clinker-build boat, I would leave it as is, You may add some small details like rudder, oars, anchor, also substitute the plastic thwarts with wooden and would add more. Maybe knees...
Thank you Jim, for the suggestions, I think that I will go with what you have suggested,
Best regards John,
I have just opened and scrolled down your log which you have presented very well with your careful and foresightful work. I can envision a very good outcome. I wonder if you will undertake the steam boiler engine and controls to operate the boat? At the 20 scale you are not having to work like a watchmaker with very small components all the time and getting finger cramps. Excellent progress. Rich (PT-2)Very nice additions, John! It is a nice looking clinker-build boat, I would leave it as is, You may add some small details like rudder, oars, anchor, also substitute the plastic thwarts with wooden and would add more. Maybe knees...
I have just opened and scrolled down your log which you have presented very well with your careful and foresightful work. I can envision a very good outcome. I wonder if you will undertake the steam boiler engine and controls to operate the boat? At the 20 scale you are not having to work like a watchmaker with very small components all the time and getting finger cramps. Excellent progress. Rich (PT-2)
Thank you Rich for your very encouraging words, as for a steam engine and boiler I doubt it very much, if she does get as far as the pond it will probably be with an electric motor and a smoke unit.
It is nice to work on something a bit bigger something that you can get your teeth into,
Best regards john.
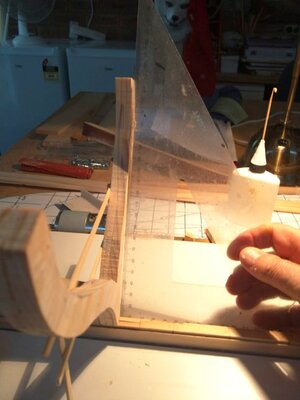
checking for squareness before gluing,
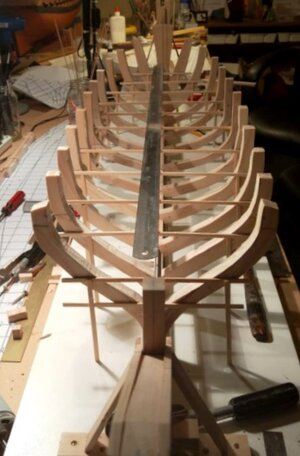
thats nearly all the frames in place, I have to work up and around the stern post next,
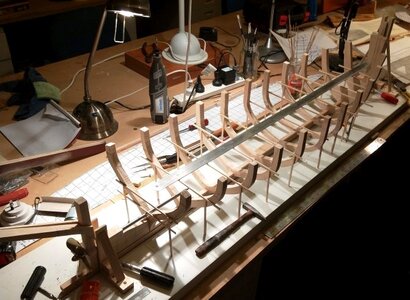
next few pics are just various views of the carcass,
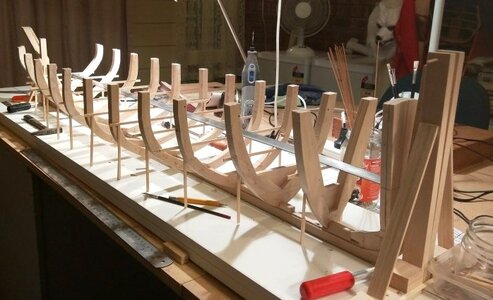
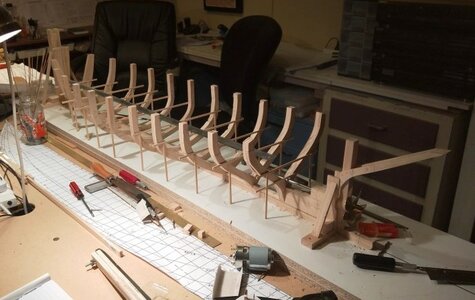
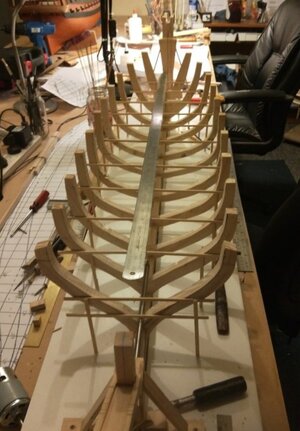
everything seems to be lining up OK, i have to decide now if I want to add extra frames
I will check everything tomorrow when the glue has set and make up my mind what I want
or rather I should say Need to do, as one of the next things will be to install the keelson,
once again thank you for looking, hope you enjoy,
best regards john.
.
Thank you Heinrich for your nice comments, it's good to have you aboard,Absolutely beautiful work John! I will follow with great interest!
.Best regards John,
- Joined
- Apr 10, 2020
- Messages
- 654
- Points
- 353

Looking good ! I love your building style
Kind Regards,Daniel
Kind Regards,Daniel
It is informative to watch a build at this larger scale compared to how we proceed in the small models. Thanks for your photo log. RichLooking good ! I love your building style
Kind Regards,Daniel
- Joined
- Apr 10, 2020
- Messages
- 654
- Points
- 353

Hello ,I have a question.
Can you post a link for the vendor of the portholes?
Many Thanks
Daniel
Can you post a link for the vendor of the portholes?
Many Thanks
Daniel
G'day Daniel here is the link to Cornwall Model boats, I bought all the fittings from them,Hello ,I have a question.
Can you post a link for the vendor of the portholes?
Many Thanks
Daniel
https://www.cornwallmodelboats.co.u...With-6-Hole-Flange-Glazed-C67018.html#SID=158
best regards john.
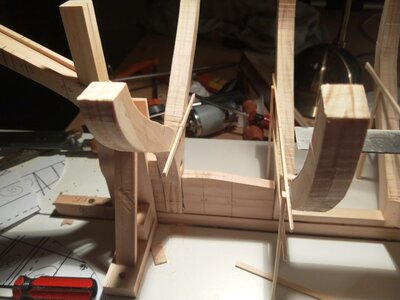
This frame is meant to be in two halves, each sitting against the deadwood, I decided to cut down through the
deadwood and sit the frame on the keel as one piece,
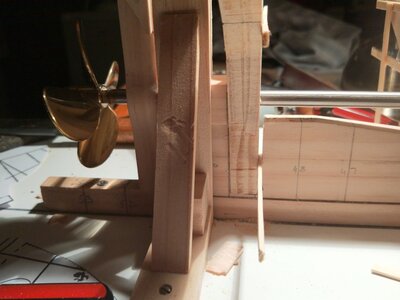
I cut the slot a little oversize to allow me to manipulate the frame into position and i will add a strip of wood to
lock everything up tight,
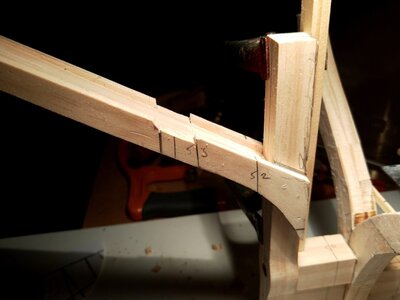
I cut a rebate into the stern knee post for sitting the last square frame into,
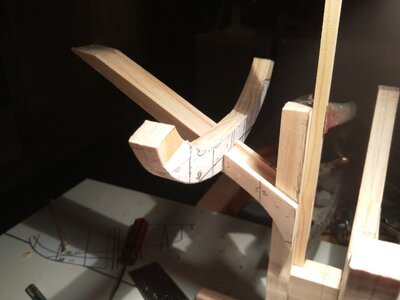
test fitting the last square frame,
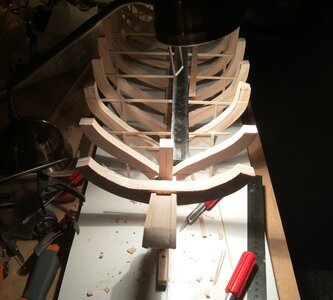
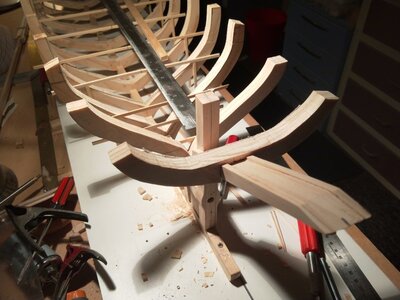
and a couple of views of the last frame, I still have one more square frame to fit and that goes on the stern post
itself, hopefully tomorrow,
.
Last edited:
Your progress is carefully planned and laid out with the excellent joinery. You almost have a full sized shipyard here. RichView attachment 223863
This frame is meant to be in two halves, each sitting against the deadwood, I decided to cut down through the
deadwood and sit the frame on the keel as one piece,
View attachment 223864
I cut the slot a little oversize to allow me to manipulate the frame into position and i will add a strip of wood to
lock everything up tight,
View attachment 223865
I cut a rebate into the stern knee post for sitting the last square frame into,
View attachment 223866
test fitting the last square frame,
View attachment 223867
and a couple of views of the last frame, I still have one more square frame to fit and that goes on the stern post
itself, hopefully tomorrow,
View attachment 223868
.


