-

Win a Free Custom Engraved Brass Coin!!!
As a way to introduce our brass coins to the community, we will raffle off a free coin during the month of August. Follow link ABOVE for instructions for entering.
-

PRE-ORDER SHIPS IN SCALE TODAY!
The beloved Ships in Scale Magazine is back and charting a new course for 2026!
Discover new skills, new techniques, and new inspirations in every issue.
NOTE THAT OUR FIRST ISSUE WILL BE JAN/FEB 2026
You are using an out of date browser. It may not display this or other websites correctly.
You should upgrade or use an alternative browser.
You should upgrade or use an alternative browser.
Steam powered wooden Drifter trawler, Formidable LT100, 1/20 scale by neptune
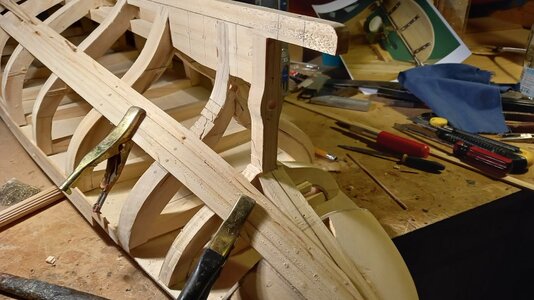
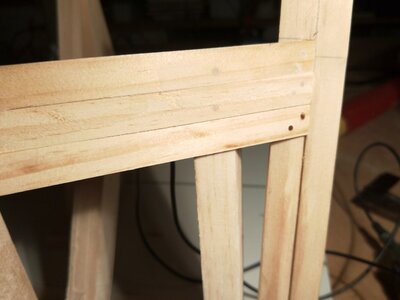
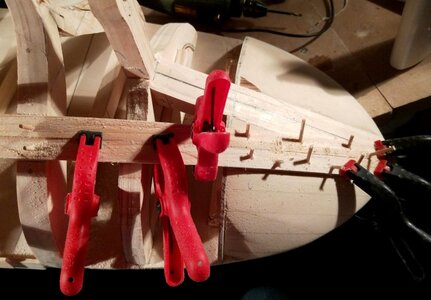
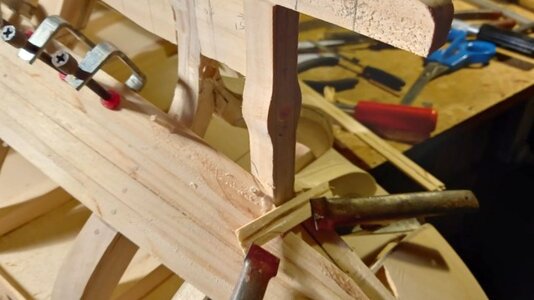
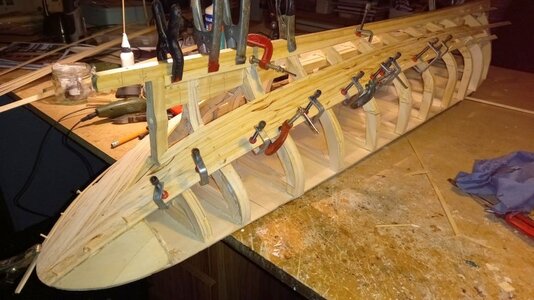
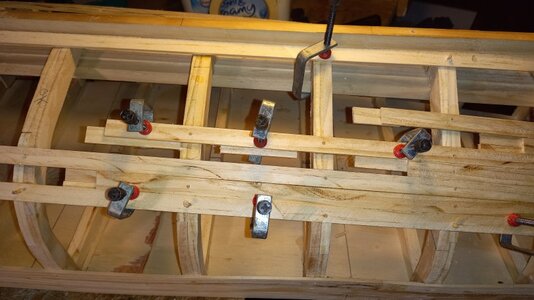
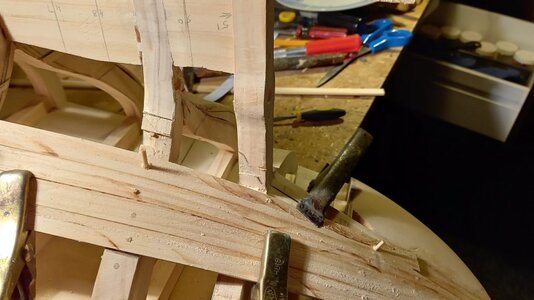
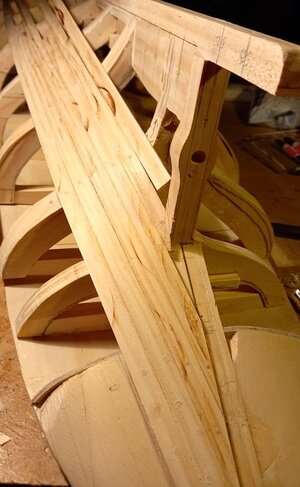
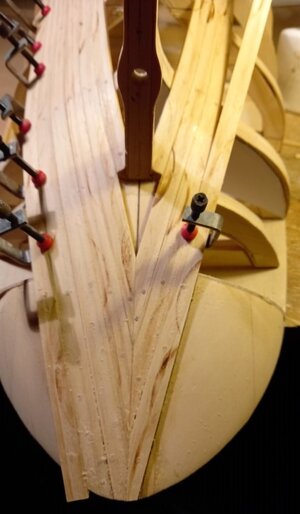
I have been having a lot of problems with the frame between the two clamps, I couldn't get the planks to run over it
properly, so what I decided to do before adding any planks was to add some extra timber to the frame and then cut
and adjust the frame for each plank, you can see that the planks are now lying fair to the frames and down over the
transom filling blocks, i am keeping a record of the frame shape so that i can copy it to the other side, the problem is
that when the planks get to just past that last cut you can see they then have to go almost vertical so as to meet up
with the stern post, I was very lucky that Steve had posted some great pics of his LT100, thank you Steve, and they
helped me a lot, I guess I shouldn't have been so lazy in the first place and should have lofted all the frames, anyway
it seems to be working out OK now,
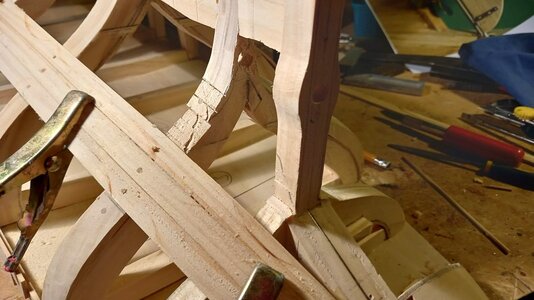
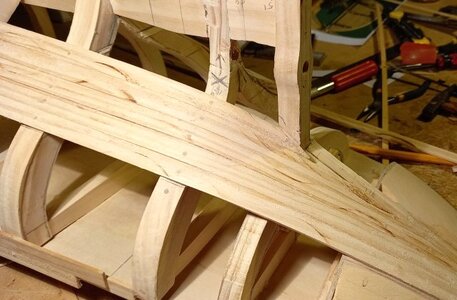
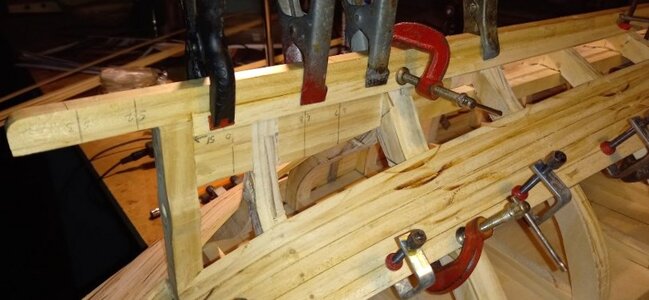
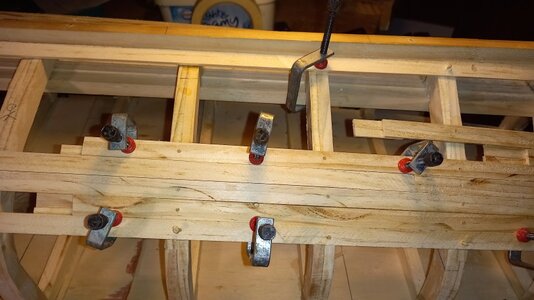
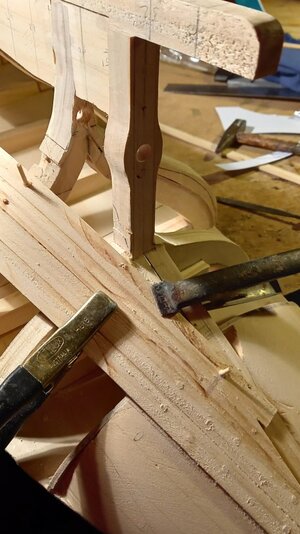
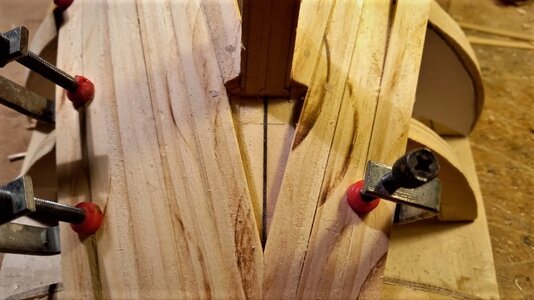
a close up view, also I think from looking at the drawings and sketches in the book that the stern post on the plans
doesn't look as wide in parts as it does in the book, time will tell,
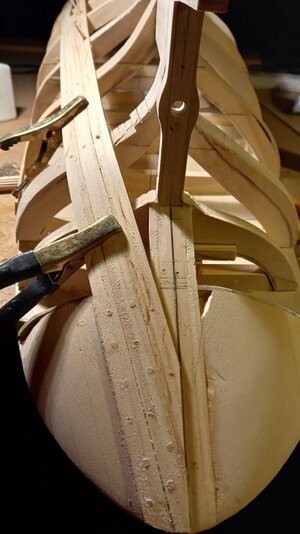
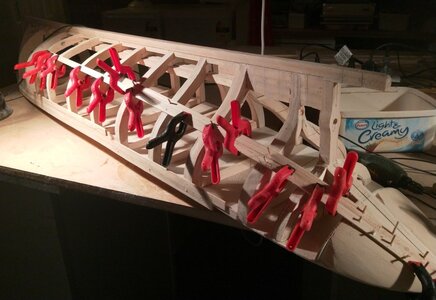
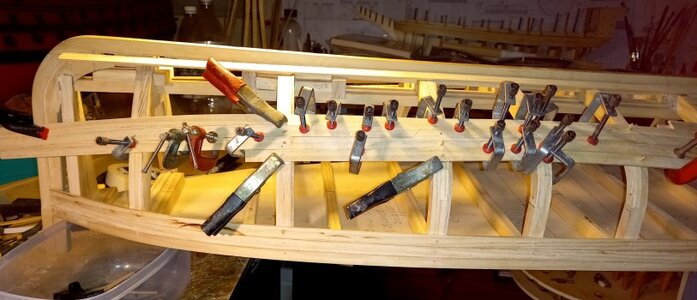
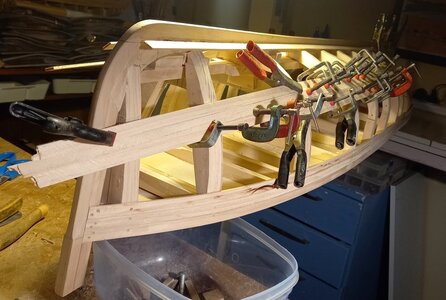
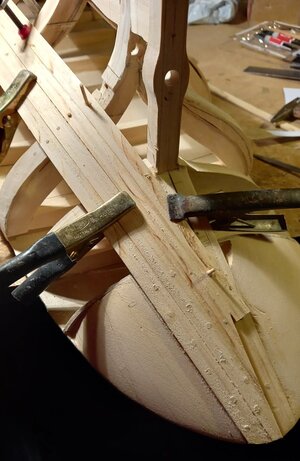
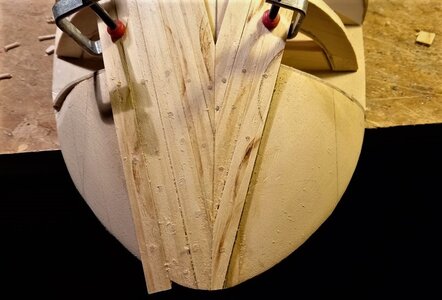
and just a few more pics of the stern planking,
.
Gosh John, you are a busy man with all your ship modelling projects. Well done. 
Thank you Brian, but methinks that you are not far behind,Gosh John, you are a busy man with all your ship modelling projects. Well done.
best regards John.
Side question from one on the pier watching. . . are you moistening and hot bending the planks to a better setting curve before your trying to clamp them in place? Even if you just heat and rough curve them with your hands and fingers will begin to give the curves that are needed including twists along the plank curve. That may help with your setting problems somewhat. Just a thought. Rich (PT-2)View attachment 237168
I have been having a lot of problems with the frame between the two clamps, I couldn't get the planks to run over it
properly, so what I decided to do before adding any planks was to add some extra timber to the frame and then cut
and adjust the frame for each plank, you can see that the planks are now lying fair to the frames and down over the
transom filling blocks, i am keeping a record of the frame shape so that i can copy it to the other side, the problem is
that when the planks get to just past that last cut you can see they then have to go almost vertical so as to meet up
with the stern post, I was very lucky that Steve had posted some great pics of his LT100, thank you Steve, and they
helped me a lot, I guess I shouldn't have been so lazy in the first place and should have lofted all the frames, anyway
it seems to be working out OK now,
View attachment 237169
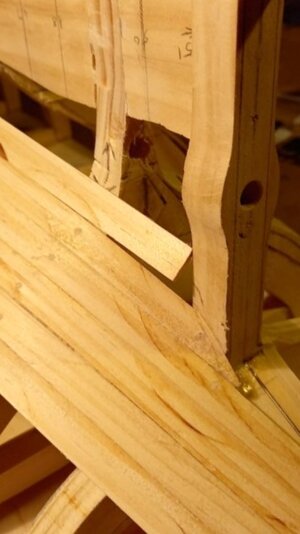
a close up view, also I think from looking at the drawings and sketches in the book that the stern post on the plans
doesn't look as wide in parts as it does in the book, time will tell,
View attachment 237170
and just a few more pics of the stern planking,
View attachment 237171
View attachment 237172
View attachment 237173
.
Side question from one on the pier watching. . . are you moistening and hot bending the planks to a better setting curve before your trying to clamp them in place? Even if you just heat and rough curve them with your hands and fingers will begin to give the curves that are needed including twists along the plank curve. That may help with your setting problems somewhat. Just a thought. Rich (PT-2)
G'day Rich, I should have explained it better, the planks are laying down OK, no need for steaming etc at the moment, but I will have to start doing that soon, the problem is that when I enlarged the frame drawings there must have been some distortion or I have made a mistake when cutting out the frame, anyway what ever happened, that particular frame is way out of the shape it is supposed to be, so that is why I am going the way I am, thank you for pointing it out for me, if you ever see something you think is wrong let me know, I would rather correct it now than having to remove planks later on,
best regards John.
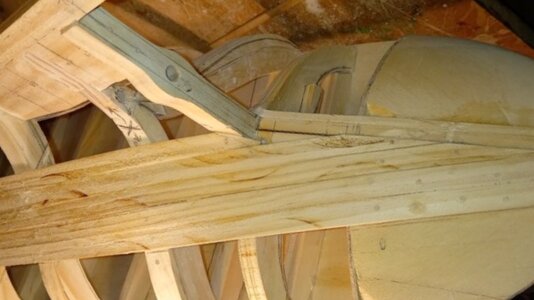
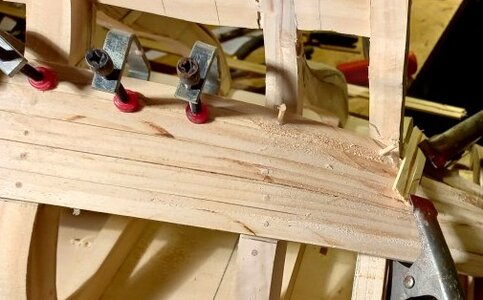
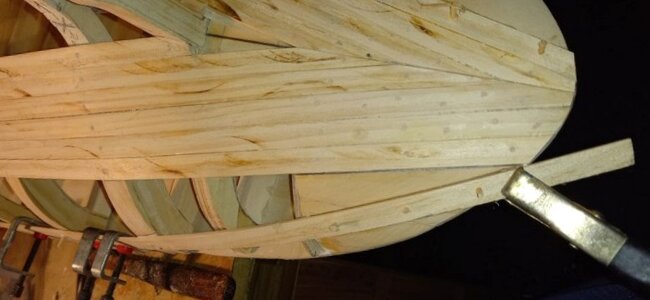
Thats the plank glue and dowelled in place,
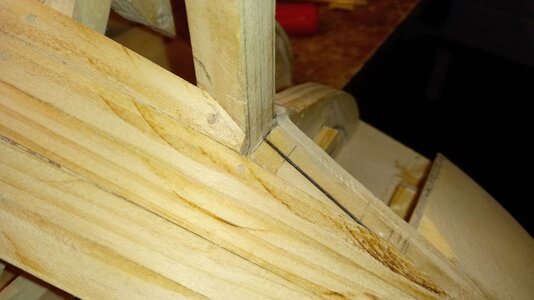
close up, Ive nibbed off the end of the plank flush with the stern post as there will be a filler piece going there
when the rest of the planking is finished,
this is how the next plank has to be fitted, you can see how it will have to be twisted to fit,
I may use narrower thicker planks and shape them to fit, I will also have to glue the stuffing
box back in place,
a close up view,
thank you for all the comments and the likes,
best regards John,
.
Last edited:
Hi John, nice new project looking forward to the progress.
Thank you Maarten, I still have to get around to going through your Alert build, should be an interesting read,Hi John, nice new project looking forward to the progress.
Best regards John,
That last plank will definitely have to decide whether it is a plank on a hull or a propeller for an aircraft. ;-)View attachment 237256
Thats the plank glue and dowelled in place,
View attachment 237257
close up, Ive nibbed off the end of the plank flush with the stern post as there will be a filler piece going there
when the rest of the planking is finished,
View attachment 237258
this is how the next plank has to be fitted, you can see how it will have to be twisted to fit,
I may use narrower thicker planks and shape them to fit, I will also have to glue the stuffing
box back in place,
View attachment 237260
a close up view,
thank you for all the comments and the likes,
best regards John,
.
A lot of hot bending will be required with a number of dry fits and maybe some filing to taper the edges and inside face while finding the fit. Square plank edges in these conditions need to be tapered to an angled edge for the fit. You are doing well. Rich
A few more pics of the after planking,
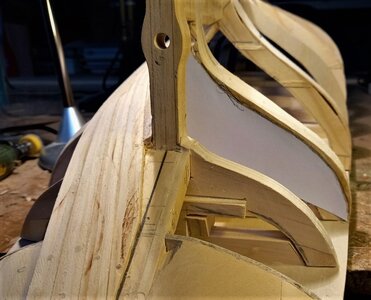
I moved the template to the Port side and trimmed the frame to size,
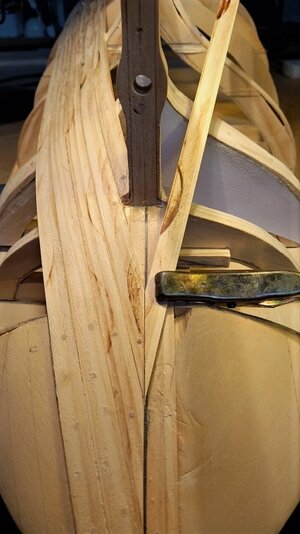
first plank on the Port after end,
thats the fourth plank, ev thing seems to be going well,
I moved back to the starb side while the port side was drying,
ev thing looks OK, nice and symmetrical,
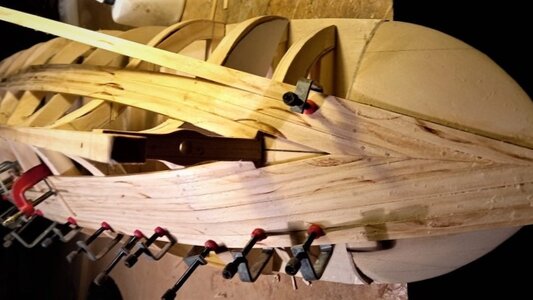
another view,
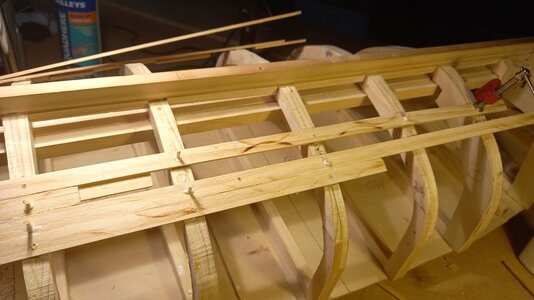
glued and doweled some of the mid ship planks,
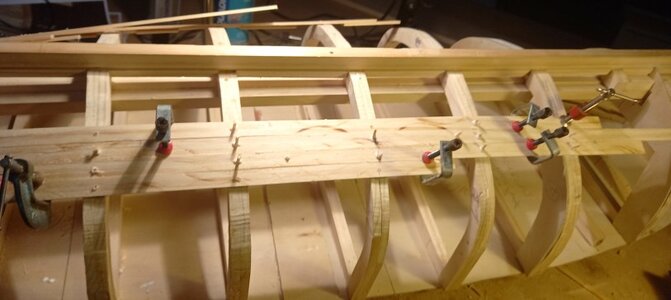
another view,
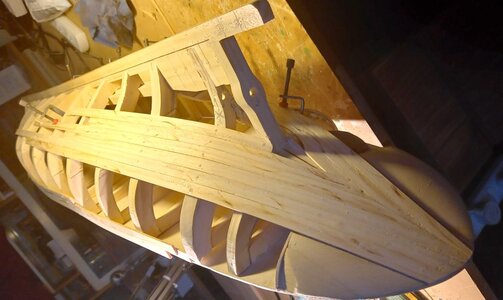
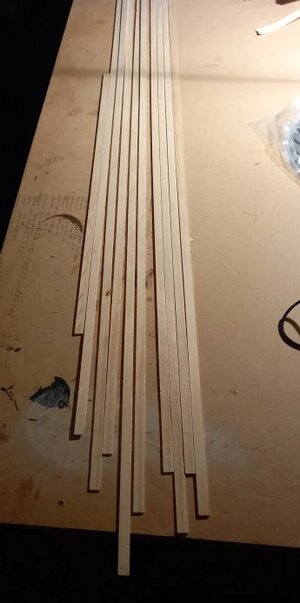
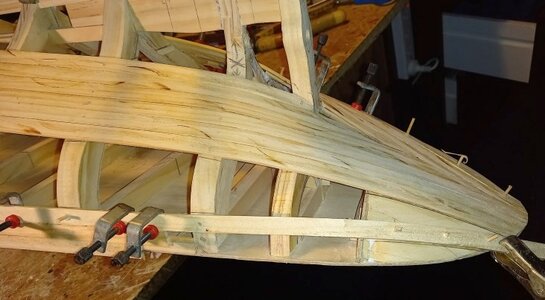
looking forward along the starb side, thats it for now, I have run out of planks, I have to cut some more, my 10 inch
saw gave up the ghost, so my Admiral bought a new one for me as an early birthday present, I will post some pics
later on,
best regards john,
.

I moved the template to the Port side and trimmed the frame to size,

first plank on the Port after end,

thats the fourth plank, ev thing seems to be going well,

I moved back to the starb side while the port side was drying,

ev thing looks OK, nice and symmetrical,

another view,

glued and doweled some of the mid ship planks,

another view,

looking forward along the starb side, thats it for now, I have run out of planks, I have to cut some more, my 10 inch
saw gave up the ghost, so my Admiral bought a new one for me as an early birthday present, I will post some pics
later on,
best regards john,
.
Last edited:
my Admiral bought me an early birthday present,
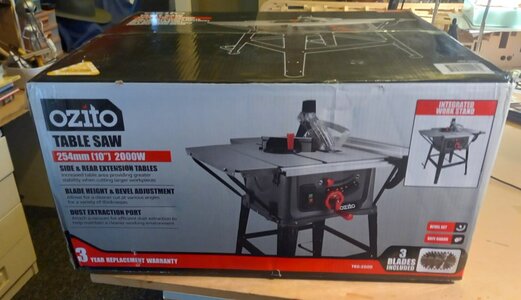
this is the saw boxed up, it comes with a stand and also side and rear tables, cost of the saw was AUD 190, which
I thought was a great deal considering it come with three blades,
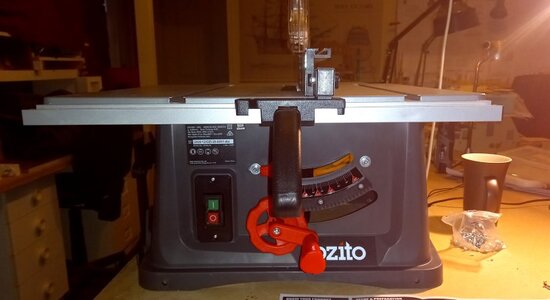
I will only attach the rear table extension, and I will not attach the legs as i have a bench that is just the right height
for the saw to sit on,
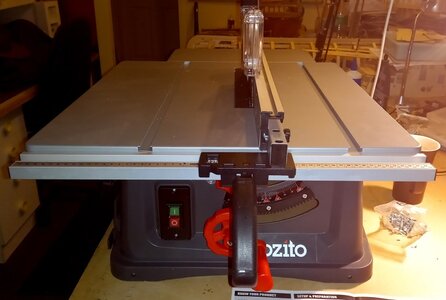
another couple of views,
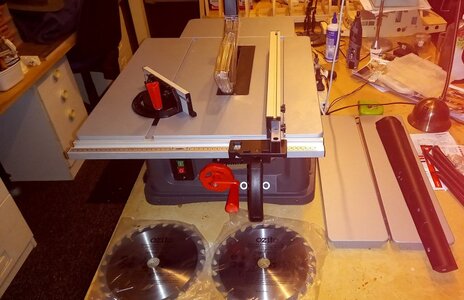
it came with one blade fitted and two spare blades as well, on the right of the pic you can see the two side table
extensions and one of the legs,
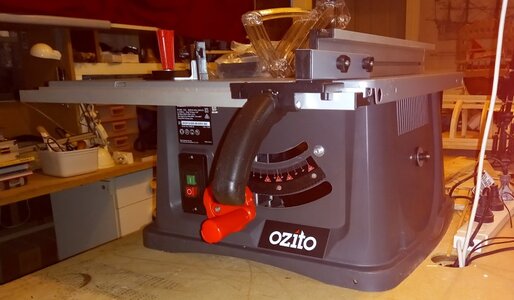
it has a nice tight fence that you can use in two positions for smaller pieces or larger pieces, it also has rise and fall
function and also beveling
,

when I set up the fence and took it tight up against the blade the
marker showed spot on zero,

my Admiral really spoilt me, she also bought me a 125mm 5 speed sander, cost was AUD 50, which I thought
was another great bargain,
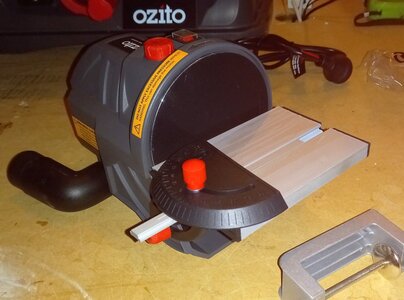
and a couple of pics,
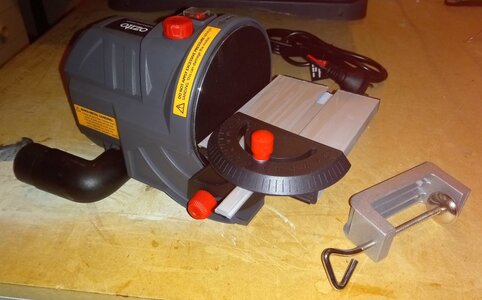
.

this is the saw boxed up, it comes with a stand and also side and rear tables, cost of the saw was AUD 190, which
I thought was a great deal considering it come with three blades,

I will only attach the rear table extension, and I will not attach the legs as i have a bench that is just the right height
for the saw to sit on,

another couple of views,

it came with one blade fitted and two spare blades as well, on the right of the pic you can see the two side table
extensions and one of the legs,

it has a nice tight fence that you can use in two positions for smaller pieces or larger pieces, it also has rise and fall
function and also beveling
,

when I set up the fence and took it tight up against the blade the
marker showed spot on zero,

my Admiral really spoilt me, she also bought me a 125mm 5 speed sander, cost was AUD 50, which I thought
was another great bargain,

and a couple of pics,

.
Last edited:
Very nice early birthday!!!!my Admiral bought me an early birthday present,
View attachment 237831
this is the saw boxed up, it comes with a stand and also side and rear tables, cost of the saw was AUD 190, which
I thought was a great deal considering it come with three blades,
View attachment 237832
I will only attach the rear table extension, and I will not attach the legs as i have a bench that is just the right height
for the saw to sit on,
View attachment 237833
another couple of views,
View attachment 237834
it came with one blade fitted and two spare blades as well, on the right of the pic you can see the two side table
extensions and one of the legs,
View attachment 237835
it has a nice tight fence that you can use in two positions for smaller pieces or larger pieces, it also has rise and fall
function and also beveling
,
View attachment 237836
when I set up the fence and took it tight up against the blade the
marker showed spot on zero,
View attachment 237837
my Admiral really spoilt me, she also bought me a 125mm 5 speed sander, cost was AUD 50, which I thought
was another great bargain,
View attachment 237838
and a couple of pics,
View attachment 237839
.
Question about the small planking c-clamps . . . where did you get those? They look like an excellent solution for that use. Rich (PT-2)
You have a very generous Admiral, she must love you very much and your hobby! 
I bought them years ago, they came as a pack of three, assorted sizes, I saw them in Woolworth one day $6.99 a pack, and when I went back to get some they had been reduced to $1 a pack so I bought what they had, I haven't seen any since then, they are great little clamps,Very nice early birthday!!!!
Question about the small planking c-clamps . . . where did you get those? They look like an excellent solution for that use. Rich (PT-2)
Best regards John,
I agree Jim with you on both counts, we are coming up to our 53rd anniversary and 55 years since we first met, we were married for six year's when we came to Australia and had a boy of three and twin's nine months, the twin's were a girl and a boy, we have had a great life with hopefully a few more years ahead, thank you for all of your encouragement and support,You have a very generous Admiral, she must love you very much and your hobby!
Best regards John,
- Joined
- Apr 10, 2020
- Messages
- 654
- Points
- 353

Is starting to shape nicely!
Looking forwart to see your progress.
Kind regards,Daniel
Looking forwart to see your progress.
Kind regards,Daniel


