Swan Class – ¼” Scale - Stuglo [COMPLETED BUILD]

Joined
Aug 21, 2019
Messages
762
Points
403

I was undecided whether to start a blog as there are so many good ones already out there. What can I add? Maybe a perspective from someone with more enthusiasm than talent. I'm no artist-can't draw for toffee. But wood is forgiving and the final result can hide a lot of mistakes and botch ups. When I started building 30 years ago, there were few books, no forums and restricted number of kits, mainly european. I had a mentor/teacher/friend who started me with additional help from magazines, Ships in Scale. Kit-bashing was for an elite and I never heard of scratch. In these magazines several builders were so good that they had to be professional. Well, we have forums, massive of information and machine and tools not available not so long ago. I built the Onieda (lumberyard) beautiful wood and kit but very difficult for me to understand the building process and lost some enthusiasm. I gave up in the middle, built the Charles Morgan ,visiting the real ship, and returned to Oneida with renewed enthusiasm and guidance from a blog on the internet (2014) After several large builds (Diane and Agamemnon ) I deliberately built variety of "quickies". I then bought the Robert Hunt Practicum of the Hannah with wood from Lumberyard. A new level. I love books,and have over 40 printed and e-books. Reading another blog I discovered The Fully Framed Model,TFFM (thanks Canoe21). The idea of scratch took root. Visiting my friendly carpenter to buy a cheap off-cut to use as a display base for a soon to be completed model, I asked him if he has any wood, beside MDF, Pine or Ply that is used in cupboards these days. He showed me some planks of cherrywood that had stood unused for 10 years. I bought them for the price asked (very cheap) and now owned 450X15X3 cm of raw material that TFFM says should be enough. Over the last year, I purchased what seemed according to others, to be essential. Plans from Seawatch books, vol.2 TFFM, milling machine, a larger table saw, thickenessor (Proxxon) and Band Saw and spindle oscillating sander (together less than the cost of a weeks holiday that I cannot have in covid - time, as I told my wife). I still thought that more experience was necessary and purchased another semiscratch kit, Rattlesnake and ordered Alert. A sudden health issue and seeing how many years others took to build scratch, I took the plunge.
I think Einstein said he stood on the shoulders of giants, I intend to stare under the armpits of other bloggers particularly video blog of Kevin Kenny and Dan Vardess and Trussben. Thank you.
The foregoing is to encourage the "ordinary" hobbyist to realise it can be done and not be overawed.
18th Aug 2020. First clear decks from previous build. I tidy up between stages but generally work in chaos ( spare bedroom, wife keeps distance)

IMG_20200811_085722 (1).jpgIMG_20200814_064200 (1).jpg
 
19th August.
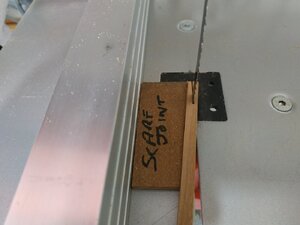
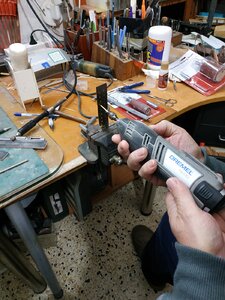
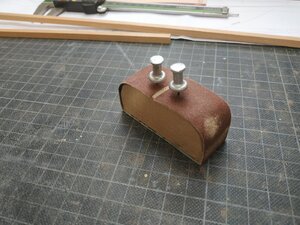
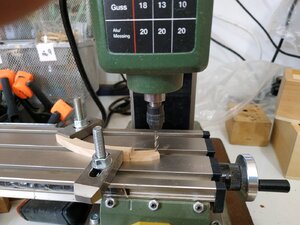
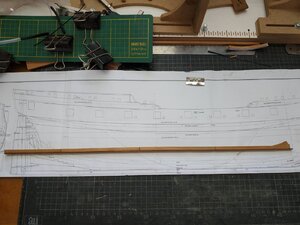
First item to learn to produce is the scarf joint. Tried as recommended with a chisel. Used a brand new Stanley Bailey 1/2 inch -first half like butter then rest split! Tried again same result. No time or patience to develop a better skill, so turned on my new machines, for which I have next to no experience but paradoxically, guve me better control. Initial cutting with jig(puzzle)saw wasn't so good. Small pieces jump and result was useable correction with the sanders. The the revelation, use the band saw. What a difference, control to 1 mm margin as suggested. Then the problem of consistent reproduction- make a jig. Also must get used to conversion of sizes. Being told the part is 12 or 15 inches in real life, sounds ridiculous on such a large boat. It takes a conscious effort to think in scale. Also, as someone brought up in England, parts of inches are fractions. Decimal inches was tautology and unheard of. I cannot visualise them so I work in mm (almost all the kits I built were metric)A digital caliper and pocket calculator are essential.

IMG_20200820_100114 (1).jpg
 
I shall look on with interest. I'm in the average builder group where 'naturally weathered look' is the standard I can only hope to attain. My finished boats look like they've had a few knocks in their working life, but you build to your level and hope to learn.
 
Oh - this is a very interesting project. Thumbsup
I have also a copy of the Swan class books in my book-shelve, so I will follow your log with big interest - GREAT
 
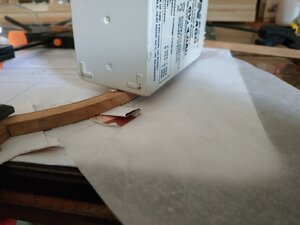
20th Aug. A lot of time is spent thinking and planning- sometimes obsessively. The joints also call for black paper to be used in the joints instead or tarred flannel. (This is good because I don't have a source of tarred flannel). Note the paper is 0.2mm thick. In certain places the accumulative extra can be significant. Never done this before and it makes alignment difficult while the glue is drying. Fixation in both direction is essential. Clamps and weights (I have a large collection of used batteries )The scarf joints are reinforced by Treenails(trunnels) I have made thousands in past but reading number of blogs recently, there is criticism of their oversize and colour. They look good but "scratch" means to me greater authenticity. TFFM says copper 0.5 mm. Don't have any ( I have 0.3 or 1.0 or 1.5). Copper pins are about 0.7. (I said obsessional ) my trunnels go to 0.8 from an old draw plate. Last year bought a Byrnes so I tried to make them to the required size 0.5mm . (bamboo toothpicks) Total failure. Why thousands ok to 0.7 or 0.8 but not 0.5. wood grain size? Panic call to my son in Tel Aviv and he found what I needed in a jewelry craft shop. Phew.
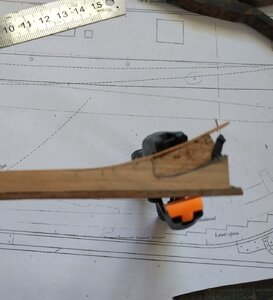
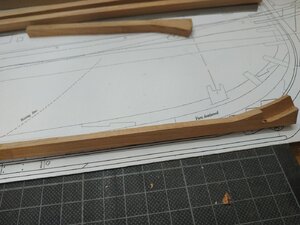
Now for something new for me. The rising scarph joint at the front of the keel .
A word about working from plans. In the past tracing paper was used. Mabe still good but I have little skill (=lack of patience). What I should have mentioned is the need for copies, at 2 or 3. Cut out the part to be made, glue it to the wood (rubber/photography glue). Also at least a "flip" or mirror copy of the sheer view . This I discovered later, very useful .
Calculate size of maximum height, add a bit and cut the table saw. Thin down using the thicknesser to 6.35 mm (said digital caliper essential).The curve of the part is marked using the radius taken the X on the plan. Marked with compass, cut with band saw, fine adjustment with oscillating sander. How do I reduce the straight part to the required 6.35mm? Band saw to within 1 mm then hand sand with a small purpose made sander. The smooth transition to the curved aspect of the part was surprisingly difficult.When later I made the lower apron , this was shown to be unsatisfactory. I remade it. Like any true artist (Ha! Ha!), I often am not happy with the result. Spare yourself later anguish- remake it.
I also made the false keel from beech as a contrast, but looked the same when attached. Changed it for some darker wood that is used here for decking. I'll think twice next time because it was tougher than the cutting blades!
The scarf itself was milled -a very satisfying bit of work.( the pictures are out of sequence, but hopefully illustrate the point)
TFFM omits use of superglue- I find it very useful for stopping bleeding wounds which tend to discolour the wood!
Using the Alcohol to separate the glued keel showed the frailty of the joints with intervening black paper.Careful reinforcement by trunnels is essential .
I buy the PVA glue in 4 ltre bottels and decant into HairDye bottles (wife's,not mine . I don't need it- I'm bald)Even with its small nozzle, I rarely apply directly, I use modified dental pecks or occasionally, a syringe with needle attached.

IMG_20191207_194853.jpgIMG_20200828_152521.jpgIMG_20200821_135619.jpgIMG_20200820_120240.jpgIMG_20200819_130737.jpgIMG_20200827_112007.jpgIMG_20200820_174243.jpgIMG_20200901_120719.jpg
 
25 th Aug.2020
Still not happy with copper trunnels. The experts say the should be invisible when viewed from a foot or two. But I want to see something and they do look good my previous ships, especially hull planking. In my opinion, where appropriate, short planks plus trunnels look better than paint. So I've order some 1mmx1mm boxwood strips ,white and black, from a marquetry company in UK. Someone on the forum suggested this. As I asked before, stop these suggestions. It was bad enough before, but corona has further weakened my conscious.
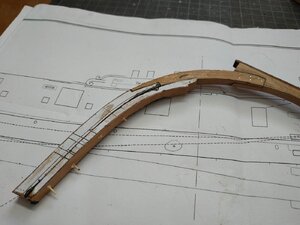
Anway, to the upper and lower stems. Cut out shape from plan, glue to wood . Note the upper thickness is increased to 7.42mm . the scarf joint is lined with black paper. I tried gluing joints with paper in 2 stage, but found the 2 sides of the joint are needed to act as clamps for a tight fit. The joint itself tends to "slide", so reassess and check after clamps and weight is applied. Also, because the difference in with, the lower stem needs "bolstering" to ensure a straight joint.
The black mess on img...852 shows the black coloured glue that is used to attach the upper apron.

IMG_20200824_114014.jpgIMG_20200830_080852_BURST1.jpgIMG_20200821_135619.jpg
 
26th Aug 2020
The lower apron. Read through TFFM to point were it says this is one of the most complex parts I will need to make.
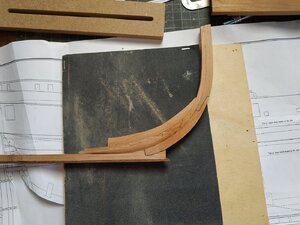
Note wood thickness is now 9.54mm. As usual , glue cutout from plan and cut out with band saw and finish concave side with oscillator. Now noticed, probably because piece is shorter and with the larger sanding drum, that the face is not 90 deg. the plastic ring needs a raise. Cut paper rings to overcome "dip"
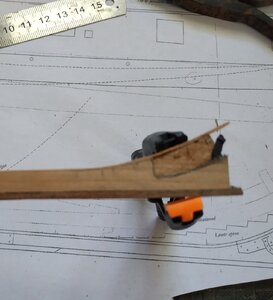
Further frustration as the convex curve will not fit the curve formed by front of keel, lower and upper stem) removed by hand sanding using the curved cutoff with sandpaper glued. Not very successful . Saw light between the pieces as TFFM says how to check for a close fit. At this point I again remade the font of the keel, fortunately not yet ungluing it. Excessive sanding had removed 0.01 too much! New part worse (or less good, depending on mood). Then remembered old lesson (lots of old lessons are forgotten) that ADDING can be better than taking off. A Imm sliver to build up last few cms of straight section and then the rise. Hand sand and repeated checking and something acceptable and will go unnoticed.
( I am writing this listening to the Carpenters- very relaxing. I know that the music often REFLECTS the times, but, without getting into politics, I can't help feeling that if such music was again popularised and played we would all be more relaxed . Modern popular music seems to lend itself to aggression. Probably all older generations felt the same viz. jazz and rock and roll, nevertheless...........)

IMG_20200830_114032.jpgIMG_20200823_080455.jpgIMG_20200820_120240.jpgIMG_20200827_112007.jpg
 
28th Aug
Now the fun. Note that the steps must be of a depth to leave 6.35 mm. From the initial 9.54mm means removal of 1.6mm from both sides. NOTE the steps are not exactly horizontal and perpendicular sides, be aware of this when setting up the milling machine or leave excess to be removed later. Similarly, I should have mentioned to leave excess to allow good fit of "lips"fore and aft. **Forgot- when you have the lower apron fitting the curve of the stem, mark points on both pieces adjoining so realignment can easily be found**
How to make the steps symmetrical? Had to run out and print up a flip or mirror plan. (told you to learn by my mistakes or oversights) Now, with the piece shaped, the reversed cutout can be stuck to the obverse side. Hey presto! symmetry.
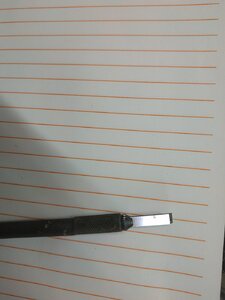
Finishing the steps using a mini chisel. Xacto blade holder, chisel shaped blades in various sizes purchased in packets of 5 online- cheap very sharp and ideal for this work.
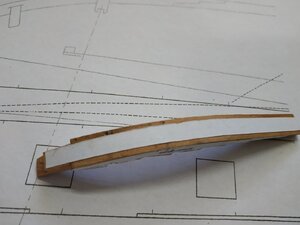
The plan calls for the "back" of the piece, under the steps, to be tapered from 6.35 to 5.3mm , the thinner being below the biggest step, that is forward. Triple check this. ! I cut out a simple paper strip, appropriate length and taper, stuck it. Some initial hand sanding -my little block- before finishing by scraping with a blade. Sanding alone fails to give me a sharp edge. I couldn't be sure of depth of taper so I left it narrow. Later, with the help of the 3D rendering, this was upto a curved line running just below the steps. This is also shown on the drawing marked "typical section" but I was not 100% convinced and didn't want to remake this part if it was a mistake. In any case there is another opportunity after the apron is fixed into place.
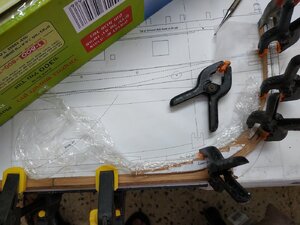
The upper apron offers a relatively simple build. Again, dry fitting and patient use of band sander made the job straight forward. The book warns against mixing acrylic paint with PVA glue . I have seen alternative suggestions in this book and elsewhere, but couldn't be bothered to delay while finding them. Last night made up the forbidden mixture and glued and clamped 2 pieces of scrap. Today they are locked tight, maybe luck, but I went ahead and glued the upper apron in place, having temporarily placed the lower apron on siting pins (I used dress makers pins with head cut off) and wrapped in clingfilm to prevent gluing. The "black " is sure messy.
Note my "oversize"trunnels 0.8mm Wont be seen and will reinforce joint if my black glue is indeed foolhardy. Note also they do NOT go all the way through. Dipped in PVA (the white stuff)

IMG_20200828_125729.jpgIMG_20200828_152452.jpgIMG_20200830_095926.jpgIMG_20200830_102351.jpgIMG_20200828_152521.jpgIMG_20200830_080852_BURST1.jpg
 
31st Aug
Maybe the "fit" is too good. Can't see most of the black glue line. Maybe I should cheat and emphasize the joint. No, better not.
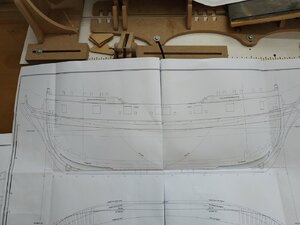
The instructions call for tapering the keel. Says probably from frame "J". But where is this? search plans and books. I know it says at the beginning of TFFM that I should obtain plans from the National Maritime Museum (NMM) in UK , but Covid- closed and not answering website or emails. I have sets of plans for 3 Hahn ships and they have everything. PANIC. Contact others with swan blogs, ? page of plans missing. Apparently not. Others said look in book, order NMM plans .Just after discovering for myself, one pointed out what that the information is there . On the sheer profile view are faint 1 and 2 mm perpendicular lines above the rabbit line . Later still I noticed under the fold of the plan tiny numbers and letters Saved . The next day someone emailed me a photo of the framing disposition, not to scale but very helpful until NMM reawakens.
Suggested and done - make a pattern of inside curve of the fore keel lower and upper aprons for later use. I use the card that the pizza places give away- just right for the job .
Final Job is to Taper the stem , top to bottom and , with the keel, foreword . This eliminates the steps caused by different thicknesses of the blanks. I used a board with sand paper fixed to it (staples) and move the piece a number, 10 or 15 times before turning it over. This helps symmetry.
The fuller trim below the "steps" can be done with the sand block and scraping knife at this time. The final clean up , after the stern is made ,because I'm bound to knock the stem while doing so.

IMG_20200823_101822.jpgIMG_20200820_120240.jpgIMG_20200902_133310.jpgIMG_20200902_134328.jpg
 
This is awesome ,thanks for sharing it, which Swan class ship do you have in your mind?

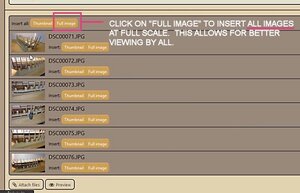
also you may notice that your images not showing up in full size,here is a how to

2B9E23D5-4682-4000-BA4D-C0C56B9334F0.jpeg
 
", which Swan class ship do you have in your mind? "
Not sure. Was suggested one that somebody else hasn't yet built, but the there is scarcity of information. To be truthful, not that bothered because I know ships plans were not slavishly followed and refits often changed things significantly. Maybe just a "generic" with some interesting figurehead from list of ships' names!
There were 25 sloops built based on the drawings - so enough names are available
On three decks you have also the list of the Swan class sloops, maybe you find one with a (for you) interesting history:
Maybe you do not know, but the NMM has some original drawings of the class available...
Swan: https://collections.rmg.co.uk/colle...el-351911;browseBy=vessel;vesselFacetLetter=S
Kingfisher: https://collections.rmg.co.uk/colle...el-323531;browseBy=vessel;vesselFacetLetter=K
very interesting f.e. is the framing details of the Kingfisher:
j4865.jpg
 
1st sept.
Start on stern deadwood. I make more use of the 3D to understand the parts and final result. Again speaks of tapering from a certain point on the keel. Thank goodness I solved that problem of identifying the station yesterday .I do not tolerate the insecurity of not knowing. Thus I have a large collection of books + google.
The part is made of 5 blocks, 7.95 mm wide. I thought to make I slap, stick the 5 cut outs on the wood with only a minimum gap to allow the band saw blade to pass between with a minimum of gap, thus making the fit between pieces good with little correction. First problem: where is the top of the top (no5) piece. Due to overlap, this appears to have a squared indent in surface. This is incorrect, its flat, but at what level. The lower transom sits on this. I'll leave it overlog and alter later on. So, I'll cut my block to thickness of 8.5 by band saw and reduce accurately by the thicknessor..Until now my band saw cuts like hot knife through butter. Going great and suddenly bang!. Blade snapped. ? Was the wood too tall at 8 cms?causing excess resistance even though I used minimum of pressure. Lesson learned. I cut it with a 10 inch table saw, then the thicknessor . The irony is that this is the only machine I bought locally and not imported. Because of cost and delay I always buy spares at time of ordering. Its been on my mind to order a spare , but never got round to it. Well, no spares locally and ordered from company up north. A pack of 5, BUT delivery in 6 days. Thus I write this (?overlong) blog. What will I do for the next few days. A kit allows "sub"builds, a scratchless so. Maybe I'll start the Alert building frame? Or maybe the Bosun (wife) will find some jobs for me to do around the house. "shiver me timbers":eek:
 
stuglo, My dearest friend,
you told at the beginning of the blog about
the guide that accompanied you to the field of building ship models.
So I want to share with our friends in the site that for the past six months you have been my guide to the world of shipbuilding in the League of Experts , and to the world of construction from Scratch.
You are an amazing man, also extremely generous , willingness to teach and much more.

As someone who has seen the process with you at your home , I can say that you are super Accurate and meticulous in the accuracy of the details, both small and large. Lots of fun and success in the process because I have no doubt that the result will come out amazing.
 
Last edited:
There were 25 sloops built based on the drawings - so enough names are available
On three decks you have also the list of the Swan class sloops, maybe you find one with a (for you) interesting history:
Maybe you do not know, but the NMM has some original drawings of the class available...
Swan: https://collections.rmg.co.uk/colle...el-351911;browseBy=vessel;vesselFacetLetter=S
Kingfisher: https://collections.rmg.co.uk/colle...el-323531;browseBy=vessel;vesselFacetLetter=K
very interesting f.e. is the framing details of the Kingfisher:
View attachment 176761
Thanks. I've reread the rather sparse info publically available and the differences between ships seem relatively small and as I cannot compare as I cannot obtain at the present time plans from NMM. Even so, from their list, only part plans or even none are available for majority of ships. (If anyone wants to sell me their plans -or copies- I will be most happy )Some years ago I purchase a set of plans from NMM for an Elizabethan galley (to help build the Great Harry,based on Mantua plans, POB semi scratch). These were redrawn as supplied and certainly more informative.
 
Back
Top