Syren 1803 1:64 Model Shipways

Joined
Mar 5, 2021
Messages
1,290
Points
443

Location
East Coast, Canada
9D72879C-0962-4874-96AB-F47917C8565F.jpeg

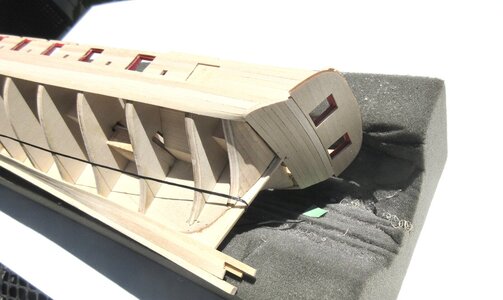
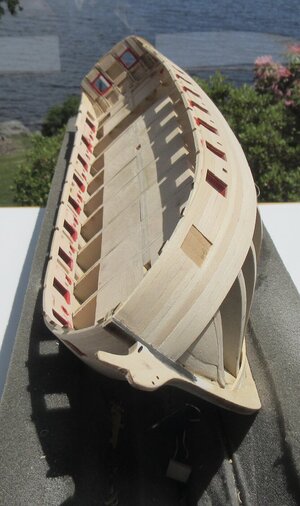
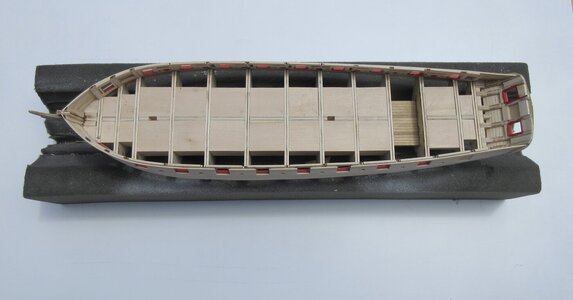
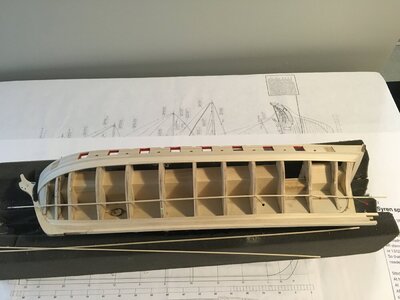
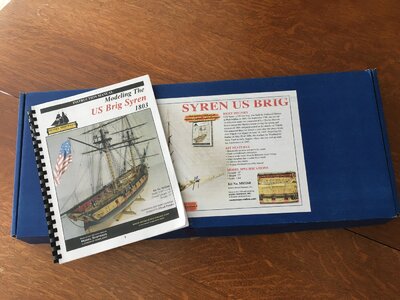
I started building the Model Shipways Syren last year. I knew, because of other commitments, it would be very slow progress for me. Since joining SOS I have read through many logs, threads and posts. The knowledge of members, incredible model builds and workmanship on this site make it kind of humbling to even think I should start a log. However, I need to force myself to keep going and complete the Syren. So a log it is.

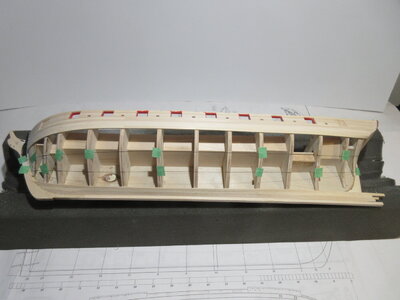
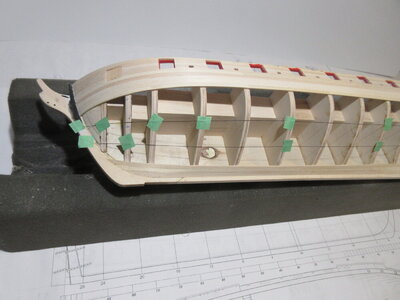
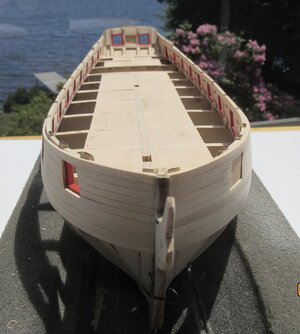
My first few photos are progress so far. I am currently working away at the hull planking. Even though the hull below the waterline will be plated I am thinking of trying my best to complete the planking as though it were going to be visible. Extra work no doubt but that way I can try my hand at proper planking techniques. It will be a good learning experience for me. Then I get to cover it up with copper plates!

I did not simulate caulking of the plank seams above the wales. I was going to eventually paint the sides dull yellow ochre. Changed my mind because I thought the fibrous basswood would look terrible. Then after doing those upper areas, decided I would stain instead, then realized I should have after all used a pencil for caulking. So now I am hoping a Golden Oak stain will darken the seams and make it appear as though they are caulked. Time to experiment I think.

So a few photos to start me off.
27354DE2-A19C-4FB7-8D79-3BF65F34EBF6.jpeg7581BFD5-0332-4F3F-9C42-63D506A6C3A5.jpegB2D3437D-403E-49A2-A55E-200664D9644D.jpeg9F97C91B-9E42-4B82-B5E3-18B355EA4C21.jpeg70451A9F-83D7-4976-9D32-B047CC0601CC.jpeg
 
Hello Roger. Thank you for posting the build log. I think the Syren is a beautifully-lined Brig and SOS member @NovaStorm build is one of my favorites. You have made a very neat start with excellent planking. Keep the progress and updates coming.
 
OH, many thanks for starting this building log - it will be very interesting to follow your progress and your experiences with this kit :cool:
 
Hello dockattner, Hedley, vintagemodeler and Uwek:

My thanks to everyone for your interest and encouragement. I am looking forward to working away on this model. Your comments, advice and critiques will be more than welcome :)
 
Last edited:
B8396C3B-E543-42C9-9FC2-C3B56EA30010.jpeg

The planking for this vessel, especially at the aft end, looks intimidating. I made a few models over the past many years but they were more of a cut, fit, glue, fill, smooth and paint process. I tried to get smooth fair lines but didn’t worry too much about how to plank. I didn’t even cut rabbets for those early builds. (Though if they keep eating my beans this year they’ll soon find out - oh, those are rabbits :) )

Syren is a single layer hull planking build and the instructions tend to leave it to the builder to work out the planking. However, there is some guidance with working out measurements. The manual is very good overall. I mentioned at the start of this log I really want to try and learn how to do it “properly”. It’s going to be a slow process, I think.

So I have read from a number of book sources ways to layout and plank. However, the more I read the more confused I become. Measure this, measure that, use tape, use cotton, use battens, lay by eye, divide this, tweak that, and so on. At the end of the day I better just get on with it and hope to minimize mistakes.

I had worked out some initial figures, laid a first “batten” using sticky art tape and promptly pulled that off. Every time I sighted along the tape parts fell off. Cotton was too awkward as well.

Yesterday I cut some 1/16” battens and surprised my wife when I showed her I still had all my fingers. The first batten is temporarily placed on the hull but here the head scratching starts. At midships I measured the distance from the lower wale to the bottom planking. That distance, 73.20mm divided by the planking width 1/8” (3.21mm) gives me (22.88) so 23 planks. For’d the planks will be reduced to 2.43mm, Does that mean every one of them or is that an average? (I find I work in inches and mm - it’s an age thing ;) )

At the aft end I measured along the counter and down the sternpost, giving me 99.39mm divided by 3.2mm (1/8”) giving me 31 planks. Wow, that means I need maybe eight stealers (31-23=8). Now I am wondering if I got that right, but re-measuring confirms it. More head scratching.

So today, time permitting, it’s more reading, back to the work table to measure again, and possibly get those battens on properly.
 
Last edited:
Hello jbradford,
I think you’ll enjoy building the Syren. The slowest part for me so far was the gun and sweep port framing. Once I got started on the wales and upper planking I wished I had discarded the basswood and used a better quality wood. Time will tell.
 
I decided to go with two battens each side giving me three planking belts. I tried using the wood 1/16” battens I cut two days ago but trying to pin them into plywood bulkheads was awkward. I found the pins would not hold well, especially as I had to keep adjusting the lay of the battens. So I resorted to black cotton and masking tape after all. With patience it has worked reasonably well.

I divided up the midships frame into three equal parts and laid the first cotton batten at the lower point mark. Then ran the cotton to the stern post at the 1/3rd mark as well. For’d I let it run in a fair line to the rabbet. Then the tweaking started. That’s when my wife called out and asked what I was doing, “tweaking”, I said. There was just silence from upstairs :D

Back to tweaking. The lay of that lower cotton batten just didn’t look right so I kept adjusting it and actually ended up dropping the lower midships mark. By luck the measurement at that point gives me seven 1/8” (3.21mm) planks. More tweaking and adjustments and I think it’s ok. Since I knew I needed 23 planks that meant 16 to fit in the two top belts. I marked the middle point on the midships frame and ran the cotton aft to the other 1/3rd upper mark on the counter/stern post. More tweaking and so on and after a while I think I have a reasonable looking run.

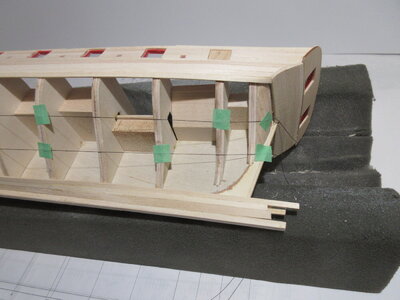
I took a couple of photos but the lens angle doesn’t show the lines of the cotton too well. The result is three belts. At the midships frame the lower is 7 planks, then the upper two, 8 planks each. Aft will require stealers unless I increase the plank widths but then I’m into a different problem. For’d along the rabbet I have for the top belt 12.56mm for 8 planks gives me 1.57mm for each plank end taper. The middle belt is 16.40mm for 8 planks giving 2.05mm. The bottom belt works out at 16.84 for 7 planks, taper of 2.41mm each. The tapering for’d to all those dimensions still keeps me within the “no less than 50%” of the plank width rule. Therefore avoiding pointy ends.

This is my first attempt at laying belts. Different sources give different methods of doing it but I think I have it basically correct. I hope so anyway. I might be seriously overthinking this!

Can anyone see any glaring errors or future problems in my method?

Thanks.

01864287-28A6-4FA3-ACF5-6D37179017D3.jpeg13E1F529-B881-4B50-9040-9F0E9F519F94.jpeg3B8411CD-A2FD-4AD5-8F45-54DA86536874.jpeg
 
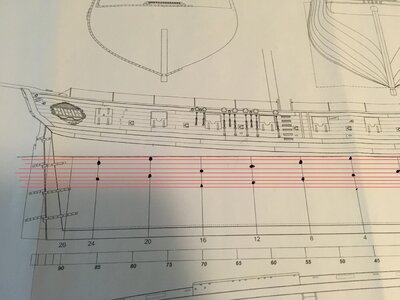
I decided to try a hull planking layout while following recommended practices. A couple of problems are apparent though. Being a single plank vessel my butts are going to have to be on bulkheads not frames. The spacing of the bulkheads is of course not consistent. The wales and their butts shown on the plan are for the second layer. Therefore, although it appears I need to only follow the pattern of the butts of the wales, it doesn’t seem to work as I plan for the lower planks. Some of those wale butts terminate on imaginary frames.

Underhill in his book suggests putting the wales on in one continuous strip instead of multiple planks. Not actual practice he states but for a model it provides for additional longitudinal strength. If I also do this it makes it easier for me to plan the lower planks and follow the “rules”. The same goes for the garboard and broad strakes. I followed the Syren manual for those. In addition I am hoping the shorter plank runs will make the actual planking easier. It remains to be seen.

So the “rules” I’ll follow are from Ben Lankford, three strakes between butts on a frame (bulkhead in my case). Then 5 feet between butts, this is going to need to be flexible. My chosen plank length is 24 feet but because of the limitations of bulkhead spacing I am going to have to be very adaptable. It looks like shorter lengths here and there and longer, within reason, at other areas. Jim Roberts mentions a simplified version using only available bulkheads. It looks like I am doing a combined Lankford and Roberts plan. An interesting exercise for me in pre-planning. It’s extra work and will later get copper plated but I am treating this as a learning exercise. I have now learned that double planking would make it so much easier.

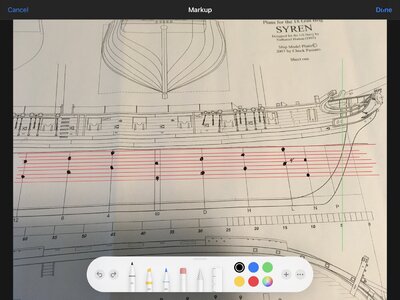
Rather than draw lines on paper I used my iPad and copied from the plan. I then used the “mark up” capability of the iPad to do the butts and lengths. Mistakes are easily rectified and I have a fast picture of my intentions. So a couple of photos to show what I am trying to do. The “mark up” shown is rough and only for the first belt below the wales. I’ll work on the other two belts as time permits. Nothing is fixed in stone, yet.

Underhill: Plank-on-Frame models vol. 1
Lankford: How to build first-rate ship models from kits
Roberts: Planking the built-up ship model


2920DA87-94BE-451D-9490-011F638B7EFA.jpegA0AA457B-8A39-4879-A9C9-113142B50844.jpeg
 
View attachment 240358

I started building the Model Shipways Syren last year. I knew, because of other commitments, it would be very slow progress for me. Since joining SOS I have read through many logs, threads and posts. The knowledge of members, incredible model builds and workmanship on this site make it kind of humbling to even think I should start a log. However, I need to force myself to keep going and complete the Syren. So a log it is.

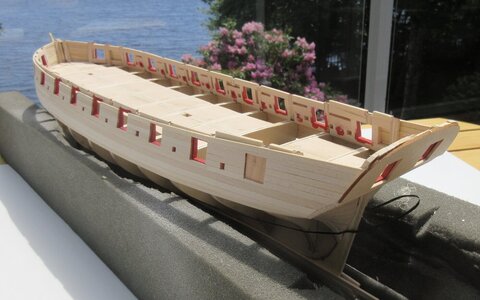
My first few photos are progress so far. I am currently working away at the hull planking. Even though the hull below the waterline will be plated I am thinking of trying my best to complete the planking as though it were going to be visible. Extra work no doubt but that way I can try my hand at proper planking techniques. It will be a good learning experience for me. Then I get to cover it up with copper plates!

I did not simulate caulking of the plank seams above the wales. I was going to eventually paint the sides dull yellow ochre. Changed my mind because I thought the fibrous basswood would look terrible. Then after doing those upper areas, decided I would stain instead, then realized I should have after all used a pencil for caulking. So now I am hoping a Golden Oak stain will darken the seams and make it appear as though they are caulked. Time to experiment I think.

So a few photos to start me off.
View attachment 240366View attachment 240364View attachment 240365View attachment 240363View attachment 240362
Hallo @RogerD
we wish you all the BEST and a HAPPY BIRTHDAY
Birthday-Cake
 
Back
Top