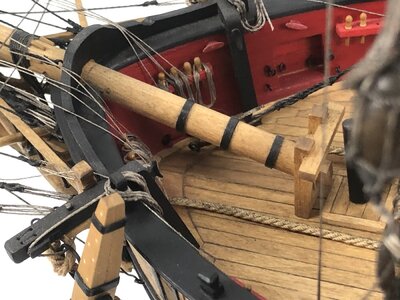
Thank you Uwek, it was a great day.
-

Win a Free Custom Engraved Brass Coin!!!
As a way to introduce our brass coins to the community, we will raffle off a free coin during the month of August. Follow link ABOVE for instructions for entering.
-

PRE-ORDER SHIPS IN SCALE TODAY!
The beloved Ships in Scale Magazine is back and charting a new course for 2026!
Discover new skills, new techniques, and new inspirations in every issue.
NOTE THAT OUR FIRST ISSUE WILL BE JAN/FEB 2026
You are using an out of date browser. It may not display this or other websites correctly.
You should upgrade or use an alternative browser.
You should upgrade or use an alternative browser.
Syren 1803 1:64 Model Shipways
- Thread starter RogerD
- Start date
- Watchers 61
-
- Tags
- model shipways syren
Happy Birthday!! 

Hi Jim, thanks and the cake was great 
A few days have gone by with only small progress due to other commitments. However, I have started planking down from the wales when time permits. It’s an interesting learning experience.
As an aside, one of my recent problems is now fine basswood dust. It seems to be one of those woods that you don’t personally know about until you start sanding. To try to ease the apparent allergy discomfort I purchased a bench-top dust collector not too long ago. It helps enormously so I thought I’d post a couple of photos in case anyone else is interested. A face mask also helps but I find it causes fogging of my glasses.
I have two layers of filter on the unit I purchased. There’s a plexiglass “hood” that assists the intake fan draw in the finer wood dust. The filters are extremely efficient and the clear air exhausts out the side of the unit. It sits just a couple of feet from my work area.
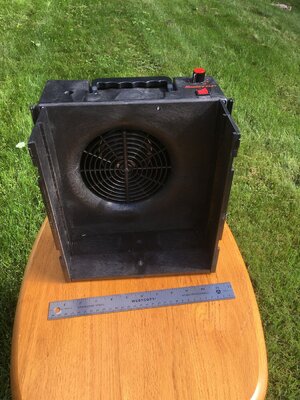
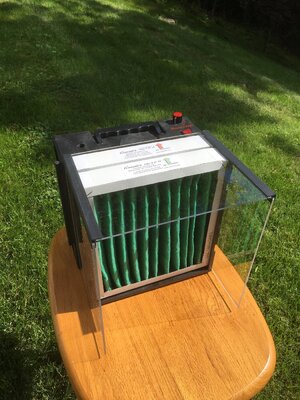


Yes it sure is Heinrich, just reducing the airborne dust is a huge help. It has size limitations but it's a powerful little device.Very interesting device and if it fulfills its intended purpose, then it is money well spent!.
Nearly three weeks since my last “construction” post but better some limited progress than none.
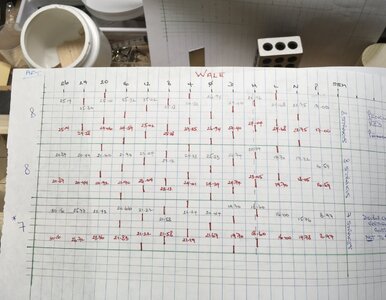
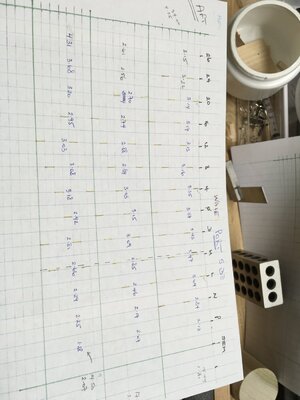
I spent considerable time working out the measurements for each strake on each bulkhead, port and stb’d. An interesting paperwork exercise that seemed to initially be working in practice as I cut and laid planks. However, I hit road blocks as I attempted to follow my butt and plank length plan. So I have resorted to a mix of planking methods, as mentioned previously.
In my rough plans the first photo shows each bulkhead measured for each belt. Pencil is port, red marker stb’d (no it’s not nautical, it’s what was in my holder). The second photo (port side only) is each measurement for each plank in a belt. Yep, I easily confuse myself too.
I have cut and laid three strakes on the stb’d side so far (next photo). I should have paid more attention to the measurements I planned for at the stem because I left the first one a little too wide. That reduces the next few but I think I am still within the minimum width. I didn’t allow for “creep” so that may throw out my intentions too.
I have now progressed to the port side and will complete those three strakes before returning to the stb’d side. Cutting the planks into multiple lengths helps with the glueing and clamping as well. I am cutting/sanding in pairs trying to get even widths port and stb’d.
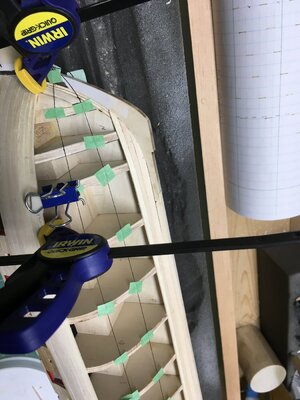
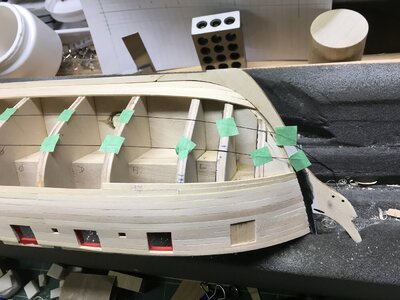
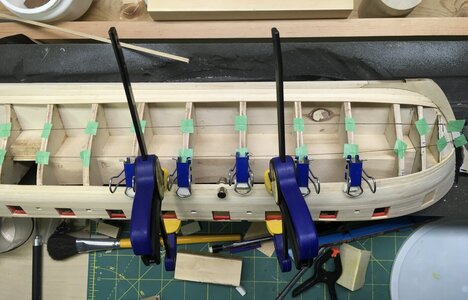
Clamping has become a process in itself. I am using a mix of 6” clamps, the reverse paper clip idea I have seen, and I’m now trying magnets as well. To avoid marring the soft basswood I am using cut up pieces of eraser as mini wedges. To initially hold the pieces I am spot glueing with super glue (CA), and applying high tack carpenter’s glue (PVA) with a syringe. Those cotton “battens” get in the way a lot so I am glad I took lots of measurements. Cursing doesn’t seem to help them stay in place!
So today it’s back to the basswood dust…… I feel a sneeze coming on.
I spent considerable time working out the measurements for each strake on each bulkhead, port and stb’d. An interesting paperwork exercise that seemed to initially be working in practice as I cut and laid planks. However, I hit road blocks as I attempted to follow my butt and plank length plan. So I have resorted to a mix of planking methods, as mentioned previously.
In my rough plans the first photo shows each bulkhead measured for each belt. Pencil is port, red marker stb’d (no it’s not nautical, it’s what was in my holder). The second photo (port side only) is each measurement for each plank in a belt. Yep, I easily confuse myself too.


I have cut and laid three strakes on the stb’d side so far (next photo). I should have paid more attention to the measurements I planned for at the stem because I left the first one a little too wide. That reduces the next few but I think I am still within the minimum width. I didn’t allow for “creep” so that may throw out my intentions too.
I have now progressed to the port side and will complete those three strakes before returning to the stb’d side. Cutting the planks into multiple lengths helps with the glueing and clamping as well. I am cutting/sanding in pairs trying to get even widths port and stb’d.


Clamping has become a process in itself. I am using a mix of 6” clamps, the reverse paper clip idea I have seen, and I’m now trying magnets as well. To avoid marring the soft basswood I am using cut up pieces of eraser as mini wedges. To initially hold the pieces I am spot glueing with super glue (CA), and applying high tack carpenter’s glue (PVA) with a syringe. Those cotton “battens” get in the way a lot so I am glad I took lots of measurements. Cursing doesn’t seem to help them stay in place!

So today it’s back to the basswood dust…… I feel a sneeze coming on.
Really nice work Roger. I believe your careful planning will pay off in a great result. I was a bit more cavalier in my approach and it caused me some stress...
Hey Paul, thanks for your supportive comments. If a little stress resulted in your great Vasa build then I could use someReally nice work Roger. I believe your careful planning will pay off in a great result. I was a bit more cavalier in my approach and it caused me some stress...
- Joined
- Jan 9, 2020
- Messages
- 10,566
- Points
- 938

Your planking will most certainly turn out great. I agree with Paul - personally I do not have the patience/inclination/mathematical ability to follow your approach ... BUT ... that is what makes this hobby so great! There are so many ways to arrive at the same destination and if this one works well for you - run with it! You are building a very fine model!
Your planking will most certainly turn out great. I agree with Paul - personally I do not have the patience/inclination/mathematical ability to follow your approach ... BUT ... that is what makes this hobby so great! There are so many ways to arrive at the same destination and if this one works well for you - run with it! You are building a very fine model!
Hello Heinrich,
I have read so many different methods for planking a ship model it has become almost confusing. I totally agree that there are many ways to arrive at the same destination. The Syren is a single layered construction so I wanted to strive for at least some semblance of suggested practices, as a learning experience. However, a huge benefit will be the ability to hide my mistakes as I cover the hull with copper plates
As for the math I am just glad we now have calculators instead of slide rules and, heaven forbid, logarithms of years gone by.
I am following your fascinating history and build of the Sampan. I see a lot of patience, inclination, ability and knowledge in your Sampan log, so your kind and considerate words are very encouraging.
Thanks Bluebeard, with your knowledge and excellent modelling skills I really appreciate your comment.Excellent workmanship. Your planking is going very clean.
I have this kit waiting for me to finish my current build. I'm looking forward to diving in, and resisting the urge to start it even though I haven't finished the one I'm working on. Your work is awesome so far, I'm following this post to see how it goes.
I have this kit waiting for me to finish my current build. I'm looking forward to diving in, and resisting the urge to start it even though I haven't finished the one I'm working on. Your work is awesome so far, I'm following this post to see how it goes.
@CallMeKristy,
Hi, thanks for following my build, I really appreciate your comments and hope I can live up to expectations. By following the well written manual and reading many other Syren logs I hope to minimize mistakes, of which there are a few already. I started my log after I had already completed the framing of the ports. The main thing I wish I had thought hard about was replacing some of the basswood, especially for the upper hull planking. For reference NovaStorm, on this site, built and finished a great model Syren not long ago, well worth a look.
I read through your own build logs this morning and you certainly have great aptitude for this hobby. It’s a very enjoyable learning process looking at such an array of impressive builds and logs.
I understand your feelings.
That’s is exactly how I felt when I first joined this great forum.
You feel secure about building your model because in the back of your mind know that there are many guys eagerly waiting to give you a hand either by directly giving advices or like you said, by looking at others modelers build log.
That’s is exactly how I felt when I first joined this great forum.
You feel secure about building your model because in the back of your mind know that there are many guys eagerly waiting to give you a hand either by directly giving advices or like you said, by looking at others modelers build log.
RogerD:
Your model is coming up very nicely.
Planking looks very clean and shows your expertise.
I will be looking forward for the rest if your build.
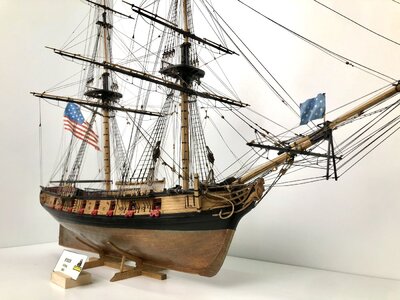
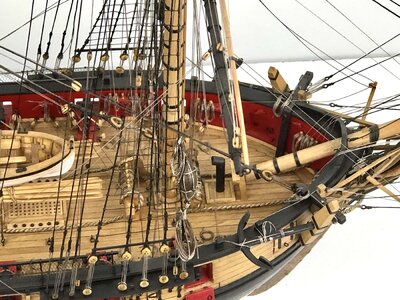
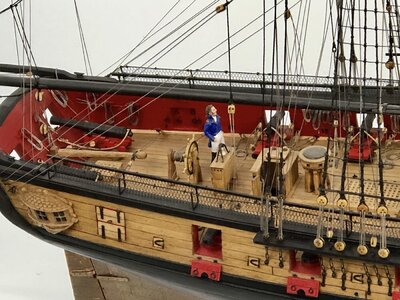
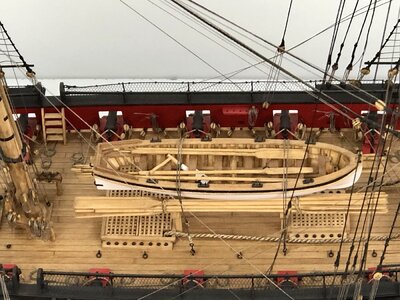
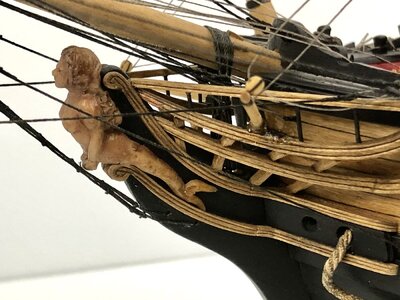
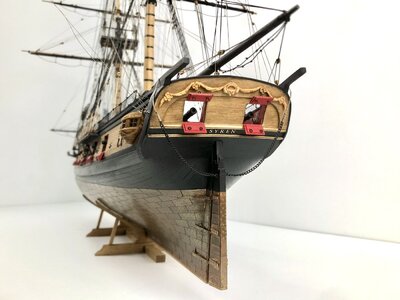
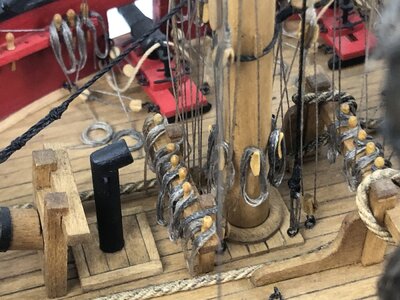
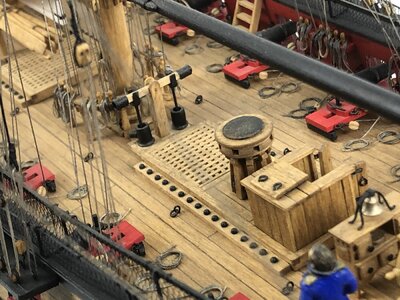
Meanwhile let me show you a few pictures of our Syrene Model Expo that we have at the store.
@Bluebeard, Hi Bluebeard, many thanks for those great photos and your supportive comments. Being able to see the original model build close up is going to really help me. I am, time permitting, steadily working away on the lower hull planking. Trying to bend those planks aft is quite the process though. Water, heat and patience seems to be the trick
Thanks again.
That would be very helpful, thanks. You just reinforced once again why the members and this site is so great.I did a steam box that helped me a lot in all of my builds.
Because you said that, I will later post a building log of how I created it so you could see it.


